Table of Contents
Advertisement
Advertisement
Table of Contents

Related Manuals for Baxi POWER HT-A 1.430


Summary of Contents for Baxi POWER HT-A 1.430
-
Page 2: Table Of Contents
Table of contents About this manual ............................... Contents of these instructions ........................Overview table ............................Used symbols ............................... For whom is this manual intended? ......................Safety .................................... Usage according to purpose ........................General safety instructions ........................... Regulations and standards ........................... CE-Marking .............................. - Page 3 Check water pressure ........................... Switching-on ............................Temperatures for heating and drinking water ..................Individual time programme ........................Instruction for the customer ......................... Operation ............................Operating elements ..........................Display ............................... Setting up heating operation ........................ Stop drinking water operation ......................Setting room setpoint .......................... Display information ..........................
-
Page 4: About This Manual
Contents of these instructions is the installation of gas condensing boilers of the following series for standard use 1 pump heating circuit and 1 DHW storage tank: POWER HT-A 1.430 - 1.500 - 1.570 - 1.650. More application options are available by the installation of expansion modules (EWM) (mixer heating circuit, solar connection, etc.) -
Page 5: Used Symbols
About this manual 1.3 Used symbols Danger! Danger exists for body and life in case it is not observed. Danger of electric shock! In case it is not observed, danger from electricity exists for body and life! Caution! If warning is not observed, danger exists for environment and the device. Note/tip: Here, you can find background information and useful tips. -
Page 6: Safety
Safety 2. Safety Danger! Observe the following safety information! Otherwise you are endangering yourself and others. 2.1 Usage according to purpose The gas condensing boilers in the series POWER HT-A are designed for use as heat sources in DHW heating systems according to DIN EN 12828. They correspond to DIN EN 676, DIN 4702 Part 6 and DIN EN 677, Installation type and C Country of destination DE: Category II... -
Page 7: Regulations And Standards
Safety 2.3 Regulations and standards Beside the general technical rules, the relevant standards, regulations, ordinances and guidelines should be followed: - DIN 4109; Noise protection in construction engineering - DIN EN 12828; Heating plants in buildings - EnEV - Energy saving regulation - Federal Immission Control Ordinance 3. -
Page 9: Technical Data
Technical Data 3. Technical Data 3.1 Dimensions and connections... - Page 10 Technical Data Model 1.430 1.500 1.570 1.650 Dimension A Dimension B 1009 1009 1009 Dimension C Dimension D 1882 2192 2192 2192 Dimension E 1018 1018 1018 " 2 Condensate connection(optional right/left) DN 32 Safety group connection R¾" external thread Safety valve connection R2"...
-
Page 11: Technical Data
Technical Data 3.2 Technical Data Tab. 1: Technical Data Model 1.430 1.500 1.570 1.650 Product-ID-No. Installation types Power values Nominal heat input range Heating 80,0-400,0 94,0-470,0 108,0-540,0 122,0-610,0 Nominal heat output range 80/60°C 77,0-392,8 91,0-462,0 105,0-531,4 119,0-601,0 C ° 84,8-422,4 99,8-498,2 115,0-574,6 130,4-651,5... -
Page 12: Water Side Resistance
Technical Data 3.3 Water side resistance Fig. 2: Diagram of water side resistance POWER HT-A 1.430 to 1.650 1.430 1.500 1.650 1.570 Water mass flow [m 3 /h]... -
Page 13: Wiring Diagram
Technical Data 3.4 Wiring diagram Fig. 3: Wiring diagram... -
Page 14: Sensor Value Tables
Technical Data 3.5 Sensor value tables Tab. 2: Resistance values for outside temperature sensor ATF ° [ 3758 2954 2342 Tab. 3: Resistance values for flow sensor KVS, drinking water sensor TWF, return sensor KRV, sensor B4 ° [... -
Page 15: Prior To Installation
Prior to installation 4. Prior to installation 4.1 Notes for installation location Please note Danger of damage from water! The following has to be observed for the installation of the POWER HT-A: In order to prevent damage due to water, particularly due to leakages in the DHW storage tank, suitable precautionary measures should be taken regarding installa- tion. -
Page 16: Combustion Air Openings
Room air-dependent operation The required cross-sectons for the combustion air openings with room air-depend- ent operation are to be taken from the following table: POWER HT-A 1.430 > 850 POWER HT-A 1.500 > 990 POWER HT-A 1.570 >... -
Page 17: Space Requirement
Prior to installation 4.3 Space requirement Fig. 4: Recommended space requirement 1.430 1.500 1.650 1.570 Dimension A 1882 2192 2192 2192... -
Page 18: Transportation
Prior to installation 4.4 Transportation Transportation with a crane Risk to life due to boiler falling! Crane work must only be carried out by trained specialists! The belts or cables to be used for lifting must be checked for perfect condition be- fore using! Persons taking part in transportation must wear protective gloves and safety shoes! - Page 19 Prior to installation Transport with a lift truck Risk to life due to boiler tipping! When using a lift truck make sure the weight is distributed evenly on the forks! Persons taking part in transportation must wear protective gloves and safety shoes! Caution! Risk of damage to boiler by impacts during transporting! The boiler must...
- Page 20 Prior to installation Transport with two lift trucks Risk to life due to boiler tipping! When using a lift truck make sure the weight is distributed evenly on the forks! Persons taking part in transportation must wear protective gloves and safety shoes! Caution! Risk of damage to boiler by impacts during transporting! The boiler must...
- Page 21 Prior to installation Transport on rollers Caution! Risk of damage to boiler by impacts during transporting! The boiler must be protected during transport against impacts! In addition avoid forces on the gas pipes or the fan by pulling or pushing! Note: The use of rollers for transporting is only possible on completely even floors.
-
Page 22: Bringing The Boiler In Tight Spacesi
Prior to installation 4.5 Bringing the boiler in tight spacesi When bringing the boiler in tight spaces it can be helpful to remove the front frame, the fan and the Venturi tube with integrated gas valve. In this manner the heating boiler is shorter and can then be manouvered around tight curves. - Page 23 Prior to installation Fig. 11: Remove the fan 6. Remove fan with air flap (5) Fig. 12: Removing the front frame 7. Loosen the screws (6) and remove the front frame (7) Note: The support holer for the condensate pipe (A) must be installed when rein- stalling the front frame.
- Page 24 Prior to installation Fig. 13: Loosening the screwed connections 8. Disconnecting the gas supply line on the gas valve (8) 9. Loosen the hexagon head screws on the lower Venturi tube flange (9) Fig. 14: Remove the Venturi with the gas valve 10.
-
Page 25: Installing And Aligning The Boiler
Prior to installation 4.6 Installing and aligning the boiler The boiler has 4 adjustable feet to equalize floor unevenness. The adjustable feet are equipped with a rubber base to dampen structure-borne sound. The boiler must be aligned horizontally using the adjustable feet ( Fig. -
Page 26: Install Cover Panels For Transport Openings
Prior to installation 4.7 Install cover panels for transport openings Note: The cover panels for closing the transport openings are in the accessory box, which is fastened to the wood cladding of the gas condensing boiler. Fig. 16: Installing the cover panels 1. -
Page 27: Install Siphon And Condensate Piping
Prior to installation 4.8 Install siphon and condensate piping After installing and setting up the boiler, the siphone and condensate piping must be installed. Fig. 17: Install siphon and condensate piping 1. Push the condensate piping according to Fig. 17 to the stop through the front fastening hole and the support holes inside the boiler (1) 2. -
Page 28: Exhaust Connections And Air Supply Ducts
Prior to installation 5. Screw the siphon with the included seal on the previously installed siphon adapter (5) Danger! Risk of life due to escaping exhaust gas! Before installing the siphon and commissioning of the gas condensing boiler, fill the siphon with approx. 1 l water! 6. - Page 29 Prior to installation Fig. 19: Remove the bottom cover panel 3. Loosen the screws and remove the lower cover panel (3) Fig. 20: Loosen the upper fastening screws 4. Loosen the upper fastening screws (4) Note: Both outer screws (A) have a lip and are used for fixing the upper cladding. When reinstalling the rear wall they must absolutely be screwed back on the out- side.
- Page 30 Prior to installation Fig. 21: Loosen the lower fastening screws 5. Loosen the lower fastening screws (5) Fig. 22: Removing the rear wall 6. Lift the rear wall up slightly and remove (6)
- Page 31 Prior to installation Fig. 23: Installation of the 87° elbow (accessory) 7. Remove the exhaust connetion leading upward and install the 87° elbow (7) ; make sure of the proper seat of the seal while doing this Danger! Risk of life due to escaping exhaust gas! Before commissioning the gas condensing boiler the exhaust pipes must be checked for leaks! 8.
- Page 32 Prior to installation Installating the air supply duct The installation of the air supply duct for the rear and side outlet is shown in the following figure. Fig. 24: Installation of the air supply duct Outlet toward the side 1. Remove upper cladding according to Fig. 18 1.
-
Page 33: Corrosion Protection
Please note Use only approved additives and processes. When using additives, use only agents approved by BAXI. Softening and desali- nation must also only be carried out with systems approved by BAXI and with observation of the specified limits. Failure to observe this rule voids the warranty. -
Page 34: Treating And Preparing The Heating Water
Underfloor heating circuits must be considered separately. In this connection, con- tact a manufacturer of water additives or the pipework supplier (see above). Adherence to the conditions issued by BAXI is vital to safeguard the warranty. Further information on the heating water - The water must not have any foreign matter, such as sweat beads, rust particles, scale or sludge. - Page 35 To set this operating point, the heat transfer medium should be diluted with water in a ratio of 2:1. This mixing ratio has been test by BAXI in relation to its practical suitability for use with gas condensing boilers.
- Page 36 Prior to installation Water content of Amount Antifreeze to Water in the mixture the plant ® Lasacor LS 1 [°C] 1000 *) The water for the mixture must be neutral (potable water quality with no more than 100 mg/kg chlorine) or demineralised.
-
Page 37: Diagram Water Hardness
Example: POWER HT-A 1.430, Water hardness 24°dH, 1300 l Water volume => no addition required The usual refill volume of the plant has been taken into account. -
Page 38: Practical Information For Heating Contractors
3. Record the filling process (if possible, use the BAXI system log. If an additive is used, note this on the boiler). To prevent gas pockets and bubbles, it is essen- tial to fully vent the system at maximum operating temperature. -
Page 39: Description Of The Function Of The Air Pressure Monitor
Prior to installation 4.15 Description of the function of the air pressure monitor Fig. 26: Description of function of the air pressure monitor (schematic drawing) In boiler operation the exhaust gas air pressure monitor (1) monitors the differen- tial pressure between the condensate bowl and trim (3). If this differential pres- sure exceeds a value of 6 mbar, the burner is shut off and the error message "132"... -
Page 40: Application Examples
Prior to installation 4.16 Application examples... - Page 41 Prior to installation...
- Page 42 Prior to installation...
- Page 43 Prior to installation...
- Page 44 Prior to installation...
- Page 45 Prior to installation...
- Page 46 Prior to installation...
- Page 47 Prior to installation...
- Page 48 Prior to installation...
-
Page 49: Legend
Prior to installation 4.17 Legend... -
Page 50: Installation
The condensate piping of the POWER HT-A must be installed according to Section 4.8 In- stalling siphon and condensate piping. If there is no run-off facility underneath the condensate discharge, the use of BAXI-neutralisation and syphoning system is recommended. Draining condensate The ATV worksheet A 251 can be used as a guideline for draining the condensate into the public sewage system. -
Page 51: Cleaning And Inspection Openings
Installation 5.5 Cleaning and inspection openings Please note Check exhaust gas pipes! Exhaust gas pipes must be able to be checked for their free cross-section and for leaks. At least one test opening must be provided in the installation room of the POWER HT-A. Exhaust gas pipes in buildings, which cannot be cleaned or inspected from their mouth side must have an additional cleaning port in the upper part of the exhaust system or above the roof. -
Page 52: Controller Stop Mode (Manual Adjustment Of Burner Load)
Installation 5.10 Controller Stop Mode (Manual Adjustment of Burner Load) For setting and controlling the CO values the in operated in the POWER HT-A control stop function . xxxxxxxxxxxx > 3 s Press operation mode button Heating Operation for approximately 3 seconds =>... -
Page 53: Set Co2-Content
Installation 5.11 Set CO2-content Set CO -content for POWER HT-A 1.430 - 1.570 Fig. 27: Gas valve (Honeywell) 1 Measuring nozzle for inlet pressure 4 Adjustment screw for small load (3 mm Allen key) r o t i n e r u s s e r p... - Page 54 Installation Set CO -content for POWER HT-A 1.650 Fig. 28: Gas valve (Dungs) 3 Compensation line 1 Gas pressure monitor 2 Adjustment screw for full load (screwdriver) 4 Adjustment screw for small load (2,5 mm Allen key) Set CO -content at max. output 1.
-
Page 55: Electrical Connection (General)
Installation 5.12 Electrical connection (general) Risk of electric shock! Risk to life through incorrect work! All electrical work in connection with the installation must only be carried out by a qualified electrician. - Mains supply AC 230 V +6% -10%, 50 Hz In Germany the VDE 0100 and local regulations must be followed during installa- tion;... - Page 56 Installation Fuses Fuses in the Control Unit ISR: - Mains fuse: T 6,3A H 250V Connection sensor / components Danger of electric shock! Danger of life, if handled inappropriately! The wiring diagram must be followed! Optional accessories must be fitted and connected according to the instructions provided.
-
Page 57: Commissioning
Commissioning 6. Commissioning Danger! The Commissioning must only be carried out by an approved heating spe- cialist! The heating specialist checks the tightnesss of connections, the correct functioning of all regulating, control and safety installations and measures the combustion values. In case of incorrect performance possible danger of considera- ble damage to persons, environment and property! Caution! In dusty environment, e.g. -
Page 58: Temperatures For Heating And Drinking Water
Commissioning Switch on heating isolator switch 2. Open gas shut-off installation 3. Open front panel cover and switch on the operating switch on the front panel of the boiler xxxxxxxxxxxxxx Select the operation mode automatic operation with the operation mode but- Auto ton on the control unit Set the required room temperature on the rotating knob of the control unit... - Page 59 Commissioning - the air inlet must not be restricted; - flammable materials and liquids must not be stored in the vicinity of the gas boiler; - the customer has to carry out the following control checks himself: - pressure check on the manometer; - check the discharge from the safety valve;...
-
Page 60: Operation
Operation 7. Operation 7.1 Operating elements Fig. 30: Operating elements 1 Reset safety temperature limiter (STB) 7 OK key (acknowledgement) 2 ON/OFF switch 8 Information button 4 Operating unit 10 Chimney-sweep button 5 Operating mode key, heating operation 11 ESC key (cancel) 6 Display 12 Operating mode key DHW operation... -
Page 61: Display
Operation 7.2 Display Fig. 31: Symbols on the display sRE081B Meaning of the displayed symbols Heating to set comfort tempera- Cooling active (heat pump only) ture Heating to Compressor in operation set reduced tempera- (heat pump only) ture Heating to set frost pro- Service message tection temperature Current process... -
Page 62: Stop Drinking Water Operation
Operation Auto Automatic operation - Heating operation according to time programme - Nominal temperature values comfort or reduced according to time pro- gramme - Protection functions (plant frost protection, overheating protection) activated - Automatic summer/winter switch-over (automatic switching over between heating and summer operation from a certain outside temperature) - Automatic day heating limit (automatic change-over between heating and sum- mer operation, if outside temperature exceeds the nominal room value) -
Page 63: Display Information
Operation Setting reduced setpoint: 1. Press OK button 2. Select heating circuit. 3. Press OK button 4. Select parameter Reduced setpoint 5. Press OK button 6. Set reduced setpoint with the control knob 7. Press OK button 8. Leave programming level by pressing the operation mode button heating oper- ation 7.6 Display information Various temperatures and messages can be called up by pushing the information... -
Page 64: Servicing Message
Operation 7.8 Servicing message If the maintenance sign appears in the display, a maintenance message exists or the heating system is in special operation. - Press information button (i) - Further information can be called up (see section Maintenance code- table ). Note: The maintenance message has not been activated by the setting in the fac- tory. -
Page 65: Programming
Programming 8. Programming 8.1 Programming procedure The selection of the setting levels and menu points for end users and heating spe- cialists is carried out by means of the following diagram: Fig. 32: Selection of setting levels and menu points Boiler temperature... -
Page 66: Modification Of Parameters
Programming 8.2 Modification of parameters Settings, which are not directly modified via the front panel, have to be carried out in the setting level. The basic programming processs is depicted in the following by the setting of time and date. Basic display: Press Select with... - Page 67 Programming Select with set the minutes (e.g. 30 minutes). Acknowledge selection with Press heating circuit operation mode button to return to the basic display. The previous menu point will be called-up by pressing the ESC-button without tak- ing over previously modified values. If no settings are carried out for approximate- ly 8 minutes, the basic display is called-up without taking over previously modified values.
-
Page 68: Setting Table
Programming 8.3 Setting table - Not all parameters displayed in the display are listed in the setting table. - Depending on the plant configuration, not all parameters listed in the setting ta- ble are displayed in the display. - In order to get to the setting levels: Enduser (Eu), Commissioning (C) and Engi- neer (E), press OK button;... - Page 69 Programming Function Prog. Standard value Level Operation HC2 Commonly with HC1 Commonly with HC1 | Independently Operation HK3 Commonly with HC1 Commonly with HC1 | Independently Room temperature unit 1 For all assigned heating Only for Heating circuit 1 | For all assigned heating circuits circuits This parameter is only visible in the room device! Occupancy button unit 1...
- Page 70 Programming Function Prog. Standard value Level Default values No | Yes Time prog heating circuit 2 Parameter only visible, if heating circuit 2 exists! Preselection Mo - Su Mo-Su | Mo-Fr | Sa-Su | Mo | Tu | We | Th | Fr | Sa | Su 1st phase on 06:00 (h/min) 1st phase off...
- Page 71 Programming Function Prog. Standard value Level 2nd phase on --:-- (h/min) 2nd phase off --:-- (h/min) 3rd phase on --:-- (h/min) 3rd phase off --:-- (h/min) Copy? Default values No | Yes Holidays heating circuit 1 Preselection Period 1 Period 1 ... 8 Start --.-- (day.
- Page 72 Programming Function Prog. Standard value Level Delayed heat request Room influence - - - % Room temp limitation 0.5°C Boost heating - - -°C Quick setback Down to reduced set- Off | Down to reduced setpoint | Down to frost prot setpoint point Optimum start control max 0 min...
- Page 73 Programming Function Prog. Standard value Level Heating curve displacement 1021 0.0°C Heating curve adaption 1026 Off | On Summer/winter heating limit 1030 20°C 24-hour heating limit 1032 0°C Flow temp setpoint min 1040 8°C Flow temp setpoint max 1041 80°C Flow temp setpoint room stat 1042 - - -°C...
- Page 74 Programming Function Prog. Standard value Level Optg mode changeover 1200 Protection None | Protection | Reduced | Comfort | Automatic Heating circuit 3 Parameter only visible if heating circuit 3 is installed. Comfort setpoint 1310 20.0°C Reduced setpoint 1312 18.0°C Frost protection setpoint 1314 10.0°C...
- Page 75 Programming Function Prog. Standard value Level Pump speed reduction 1480 Characteristic Operating level | Characteristic Pump speed min 1482 10 % Pump speed max 1483 100 % Curve readj at 50% speed 1488 10 % Flow setp readj speed ctrl 1490 No | Yes Operating level changeover...
- Page 76 Programming Function Prog. Standard value Level Consumer circuit 2 Flow temp setp cons request 1909 70°C DHW charging priority 1924 No | Yes Excess heat draw 1925 Off | On With buffer storage tank 1928 No | Yes With prim contr/system pump 1930 No | Yes Swimming pool circuit...
- Page 77 10 % Pump speed max 2323 100 % Output nominal 2330 POWER HT-A 1.430 : 400 kW POWER HT-A 1.500 : 470 kW POWER HT-A 1.570 : 540 kW POWER HT-A 1.650 : 610 kW Output basic stage 2331 POWER HT-A 1.430 : 80 kW POWER HT-A 1.500 : 94 kW...
- Page 78 Function Prog. Standard value Level Fan output controller delay 2452 POWER HT-A 1.430 : 80 kW POWER HT-A 1.500 : 94 kW POWER HT-A 1.570 : 108 kW POWER HT-A 1.650 : 122 kW Controller delay duration 2453 60 s...
- Page 79 Programming Function Prog. Standard value Level Delay secondary pump 3828 60 s Collector start function 3830 - - - Min run time collector pump 3831 20 s Collector start function On 3832 07:00 (h:min) Collector start function Off 3833 19:00 (h:min) Collector start funct grad 3834 - - - min/°C...
- Page 80 Programming Function Prog. Standard value Level Full charging 4810 Off | Heating mode | Always Full charging temp min 4811 8°C Full charging sensor 4813 With B42/41 With B4 | with B42/41 DHW-storage Parameter depends on hydraulic system! Charge push forward time 5011 01:00 min Flow setpoint boost...
- Page 81 Programming Function Prog. Standard value Level Excess interm circ temp max 5141 2°C Flow setp compensation delay 5142 30 s Flow setp compensation Xp 5143 60°C Flow setp compensation Tn 5144 30 s Flow setp compensation Tv 5145 30 s Full charging with B36 5146 No | Yes...
- Page 82 Programming Function Prog. Standard value Level Relay output QX3 5892 DHW actuator Q3 Parameters see Relay output QX1 (prog.-no. 5890)! Sensor input BX1 5930 Collector sensor B6 None | DHW sensor B31 | Collector sensor B6 | DHW circulation sensor B39 | Buffer sensor B4 | Buffer sensor B41 | Common flow sensor B10 | Solid fuel boiler sensor B22 | DHW charging sensor B36 | Buffer sensor B42 | Common return sensor B73 | Cascade return sensor B70 | Swim-...
- Page 83 Programming Function Prog. Standard value Level Function input H5 5977 None None | Optg mode change HCs+DHW | Optg mode changeover DHW | Optg mode changeover HCs | Optg mode changeover HC1 | Optg mode changeover HC2 | Optg mode changeover HC3 | Heat genera- tion lock | Error/alarm message | Consumer request VK1 | Consumer request VK21 | Release swi pool source | Excess heat discharge | Re- lease swi pool solar | Operating level DHW | Operating level HC1 | Op-...
- Page 84 Programming Function Prog. Standard value Level Relay output BX21 module 2 6042 None Parameters see Sensor input BX1 (prog.-no. 5930)! Relay input BX22 module 2 6043 None Parameters see Sensor input BX1 (prog.-no. 5930)! Sensor input BX21 module 3 6044 None Parameters see Sensor input BX1 (prog.-no.
- Page 85 Programming Function Prog. Standard value Level Readjustm collector sensor 6098 0°C Readjustm outside sensor 6100 0°C Time constant building 6110 10 h Central setp compensation 6117 20°C Frost protection plant 6120 Off | On Save sensors 6200 No | Yes Check no.
- Page 86 Programming Function Prog. Standard value Level Flow temp 1 alarm 6740 - - - min Flow temp 2 alarm 6741 - - - min Flow temp 3 alarm 6742 - - - min Boiler temp alarm 6743 - - - min DHW charging alarm 6745 --- h...
- Page 87 Programming Function Prog. Standard value Level Telephone customer service 7170 PStick storage pos 7250 PStick Reg data set 7251 PStick command 7252 No operation No operation | Reading from stick | Writing on stick PStick progress 7253 State PStick 7254 No stick | Stick ready| Writing on stick | Reading from stick | EMC test active | Writing error | Reading error| Incompatible data set | Wrong stick type | Stick format error | Check data set | Data set disabled |...
- Page 88 Programming Function Prog. Standard value Level Contact state H4 7860 Open | Closed Frequency H4 7862 Contact state H5 7865 Open | Closed Contact state H6 7872 Open | Closed State State heating circuit 1 8000 State heating circuit 2 8001 State heating circuit 3 8002...
- Page 89 Programming Function Prog. Standard value Level Priority/state source 10 8118 Parameters see Priority/state source 1 (prog.no. 8100)! Priority/state source 11 8120 Parameters see Priority/state source 1 (prog.no. 8100)! Priority/state source 12 8122 Parameters see Priority/state source 1 (prog.no. 8100)! Priority/state source 13 8124 Parameters see Priority/state source 1 (prog.no.
- Page 90 Programming Function Prog. Standard value Level Solar ctrl elem swi pool 8502 Collector temp 1 8510 Collector temp 1 max 8511 Collector temp 1 min 8512 dt collector 1/DHW 8513 dt collector 1/buffer 8514 dt collector 1/swimming pool 8515 Solar flow temp 8519 Solar return temp 8520...
- Page 91 Programming Function Prog. Standard value Level Flow temp 2 8773 Flow temp setpoint 2 Room thermostat 2 8779 No demand | Demand Heating circuit pump 3 8790 Off | On Heat circ mix valve 3 open 8791 Off | On Heat circ mix valve 3 close 8792 Off | On...
- Page 92 Burner control Pre-purge time 9500 20 s Nominal output pre-purging 9504 POWER HT-A 1.430 : 338 kW POWER HT-A 1.500 : 362 kW POWER HT-A 1.570 : 364 kW POWER HT-A 1.650 : 343 kW Nominal output ignition load 9512 POWER HT-A 1.430 : 129 kW...
-
Page 93: Parameter List Explained
Programming Function Prog. Standard value Level Info Option The display of the information values depends on the operation status! Fault message Servicing message Setpoint manual control Controller stop setpoint Boiler temp State heating circuit 1 State heating circuit 2 State heating circuit 3 State DHW State boiler State solar... - Page 94 Programming Contrast of display Under prog. no. 25 the contrast of the display can be adjusted. (25) Operation lock If this function is activated the following operating elements are locked: (26) - Operating mode buttons for heating and DHW mode - Control knob (comfort-setpoint room temperature) - Presence button (only room device) Programming lock...
- Page 95 Programming Operation HC2/HC3/P When selecting room unit 1 or operator unit (prog.no. 40), it must be set under (44, 46) prog. no. 44 or 46, if the heating circuits HC2 and HC3/P have to be operated to- gether with heating circuit 1 or independent from heating circuit 1 by the opera- tor unit.
- Page 96 Programming Preselection Selection of weekday or day blocks. The day blocks (Mo-Su, Mo-Fr and Sa-Su) as- (500, 520, 540, 560, 600) sist the adjustment. The set times are only copied to the individual weekdays and can be changed in the individual day settings, as required. The times of the individual weekdays always determine the heating program.
- Page 97 Programming Reduced setpoint Setting of the desired room temperature during the reduced heating phase. With- (712, 1012, 1312) out room sensor or with the room influence (prog.no. 750, 1050, 1350), this value is used for calculation of the flow temperature, to theoretically reach the set room temperature.
- Page 98 Programming Heating curve adaption Automatic adaptation of the heating nominal line to the actual circumstances, (726, 1026, 1326) due to which a correction of the heating nominal line gradient becomes obsolete. For automatic adaptation of the heating curve a room sensor must be connected. The value for room influence (see prog.
- Page 99 Programming Delay heat request The boiler heat request is forwarded to the burner delayed by the time set here. In (746, 1046, 1346) this way a slowly opening mixer can already start up before the burner goes into operation. Note: If, uner Prog. no. 1630 the option Absolute is selected, the value "0" must be set under Prog.no.
- Page 100 Programming Fig. 35: Room temp limitation Room temperature actual value Room temperature setpoint Room switching difference Pump Time Boost heating The boost heating is active if the room set point is switched from protection (770, 1070, 1370) mode or reduced mode to comfort mode. During the boost heating the the room set point is increased to the value set here.
- Page 101 Programming Quick setback The quick setback is active if the room setpoint is switched from comfort level to (780, 1080, 1380) another operating level (selected between reduced mode or protection mode). During the quick setback the heating circuit pump is turned off and the mixing valve is also closed during mixing circuits.
- Page 102 Programming Fig. 37: Optimum start and stop control Start time set forward Xoff Stop time set forward Time switching program Room temperature setpoint Room temperature actual value Reduced setp increase start For a relatively small required heating output, the reduced room setpoint can be (800, 1100, 1400) raised for cold outside temperatures.
- Page 103 Programming Continuous pump operation Using the continuous pump operation function switching off the pump can be (809, 1109, 1409) suppressed by the quick setback and when reaching the room set point (room thermostat, room sensor or room model) - No: the heating circuit pump /boiler pump can be switched off by quick setback or reaching the room set point - Yes: the heating circuit pump/boiler pump remains switched on even during the quick setback and after reaching the room set point...
- Page 104 Programming Important! The respective regulations and standards of the screed manufacturer have to be observed. A correct function is only possible with a correctly installed plant (hydraulic, elec- trical systems and settings). Deviations can only lead to damage of the screed. The floor curing function can be stopped prematurely by setting 0=OFF.
- Page 105 Programming Pump speed max Using this function the maximum speed for the heating circuit pump can be (883, 1183, 1483) specified. Curve readj at 50% speed Correction of the flow setpoint with reduction of the pump speed by 50%. The (888, 1188, 1488) correction is calculated from the difference from the flow setpoint according to the heating curve and current room setpoint.
- Page 106 Programming Fig. 40: Release depending on the time switching programmes of the heating circuits (example#) - Time program 4 The DHW temperature will be switched over between the nomi- nal setpoint and the reduced setpoint independent from the time switching pro- grams of the heating circuits.
- Page 107 Programming Legionella funct time Setting the start time for the legionella function. The legionella function will be (1644) carried out at the first release of the DHW preparation with the setting "---". Legionella funct setpoint Setting the temperature setpoint for killing the germs. (1645) Legionella funct duration With this function, the time will be set, during which the legionella function set-...
- Page 108 Programming Excess heat draw If an excess temperature discharge is activated, the excess energy can be dis- (1875, 1925, 1975) charged through a consumercircuit of the room heating. This can be separately set for each consumercircuit. With buffer storage tank - No: the consumer circuit is fed directly from the boiler.
- Page 109 Programming Prim contr/system pump - Before buffer storage tank : the primary controller/feed pump is arranged with (2150) existing buffer storage tank hydraulically before the buffer storage tank - After buffer storage tank : the primary controller/feed pump is arranged with existing buffer storage tank hydraulically after the buffer storage tank Boiler Release below outside temp...
- Page 110 Programming Temp differential max The limit of the boiler stroke is only possible if a valid value of the boiler return (2316) temperature is available. Caution! The limit of the boiler stroke is only performed if a modulating heat cir- cuit pump is configured, i.e.
- Page 111 Programming Note : These are calculated values. The actual output must be calculated using a gas meter, for example. Max fan output heating full With this parameter the maximum boiler capacity can be limited in full charging charging mode at layer storage. (2442) Note : These are calculated values.
- Page 112 Programming Switching diff on HCs To avoid unnecessary switch off during transient effects the switch off difference (2454) adapts dynamically depending on the temperature profile (see Fig. 42 ). Switching diff off min HCs (2455) Fig. 42: Switching differential Switching diff off max HCs (2456) Switching diff on DHW (2460)
- Page 113 Programming Release integral source seq A value generated from temperature and time. The following boiler will be (3530) switched on in case of exceeding the set limit. . Reset integral source seq The following boiler will be switched off in case of exceeding the setpoint (3531) Restart lock The restart lock prevents switching back on of a switched off boiler.
- Page 114 Programming Fig. 43: charging control /schematically) ON / OFF Collector pump Tkol Collector temp TLmin Charging temp min buffer / swimming pool Storage temperature Charg temp min DHW st tank In addition to the temperature difference, reaching a certain collector tempera- (3812) ture is necessary for the storage charging process.
- Page 115 Programming Charging temp min swi pool Temperatures that the collector must have at the least in order to begin charging (3818) a swimming pool. Charging prio storage tank For several combined exchangers in the system, the loading sequence for the (3822) combined storage tank can be defined by setting the loading priority.
- Page 116 Programming Min run time collector pump The collector pump is periodically switched on for the running time set here. (3831) Collector start function ON The time that the collector start function starts or stops is set here. (3832) Collector start function OFF (3833) Collector start funct grad As soon as there is a temperature increase on the collector sensor, the collector...
- Page 117 Programming Temp diff ON/OFF A sufficiently large temperature difference is necessary between the boiler tem- (4130, 4131) perature and the comparative temperature for start-up of the pump. Comparative temp (44133) Fig. 45: Storage tank charging Boiler temperature Comparative actual temperature ON/OFF ON/OFF Boiler pump To maintain the comparative temperature, the following settings are available...
- Page 118 Programming Min st tank temp heat mode If the storage tank temperature of the buffer storage tank drops below this value, (4724) the heating circuit is switched of if no generator is available. Charging temp max The buffer storage tank is charged from solar energy up to the set charging tem- (4750) perature maximum.
- Page 119 Programming Full charging The function full charging makes it possible that the released heat source is first (4810) switched off, despite automatic heat source block if the buffer storage tank is fully charged. During active function the heat source parameterized for the fully charging function is first switched off, if the fully charging setpoint is reached or the boiler must be switched off because of burner control.
- Page 120 Programming Type of charging Charging a layer storage (if exists): (5022) - Recharging: The cylinder is only reheated at every DHW demand. - Full charging: The cylinder is fully heated at every DHW demand. - Full charging legio: The cylinder is fully heated if the pasteurisation function is enabled;...
- Page 121 Programming Recooling temp Setting the temperature for recooling the DHW-storage. (5055) Recooling collector Recooling of the overheated collector through giving off of the energie to the sur- (5057) rounding of the collector. El imm heater optg mode - Replacement: the DHW is only heated by electrical immersion heater if the boil- (5060) er signals a malfunction or a boiler lock exists.
- Page 122 Programming With solar integration This function sets whether the DHW storage tank should be filled. (5093) Pump speed limitations Setting of the minimum and maximum speed of the storage tank charging pump (5101, 5102) in percent. Speed Xp The P-band Xp defines the amplification of the controller A smaller Xp value leads (5103) to a higher actuation of the charging pump with equal control difference.
- Page 123 Programming Min start temp diff Q33 This parameter determines switch on delay of the intermediate circuit pump de- (5148) pending on the boiler temperature. The intermediate circuit pump is switched on as soon as the boiler temperature has reached the boiler setpoint plus the value set here.
- Page 124 Programming Separate circuit The DHW separate circuit can only be used in a boiler cascade. (5736) - Off: The DHW separate circuit is switched off. Each available boiler can feed the DHW storage tank. - On: The DHW separate circuit is switched on. The DHW charging is only done from the boiler defined for this.
- Page 125 Programming - El imm heater DHW K6 : With the connected electrical immersion heater, the DHW can be charged according to the operating side DHW storage operating lines electrical immersion heater. Note: The Operating mode is set under programme number 5060. - Collector pump Q5: Connection of a circulating pump in case of solar collector use.
- Page 126 Programming - Status information K36 : The output is set, when the burner operates. - Flue gas damper K37 : This function activates the flue gas damper control. If the flue gas damper control is activated the burner will only start operating, when the flue gas damper is open.
- Page 127 Programming - Excess heat discharge: an active excess heat discharge enables, for example, an external source to force the consumer (heating circuit, DHW storage tank, pump Hx) to take up the excess heat. For each consumer it can be set by the parameter excess temperature discharge whether the forced signal is paid attention to and therefore should take part in the heat discharge or not.
- Page 128 Programming Fig. 47: Example for two different sensor curves Function extension module Specification of functions that are controlled by the extension modules 1 2 and 3. 1/2/3 Multifunctional : For possible functions that can be assigned to the multifunction- (6020 - 6022) al inputs/outputs, see prog.
- Page 129 Programming Fig. 48: Example for heat demand 10 V and cooling demand 10 V Function value 1 Function value 2 Voltage value 1 Voltage value 2 PWM-output P1 With this parameter the function for the modulating pumps is specified. (6085) - None: No output P1 exists.
- Page 130 Programming Central setp compensation The central setpoint lead monitors the heat generator setpoint to the required (6117) central flow temperature. With the setting the maximum corrector is restricted, even if a large adaptation is required. Frost protection plant The heating circuit pump will be activated by the outside temperature without (6120) heat request If the outside temperature reaches the lower setpoint of -4°C,the heating circuit pump will be activated.
- Page 131 Programming Solar DHW+B DHW/B Tab. 8: Check no. storage tank (prog.-no. 6215) Buffer storage DHW storage tank No buffer No DHW storage tank Buffer storage Electric immersion heater Buffer, heat generation shutoff valve Charging pump Heat gen shutoff valve Diverting valve Diverting valve, solar connection Primary control, without exchanger Primary control, 1 exchanger...
- Page 132 Programming LPB-system Device address/Segment ad- The two-part LPB address of the controller consists of the 2-digit segment num- dress ber and the 2-digit device number. (6600/6601) Bus power supply function - Off: the power supply of the bus system does not take place through the con- (6604) troller.
- Page 133 Programming DHW assignment This setting is only necessary if the control of the DHW charging is done by a (6625) heating circuit time program (see prog. no. 1620 and 5061) - Local HCs: the DHW charging is done only for the local heating circuit. - All HCs in segment: the DHW charging is done for all heating circuits in the seg- ment.
- Page 134 Programming Service / special operation Burner hours interval Setting of the interval for maintenance of the burner. (7040) Burn hrs since maintenance Burner hours since the last maintenance. (7041) Note: The burner hours are only counted, when the maintenance message has been activated.
- Page 135 Programming PStick command - No operation: this is the base condition. As long as no operation is active on the (7252) stick, this command is displayed. - Reading from stick : starts reading the data from the stick. This operation is only possible with READ sticks.
- Page 136 Programming The following messages are possible under Heating circuit : state) Monitor has tripped Monitor has tripped Manual control active Manual control active Floor curing function active Floor curing function active Heating mode restricted Overtemp prot active Restricted, boiler protection Restricted, DHW priority Restricted, buffer Forced draw source...
- Page 137 Programming The following messages are possible under DHW : state) Monitor has tripped Monitor has tripped Manual control active Manual control active Holding mode On Holding mode Active Holding mode On i t c e l l Recooling via heat gen Recooling via HCs Charging lock active Discharging prot active...
- Page 138 Programming The following messages are possible under boiler: state) Flue gas temp too high Flue gas temp, shutdown Flue gas temp, powerlimitation Limitter has tripped Limitter has tripped Manual control active Manual control active Chimney sweep funct active Chimney-sweep function, nominal load Chimney-sweep function, part load Locked, solid fuel boiler Locked, automatic...
- Page 139 Programming The following messages are possible under Solar : state) Manual control active Manual control active Frost prot collector active Frost prot collector active i t c i t c Max st tank temp reached Max st tank temp reached Evaporation prot active Evaporation prot active Overtemp prot active...
- Page 140 Programming The following messages are possible under solid fuel boiler : state) Manual control active Manual control active Overtemp prot active Overtemp prot active Locked, automatic Min limitation active Min limitation Min limitation, part load Min limitation active In operation for HC Protective start Protective start, part load Return limitation...
- Page 141 Programming The following messages are possible under Buffer : state) Frost protection active Frost protection active Charg el imm heater El charg, emergency mode El charg, source protection Electric charging defrost Electric charging, forced Electric charging, substitute Charging restricted Charging locked Restricted, DHW priority i t c i t c...
- Page 142 Programming Burner control Prepurge time Pre-venting time. (9500) Note: This parameter must only be changed by a heating specialist! Nominal output prepurging Nominal output fan speed during preventing. (9504) Nominal output ignition load Nominal output fan speed during ignition. (9512) Nominal output Partial load Nominal output fan speed under boiler in LF.
-
Page 143: Maintenance
Maintenance 9. Maintenance 9.1 Inspection and need dependent service Note: The inspection of the POWER HT-A must be compeleted annually. Should during inspection the need for maintenance work be found, these should be carried out according to need. Maintenance work includes among others: - Clean POWER HT-A outside. -
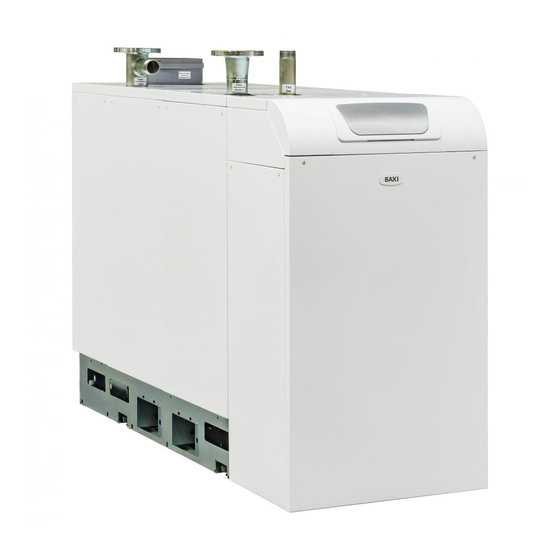
Page 144: Boiler View
Maintenance 9.2 Boiler view Boiler view POWER HT-A 1.430 - 1.500 - 1.570 Fig. 49: Boiler view POWER HT-A 1.430 - 1.500 - 1.570 1 Boiler feed 12 Air pressure monitor exhaust (behind the fan) i r t 3 Boiler return... - Page 145 Maintenance Boiler view POWER HT-A 1.650 Fig. 50: Boiler view POWER HT-A 1.650 e l i 2 Safety valve connection 13 Air pressure monitor trim (behind the fan) l i o 4 Gas connection 15 Ignition and ionisation electrode/sight glass 5 Gas valve (Dungs) 16 Control damper 6 Water pressure monitor...
-
Page 146: Clean Fan
Maintenance 9.3 Clean fan Fig. 51: Lifting up the controls 1. Remove front cladding and front side cladding 2. Fold up control box (1) and secure with a lock (2) 3. Remove all connection plugs on the top of the fan Fig. - Page 147 Maintenance Fig. 53: Remove the fan 6. Remove fan with air flap (5) 7. Check fan for function 8. Clean fan with compressed air 9. Reinstall fan in the reverse sequence...
-
Page 148: Check And Replace Ignition And Ionisation Electrode
Maintenance 9.4 Check and replace ignition and ionisation electrode Risk of electric shock! Before performing service work, power to the boiler must be shut off and it must be secured from accidentally being switched back on! 1. Remove front cladding and front side cladding 2. -
Page 149: Clean Burner Pipe
Maintenance 9.5 Clean burner pipe 1. Remove front clanning and front side cladding 2. Fold up control box and secure with a lock (see Fig. 51 ) 3. Remove fan (see Fig. 10 and Fig. 11 ) Fig. 56: Removing the mixing adapter 4. -
Page 150: Clean Heat Exchanger And Siphon
Maintenance 8. Reinstall the mixing adapter and fan. When installing the mixing adapter use a new seal. 9.6 Clean heat exchanger and siphon The heat exchanger and siphon must be cleaned in the scope of the annual service . The cleaning is done as follows: 1. - Page 151 Maintenance Fig. 60: Dry cleaning of the heat exchanger 4. Clean the heat exchanger with the cleaning rod (accessory) horizontal and ver- tical 5. Remove fan, mixing adapter and burner pipe (see Section 9.3 Cleaning fan and 9.5 Cleaning burner pipe ) 6.
- Page 152 Maintenance Fig. 62: Remove the cap 10. Remove the cap of the condensate trough Note: On the opposite side of the exhaust gas connetion there is another cap. Fig. 63: Rinse the condensate trough 11. Rinse out the condensate trough with water through the opening...
-
Page 153: Control And Regulating Centre Lms
Maintenance Fig. 64: Removing the siphon 12. Remove the pipe connection (1) 13. Loosen the screwed connection on the condensate connetion and remove the siphon (2) 14. Rinse out the siphon with clear water and reinstall in the reverse order Danger! Risk of life due to escaping exhaust gas! Before installing the siphon and commissioning of the gas condensing boiler, fill the siphon with approx. -
Page 154: Fault Switch-Off
Maintenance 9.8 Fault switch-off Safety switch-off in case of flame failure during the operation. After every safety switch-off a new ignition attempt is carried out as per program. If this does not result in flame formation a fault switch-off occurs. In case of fault switch-off, the reset button on the control panel should be pressed. -
Page 155: Fault Code Table
Maintenance 9.10 Fault code table The following is the fault code table. In case of further displayed fault codes, please inform the heating specialist. Fault i r c code No error Boiler temperature 1 Sensor fault Check connection, inform heating specialist Boiler temperature solid fuel sensor fault Boiler temperature solid fuel sensor fault Boiler temperature solid fuel sensor fault... - Page 156 Maintenance Fault i r c code Safety temperature limiter lockout No heat removal, STB/interruption, possibly short in gas valve , internal fuse defective; let device cool down and reset; if this fault occurs several times, inform heating specialist Temperature monitor switching off No heat removal;...
- Page 157 Maintenance Fault i r c code Sensor BX21 no function (EM1, EM2 or EM3) Sensor BX22 no function (EM1, EM2 or EM3) l l o Solar DHW sensor B31 missing Solar ctrl elem buffer K8 missing Sol ctrl elem swi pool K18 missing Solid fuel boiler pump Q10 missing Solid fuel boil comp sens missing e l '...
-
Page 158: Maintenance Code Table
Maintenance 9.11 Maintenance code table Maintanance codes Maintenance description Burner operating hours exceeded Burner starts exceeded Maintenance interval exceeded 9.12 Operating phases of the Control Centre LMS Press the information key to display the operating phases. Phase no. i r c Standby (no heat demands) Burner on stand-by t - f... - Page 159 Automatic day heating limit Automatic operation Factory setting Automatic summer/winter switch-over Factory settings Fault Boiler view Fault code table -POWER HT-A 1.430 - 1.500 - 1.570 Fault message -POWER HT-A 1.650 Floor curing function Boiler Frost protection plant -Alignment Frost protection setpoint...
- Page 160 Maintenance message Used symbols Manual adjustment of burner load Manual control Water pressure Menu-Commissioning Wiring diagram Neutralisation equipment Operating phases Operator section -Activate Optimum start and stop control Original spare parts Outside temperature sensor PH value Protection Protection against contact Purging the gas line Quick setback Reduced setpoint...
- Page 161 Space for notes...
- Page 162 Space for notes...
- Page 163 Space for notes...
Need help?
Do you have a question about the POWER HT-A 1.430 and is the answer not in the manual?
Questions and answers