Table of Contents
Advertisement
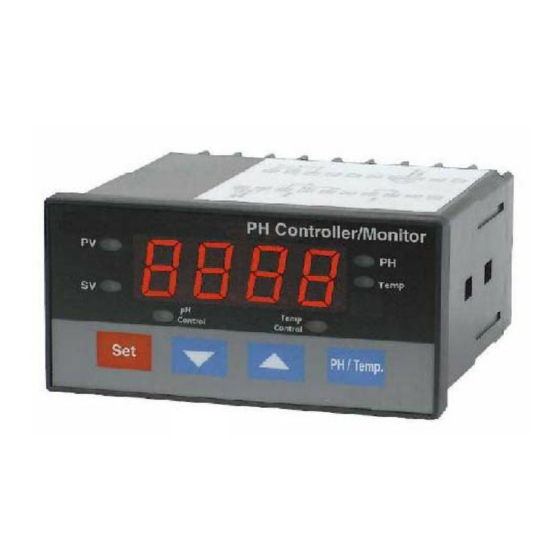
pH
CONTROLLER/MONITOR
Model : PPH-2108
Your
purchase
MONITOR marks a step forward for you into the field of
precision measurement. Although this pH controller is a
complex and delicate instrument, its durable structure
developed. Please read the following instructions carefully
and always keep this manual within easy reach.
OPERATION MANUAL
of
this
pH
CONTROLLER/MONITOR
Advertisement
Table of Contents

Subscribe to Our Youtube Channel
Related Manuals for Lutron Electronics PPH-2108


Summary of Contents for Lutron Electronics PPH-2108
- Page 1 CONTROLLER/MONITOR Model : PPH-2108 Your purchase this CONTROLLER/MONITOR MONITOR marks a step forward for you into the field of precision measurement. Although this pH controller is a complex and delicate instrument, its durable structure developed. Please read the following instructions carefully and always keep this manual within easy reach.
- Page 2 Caution Symbol Caution : * Risk of electric shock ! Caution : * Do not use fingers or any tool to touch the FLASH TUBE. * The instrument contains no user serviceable parts and should not be opened by the user. * Repair or after service should be done by a qualified technician only.
-
Page 3: Table Of Contents
TABLE OF CONTENTS 1. FEATURES...............1 2. SPECIFICATIONS............. 2 2-1 General Specifications..........2 2-2 Electrical Specifications..........4 3. FRONT PANEL DESCRIPTION..........5 3-1 Display..............5 3-2 PV ( process value ) indicator........5 3-3 SV ( set value ) indicator..........5 3-4 Set Button..............5 Button.............. -
Page 4: Features
1. FEATURES * Professional pH and Temp. measurement monitor and controller. * pH range : 0 to 14 pH x 0.01 pH. * pH function with high input impedance avoids measuring error. * Optional Temp. probe ( ATC probe, Automatic Temp. Compensation probe ) is available for pH measurement compensation and the Temp. -
Page 5: Specifications
2. SPECIFICATIONS 2-1 General Specifications Display 4 digits red LED, digit size : 14 mm. Circuit Custom chip of microprocessor LSI circuit. Range 0 to 14 PH Temp. -30 to 100 ℃ Display Unit Temp. ℃ ℉ pH Input 10^12 ohm Impedance Temperature Manual... - Page 6 Setting value 1. High limit value setting. 2. Low limit value setting. 3. Hysteresis value setting. 4. Temp. Offset value setting. * 1, 2, 3 Setting for pH and Temp. function. External DC 12 V, 50 mA max. Power Supply Data Output RS 232 PC serial interface.
-
Page 7: Electrical Specifications
2-2 Electrical Specifications (23 ± 5 ℃ pH ( meter only ) Range Resolution Accuracy 0 to 14 PH 0.01 PH ± (0.02 PH + 2 d) Temperature ( used optional Temp. probe, TP-07 A) Measurement Range Resolution Accuracy to 65 to 65 ℃... -
Page 8: Front Panel Description
Fig. 1 3. FRONT PANEL DESCRIPTION Fig. 1 3-1 Display 3-2 PV ( process value ) indicator 3-3 SV ( set value ) indicator 3-4 Set Button Button ▼ Button ▲ 3-7 PH/Temp Button 3-8 pH control relay indicator 3-9 Temp. control relay indicator 3-10 pH indicator 3-11 Temp. -
Page 9: Measuring Procedure
4. MEASURING PROCEDURE Terminal layout Fig. 2 4-1 Terminal connection 1)Input the ACV power ( 90 to 260 ACV ) to T1, T2. Do not input the over voltage to the AC input terminals. 2)Connect the " pH Control Relay " output from T3, T4. Connect the "... -
Page 10: Ph Measurement ( With Atc Probe )
4-3 pH measurement ( with ATC probe ) 1)Prepare the optional Temp. probe ( ATC probe TP-07A ) connect the Temp. Wires ( 3-19, Fig. 1 ) to the " Wire terminals " ( 3-12 ) T10, T9 ( bare wire ). Prepare the optional pH electrode ( For example PE-21, PE-03... -
Page 11: St Layer Setting Procedures
2)Power on the meter, Immerse the above pH electrode into the measuring solution. The " Display " ( 3-1, Fig. 1 ) will show the pH value, in the same time the " pH indicator " ( 3-10, Fig. 1 ) will light. - Page 12 Remark : * Under " Display " show " LoLt ", if " pH indicator " ( 3-10, Fig. 1 ) is lit, meter is ready for " pH Low Limit " setting. * Under " Display " show " LoLt ", if " Temp. indicator " ( 3-11, Fig.
-
Page 13: Nd Layer Setting Procedures
2)Use the " " Button " ( 3-5, Fig. 1 ) and the " ▼ ▲ Button " ( 3-6, Fig. 1 ) to adjust the desiring " High Limit " value. * When adjust the value, the " SV indicator " ( 3-3, Fig. 1 ) will light. - Page 14 Temp. compensation value setting The pH measurement value is effected by the measurement environment Temp. value. If intend to make the precision pH measurement, it should connect the Temp. probe ( ATC probe, TP-07A ) to " Wire terminals " T9, T10. Otherwise, it should adjust the Temp.
- Page 15 Press the " " PH/Temp Button " ( 3-7, Fig. 1 ) once, the " Temp indicator " ( 3-11, Fig. 1 ) will light, now the meter is ready for the Temperature " Hysteresis " value setting. Remark : * Under "...
- Page 16 * When adjust the Offset value, the " SV indicator " ( 3-3, Fig. 1 ) and Temp. indicator ( 3-11, Fig. 1 ) will light. Remark : * For example of " Temp. Offset value setting " : The Temp. reading value is 18.2 The offset value is 1.1 The new display value will be 19.3 ( 18.2 + 1.1).
-
Page 17: Ph Calibration Procedures
Note : During the Display show above " CAL " text, before to reset the usage hours, the user can no execute the normal function setting. 3)After finish the PCPS value setting, press the " Set Button " ( 3-4, Fig. 1 ) again, the " Display " will return to normal measurement screen and finish the "... - Page 18 Use the " " Button " ( 3-5, Fig. 1 ) and the " ▼ ▲ Button " ( 3-6, Fig. 1 ) to adjust the Display until its value reach to the Temp. value of " Buffer solution ", then press "...
- Page 19 When change the new pH electrode, it recommend that to execute the " SYSTEM RESET " at first, refer to page 19. 5-2 pH calibration ( with ATC probe ) 1)Power on the meter, immerse the above pH electrode and the Temp. probe into the measuring solution. The "...
-
Page 20: Rs232 Pc Serial Interface
6. RS232 PC SERIAL INTERFACE The instrument has RS232 PC serial interface via a 3.5 mm terminal ( 3-13, Fig. 1 ). The data output is a 16 digit stream which can be utilized for user's specific application. A RS232 lead with the following connection will be required to link the instrument with the PC serial port. - Page 21 Each digit indicates the following status : Start Word When send the upper display data = 1 When send the lower display data = 2 D12 & D11 Annunciator for Display = 01 = 02 pH = 05 ℃ ℉ Polarity 0 = Positive 1 = Negative Decimal Point(DP), position from right to the...
-
Page 22: Ph Electrode Quality Check
7. pH ELECTRODE QUALITY CHECK If the pH electrode output value already beyond ± 1.2 pH, the electrode's quality is bad, it can not be used any more and should change the new electrode. Install the pH electrode, power on the meter, use the two fingers to press both "... -
Page 23: The Address Of After Service Center
9. THE ADDRESS OF AFTER SERVICE CENTER 0704-PPB2108...
Need help?
Do you have a question about the PPH-2108 and is the answer not in the manual?
Questions and answers