Table of Contents
Advertisement
Advertisement
Table of Contents

Related Manuals for Avery Weigh-Tronix E1010


Summary of Contents for Avery Weigh-Tronix E1010
- Page 1 Model E1010 Indicator User Instructions...
- Page 2 Full acknowledgment of the source must be given. Avery Weigh-Tronix is a registered trade mark of the Avery Weigh-Tronix, LLC. This publication was correct at the time of going to print however, Avery Weigh-Tronix, LLC reserves the right to alter without notice the specification, design, price or conditions of supply of any product or service at any time.
-
Page 3: Table Of Contents
Limit Mode: Entering Upper and Lower Limits ............35 Sample Mode: Using Product to Set Target Weight ..........36 Performing a Checkweighing Weighment ..............36 Using Outputs ......................36 Counting ........................... 37 Batch Weighing ........................ 39 Configuring Outputs ....................40 E1010 Indicator User Instructions... - Page 4 Peak Weighing ......................... 41 Using Outputs ......................42 Chapter 9 Communications and Printing ....................43 Chapter 10 Error Messages ........................44 Chapter 11 Indicator Diagnostics ......................45 Indicator Test Functions ....................45 E1010 Indicator User Instructions...
-
Page 5: Chapter 1 General Information And Warnings
Cautions give information about procedures that, if not observed, could result in damage to equipment or corruption to and loss of data. NOTE: This is a Note symbol. Notes give additional and important information, hints and tips that help you to use your product. Model E1010 Indicator User Instructions... -
Page 6: Installation
Permanently connected equipment must have a readily accessible disconnect device incorporated in the fixed wiring such as an isolator or circuit breaker with at least 3mm contact separation. The isolator MUST NOT be installed into the flexible power cable supplied with the unit. Model E1010 Indicator User Instructions... -
Page 7: Safe Handling Of Equipment With Batteries
Always turn off the machine and isolate from the power supply before starting any routine maintenance to avoid the possibility of electric shock. Make sure that it is placed securely on a flat and level surface. Model E1010 Indicator User Instructions... -
Page 8: Cleaning The Machine
Classe A prescrites dans le Règlement sur le brouillage radioélectrique edicté par le ministère des Communications du Canada. European Countries WARNING: This is a Class A product. In a domestic environment, this product may cause radio interference in which the user may be required to take adequate measures. Model E1010 Indicator User Instructions... -
Page 9: Declaration Of Conformity
A copy of the original signed declaration for this instrument is available from: Avery Weigh-Tronix, Foundry Lane, Smethwick, West Midlands B66 2LP England Model E1010 Indicator User Instructions... -
Page 10: Chapter 2 Introduction
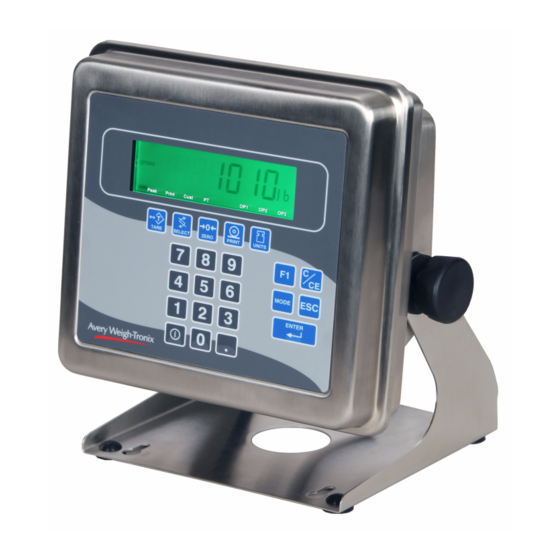
Introduction The Model E1010 is an easy to use, uncomplicated indicator for general weighing applications. It is ideal for bench scales, floor scales and tank weighing applications. The display includes a multi-segment fan graph for fast visual awareness for checkweighing. The indicator can perform counting functions, peak weight functions, act as a remote display and operate on battery power (optional). -
Page 11: Chapter 3 Front Panel
Front Panel The front panel, shown in Figure 1, consists of the keys and display. Figure 3.1 E1010 front panel 3.1 Keys The functions of the keys on the front panel are listed below. Press the TARE key to perform a tare function. To key in a known tare weight, key in the value and press the TARE key. - Page 12 Units are enabled in a password protected menu. (Contact your local supplier or Avery Weigh-Tronix distributor for assistance.) Also acts as a right arrow key when in the menu structure. Press the F1 key to select application specific choices. Also used to access PLU (Product Look Up) memory channels.
- Page 13 Count annunciator lights when count is displayed in the counting application. Total annunciator lights when displaying the total count in the accumulator application. Unit of measure annunciator shows the current unit of measure. Checkweighing annunciator lights during use of the checkweiging application. Model E1010 Indicator User Instructions...
-
Page 14: Chapter 4 Battery Information
The battery should never be stored in a discharged state as permanent damage will occur. CAUTION: Risk of explosion if battery is replaced by an incorrect type. Dispose of used batteries according to the battery manufacturer’s instructions. Model E1010 Indicator User Instructions... -
Page 15: Chapter 5 Plu (Product Look Up) Memory Channels
PLU channels can be cleared by using a password protected menu. These instructions are found in the Supervisor Menu on page 18. You can also print a report of all the PLU channels in the same password protected menu. Model E1010 Indicator User Instructions... -
Page 16: Chapter 6 Entering An Id Number
You can enter an ID number which is then part of the active PLU channel. To enter an ID you must be in weighing mode. Key in a number on the keypad then press the ENTER key. This number will be assigned to the currntly active PLU. Model E1010 Indicator User Instructions... -
Page 17: Chapter 7 Menu Mode
Menu Mode The E1010 has two menus you can use to set up and test the indicator: the User menu and the Supervisor menu. Both are explained below. 7.1 User Menu Use the User menu to do the following: Audit the number of configurations and calibrations performed... -
Page 18: Supervisor Menu
Sure? report Print Clear PLU0 PLU9 Prints Sure? report Preset Tare Print Type Clear entry Prints Limit Sure? report Print Type Clear Prints Auto Sure? report Print Clear Prints Sure? report Figure 7.2 Supervisor Menu Model E1010 Indicator User Instructions... -
Page 19: Date Submenu (Set Date)
Key in the date value and press the ENTER key… YY XX is displayed. YY stands for year and XX represents the current value. Key in the year (04=2004, etc.) and press the ENTER key… DATE is displayed. Model E1010 Indicator User Instructions... -
Page 20: Hour Submenu (Set Time)
SETUP is displayed. Use this submenu to print and/or clear application reports and choose the operation modes or values for applications which have choices. Each is explained in the following steps. Reference Supervisor Menu on page 18 Model E1010 Indicator User Instructions... - Page 21 APP is displayed. Each application is listed below this menu item. Applications are enabled and disabled in a password protected menu but you do each application’s configuration under this menu item. Contact your local supplier or Avery Weigh-Tronix distributor for assistance with the password protected menu. PLU (Product Look Up) Press the PRINT key…...
- Page 22 ACC (Accumulator Application Press the UNITS key… ACC. is displayed. This stands for the accumulator application. Press the PRINT key… PRINT is displayed. Use this item to print out a complete report of accumulator totals. Model E1010 Indicator User Instructions...
- Page 23 F1 key to activate each subsequent output. Press the PRINT key… The current type setting is displayed. Toggle between the choices by pressing the TARE or UNITS key. Press the ENTER key when your choice is displayed… TYPE is displayed. Model E1010 Indicator User Instructions...
- Page 24 1 scale division. The TARGET light stays lit if weight is ±1 division of the target weight. Toggle between the choices by pressing the TARE or UNITS key. Press the ENTER key when your choice is displayed… TYPE is displayed. Model E1010 Indicator User Instructions...
- Page 25 Press the ENTER key… SURE? is displayed. Press the ESC key to abort the save process or press the ENTER key to clear all the information… CLEAR is displayed. Press the SELECT key… COUNT is displayed. Model E1010 Indicator User Instructions...
-
Page 26: Test Submenu (Test Menu)
Press SELECT key to return to ABOUT. ADC (Analog to Digital converter) Press the UNITS key… ADC is displayed. This stands for the analog to digital converter value in mV/Vs. Model E1010 Indicator User Instructions... - Page 27 When the port you want to test is displayed, press the PRINT key… With the pins jumpered, if the wiring and hardware are operating correctly, PASS will be displayed. If there is a problem, FAIL will be displayed and you should contact a service representative. Model E1010 Indicator User Instructions...
- Page 28 Press the UNITS key… OUT 2 is displayed. Repeat steps for outputs 2 and 3. At step 21, use the TARE or UNITS key to scroll to the desired output. Press the SELECT key… OUTPUT is displayed. Model E1010 Indicator User Instructions...
-
Page 29: Audit (Audit Counters)
SLEEP is displayed. This stands for the sleep mode timer. When the indicator goes to sleep you must press the ON/OFF switch to restart the indicator. Any motion or any key press restarts the sleep timer. Model E1010 Indicator User Instructions... - Page 30 Press ENTER when choice is displayed… SLEEP is displayed. This completes the Sleep item and the Supervisor menu. Press ESC to save and return to normal weighing operation. Model E1010 Indicator User Instructions...
-
Page 31: Chapter 8 Indicator Operations
Peak capture Remote display These applications are enabled using a password protected menu. Contact your local supplier or Avery Weigh-Tronix distributor for assistance with the password protected menu. Also see SETUP submenu (Setup menu) on page 20 in this manual for configuring a specific application. -
Page 32: General Tare/Net Weighing
Press the PRINT key to accept the displayed value or key in a new value and press the ENTER key to accept. OP2 will be displayed. Repeat for the other outputs. You can skip the displayed output by pressing the ESC key. Model E1010 Indicator User Instructions... -
Page 33: Accumulator Weighing
4th press = Net total of all weighments is displayed 5th press = Number of weighments is displayed 6th press = Active PLU number is displayed. 7th press = Display returns to gross weigh mode You need the supervisor’s password to clear the accumulator. Model E1010 Indicator User Instructions... -
Page 34: Using Outputs
You can set your target weight in one of two ways. The mode is set in the password protected Supervisor menu. See the Supervisor Menu on page 18 for instructions. The two modes are explained below: Model E1010 Indicator User Instructions... -
Page 35: Limit Mode: Entering Upper And Lower Limits
Key in the lower weight limit. Press the F1 key… The indicator returns to normal weigh mode. Place items on the scale and the display will show if the weight is over, under or acceptable based on the limits you have set. Model E1010 Indicator User Instructions... -
Page 36: Sample Mode: Using Product To Set Target Weight
OP2 activates and its annunciator illuminates when the accept condition is present. OP3 activates and its annunciator illuminates when the over condition is present. Model E1010 Indicator User Instructions... -
Page 37: Counting
This section applies if your indicator has the counting application active. Applications are activated through a password protected service menu. Follow these steps to perform a counting function with the E1010: In gross weight mode, press the F1 key… PCS is displayed followed by an underscore cursor. - Page 38 Repeat for the other outputs. You can skip the displayed output by pressing the ESC key. After OP3 has been set, or skipped, the indicator will automatically return to normal weighing mode. Model E1010 Indicator User Instructions...
-
Page 39: Batch Weighing
OP3 annunciator lights and Output #3 activates. MANUAL In manual mode, after you begin the batching process, you must press the F1 key to activate each subsequent output after each output weight is reached. Figure 8.3 Output flowchart Model E1010 Indicator User Instructions... -
Page 40: Configuring Outputs
Repeat steps 2 and 3 for each output. Press ESC key to return to normal operation with the ingredients active. Indicator will automatically return to normal weighing mode after OP3 value is entered. To start a batch, push the F1 key. Model E1010 Indicator User Instructions... -
Page 41: Peak Weighing
The peak weight is displayed and the center-of-zero annunciator lights. To clear the peak value, press the F1 key… 0 is displayed. Repeat steps 2-4 for other weighments. Use the SELECT key to scroll through G, T, N and peak values Model E1010 Indicator User Instructions... -
Page 42: Using Outputs
ENTER key to accept. OP2 will be displayed. Repeat for the other outputs. You can skip the displayed output by pressing the ESC key. After OP3 has been set, or skipped, the indicator will automatically return to normal weighing mode. Model E1010 Indicator User Instructions... -
Page 43: Chapter 9 Communications And Printing
Communications and Printing The E1010 provides two RS-232 outputs for data transmission to peripheral devices. Contact your local supplier or Avery Weigh-Tronix distributor for assistance with RS- 232 interface connections. If your indicator has a peripheral device connected, from the gross/net weighing mode press the PRINT key to transmit the configured print formats. -
Page 44: Chapter 10 Error Messages
Appears on the display when the EEprom is not functioning correctly. Appears on the display when the Analog to Digital converter is not functioning correctly. Appears on the display when trying to change something and the scale is sealed. Model E1010 Indicator User Instructions... -
Page 45: Chapter 11 Indicator Diagnostics
DISP is displayed. This is the display test item. Press the PRINT key to perform a dynamic test of the display. Press ESC key to stop the dynamic test. Press the UNITS key… BUTTON is displayed. This is the button test item. Model E1010 Indicator User Instructions... - Page 46 When the port you want to test is displayed, press the PRINT key… With the pins jumpered, if the wiring and hardware are operating correctly, PASS will be displayed. If there is a problem, FAIL will be displayed and you should contact a service representative. Model E1010 Indicator User Instructions...
- Page 47 Press the PRINT key… The number of times the indicator has been calibrated is displayed. After a few seconds… CAL is displayed. Press the ESC key… The display returns to normal operation mode. This completes the User menu. Model E1010 Indicator User Instructions...
- Page 48 Model E1010 Indicator User Instructions...
Need help?
Do you have a question about the E1010 and is the answer not in the manual?
Questions and answers