Table of Contents
Advertisement
Advertisement
Table of Contents

Related Manuals for Avery Weigh-Tronix 1040/XL


Summary of Contents for Avery Weigh-Tronix 1040/XL
- Page 1 Model 1040/XL Indicator User Instructions 29811-0016 Issue AD July 2009...
- Page 2 CAUTION Risk of electrical shock. Do not remove cover. No user service- able parts inside. Refer servicing to qualified service personnel. Weigh-Tronix reserves the right to change specifications at any time. 1040_u_en_ 29811_0016.p65 Model 1040/XL User’s Manual...
-
Page 3: Table Of Contents
Recipes and Pens ..........................28 Recipe Features ..........................28 Choose a Recipe Entry Mode ......................28 Recipe Menu ..........................29 Creating a Recipe .......................... 29 Editing Operations ......................... 31 Pens .............................. 32 Using ID ............................33 Model 1040/XL User’s Manual... - Page 4 Power On ............................52 Indicator Over/Under Capacity ....................... 53 Inaccurate Weight Readings ......................53 Measuring Supply Battery Voltage ....................54 Service Repairs ..........................54 Windows Setup ..........................55 To Download ..........................56 Transfer Data Module (TDM-40) ..................... 56 Model 1040/XL User’s Manual...
-
Page 5: Specifications
6. *W/T 3 x 5pin w/dual RS-232 and RD64 output 7 conn (pwr/alm/RD64/Com1/3-5 pin conn) 7. *W/T 4 x 4pin w/dual RS-232 and RD64 output 8 conn (pwr/alm/RD64/Com1/4-4pin conn) *NOTE: These versions do not offer Speed Sensor input or com 2. Model 1040/XL User’s Manual... - Page 6 RD64XL Remote Display RD125RF Remote Display XM64 Transmitter/receiver set Speed Sensor switch assembly Operating Temperature: -40° to 140° F (-40° to 60° C) Weight: 10 lb/ 4.5 kg Agencies: FCC Class A CE (European Approval) Warranty: Three Year Model 1040/XL User’s Manual...
-
Page 7: Introduction
This manual covers the information you need to operate your Weigh-Tronix About This Manual batching Model 1040/XL indicator. Major sections of this manual are headed by titles in a black bar like Intro- duction above. Subheadings appear in the left column. Instructions and text appear on the right side of the page. -
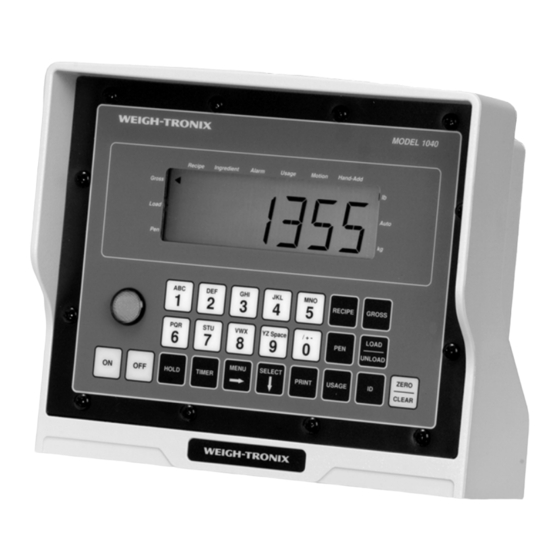
Page 8: Key Descriptions
To indicate unit is in the pen unloading mode, pen programming/editing, or viewing the pen accumulators. LOAD To indicate unit is in the loading/unloading mode when using the LOAD/UNLOAD key, or the recipe loading mode. GROSS To indicate unit is in the gross weighing mode. Model 1040/XL User’s Manual... -
Page 9: Display Messages
PRINT.X Shows on the display when the Print key was pressed after a quick print was selected for printing. LOW.BAT Alternates on the display between current mode and LOW.BAT when input voltage is between 8-10 volts. Model 1040/XL User’s Manual... -
Page 10: Entering Alphanumeric Characters
3. Repeatedly press the 6(PQR) key until R appears. 4. Repeatedly press the 5(MNO) key until N appears. 5. Press the SELECT key to accept the ingredient name or press the ZERO/CLEAR key to clear the name and try steps 1-4 again. Model 1040/XL User’s Manual... -
Page 11: Getting Started
5. Insert the indicator bracket into the quick-detach bracket and push it down into place. 6. For mobile applications, wrap and twist a strong wire around the indicator bracket and the quick-detach bracket to stabilize the mount- ing. Model 1040/XL User’s Manual... -
Page 12: Cable Connections And Power Requirements
SHT.DWN and turns off. Figure 3 Bottom panel w/power, alarm, speed sensor, remote display, 2 Com ports, and 7-pin J-box connections Figure 4 Bottom panel w/power, alarm, speed sensor, remote display, 2 Com ports, and 4-pin J-box connections Model 1040/XL User’s Manual... - Page 13 Figure 5 Bottom panel w/power, alarm, remote display, 1 Com port, and 3 Weigh Bar connections Figure 6 Bottom panel w/power, alarm, remote display, 1 Com port, and 4 Weigh Bar connections Model 1040/XL User’s Manual...
- Page 14 5-Pin Weigh Bar Input Pin Description - Bridge Pin Description + Excitation +12V Alarm + Bridge - Excitation Shield RD64/XL/M Input 4-Pin Weigh Bar Input Pin Description +12V Pin Description Pwr Ret Seg Test Data In Clock Load Remote Model 1040/XL User’s Manual...
-
Page 15: Weighing Procedures
Display shows HOLD. Because the unit is in HOLD mode it will not allow the display weight to change because of the terrain. This will prevent a scale zero shift. Press MENU (or XM64) or GROSS key to return to Gross mode. Model 1040/XL User’s Manual... -
Page 16: Loading Or Unloading Ingredients By Using The Xm64
XM64 button for more than three seconds. To return to the net mode, press LOAD/UNLOAD. 6. Load or unload additional quantities by repeating steps 3-5 as needed, otherwise, if done loading, press the GROSS key to return to gross weighing mode. Model 1040/XL User’s Manual... -
Page 17: Operational Overview
Operational Overview The following is an operational overview of the 1040/XL indicator. Menus The indicator has the following menus: • User menu (no password) • Test menu (111 Menu) • Setup menu (covered in the Service Manual) • History menu (covered in the Service Manual) •... -
Page 18: User Menu
Gross mode. to move to the right in the menu. When you are done configuring one of the menu items, press the GROSS key to move back up to the menu item. Figure 7 User menu Model 1040/XL User’s Manual... -
Page 19: List
3. Press the SELECT key. . . ALL is displayed. 4. Use the MENU key to move through the choices. Display the one you want to clear and press SELECT key. . . NO is displayed. Model 1040/XL User’s Manual... -
Page 20: Bat.cnt
OVR.TOL and the amount overloaded until the indicator doesn’t sense motion, then it will advance to the next ingredient. Follow these steps to set or view the ING.TOL parameter: Model 1040/XL User’s Manual... -
Page 21: Timer
1. From the Gross mode, press and hold the MENU key for two beeps (2 sec), then release. . . LIST is displayed. 2. Press the MENU key repeatedly until TIMER is shown 3. Press the SELECT key . . . TIM.STD or SLF.ADJ is shown Model 1040/XL User’s Manual... -
Page 22: Entry
This mode is based on entering recipes with weight amounts to feed 100 head. Example 1: Entering a recipe by net weight (WEIGHT>NORMAL mode or WEIGHT>ADJUST mode) Use this method when you have a recipe set up by weight for each ingredient such as: Model 1040/XL User’s Manual... - Page 23 2. Press MENU repeatedly until ENTRY is displayed. 3. Press SELECT. . . WEIGHT or HEAD.Ct is displayed. 4. Press MENU repeatedly until. . . WEIGHT is displayed 5. Press SELECT. . . NORMAL or ADJUST is displayed. Model 1040/XL User’s Manual...
- Page 24 4. Press MENU repeatedly until HEAD.CT is displayed. 5. Press SELECT. . . ENTRY is displayed. 6. Press the GROSS key to return to the Gross weighing mode or press the MENU key to move to the next menu item. Model 1040/XL User’s Manual...
-
Page 25: Time
To leave time as it is, press SELECT. . . DATE is displayed 5. Press the GROSS key to return to the Gross weighing mode or press the MENU key to move to the next menu item. Model 1040/XL User’s Manual... -
Page 26: Volume
Choose from English, Spanish, German, French, Danish, and Dutch. 1. From the Gross mode, press and hold the MENU Key for two beeps (2 sec), then release… LIST is displayed 2. Press the MENU key several times until…. NATION is displayed Model 1040/XL User’s Manual... -
Page 27: Clr.dat
7. Press the GROSS key to return to CLR.DAT. 8. Press the GROSS key to return to the Gross weighing mode or press the MENU key to move to the next menu item. This completes the User menu description. Model 1040/XL User’s Manual... -
Page 28: Recipes And Pens
When a recipe is programmed, the indicator remembers which recipe entry mode the indicator was in at the time of recipe creation. This means you can have some recipes based on head counts and some based on weight, if desired. Model 1040/XL User’s Manual... -
Page 29: Recipe Menu
2. You can change the name of the recipe by using the keypad (See the directions for entering alphanumeric characters found in Entering Alphanumeric Characters.) Once completed go to step 3. you can press SELECT to accept the default recipe name and go to step 3.. Model 1040/XL User’s Manual... - Page 30 REC.001 (or your custom name) is displayed 11. Press MENU to move to the next recipe. REC.002 is displayed (or your custom name) 12. Repeat above steps until all recipes are programmed.. Press GROSS to exit from recipe programming mode. Model 1040/XL User’s Manual...
-
Page 31: Editing Operations
AMOUNT is shown. 5. Enter in amount of that ingredient. . . Amount entered is shown. 6. Press SELECT. . . Next ingredient in the recipe is shown. 7. Press GROSS to return to the gross weighing mode. Model 1040/XL User’s Manual... -
Page 32: Pens
ZERO/CLEAR key for 2 beeps (2 sec) PEN.CLR is displayed and then the next Pen description is shown. 7. Press GROSS to return to Gross weighing mode. Model 1040/XL User’s Manual... -
Page 33: Using Id
Current ID is displayed. If no ID exists, display shows NO ID, for two seconds and returns to Gross mode) 2. Press the ZERO/CLEAR key while the ID Is displayed. . . NO ID is displayed, and returns to the Gross mode. Model 1040/XL User’s Manual... -
Page 34: Other Operations
Otherwise proceed to next step. If you attempt to enter a weight amount above the capacity parameter or a head count amount larger than 999, the display will show CAN’T. Edit amount, and then press the SELECT key. Model 1040/XL User’s Manual... - Page 35 After mixer counts down, alarm light comes on, and unit will return to the gross mode after pressing the MENU, or GROSS key. 9. Now proceed to unload to the appropriate pen. (SEE SECTION EN- TITLED PEN UNLOADING) Model 1040/XL User’s Manual...
-
Page 36: Mix Timer Operation
1. From Gross mode, press TIMER. . . TC MM:SS is displayed (MM:SS is the last entered value) for three seconds, then timer starts to count down. 2. Press GROSS to return to the gross mode. Model 1040/XL User’s Manual... -
Page 37: Pen Unloading
SELECT. Otherwise proceed to next step. If attempting to enter a weight amount above the overcapacity parameter the display will show CAN’T. Edit amount properly and then press the SELECT key Model 1040/XL User’s Manual... - Page 38 12:10 PM HAY-1 3000 lb 3030 lb 12:20 PM COTTON 3000 lb 2980 lb TOTAL 10000 lb 9910 lb Time Pen Name Target Actual 12:40 PM PEN-1 5000 lb 5050 lb 12:50 PM PEN-2 5000 lb 4900 lb Model 1040/XL User’s Manual...
-
Page 39: Viewing The Accumulators
The Model 1040 automatically records ingredient, recipe and pen usage Viewing the when using recipes and pen unload features. The following describes how to Accumulators view the accumulators on the indicator. Refer to Figure 9. Figure 9 Usage Accumulator Model 1040/XL User’s Manual... - Page 40 3. Press the SELECT key. . . tion is displayed. The total of all the recipes is displayed. 4. Press the SELECT key . . . TOTAL is displayed OR press the MENU key. . . REC.XXX is displayed. Model 1040/XL User’s Manual...
- Page 41 PEN.XXX is displayed OR press MENU key. . . PEN.YYY is displayed 8. Repeat steps 6-7 until done viewing accumulators. 9. Press GROSS. . . PENS is displayed. 10. Press GROSS to return to the gross weighing mode. Model 1040/XL User’s Manual...
-
Page 42: The Xm64 Transmitter/Receiver
Any ingredient tagged with an SILAGE (*) means it is a pre-weighed CORN-2 hand-add ingredient. When used in a recipe, it will be S-BEET saved in the accumulators as FHAY HAY-2 the target value not the actual. Model 1040/XL User’s Manual... - Page 43 3000 lb 3030 lb at right. 12:20 PM COTTON 3000 lb 2980 lb TOTAL 10000 lb 9910 lb Time Pen Name Target Actual 12:40 PM PEN-1 5000 lb 5050 lb 12:50 PM PEN-2 5000 lb 4900 lb Model 1040/XL User’s Manual...
- Page 44 20000 lb H-COW 22000 lb Total 42000 lb QUICK PRINT 7 10-18-02 11:00 AM (Prints a listing of Pen Pen # Description Usage Unloading Accumulators PEN1 20000 lb PEN2 22000 lb with usage) Total 42000 lb Model 1040/XL User’s Manual...
- Page 45 ING.030 10000 lb ING.040 10000 lb ING.050 10000 lb ING.060 10000 lb Total 40000 lb Recipe 2: REC.002 Ingred. Description Usage ING.030 10000 lb ING.020 25000 lb ING.040 30000 lb ING.050 15000 lb Total 80000 lb Model 1040/XL User’s Manual...
- Page 46 STD Mode Input2: STD Mode Update: Average: FILTER Const: Window AZT: Stable: RS232.1 Baud: 9600 Parity: NONE Data: 8 bits Handshake: NONE Layout: Auto: RS323.2 Baud: 9600 Parity: NONE Data: 8 bits Handshake: NONE Layout: Auto: Model 1040/XL User’s Manual...
-
Page 47: Indicator Diagnostics
1. Press and hold the MENU key for 3 beeps (about 3 seconds). Release Access the Test Menu the key. . . SET.PAS is displayed. 2. Key in the password, 111, and press the SELECT key. . . VOLTS is displayed. Model 1040/XL User’s Manual... - Page 48 A/D display, press the SELECT key. . . CNTS is shown momentarily then the actual A/D raw counts. 14. Press the SELECT key. . . MV/V is shown momentarily then the actual mV/V reading is shown. Model 1040/XL User’s Manual...
- Page 49 26. Press the SELECT key. . . IN.1 is displayed. 27. Press the MENU key. . . IN.2 is displayed. 28. Press the SELECT key. . . OPEN or CLOSED is displayed. 29. Press the SELECT key. . . IN.2 is displayed. Model 1040/XL User’s Manual...
- Page 50 When you have gone through all the displayed information, SOFT is displayed. 37. Press the GROSS key to return to gross weighing mode Press MENU to advance to return to the first menu item. . . VOLTS is displayed. Model 1040/XL User’s Manual...
-
Page 51: Rd64/Xl/M Remote Displays And Xm64 Remote Transmitter
RCV-64 or the RD64XL. Transmitter/Receiver This option lets the user tare and manually ad- vance to the next ingredi- ent from a remote loca- tion, usually a front-end loader. <RCV-64 XM64> Model 1040/XL User’s Manual... -
Page 52: Troubleshooting
Now try powering-on. If this is not successful, your problem is in the indicator and you should contact your supplier. c. If you are able to power-on with only the power cable connected, your problem is probably not in the indicator; continue troubleshooting. Model 1040/XL User’s Manual... -
Page 53: Indicator Over/Under Capacity
5. Check betwccn supporting structure and weighing structure for debris ® that might restrict Weigh Bar movement. 6. Make sure the supporting structure and weighing structure do not touch ® each other at any point except at the Weigh Bars Model 1040/XL User’s Manual... -
Page 54: Measuring Supply Battery Voltage
5. If possible, the make and model number of equipment the Model 1040 is used on. If you need contact or additional information, please access www.agscales.com. If you would like to purchase a service manual, the PN is 29812-0015. Model 1040/XL User’s Manual... -
Page 55: Windows Setup
2. Assuming we want to create c:\winword\dwnld directory, click on C;WINWORD 3. Click on FILE, NEW, FOLDER. 4. In the name field, type in dwnld, and then click on OK. The directory c:\winword\dwnld has now been created for storing all the download files. Model 1040/XL User’s Manual... -
Page 56: To Download
Simple collection of batched data. B. TDM-40/TDS-1040 Bidirectional interface. Create recipes on computer and input into 1040. Collect batched data on all batches performed. Please consult your OEM or Weigh-Tronix distributor for more details on these options. Model 1040/XL User’s Manual... - Page 57 Model 1040/XL User’s Manual...
- Page 58 Model 1040/XL User’s Manual...
- Page 59 Model 1040/XL User’s Manual...
- Page 60 Weigh-Tronix 1000 Armstrong Dr. Fairmont, MN 56031 USA Telephone: 507-238-4461 Facsimile: 507-238-8283 e-mail: ag@weigh-tronix.com www.agscales.com Weigh Bar ® is a registered trademark of Weigh-Tronix Inc.
Need help?
Do you have a question about the 1040/XL and is the answer not in the manual?
Questions and answers