Table of Contents
Advertisement
Quick Links
2
Electrocardiogram (Ecg)
STM32 Cortex-M3
The Electrocardiogram (Ecg)
• Ecg: electrical manifestation of heart a
from the body surface
• monitoring of heart rate
The Ecg signal can be recorded fairly ea
electrodes placed on the limbs and/or the ches
Author
El. Ing. Lukas Kohler
below.
Adviser Daniel Debrunner
Date
09.09.2009
Site
BFH-TI Biel
Study
Master of Science in Biomedical Engineering
University of Bern and University of Applied Sciences Biel
Tutorial
Advertisement
Table of Contents

Related Manuals for STMicroelectronics STM32 Cortex-M3


Summary of Contents for STMicroelectronics STM32 Cortex-M3
- Page 1 Tutorial Electrocardiogram (Ecg) STM32 Cortex-M3 The Electrocardiogram (Ecg) • Ecg: electrical manifestation of heart a from the body surface • monitoring of heart rate The Ecg signal can be recorded fairly ea electrodes placed on the limbs and/or the ches Author El.
- Page 3 Abstract The powerful STM32 controller from STMicroelectronics with integrated Cortex-M3 core has be- come more and more relevant in embedded applications. The key points are an excellent real-time behavior, an outstanding power efficiency and superior peripherals. The new developed Cortex-M3 has a high aim: A powerful processor with a uncomplex program- ming model which is able to replace the available 8 and 16-bit microcontroller.
-
Page 5: Table Of Contents
License and Author System Description Introduction Electrostatic Warning Cortex-M3 Core 2.3.1 History 2.3.2 Cortex Processor STM32F103RB from STMicroelectronics 2.4.1 Features 2.4.2 Performance Line Block Diagram 2.4.3 Memory Map 2.4.4 Interfaces Development Boards 2.5.1 STM32H103 from Olimex 2.5.2 STM32P103 from Olimex 2.5.3 Setup for Developing... - Page 6 4.11.1 Configuration Josef Goette 2009 4.12 Real Time Clock (RTC) 4.13 Analog to Digital Converter (ADC) 4.13.1 Conversion Modes 4.14 Controller Area Network (CAN) 4.14.1 CAN Analyzer 4.14.2 Pinning 4.15 Inter IC Bus (I C) 4.15.1 Physical layer STM32 Cortex-M3 Tutorial...
- Page 7 Contents 4.15.2 Communication Protocol 4.15.3 Pinning Electrocardio 4.16 Serial Peripheral Interface (SPI) 4.16.1 Physical Layer 4.16.2 Communication Protocol 4.16.3 Pinning The Electrocardiogram 4.17 Universal Serial Bus (USB) • Ecg: electrical ma List of Figures from the body surfa Glossary • monitoring of heart The Ecg signal can b electrodes placed on the l below.
-
Page 9: Introduction
1 Introduction 1.1 Overview of this Documentation Introduction (Chapter 1) This chapter shows how this documentation is structured and meant to be read as well as some project organisation. System Description (Chapter 2) Here one can read all about the core Cortex-M3 and it’s implementation from STMicroelec- tronics into the STM32F103 processor. -
Page 10: License And Author
• Ecg: electrical manifestation of heart activity recorded from the body surface • monitoring of heart rate The Ecg signal can be recorded fairly easily with surface electrodes placed on the limbs and/or the chest, see pages 6–16 below. Josef Goette 2009 STM32 Cortex-M3 Tutorial... -
Page 11: System Description
Today exist a few hundred microcontrollers with the ARM core. Now STMicroelectronics have launched the STM32, their first microcontroller based on the new ARM Cortex-M3 core. This device sets new standards in performance and cost, as well as being capable of low power operation and hard real-time control. -
Page 12: Cortex
The Thumb-2 instruction set is a rich instruction set that is designed as a target for C/C++ compilers. STM32 Cortex-M3 Tutorial... - Page 13 2.3 Cortex-M3 Core Cortex CPU Electrocardio The heart of the Cortex core is a 32-bit RISC CPU. This CPU has a simplified version of the ARM7/9 programmer’s model, but a richer instruction set with good integer maths support, bet- ter bit manipulation and ’harder’ real-time performance has been added. Pipeline The Electrocardiogram The Cortex CPU can execute most instructions in a single cycle.
-
Page 14: Processor Stm32F103Rb From Stmicroelectronics
1 Intro 2.4 Processor STM32F103RB from STMicroelectronics Electrocardiogram (Ecg) Signals 2.4.1 Features The STM32F103RB from STMicroelectronics is a processor with a ARM 32-bit Cortex-M3 CPU The Electrocardiogram (Ecg) and peripherals. STMicroelectronics is reshaping the 16/32-bit MCU market with they’r STM32 family. -
Page 15: Performance Line Block Diagram
2.4 Processor STM32F103RB from STMicroelectronics 2.4.2 Performance Line Block Diagram STM32F103x8, STM32F103xB Description Electrocardio The block diagram in Figure shows how the components and the core are connected together. Figure 1. STM32F103xx performance line block diagram TRACECLK TRACED[0:3] Trace TPIU... -
Page 16: Memory Map
0x4000 0C00 TIM4 0x4000 0800 TIM3 0x4000 0400 TIM2 0x4000 0000 ai14394f Figure 2.2: STM32F103xx memory map Doc ID 13587 Rev 10 31/91 Flash Memory: 0x0800 0000 - 0x0801 FFFF System Memory: 0x1FFF F000 - 0x1FFF F800 STM32 Cortex-M3 Tutorial... -
Page 17: Interfaces
2.5 Development Boards 2.4.4 Interfaces Electrocardio To be able to communicate with other devices we need interfaces: JTAG - Debug Interface: The JTAG interface allows downloading the compiled code into the microcontroller and debugging the code in real time. To be able to do this operation you have to use an JTAG The Electrocardiogram adapter to the USB or parallel port to the computer. -
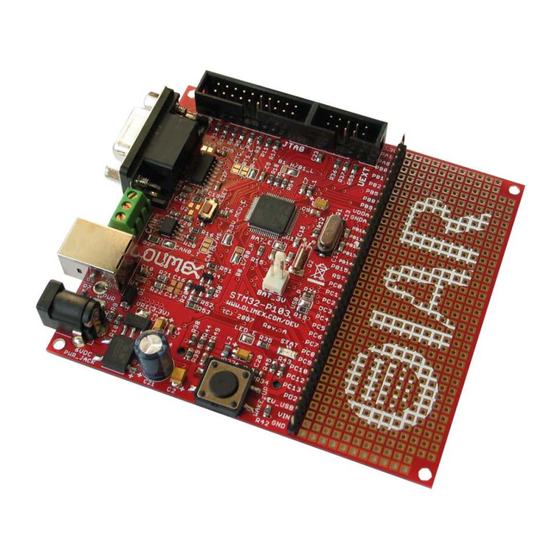
Page 18: Stm32P103 From Olimex
The JTAG Adaptor is needed for downloading the software into the processor and for debugging with the Keil toolchain. According to Keil, different adapters can be used, such as: uLink from Keil jLink from Segger J-Link from IAR I used the J-Link from IAR. STM32 Cortex-M3 Tutorial... -
Page 19: Board Layout And Schematic
2.5 Development Boards Electrocardio The Electrocardiogram • Ecg: electrical ma from the body surfa • monitoring of heart The Ecg signal can b electrodes placed on the l below. Figure 2.5: Developing Software 2.5.4 Board Layout and Schematic For schematics and board layouts please refer to the documents in CD:/hardware/EvalBoards/Olimex/ 2.5.5 BFH Mother Board On the mother board the Olimex STM32H103 board is mounted on. - Page 20 6–16 below. Figure 2.6: BFH Mother Board with STM32H103 from Olimex Josef Goette 2009 Figure 2.8: CAN interface (Pin 2: CANL, 3/6:GND, 7: Figure 2.7: RS232 directly connected (Pin 2: Rx, 3: CANH) Tx, 5: GND) STM32 Cortex-M3 Tutorial...
-
Page 21: Keil Sdk
3 Keil SDK 3.1 Introduction The development of the firmware we will write for the STM32 is done with the Vision3 from Keil. This chapter shows how a simple project can be created, simulated and downloaded to the target hardware. 3.2 Install Vision3 Vision3 can be found on the CD delivered with this documentation. -
Page 22: Setting Up A New Project
6–16 below. Figure 3.1: Create a new project The SDK needs to know your microcontroller and therefore you must specify the device to STM32F103RB from STMicroelectronics (Figure 3.2). Josef Goette 2009 Figure 3.2: Specify the device: STM32F103RB The STM32 requires startup code which can be added automatically as shown in Figure 3.3. Click on Yes. -
Page 23: Configure The Processor
3.5 Setting up a new Project Electrocardio The Electrocardiogram Figure 3.3: Add the startup code to the project • Ecg: electrical ma from the body surfa The project has now been created. Now we need to add the files STM32 Init.c gpio.c •... -
Page 24: Renaming The Target
JTAG adapter, the ELF file is required to download to the board using JTAG. The build creates an Intel HEX executable file which is placed in the same output folder for external program down- loading through the serial port. STM32 Cortex-M3 Tutorial... -
Page 25: Simulation
3.7 Simulation Listing 3.1: Minimal Code for a Counter on GPIOB Electrocardio Name : gpio . c / P r o j e c t gpio1 D e s c r i p t i o n : Counter on GPIOB Version : V1 . -
Page 26: Window Update
3.7.2 Serial Window To simulate a serial interface open View Serial Window UART x. 3.7.3 Performance Analyzer To analyse the efficiency of your code open View Performance Analyzer. This window shows the time and amount a function is called. STM32 Cortex-M3 Tutorial... -
Page 27: Configuring The Target
3.8 Configuring the Target 3.8 Configuring the Target Electrocardio After the simulation on the computer we know that our program works and in case of errors we have corrected them. Now there is need of configuring the linker and the debug utilities. Therefore quit the debug mode first. - Page 28 Figure 3.13: Options for Debug Settings Figure 3.12: Options for Debug Figure 3.15: Options for Utilities Settings Figure 3.14: Options for Utilities Connect now the BFH motherboard with the mounted STM32-H103 to the computer according to Chapter 2.5.5. Josef Goette 2009 STM32 Cortex-M3 Tutorial...
-
Page 29: Downloading
3.9 Downloading 3.9 Downloading Electrocardio The command Flash Download or its icon download the compiled file to the STM32 and let it run if the option Reset and Run is set (see Figure 3.15). If the program doesn’t start push the reset button on the STM32-H103 board. -
Page 30: Documenting Source Code
The Ecg signal can be recorded fairly easily with surface 9600 Baud electrodes placed on the limbs and/or the chest, see pages 6–16 8/1/N below. @author Lukas Kohler / BFH TI @date 1 5 . 0 7 . 2 0 0 9 Josef Goette 2009 STM32 Cortex-M3 Tutorial... -
Page 31: Getting Started
GPIO or serial interface. In case you need to use more complex functions like SPI, I C or even DMA we suggest you to use the firmware library from STMicroelectronics (see Chapter 4.3). In this document the Configuration Wizard is used whenever possible. -
Page 32: Firmware Library (Fwlib)
GPIO usage by register access. gpioFwLib STMicroelectronics offers a firmware library which allows you to access to peripherals and regis- ters easily and with a clean interface. The installation is shown in Chapter 3.4. The principle of using the FWLib is easy and straight forward since the policy is equal for all peripherals. This The Electrocardiogram (Ecg) principle is shown here with the GPIO. -
Page 33: Register Access
4.4 Register Access 4.4 Register Access Electrocardio GPIO usage by register access. Instead of using the FwLib the registers can be gpioRegister accessed directly. The properties then are set with: The Electrocardiogram Listing 4.3: Setting the GPIO Register by direct access •... -
Page 34: The Ecg Signal Can Be Recorded Fairly Easily With Surface
Alternate Function (AF): Used for Oscillator, CAN, JTAG, ADC, Timer, USART, I C and SPI – Alternate Function push-pull (max speed 2MHz, 10MHz or 50MHz) – Alternate Function open-drain (max speed 2MHz, 10MHz or 50MHz) Josef Goette 2009 Figure 4.1: GPIO Configuration Wizard STM32 Cortex-M3 Tutorial... -
Page 35: Driver
4.5 General Purpose Input/Output (GPIO) General-purpose and alternate-function I/Os (GPIOs and AFIOs) RM0008 4.5.2 Driver Figure 9. Basic structure of a standard I/O port bit Electrocardio Analog Input To on-chip peripheral on/off Alternate Function Input The Electrocardiogram on/off Read • Ecg: electrical ma from the body surfa TTL Schmitt Protection... -
Page 36: Serial Interface (Usart)
Listing 4.6: Send Data while ( ! ( USARTx SR & USART FLAG TXE ) ) ; // wait u n t i l ready USARTx DR = ( yourCharacter & 0 x1FF ) ; // sends yourCharacter STM32 Cortex-M3 Tutorial... -
Page 37: Using Interrupts
4.6 Serial Interface (USART) Read Data Electrocardio Copy the files and use the function serial.c serial.h int ser getchar (void) Listing 4.7: Receive Data while ( ! ( USARTx SR & USART FLAG RXNE) ) ; // wait u n t i l a char has been r e c e i v e d The Electrocardiogram yourCharacter = (USARTx DR &... - Page 38 CONTROL CLOCK USARTDIV DIV_Mantissa DIV_Fraction PCLKx(x=1,2) RECEIVER RATE CONTROL CONVENTIONAL BAUD RATE GENERATOR USARTDIV = DIV_Mantissa + (DIV_Fraction / 16) Figure 4.5: USART driver Josef Goette 2009 602/682 Figure 4.6: USART Names of the additional communication wires STM32 Cortex-M3 Tutorial...
-
Page 39: Pinning
4.6 Serial Interface (USART) The baud rate generator generates the internal clock for sending and receiving data. The serial protocol is shown in Figure (1 start bit, 8 data bits, 1 stop bit and 1 parity). Electrocardio The Electrocardiogram • Ecg: electrical ma from the body surfa •... -
Page 40: System Timer (Systick)
6–16 the time interval and enable the interrupt. The function above void SysTick Handler (void) below. -routine gets called when the sysTick interrupt occurs. main() Josef Goette 2009 Figure 4.8: System Timer Configuration Wizard STM32 Cortex-M3 Tutorial... -
Page 41: Timer (Tim)
4.8 Timer (TIM) 4.8 Timer (TIM) Electrocardio Running light on GPIOB timer The STM32 offers different kind of individually configurable timers: General-purpose timer (TIMx): They may be used for a variety of purposes, including mea- suring the pulse lengths of input signals (input capture) or generating output waveforms The Electrocardiogram (output compare and PWM). -
Page 42: Pulse Width Modulation (Pwm)
4 to PB9. • monitoring of heart rate The Ecg signal can be recorded fairly easily with surface electrodes placed on the limbs and/or the chest, see pages 6–16 below. Figure 4.10: PWM Configuration Wizard Josef Goette 2009 STM32 Cortex-M3 Tutorial... -
Page 43: External Interrupts (Irq)
4.10 External Interrupts (IRQ) 4.10 External Interrupts (IRQ) Electrocardio Pin PA0 is configured to generate an external interrupt. Pressing this button will toggle extInt a LED. One of the key improvements of the Cortex core over the earlier ARM CPUs is its interrupt struc- ture and exception handling. -
Page 44: Watchdog
RTC doesn’t offer registers for time and date, only for the time in seconds in the two 16-bit register RTC CNTH (higher 16-bits) and RTC CNTL (lower 16-bits). The alarm registers (RTC ALRH and RTC ALRL) is similar to the time register. Josef Goette 2009 Figure 4.13: RTC Configuration Wizard STM32 Cortex-M3 Tutorial... -
Page 45: Analog To Digital Converter (Adc)
4.13 Analog to Digital Converter (ADC) Hour Minute Second RTC CNTH RTC CNTL Seconds 0x0000 0x0001 Electrocardio 3601s 0x0000 0x003D 82801 0x0001 0x4371 Table 4.1: Configuration of the register RTC CNTL and RTC CNTH The Electrocardiogram Listing 4.9: RTC ISR •... - Page 46 = ( v a l 4 ) & 0xFF ; // S c a l e analog value t o 8 b i t s r e t u r n ( v a l ) ; Josef Goette 2009 STM32 Cortex-M3 Tutorial...
- Page 47 RM0008 Analog-to-digital converter (ADC) 10.3 ADC functional description 4.13 Analog to Digital Converter (ADC) Figure 20 shows a single ADC block diagrams and Table 43 gives the ADC pin description. Figure 20. Single ADC block diagram Electrocardio Interrupt Flags enable bits End of conversion EOCIE ADC Interrupt to NVIC...
-
Page 48: Controller Area Network (Can)
CAN and USB on same time. A remap (see example) can be done to PB8/PB9. ● Configure CAN parameters, e.g. baud rate Make sure you set up a filter even if you want to receive all CAN messages. ● Request transmissions ● Handle receptions ● Manage interrupts STM32 Cortex-M3 Tutorial ● Get diagnostic information... -
Page 49: Can Analyzer
4.15 Inter IC Bus (I C) 4.14.1 CAN Analyzer Electrocardio To understand the data transmitted on the CAN The Electrocardiogram you need a CAN Analyzer. I used the PCAN- USB from www.peak-system.com. This CAN in- • Ecg: electrical ma terface allows you to see the messages transmit- from the body surfa ted on the CAN bus. -
Page 50: Physical Layer
4.22) defines if data are read from the slave (R/W = 0) or if data are written to the slave (R/W = 1). A change of the data during a high clock is interpreted as a control command. STM32 Cortex-M3 Tutorial... -
Page 51: Ecg: Electrical Ma From The Body Surfa
Figure 15. Alternative READ Mode Sequence BUS ACTIVITY: 4.15 Inter IC Bus (I C) M41T81 MASTER Figure 10. Serial Bus Data Transfer Sequence SDA LINE DATA n DATA n+1 DATA n+X 4. The number of data bits between the start and the stop bit is not limited but has to be a full DATA LINE STABLE DATA VALID... -
Page 52: Pinning
• Ecg: electrical manifestation of heart activity recorded from the body surface • monitoring of heart rate The Ecg signal can be recorded fairly easily with surface electrodes placed on the limbs and/or the chest, see pages 6–16 below. Josef Goette 2009 STM32 Cortex-M3 Tutorial... -
Page 53: Serial Peripheral Interface (Spi)
4.16 Serial Peripheral Interface (SPI) 4.16 Serial Peripheral Interface (SPI) Electrocardio Writes data to SPI1 and SPI2 (polling) spi1 Reads the values from the accelerometer MMA7455L over the SPI interface and writes spi2 the data on the serial interface (polling). The Electrocardiogram spi2 realized with interrupts (IRQ). -
Page 54: The Electrocardiogram
Master NSS pin see a low level and become slaves when they are configured in NSS hardware mode. A basic example of interconnections between a single master and a single slave is STM32 Cortex-M3 Tutorial illustrated in Figure 208. - Page 55 4.16 Serial Peripheral Interface (SPI) Electrocardio Serial peripheral interface (SPI) RM0008 Figure 210. Data clock timing diagram The Electrocardiogram CPHA =1 • Ecg: electrical ma CPOL = 1 from the body surfa • monitoring of heart CPOL = 0 MISO LSBit MSBit (from master)
-
Page 56: Universal Serial Bus (Usb)
• monitoring of heart rate The Ecg signal can be recorded fairly easily with surface electrodes placed on the limbs and/or the chest, see pages 6–16 below. Josef Goette 2009 STM32 Cortex-M3 Tutorial... - Page 57 List of Figures STM32F103xx Performance Line Block Diagram ....STM32F103xx memory map ....... . Development Board STM32H103 from Olimex .
- Page 58 SPI data communication between Master and Slave ....• monitoring of heart rate The Ecg signal can be recorded fairly easily with surface electrodes placed on the limbs and/or the chest, see pages 6–16 below. Josef Goette 2009 STM32 Cortex-M3 Tutorial...
-
Page 59: Glossary
NVIC Nested Vector Interrupt Controller, Pulse Width Modulation, RS232 Serial Interface, Real Time Clock, Software Development Kit, Serial Peripheral Interface, Microcontroller family from STMicroelectronics us- STM32 ing the Cortex-M3 core.., SysTick System Timer, Timer, USART Serial Interface, Universal asynchronous receiver/-... - Page 60 • Ecg: electrical manifestation of heart activity recorded from the body surface • monitoring of heart rate The Ecg signal can be recorded fairly easily with surface electrodes placed on the limbs and/or the chest, see pages 6–16 below. Josef Goette 2009 STM32 Cortex-M3 Tutorial...
Need help?
Do you have a question about the STM32 Cortex-M3 and is the answer not in the manual?
Questions and answers