Advertisement

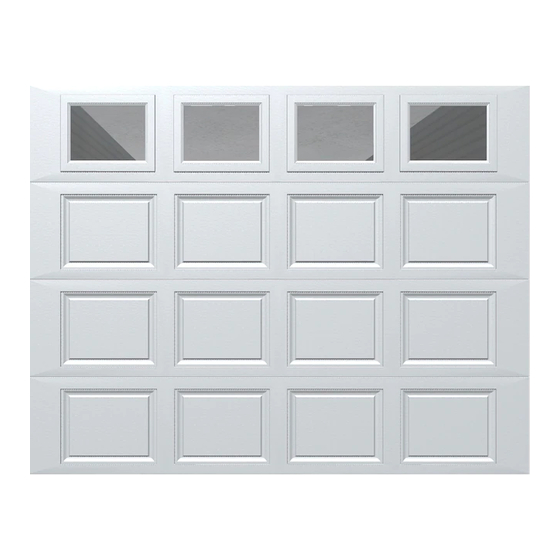
Models 9100, 9405,
9600, 5120, 5145,
9700, 9510 and 9800
R
e s i d e n t i a l
s
l
tandaRd
ift
Q
S
G
/ O
uick
tart
uide
PLEASE DO NOT RETURN THIS PRODUCT
TO THE STORE
If you need assistance, please call 1-866-
569-3799 (press Option 1) and follow the
prompts to contact a customer service
representative. They will be happy to handle
any questions that you may have.
AFTER INSTALLATION IS COMPLETE,
LEAVE THIS QUICK START GUIDE /
OWNER'S MANUAL WITH THE
HOMEOWNER, OR FASTEN IT NEAR
GARAGE DOOR FOR EASY REFERENCE.
©Copyright 2017
Wayne Dalton, a division of Overhead Door Corporation
d
o o R s
'
M
wner
S
anual
T a b l e O f C o n t e n t s
®
QUICK START GUIDE IMPORTANT NOTICES!
This Quick Start Guide / Owner's Manual provides basic instructions
for the installation of standard-package garage doors with a maximum
door height of 8 feet only. Option-Specific Installation Instructions are
available for doors over 8 feet tall, or purchased with any of the following
options:
Step Plate, Riveted Track, Angle Mount Track, Low Headroom, High Lift,
Full Vertical Lift, Roof Pitch, 32" Radius Track, Solid Shaft, Keyed Shafts,
Center Coupler Assembly or any other option not included herein.
To avoid possible injury or damage, read and fully understand these
instructions and any applicable Option-Specific Instructions carefully
before installing and operating the garage door. Pay close attention to all
warnings and notes.
The Option-Specific Installation Instructions and a more detailed
Installation Instructions And Owner's Manual are available at no charge
from:
- Your local Wayne Dalton Sales Center, or
- Online at www.Wayne-Dalton.com, or
- By mailing to: Wayne Dalton, a division of Overhead Door Corporation, P.O. Box
67, Mt. Hope, OH., 44660
Part Number
359498
2
2
2
2
3
4
5
10
10
14
17
19
19
19
19
19
20
REV5_02/22/2017

Advertisement

Table of Contents
loading

Summary of Contents for Wayne-Dalton 9100

  • Page 1: Table Of Contents

    - Your local Wayne Dalton Sales Center, or GARAGE DOOR FOR EASY REFERENCE. - Online at www.Wayne-Dalton.com, or - By mailing to: Wayne Dalton, a division of Overhead Door Corporation, P.O. Box 67, Mt. Hope, OH., 44660 Part Number 359498 REV5_02/22/2017 ©Copyright 2017...
  • Page 2: Pre-Installation

    Wrenches: 3/8”, Needle nose pliers Safety glasses FASTENER WAS RED-HEAD, THE REPLACEMENT FASTENER MUST BE RED- 9/32”, 7/16”, 1/2” 7/16”, 1/2”, 9/16”, HEAD ALSO. CONTACT WAYNE DALTON FOR FASTENER STRENGTH VALUES IF 5/8” NEEDED. Ratchet wrench Pencil Pliers / Wire cutters Level Socket driver: 7/16”...
  • Page 3: Breakdown Of Door And Track Parts

    H. DRAWBAR OPERATOR BRACKET (FOR TROLLEY OPERATED DOORS): C1. Short Stem Track Rollers H1. Drawbar Operator Bracket - For Models 9100 / 9405 / 9600 / 5120 / 5145 C2. Long Stem Track Rollers H2. Drawbar Operator Bracket - For Models 9700 / 9510 / 9800 D.
  • Page 4: Breakdown Of Counterbalance Parts

    BREAKDOWN OF COUNTERBALANCE PARTS NOTE: The illustrations shown on this page are general representations of the door parts. Each specific door K19. models may have unique variations. K12. K19. K10. K14. K18. K19. K20. K15. K16. K19. COMMON FASTENERS K18. K15.
  • Page 5: Door Installation Instructions

    NOTE: If you have Riveted Track or Angle Mount Track, skip this step. FOR DOORS WITH QUICK INSTALL TRACK: Left hand flag angle For Door Models 9100, 9405, 9600, 5120 and 5145, Jamb Bracket Schedule NOTE: Loosely fasten DOOR VERTICAL...
  • Page 6 Attaching Counterbalance Lift Cables and Double graduated end hinge Track Rollers (Hinge tube) Tools Required: Tape measure, Safety glasses, Leather gloves Counterbalance lift cable WARNING Long stem track roller ENSURE TIGHT FIT OF CABLE LOOP OVER MILFORD PIN TO PREVENT Bottom section Short stem COUNTERBALANCE LIFT CABLE FROM COMING OFF THE PIN, WHICH...
  • Page 7 FOR WINDLOADED DOOR MODELS 9100, 9405, 9600, 5120, 5145: Refer to your Wind- Top rib load Specification Sheet and install the Struts, then install the Roller Slides onto your sections accordingly.
  • Page 8 Attaching Top Fixtures To Top Section FOR WINDLOADED DOORS: NOTE: If you have a Windloaded door and door models 9100, 9405, 9600, 5120, 5145, Tools Required: Power drill, 7/16” Socket driver, Step ladder, Safety glasses, 9700, refer to your Windload Specification Sheet and install the Top Fixture Roller Slides onto Leather gloves your top section accordingly.
  • Page 9 Horizontal track angle Quick Quick Install Flag Install tab in angle place slot Level Vertical Vertical Alignment sticker track track 3/8”-16 x Intermediate (if applicable) Flag 3/4” Truss section angle head bolt upper slot 3/8”-16 Hex nut Alignment sticker Lock (if applicable) section Horizontal...
  • Page 10: Counterbalance Installation Instructions

    Leather gloves For Door Models NOTE: Cable drum assemblies are marked right and left hand. Cable drums and TorqueMas- Square hole in 9100 / 9405 / spring tube assembly are cam shaped to fit together only one way. ® vertical track...
  • Page 11 Right hand Right hand 5/16” x 1-5/8” Cam peak Counterbalance Right cable drum cable drum Lag screw Winding lift cable 1-1/2 straight up Bearing hand end shaft wraps bracket Groove 5/16” Washer peak 5/16” Winding 5” straight Hex nut shaft TorqueMaster ®...
  • Page 12 NOTE: Since total turns to balance door can deviate from winding spring turn chart values by SECOND GROOVES OF THE CABLE DRUM PRIOR TO WINDING SPRINGS. ± 1 turn, adjustments to the recommended number of turns may be required after rear back Counterbalance First and hangs are installed.
  • Page 13 NOTE: Windows may cause the top section to be significantly heavier than the remaining sections. Wayne Dalton attempts to balance the door at the top and bottom. To prevent any sudden door acceleration between the top and bottom, we recommend motor operating all doors with windows.
  • Page 14: Torsion Spring

    applications, repeat the same process for the other side. Bend back and fourth to seperate (2) 3/8”-16 x 3/4” Left hand the (2) end bearing brackets end bracket Truss head bolts REMOVE SPRING TENSION: To remove spring tension, place a regular 5/8” wrench onto the winding shaft.
  • Page 15 TO THE STATIONARY SPRING CONE(S) IN PLAIN VIEW. SHOULD A REPLACEMENT SPRING WINDING CONE), WHICH GOES ON THE LEFT HAND SIDE OR LEFT WOUND (BLACK WINDING WARNING TAG BE REQUIRED, CONTACT WAYNE DALTON FOR FREE REPLACEMENTS. CONE), WHICH GOES ON THE RIGHT HAND SIDE.
  • Page 16 NOTE: Repeat the same process WARNING Locking pliers for the right hand side. Jamb PRIOR TO WINDING THE SPRING, ENSURE YOU’RE WINDING IN THE PROPER DIRECTION AS SHOWN BELOW. OTHERWISE THE SPRING Counterbalance FITTING MAY RELEASE FROM SPRING AND RESULT IN SEVERE OR FATAL lift cable INJURY.
  • Page 17: Extension Spring

    12” Radius horizontal NOTE: Door not shown for clarity. track with 3” front cable lift sheave hole location 3/8”-16 15” Radius horizontal track Hex nut with 3” or 4” front cable lift sheave hole location Header Front cable lift sheave 12”...
  • Page 18 NOTE: It may be necessary to adjust spring length for proper door balance. Spring restraint cable Rear Door Height Spring Length Relaxed (Door Spring Length Extended back Open) (Door Closed) hang 6’ 0” 25” (635 mm) 61” (1549 mm) Extension spring 6’...
  • Page 19: Maintenance

    Wayne Dalton, a division of Overhead Door Corporation, P.O. Box DO NOT REMOVE, COVER OR DO NOT REMOVE, COVER OR PAINT THIS LABEL. PAINT THIS LABEL.
  • Page 20: Warranty

    Models 9100, 9405, 9600, 5120, 5145, 9700, 9510 and 9800 Wayne Dalton, a division of Overhead Door Corporation (“Seller”) warrants to the original purchaser of the Models 9100, 9405, 9600, 5120, 5145, 9700, 9510 and 9800 (“Product”), subject to all of the terms and conditions hereof, that the Product and all components thereof will be free from defects in materials and work-...
  • Page 22 Thank you for your purchase. PLEASE DO NOT RETURN THIS PRODUCT TO THE STORE If you need assistance, please call 1-866-569-3799 (press Option 1) and follow the prompts to contact a customer service representative. They will be happy to handle any questions that you may have.

This manual is also suitable for:

940551205145970095109600 ... Show all

Table of Contents