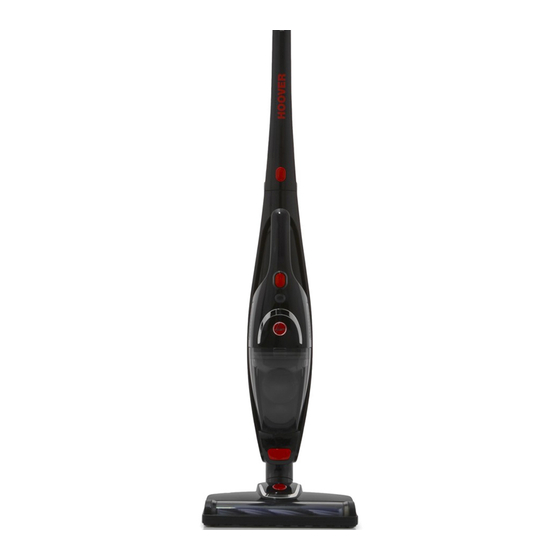
Hoover 5210 HERITAGE Instruction Manual
Dual function 2 in 1 cordless stick vac
Hide thumbs
Also See for 5210 HERITAGE:
- Instructions for use manual (11 pages) ,
- User manual (20 pages)
Summary of Contents for Hoover 5210 HERITAGE
- Page 1 5210 HERITAGE Dual Function 2 in 1 Cordless Stick Vac Bagless 3rd Generation Cyclonic Technology Multi Function Including Detachable Hand Vac HEPA Filtration Heritage...
-
Page 3: Specifications
5210 Heritage Congratulations on the purchase of your new HOOVER stick vac. There are many useful features built into your cleaner and we recommend that you carefully read thisinstruction manual so that you take best advantage of them. Features: 1. On/Off Button (on Body) 8. -
Page 4: Before You Begin
Before You Begin This cleaner must be operated in accordance with these instructions and used only for domestic household cleaning to remove DRY dirt and dust from household carpets, flooring and fabrics. This cleaner is not fit to be used as an industrial cleaner. It is not designed for the collection of vitreous building material including particle board, construction products and similar products such as wood/ fibres, cement, fillers, fibre glass or excessive sand. -
Page 5: Safety Precautions And Warnings
If the power cable or plug appears damaged, do not use. If the cleaner is not working correctly, has been dropped, damaged, left outdoors or dropped into water, return to a Hoover service agent or contact Hoover Customer Care: 1300 360 845 / sales@hooverfloorcare.com.au / www.hoover.com.au / www.hoover.co.nz. - Page 6 Safety Precautions & Warnings (continued) 15. Do not operate the vacuum cleaner without filters. Battery use and care The battery can only be replaced by a qualified technician. Do not try to open the cleaner to replace the battery. Doing so may cause risk of injury and fire. The appliance is only to be used with the charger provided with the appliance.
- Page 7 Instructions for Use Ensure the appliance is switched off and disconnected from the charger before fitting or removing accessories. Fitting the hand vac to the body a. Body of stick vac b. Hand vac c. Air inlet d. Hand vac release button...
- Page 8 Instructions for Use (continued) Fitting the power brush to the body a. Body of stick vac b. Power brush c. Slide the body into the power brush until an audible click is heard. d. Floor head release button...
- Page 9 Handle bending and locking a. Handle release button...
- Page 10 Instructions for Use (continued) Fitting the 3 in 1 accessory a. Crevice tool b. Brush tool...
- Page 11 Fitting the 3 in 1 accessory Soft brush Crevice tool Sofa brush 3 in 1 accessory Accessory holder...
- Page 12 Instructions for Use (continued) Charging the cleaner 1. Connect the power plug on the charging base to the power socket. 2. Connect the stick vac to the charging base. The stick vac should be able to stand alone once connected correctly to the charging base. 3.
- Page 13 How to operate the hand vac & stick vac On / Off Button Hand vac Indicator 1. Press the Hand Vac Release Button to release the hand vac from the body. 2. Press the On/Off Button to turn on the hand vac. A blue light will appear when the hand vac is operational.
- Page 14 Instructions for Use (continued) Operating the power brush 1. The power brush on this stick vac can be used on short haired carpet and hard floors. 2. The power brush has been manufactured with a safety switch. In the event the power brush jams, the stick vac will switch off as a precautionary measure to avoid damage or injury.
- Page 15 Using the 3 in 1 accessory This stick vac comes with a 3 in 1 accessory: Soft Brush for cleaning sofas, beds etc. Crevice Tool to clean in between tight spaces. The crevice tool can be used to clean hard to reach places. •...
-
Page 16: Maintenance
Maintenance Cleaning and changing parts Dust Cup Dust cup and filter system cleaning Release Button 1. Push the Dust Cup Release Button to release the dust cup from the hand vac. Dust cup assembly 2. To empty debris from the dust cup, separate the dust cup from the filter assembly as shown. - Page 17 Power brush cleaning Use a screw driver to rotate the locking button. Locking Button Remove the cover, take the roller out and clean it gently by removing all dirt and debris (do not clean with water or any liquids). The roller can also be replaced with a new roller if necessary.
-
Page 18: Troubleshooting
Troubleshooting Problems and solutions If you come across a problem, please refer to the troubleshooting checklist below. If the problem still persists, please contact Hoover Customer Care for further assistance. Stick vac does • Does the battery need charging? not work •... -
Page 19: Customer Care
Customer Care Please contact Hoover Customer Care: 1300 360 845 or NZ: (09) 263 7573 to find your local spare parts provider or for further assistance. Part Part Number Filter 32200739 Cone filter assembly 32200738 Brush bar assembly 33701711... -
Page 20: Conditions Of Warranty
Conditions of warranty Your Hoover cleaner, in the case of domestic use, has a one not carried out by an authorised Hoover Service Agent or from year parts and labour warranty against product defects the use of non-genuine parts. If any part is no longer available or...


Need help?
Do you have a question about the 5210 HERITAGE and is the answer not in the manual?
Questions and answers