
Related Manuals for Hoover Ranger 5241


Summary of Contents for Hoover Ranger 5241
- Page 1 Robot Vacuum Cleaner Clean Anywhere, Anytime Smart Autonomous Cleaning Powerful Cleaning Performance ranger...
-
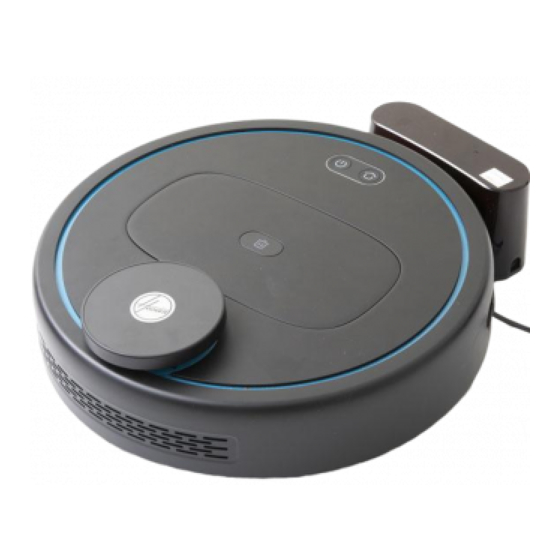
Page 2: Front View
Front View ON/OFF Switch (not shown) Top Cover Laser Distance Sensor Dust Bin Release Button Bumper Dust Bin On-board Controls & Status Indicator Signal Window Cliff Sensors Bottom View Charging Contacts Front Caster Wheel Side Brushes... -
Page 3: Accessories Included
5241 Ranger Congratulations on the purchase of your new HOOVER cleaner. There are many useful features built into your cleaner and we recommend that you carefully read this instruction manual to take the best advantage of these features. Accessories Included... -
Page 4: Before You Begin
Before You Begin This cleaner must be operated in accordance with these instructions and used only for domestic household cleaning to remove DRY dirt and dust from household carpets, flooring, walls and fabrics. This cleaner is not fit to be used as an industrial cleaner and will void the manufacturer’s warranty if used inappropriately. -
Page 5: Safety Precautions And Warnings
Safety Precautions & Warnings IMPORTANT! Always switch off the appliance before cleaning, when not in use or attempting any maintenance task. The charger must only be connected to an AC power supply at the voltage shown on the rating label. This cleaner should only be used for its intended purpose as described in this instruction manual. - Page 6 17. If the air inlet is blocked, switch off the cleaner When appliance is not in use, keep it away from straight away. First, clear the blocked object other metal objects, like paper clips, coins, before attempting to start the vacuum cleaner keys, nails, screws or other small metal objects again.
- Page 7 Risk of damage! Laser navigation sensor Light, moveable objects can be dragged along The navigation sensor contains a class 1 by the robot vacuum and cause damage to rotating laser. the object or floor depending on the object characteristics. The following rules of conduct generally apply Remove light, moveable objects from the work for lasers: area.
-
Page 8: Charging Base
• Always keep the Charging Base plugged in and make sure it is in an area with consistent Wi-Fi coverage to allow the robot to receive information via the Hoover Ranger App. ® Please remove the protective strip on the robot before use. - Page 9 NOTE: When the robot completes the cleaning cycle or when battery power is low, the robot will automatically returns to the Charging Base to recharge. Download the Hoover Ranger App and connect to Wi-Fi ® by following the instructions in the App. iOS 9.0 or later Android 4.1 or later...
- Page 10 On-board Controls & Status Indicator Recharge/Area cleaning: Short press: return to charging base to recharge Press for 3 seconds to activate Area Cleaning. The cleaner will clean a 2m x 2m area based on the current location Status Indicator: On-Off Button: Green light: Normal operation/recharging Short press: start or pause cleaning Red light: Error/low battery...
-
Page 11: Status Indicator
Status Indicator Status Display Sound 1 Initialisation after turning on A flashing green light Extended beep on start-up 2 Initialisation finished A green light Two beeping sounds Not connected to WiFi after A yellow light initialisation 4 Connecting to the WiFi A flashing yellow light One beeping sound 5 Connected to the WiFi... - Page 12 Flashing Yellow: not connected to Wi-Fi ® Green: Wi-Fi ® is connected. Follow the prompts in the App to establish connection with the robot. Operating the Hoover Ranger App Commands the robot to clean a particular area on the virtual map Virtual Map.
- Page 13 Select ‘More’ on the App to access additional App functionality. Below are a few key features: To create a particular cleaning zone in your home, or to command the robot to double clean a particular area or to prohibit the robot from cleaning a particular area.
-
Page 14: Maintenance
Maintenance IMPORTANT! Ensure that the cleaner is switched off before preforming any maintenance. Emptying the Dust Bin Press the Dust Bin Release Open the dust bin lid and Close the dust bin lid and Button to remove the dust empty the contents into a reinsert the dust bin back bin. - Page 15 Cleaning & Replacing the Roller Brush Push the two locking Remove the roller brush and clean with the cleaning brush buttons as shown to provided. Alternatively, the roller brush can be replaced if remove the brush cover. required. NOTE: to reduce the build-up of hair wrap around the roller brush it is recommended to clean the roller brush periodically by removing the roller brush and using the cleaning brush and or scissors to cut away and remove hair wrapped around the roller brush.
-
Page 16: Troubleshooting
Troubleshooting Problems and solutions If you come across a problem, please use the checklist of troubleshooting tips before contacting Hoover Customer Care on 1300 360 845, NZ: 0800 387 442.. Fault Names Fault Forms Causes Solutions Full dust bin 5 beeping sounds... -
Page 17: Spare Parts
Spare Parts Please contact Hoover Customer Care: 1300 360 845, NZ: 0800 387 442 to find your local spare parts provider. Part Part Number Roller Brush 31155515 Side Brushes x2 31155516 Filter Set 32201689 Bust Bin 33156148 33201711 Charger Base... - Page 18 Notes...
- Page 19 Notes...
- Page 20 Robot Vacuum Conditions of warranty Your Hoover cleaner, in the case of domestic use, has a one year Electrical Home-Aids Pty Ltd is unable to accept responsibility under parts and labour warranty against product defects and failures when this warranty for any repair work not carried out by an authorised the product is used in accordance with the terms and conditions of Hoover Service Agent or from the use of non-genuine parts.
Need help?
Do you have a question about the Ranger 5241 and is the answer not in the manual?
Questions and answers
What app do I use for iPhone?
The Hoover Ranger App is compatible with the Hoover Ranger 5241 for iPhone.
This answer is automatically generated