Table of Contents
Advertisement
Advertisement
Table of Contents
Troubleshooting

Related Manuals for Allen-Bradley PanelView 5500


Summary of Contents for Allen-Bradley PanelView 5500
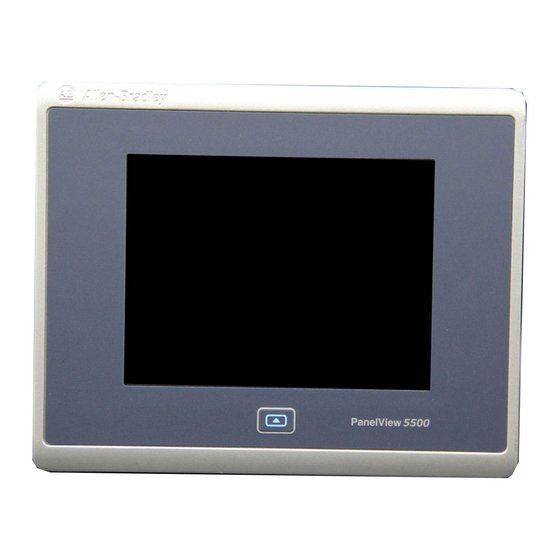
- Page 1 User Manual PanelView 5500 Terminals Catalog Numbers 2715-T7CD, 2715-T7CA, 2715-B7CD, 2715-B7CA, 2715-T9WD,2715-T9WA, 2715-T10CD, 2715-T10CA, 2715-B10CD, 2715-B10CA, 2715-T12WD, 2715-T12WA, 2715-T15CD, 2715-15CA, 2715-B15CD, 2715-B15CA, 2715-T19CD, 2715-T19CA...
- Page 2 Regulatory requirements for safe work practices and for Personal Protective Equipment (PPE). Allen-Bradley, ArmorBlock, CompactLogix, ControlFLASH, ControlLogix, FLEX, Kinetix, PanelView, POINT I/O, RSLinx, Stratix 6000, Studio 5000 Logix Designer, Studio 5000 View Designer, Rockwell Software, and Rockwell Automation are trademarks of Rockwell Automation, Inc.
-
Page 3: Table Of Contents
Overview About the PanelView 5500 Terminals ....... 9 Hardware Features ..........10 Operator Control . - Page 4 Table of Contents Configure the IP Address of the Terminal ......48 Use DHCP to Assign an IP Address For the Terminal ... 48 Assign a Static IP Address For the Terminal.
- Page 5 Table of Contents Chapter 7 Troubleshooting Status Indicators ..........90 View Diagnostic Information for the Configured Controller .
- Page 6 Table of Contents Notes: Rockwell Automation Publication 2715-UM001A-EN-P - July 2015...
-
Page 7: Preface
• Create a project for the controller by using the Studio 5000 Logix Designer® application. Package Contents This product is shipped with the following items: • PanelView 5500 terminal • Mounting levers for panel installation • Removable power terminal blocks (AC or DC) • Product information sheet •... -
Page 8: Product Release Notes
Resource Description PanelView 5500 Terminals Technical Data, publication Provides specifications and certifications for the PanelView 5500 terminal. 2715-TD001 EtherNet/IP Embedded Switch Technology Application Provides information on how to install, configure, and maintain linear, star, and Device Level Ring (DLR) networks using... -
Page 9: Overview
The PanelView 5500 terminals include these features and capabilities: • Tightly integrated control and design environment allows information to be shared between the PanelView 5500 terminal and the Logix platforms. • The Studio 5000 environment provides one point of access for both View Designer and Logix Designer applications. -
Page 10: Hardware Features
Operator Control All PanelView 5500 terminals have a color display with a touch screen and navigation key, or a touch screen, navigation key, and keypad for operator control. • Analog, resistive, touch screens provide accurate, durable touch with excellent reliability for control of industrial applications. - Page 11 – Press only one key on the terminal at one time. – The physical keypad on the PanelView 5500 terminal is used during runtime to initiate actions, control navigation, and enter data. The terminal also supports a virtual keyboard and numeric keypad that opens on PanelView 5500 terminal screens during runtime.
-
Page 12: Touch Gestures
• View Designer – you can create and design a project for a specific PanelView 5500 terminal and download the project to the terminal. You can create an application for any PanelView 5500 terminal and reuse that same application across the entire platform. - Page 13 HMI screens, controller references, and information about (VPD file) the HMI device to run the application. A Human Machine Interface (HMI) device, such as the PanelView 5500 terminal, which HMI device runs the HMI project. At runtime, the HMI device communicates directly with the controller.
-
Page 14: Ethernet/Ip Communication
Chapter 1 Overview EtherNet/IP Communication The PanelView 5500 terminals contain EtherNet/IP embedded switch technology. These terminals communicate with ControlLogix controllers over an Ethernet connection with DLR or linear network topologies. Star technology is also supported when using switches. ThePanelView 5500 terminals can reside on EtherNet/IP networks that run integrated motion and CIP Sync applications without affecting performance. -
Page 15: Accessories
Quantity 2711P-RMCP Mounting levers (black) (1) Catalog number 2711P-RMCP mounting levers are used with the PanelView 5500 terminals. Do not use gray mounting levers; they are not compatible with PanelView 5500 terminals. Table 7 - Secure Digital (SD) Cards Cat. No. - Page 16 Chapter 1 Overview Notes: Rockwell Automation Publication 2715-UM001A-EN-P - July 2015...
-
Page 17: Install The Panelview 5500 Terminal
Connect to a Network Initial Startup ATTENTION: Do not use a PanelView 5500 terminal for emergency stops or other controls critical to the safety of personnel or equipment. Use separate hard-wired operator interface devices that do not depend on solid-state electronics. - Page 18 Chapter 2 Install the PanelView 5500 Terminal ATTENTION: Environment and Enclosure This equipment is intended for use in a Pollution Degree 2 industrial environment, in overvoltage Category II applications (as defined in IEC 60664-1), at altitudes up to 2000 m (6561 ft) without derating.
-
Page 19: North American Hazardous Locations
Install the PanelView 5500 Terminal Chapter 2 North American Hazardous Locations The following information applies when operating this Informations sur l’utilisation de cet équipement en equipment in hazardous locations. environnements dangereux. ATTENTION: When marked, these products are suitable for use in Les produits marqués "CL I, DIV 2, GP A, B, C, D"... -
Page 20: Required Circuit Port Parameters For Usb Peripheral Devices
Per the National Electrical Code, the circuit parameters of associated field-wiring apparatus for use in hazardous locations shall be coordinated with the host product such that their combination remains nonincendive. PanelView 5500 terminals and the USB peripheral devices shall be treated in this manner. -
Page 21: Mounting Considerations
Install the PanelView 5500 Terminal Chapter 2 Mounting Considerations Consider the following when mounting the terminal: • Mount the terminal at a height suitable for operators. You can mount the cabinet at a level other than the operator floor. • Use appropriate light. Do not operate the terminal in direct sunlight. -
Page 22: Panel Guidelines
NEMA, UL Type, or IP ratings. Panel Cutout Dimensions Use the template that is shipped with your terminal to mark the cutout dimensions. Table 11 - PanelView 5500 - Panel Cutout Dimensions Terminal Size Input Type Height, mm (in.) Width, mm (in.) -
Page 23: Product Dimensions
The table provides product dimensions. The 10.4-inch touch and combination keypad with touch terminals are shown for illustrative purposes. All other terminal sizes look similar. Figure 4 - PanelView 5500 Terminal Dimensions (the 10.4-in. terminal is shown) Table 12 - PanelView 5500 Terminal Dimensions Mounted Depth... -
Page 24: Prepare For Panel Mounting
Chapter 2 Install the PanelView 5500 Terminal Prepare for Panel Mounting Before mounting your PanelView 5500 terminal in a panel, read this section and the entire installation procedure on page Catalog number 2711P-RMCP mounting levers (black) are used with PanelView IMPORTANT 5500 terminals. - Page 25 Install the PanelView 5500 Terminal Chapter 2 Flat Side Knob on reverse Inner notch on lever side of lever shows current lever inserts into position. large end of slot The edge of the bezel has alignment indentations to assist with the lever position.
- Page 26 Chapter 2 Install the PanelView 5500 Terminal This figure shows the lever orientation and lock sequence for a 10.4-in. touch terminal. This 10.4-in. touch terminal has all levers locked in position 3, which is appropriate for a panel thickness of 2.67…3.15 mm (0.105…0.124 in.).
- Page 27 Install the PanelView 5500 Terminal Chapter 2 Figure 5 - Mounting Lever Orientation and Lock Sequence 6.5-in. Touch Only - 6 Levers 6.5-in. Keypad and Touch - 8 Levers 10.4-in. Keypad and Touch, 12.1-Touch Only - 10 Levers 9-in. and 10.4-in. Touch Only - 8 Levers 15-in.
-
Page 28: Mount The Terminal In A Panel
Chapter 2 Install the PanelView 5500 Terminal Mount the Terminal in a The PanelView 5500 terminals were designed for single-person installation. No tools are required except for the tools needed to make the panel cutout. Panel Follows these steps to mount the terminal in a panel. - Page 29 Install the PanelView 5500 Terminal Chapter 2 c. Pull the top of the terminal toward you to verify that the levers are still intact and the terminal is stabilized in the panel. d. Insert the remaining levers in the slots by using the orientations in Figure 5 on page 27 that are correct for your terminal.
- Page 30 Chapter 2 Install the PanelView 5500 Terminal Flat side 5. Adjust each lever to its final lock position shown in the same locking sequence in Figure 5 on page a. Unlock lever one in the sequence by rotating it away from the bezel.
-
Page 31: Remove And Replace The Power Terminal Block
Install the PanelView 5500 Terminal Chapter 2 Remove and Replace the The product has a 3-pin terminal block for power connections. You can remove the terminal block for ease of installation, wiring, and maintenance. Power Terminal Block WARNING: Explosion Hazard If you connect or disconnect wiring while the power is on, an electrical arc can occur. -
Page 32: Connect To Dc Power
Chapter 2 Install the PanelView 5500 Terminal Connect to DC Power Terminals with a 24V DC power supply have these power ratings: • 24V DC nominal (18…30V DC) • 50 W maximum (2.1A at 24V DC) ATTENTION: The power supply is internally protected against reverse polarity. -
Page 33: Connect To Ac Power
Install the PanelView 5500 Terminal Chapter 2 Connect to AC Power Terminals with an AC power supply have these power ratings: • 100…240V AC (50…60 Hz) • 105VA maximum ATTENTION: Improper wiring of the power terminals can result in voltage at the communication connector shells. -
Page 34: Connect To A Network
Chapter 2 Install the PanelView 5500 Terminal Connect to a Network The two Ethernet ports connect to controllers on an EtherNet/IP network by standard Ethernet connections. These network topologies are supported: • Device Level Ring Network Topology • Linear Network Topology •... -
Page 35: Device Level Ring Network Topology
This topology is also implemented at the device level. No additional switches are required. A DLR network contains supervisor nodes and ring nodes. The PanelView 5500 terminal operates only as a ring node on the network. -
Page 36: Linear Network Topology
Chapter 2 Install the PanelView 5500 Terminal Figure 6 - PanelView 5500 Terminal in a DLR Topology Network ControlLogix Controller with 1756-EN3TR (or EN2TR) Module Computer Connected Via a 1783-ETAP EtherNet/IP Tap PanelView 5500 Terminal Connected Via Two DLR Ports Kinetix®... -
Page 37: Star Network Topology
Star Network Topology A star network topology is a traditional EtherNet/IP network that includes multiple devices that are connected to each other via an Ethernet switch. Figure 8 - PanelView 5500 Terminal in a Star Topology Network Computer ControlLogix Controller... -
Page 38: Update The Firmware Before You Use The Terminal
Chapter 2 Install the PanelView 5500 Terminal Update the Firmware Before You Use the Terminal When power is turned on, the terminal goes through its startup sequence. The Welcome screen displays with a Configure the Ethernet Network button. To configure the Ethernet settings and update the firmware, follow these steps. - Page 39 Install the PanelView 5500 Terminal Chapter 2 4. Tap the Ethernet icon. 5. Configure the Ethernet ports for the terminal. Configure the Ethernet Ports on page 6. Update the firmware by using the ControlFLASH™ software. Begin the update at Get the Terminal Firmware on page You can now download a View Designer application to the terminal.
- Page 40 Chapter 2 Install the PanelView 5500 Terminal Notes: Rockwell Automation Publication 2715-UM001A-EN-P - July 2015...
-
Page 41: Configure Terminal Settings
Chapter Configure Terminal Settings Topic Page Topic Page Runtime Environment Configure the Display Screen Saver Entering Data Using Virtual Keyboards Calibrate the Touch Screen Log On to the Terminal Disable Downloads to the Terminal Log Off of the Terminal Change the HMI Device Name Settings Menu View the Firmware Revision Configure the IP Address of the Terminal... -
Page 42: Runtime Environment
Chapter 3 Configure Terminal Settings Runtime Environment During runtime, the PanelView 5500 terminal runs HMI projects. A project is configured and downloaded to your terminal from the View Designer application. The project launches each time the terminal restarts. The terminal exchanges data values with the controller, animates the displayed data, and responds when you press keys or touch a screen or element on a screen. -
Page 43: Entering Data Using Virtual Keyboards
Keyboards • The virtual keyboard opens on the PanelView 5500 terminal screen when you tap a field or element that requires text or numeric input. • The virtual numeric keypad opens on the PanelView 5500 terminal screen when you tap a field or element that requires only numeric input. - Page 44 Chapter 3 Configure Terminal Settings Figure 10 - Virtual Numeric Keypad Table 18 - Virtual Numeric Keypad Description Item Feature Description Numeric entry field The numeric entry field into which you type the numeric value for the graphic element. Min-Max value The displayed minimum and maximum values you can enter for the selected field or element.
-
Page 45: Log On To The Terminal
Guest user account. • Screen security and user roles are assigned in Studio 5000 View Designer and cannot be modified on the PanelView 5500 terminal. To log on to the terminal, follow these steps. -
Page 46: Log Off Of The Terminal
Chapter 3 Configure Terminal Settings Log Off of the Terminal When you log off, the following actions occur: • The Guest user is logged in by default. • If the Guest user has access to the current screen, the terminal continues to display the current screen. -
Page 47: Settings Menu
Configure Terminal Settings Chapter 3 Settings Menu You can access configuration parameters and system-wide information for the terminal from the Navigation menu. To open the Settings menu, follow these steps. 1. Press the navigation button on the terminal. 2. Tap Settings, or tab to the menu item and press Enter. Item Menu Topic Tasks That You Can Perform... -
Page 48: Configure The Ip Address Of The Terminal
Chapter 3 Configure Terminal Settings Configure the IP Address of You can configure the IP address of the terminal to use the Dynamic Host Configuration Protocol (DHCP), or manually configure a static IP address. the Terminal A project is downloaded to the terminal from the View Designer application through the IP address of the terminal. -
Page 49: Assign A Static Ip Address For The Terminal
Configure Terminal Settings Chapter 3 Assign a Static IP Address For the Terminal To assign a static IP address for the terminal, follow these steps. 1. Press the navigation button on the terminal. 2. Tap Settings, or tab to the menu item and press Enter. 3. -
Page 50: Configure A Dns Address For The Terminal
Chapter 3 Configure Terminal Settings Configure a DNS Address For The domain name system (DNS) translates internet domain and host names to IP addresses. DNS automatically converts a name that is typed in a web browser the Terminal address bar to the IP addresses of web server that host that site. You can configure DNS addresses for common domain or host names. -
Page 51: Configure The Ethernet Ports
Configure Terminal Settings Chapter 3 Configure the Ethernet Ports You can configure the link speed and duplex mode for each of the Ethernet ports on the terminal. The ports are identified as Ethernet Link 1 and Ethernet Link 2. Ethernet Link 2 Ethernet Link 1 You cannot configure the Ethernet ports within the View Designer software. -
Page 52: View The Network Diagnostics
Chapter 3 Configure Terminal Settings View the Network From the Network Diagnostics screen you can view Ethernet Link 1 and Ethernet Link 2 network connection data, network status data, and IP settings Diagnostics configuration data. To view the Network Diagnostics screen, follow these steps. 1. -
Page 53: Adjust The Brightness Of The Display
Configure Terminal Settings Chapter 3 Adjust the Brightness of the You can adjust the brightness level of the terminal display in increments from 1…100%. Display • 1% is the minimum display visibility. • 100% is the maximum display visibility. Lower the brightness level to reduce the power that is consumed by the backlight and extend the life of the backlight. -
Page 54: Configure The Display Screen Saver
Chapter 3 Configure Terminal Settings Configure the Display Screen The screen saver extends the life of the backlight by dimming the brightness level when activity is not sensed for a specified amount of time. When the screen saver Saver is activated, the terminal displays a moving image at a reduced brightness level. When user input is sensed, the screen saver is deactivated and the display brightness returns to its configured level. -
Page 55: Calibrate The Touch Screen
Configure Terminal Settings Chapter 3 Calibrate the Touch Screen The touch screen is calibrated at the factory. After installation, you can recalibrate the touch screen to compensate for parallax if the screen is viewed at an angle. The calibration process requires you to touch a series of targets on the screen. For accuracy and to prevent damage to the touch screen, use a plastic stylus IMPORTANT device with a minimum tip radius of 1.3 mm (0.051 in.). - Page 56 Chapter 3 Configure Terminal Settings 6. Continue to press and hold the centers of all remaining targets as they appear. All processed targets are replaced with white targets. A green circle with a check indicates a successful calibration. A red circle with an indicates a failed calibration. If the calibration fails, the process automatically repeats.
-
Page 57: Disable Downloads To The Terminal
Configure Terminal Settings Chapter 3 Disable Downloads to the As a security measure, you can disable downloads to the terminal, including application downloads and firmware updates. Disable downloads to prevent the Terminal current application from being replaced when an application is downloaded from the View Designer application. -
Page 58: Change The Hmi Device Name
Chapter 3 Configure Terminal Settings Change the HMI Device Name Each terminal has a unique default HMI device name that identifies it to other devices on the network. You can view or change this name. To view or change the HMI device name, follow these steps. 1. -
Page 59: View The Firmware Revision
Configure Terminal Settings Chapter 3 View the Firmware Revision You can view the current firmware revision on the terminal. You need this information for firmware updates, or when you call technical support. 1. Press the navigation button on the terminal. 2. - Page 60 Chapter 3 Configure Terminal Settings Diagnostic Parameter Description CPU utilization The processor usage. Total power on time The total time the terminal has been running (powered). CPU temperature Displays the current temperature of the CPU: • Normal: 25…94 °C (77…201 °F) •...
-
Page 61: Reboot The Terminal
Configure Terminal Settings Chapter 3 Reboot the Terminal To reboot the terminal, follow these steps. 1. Press the navigation button on the terminal. 2. Tap Settings, or tab to the menu item and press Enter. 3. Tap HMI Device. 4. Tap Reboot Terminal. You are prompted to confirm the reboot. -
Page 62: Change The Date And Time
Chapter 3 Configure Terminal Settings Change the Date and Time You can change the date and time that is used for terminal operations. The date and time is displayed on the terminal screen and recorded in log files. You can also change the time zone for the terminal. -
Page 63: View General Information For The Configured Controller
Configure Terminal Settings Chapter 3 View General Information for You can view general information for the controller that is configured to operate with the terminal. the Configured Controller To view the general information for the controller, follow these steps. 1. Press the navigation button on the terminal. 2. - Page 64 Chapter 3 Configure Terminal Settings Notes: Rockwell Automation Publication 2715-UM001A-EN-P - July 2015...
-
Page 65: Alarm Indicator
Chapter Monitor and Manage Control System Alarms Topic Page Alarm Indicator Alarm Help Menu View the Alarm Summary Manage the Alarms Alarm Detail-pane Descriptions Filter the Alarms Alarm Indicator The Unacked icon in the system banner displays the number of unacknowledged alarms for the system. -
Page 66: Alarm Help Menu
Chapter 4 Monitor and Manage Control System Alarms Alarm Help Menu To view a brief description of the alarm function keys and status counts, follow these steps. 1. Open the Alarm Summary (page 68) or Alarm Manager (page 69) screen. 2. - Page 67 Monitor and Manage Control System Alarms Chapter 4 Table 19 - Alarm Function-key Descriptions (Continued) Symbol Function Key or Description Message Enable Enables the selected alarms in the alarm manager table, which allows the alarm condition to be evaluated, which turns on the alarm. An enabled alarm enables all conditions for that alarm.
-
Page 68: View The Alarm Summary
Chapter 4 Monitor and Manage Control System Alarms View the Alarm Summary The alarm summary lists alarms that are in alarm or out of alarm but still unacknowledged. It displays one alarm condition per row. Use the alarm summary to monitor and interact with alarms. To view the alarm summary for the control system, follow these steps. -
Page 69: Manage The Alarms
Monitor and Manage Control System Alarms Chapter 4 Manage the Alarms The Alarm Manager lists all alarms that are configured in a system and their current states. To manage the alarms for the control system, follow these steps. 1. Press the navigation button on the terminal. 3. -
Page 70: Alarm Detail-Pane Descriptions
Chapter 4 Monitor and Manage Control System Alarms Alarm Detail-pane The details pane shows details for the selected alarm condition of a selected alarm. Condition details display the selected alarm condition in the alarm Descriptions manager table. To view the details pane for a selected alarm, follow these steps. 1. - Page 71 Monitor and Manage Control System Alarms Chapter 4 Table 20 - Alarm Detail Descriptions (Continued) Alarm Detail Description In Alarm Time The time the selected alarm entered the In Alarm state. Inhibit State The value that is applied to the alarm condition that inhibits the alarm at some level. These states, indicated by an icon in the alarm table, include: •...
-
Page 72: Filter The Alarms
Chapter 4 Monitor and Manage Control System Alarms Filter the Alarms You can filter the alarms to view only the alarms in the selected alarm state. To filter the alarms, follow these steps. 1. Tap the filter pull-down arrow. 2. Tap the up or down arrows on the scroll bar to scroll through the filter choices 3. - Page 73 Monitor and Manage Control System Alarms Chapter 4 The selected filter displays in the filter pull-down menu. To change the filter, tap the filter pull-down menu and select another filter. To turn off the filter, tap No Filter. Rockwell Automation Publication 2715-UM001A-EN-P - July 2015...
- Page 74 Chapter 4 Monitor and Manage Control System Alarms Notes: Rockwell Automation Publication 2715-UM001A-EN-P - July 2015...
- Page 75 Chapter Install and Replace Components Topic Page Connect to USB Ports Insert an SD Card Replace the Battery Install a Protective Overlay ATTENTION: Prevent Electrostatic Discharge (ESD) This equipment is sensitive to electrostatic discharge, which can cause internal damage and affect normal operation. Follow these guidelines when you handle this equipment: •...
-
Page 76: Connect To Usb Ports
Chapter 5 Install and Replace Components Connect to USB Ports The terminals have two USB 2.0 (type A) host ports. The USB host ports support removable USB flash drives. IMPORTANT The USB device port is not functional. Do not use the USB device port. page 20 for information on the USB host ports and USB peripheral IMPORTANT... -
Page 77: Usb Cables
Install and Replace Components Chapter 5 USB Cables Use only hi-speed, USB 2.0 certified cables for error-free transmissions. The terminals have not been tested with USB 3.0 cables. We recommend only IMPORTANT the use of USB 2.0 certified cables. Insert an SD Card The SD card can only be used for loading troubleshooting profiles and to save troubleshooting logs. -
Page 78: Replace The Battery
Chapter 5 Install and Replace Components 2. Insert the SD card firmly into the slot until you hear a click. When you hear the click, the card has SD Slot locked into place. To remove the card, push the card in slightly to unlock the SD card so you can remove it from the slot. - Page 79 Install and Replace Components Chapter 5 To replace the battery, follow these steps. 1. Disconnect power from the terminal. 2. Loosen the screws that secure the logic module to the back of the display. Logic Module Display Module This equipment is sensitive to electrostatic discharge (ESD). Follow ESD prevention guidelines when handling this equipment.
-
Page 80: Install A Protective Overlay
Chapter 5 Install and Replace Components 8. Push down on the logic module and make sure that it is fully seated. 9. Tighten the screws to a torque of 0.68…0.90 N•m (6…8 lb•in). Install a Protective Overlay The overlay protects the touch screen and keys from scratches, dust, fingerprints, and external damage from chemicals or abrasive materials. -
Page 81: Clean The Overlay
Install and Replace Components Chapter 5 Adhesive Ring Protective liner (covers adhesive) Hold the peeled back portion of the protective liner out of the way as you perform the next step. Overlay Bezel Protective Liner 2. Center the overlay over the bezel and carefully position the adhesive surface on the terminal. - Page 82 Chapter 5 Install and Replace Components Notes: Rockwell Automation Publication 2715-UM001A-EN-P - July 2015...
-
Page 83: Before You Begin
Firmware Requirements ControlFLASH software is used to update firmware in the PanelView 5500 terminal on the network. The update performs these actions: • Installs updated binary files • Preserves configuration data, such as Ethernet settings, display brightness,... -
Page 84: Get The Terminal Firmware
12.00.01 or later PanelView 5500 Terminal firmware 1.0 or later Know the catalog number of the PanelView 5500 terminal you want to update Know the RSLinx network path to the targeted PanelView 5500 terminal Get the Terminal Firmware From the Quick Links list on http://www.ab.com, choose Product Compatibility and Download Center. -
Page 85: Update The Firmware By Using Controlflash Software
Update Firmware Chapter 6 Update the Firmware by To use the ControlFLASH software to update the firmware in a PanelView 5500 terminal, follow these steps. Using ControlFLASH Software 1. Click Start>Programs>FLASH Programming Tools>ControlFLASH. 2. Make sure that you know the required information in the Welcome dialog box, then click Next. - Page 86 Chapter 6 Update Firmware 4. Browse to and select the device to update on the EtherNet/IP network and click OK. 5. Select the firmware revision to install and click Next. 6. Read the Danger information in the Summary dialog, then click Finish. Rockwell Automation Publication 2715-UM001A-EN-P - July 2015...
-
Page 87: Verify The Firmware Update
Update Firmware Chapter 6 7. Click Yes to confirm that you want to update the target device. The update starts and can take several minutes to complete. Do not cycle power to the terminal during this process or the firmware IMPORTANT update does not complete successfully. -
Page 88: Rockwell Automation Publication 2715-Um001A-En-P - July
Chapter 6 Update Firmware Notes: Rockwell Automation Publication 2715-UM001A-EN-P - July 2015... - Page 89 Chapter Troubleshooting Topic Page Status Indicators View Diagnostic Information for the Configured Controller Troubleshooting Profiles Terminal Does Not Start Up Terminal Restarts Intermittently Touch Screen Issues Display Issues Ethernet Issues Cannot Download Application to Terminal Performance Is Slow Resistance to Chemicals Clean the Display Ship the Terminal Restore Factory Defaults...
-
Page 90: Troubleshooting
Chapter 7 Troubleshooting Status Indicators The back of the terminal has two indicators to identify system status: • STS indicator (green) indicates that the terminal is on and in use • ERR indicator (red) indicates hardware and firmware faults At startup the STS and ERR indicators blink on and off, then the STS indicator blinks to signal progress during startup. -
Page 91: View Diagnostic Information For The Configured Controller
Troubleshooting Chapter 7 View Diagnostic Information You can view diagnostic information for the controller that is configured to operate with the terminal. for the Configured Controller To view diagnostic information for the controller, follow these steps. 1. Press the navigation button on the terminal. 2. -
Page 92: Import A Troubleshooting Profile
Chapter 7 Troubleshooting Import a Troubleshooting Profile The Troubleshooting window indicates whether a default or imported troubleshooting profile is being used in the terminal. If an imported file is in use, a green check mark and the name of the imported file appears next to the Import Profile button. -
Page 93: Export A Troubleshooting Log
Troubleshooting Chapter 7 The name of the imported file is displayed. A green check next to the file name means that the import is complete. ATTENTION: Do not remove the USB drive or SD card before the import operation is complete. Otherwise, the USB drive or SD card can become corrupt. - Page 94 Chapter 7 Troubleshooting 6. Tap Save Troubleshooting Profile. 7. Insert a USB drive or SD card into a slot on the terminal. 8. Tap Export. The troubleshooting log is exported and the date a time of the last export is displayed next to the Export button.
-
Page 95: Terminal Does Not Start Up
Troubleshooting Chapter 7 Terminal Does Not Start Up If the terminal does not start up normally, check the table for possible causes. Table 24 - Terminal Does Not Start Up Properly Check For What to Do Insufficient power Make sure device is receiving adequate power: •... -
Page 96: Display Issues
Chapter 7 Troubleshooting Display Issues The display is unreadable or dims unexpectedly. ATTENTION: If the display darkens, or if the backlight is not functioning properly, the screen can be difficult to read and use of this touch screen could result in a potentially hazardous outcome. Do not use the touch screen under these circumstances. -
Page 97: Cannot Download Application To Terminal
Troubleshooting Chapter 7 Table 28 - Ethernet Connection Issues (Continued) Check for Description Poor cable connections Check the Ethernet cabling for the following: • Make sure that cables are fully connected. • Check for cable crimping. • Check the Ethernet switch connections. •... -
Page 98: Clean The Display
Chapter 7 Troubleshooting Clean the Display A protective overlay can help extend the life of the terminal and make it easier to clean the display. Table 4 on page 15 provides catalog numbers for overlays. ATTENTION: Do not use abrasive cleaners or solvents, they can damage the display. -
Page 99: Ship The Terminal
Troubleshooting Chapter 7 Ship the Terminal If you ship the enclosure with the terminal installed, make sure that the terminal is properly secured and protected against damage from impact, sharp objects, or abrasive materials. ATTENTION: Rockwell Automation is not responsible for damage to a product that is shipped or transported while installed in a panel or enclosure. - Page 100 To restore the terminal to its default state, follow these steps. 1. Cycle power to the terminal. The Allen-Bradley logo displays during startup. 2. Wait a few seconds, and then touch the Allen-Bradley logo when the copyright line becomes brighter. Copyright ©2015 Rockwell Automation Wait a few seconds before you touch the logo.
-
Page 101: Index
15 Ethernet cables 15 factory defaults 99 explanation 14 field wiring compliance 20 mounting hardware 15 firmware revision 59 PanelView 5500 terminals 14 firmware update 83 power supplies 15 power terminal blocks 15 firmware upgrade protective overlays 15 requirements 84... - Page 102 Index hardware specifications navigation audio out 10 button 11 Ethernet ports 10 keys 11 mounting slot 10 network diagnostics 52 SD card slot 10 nonincendive field wiring 20 status indicators 10 numeric keypad 11 USB host ports 10 virtual 43 hazardous location 18 HMI keypad 11 open source packages 7...
- Page 103 Index safety notices wash downs 98 electical arc 34 wiring and safety guidelines 18 electrical shock 33 explosion hazard 34 mounting the terminal 28 nounting positions 21 unintended operation 11 water or chemical damage 28 screen saver 54 SD card installing 77 locked 77 removing 78...
- Page 104 Index Rockwell Automation Publication 2715-UM001A-EN-P - July 2015...
- Page 106 Rockwell Automation Support Rockwell Automation provides technical information on the Web to assist you in using its products. http://www.rockwellautomation.com/support you can find technical and application notes, sample code, and links to software service packs. You can also visit our Support Center at https://rockwellautomation.custhelp.com/ for software updates, support chats and forums, technical information, FAQs, and to sign up for product notification updates.
Need help?
Do you have a question about the PanelView 5500 and is the answer not in the manual?
Questions and answers