
Related Manuals for Pullman WD20LSSO


Summary of Contents for Pullman WD20LSSO
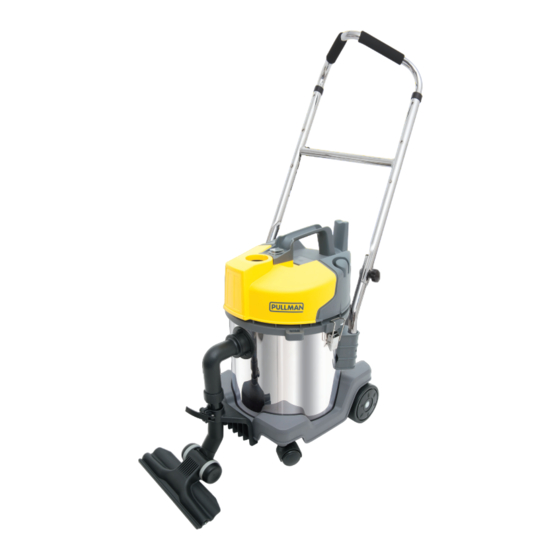
- Page 1 IDEAL FOR: Motels & Hotels Workshops & Garages Restaurants & Cafes Offices 20L WET & DRY VACUUM WITH PATENTED TECHNOLOGY OUTRIGGER Australian Patent Application No: 2013900442 WD20LSSO 1100W...
- Page 2 IMPORTANT Always switch off the cleaner and remove the plug from the mains power supply before cleaning your appliance, when not in use or attempting any maintenance task. The cleaner must only be connected to an AC power supply at the voltage shown on the rating label. This cleaner should only be used for its intended purpose as described in this instruction manual.
-
Page 3: Before You Begin
This machine is equipped with a cable restraint, cord and plug. In the event that either of these parts get damaged, it must be repaired by a qualified technician. PULLMAN 20L WET & DRY VACUUM WITH OUTRIGGER WD20LSSO... -
Page 4: Know Your Product
4. Handle 15. Extension Cord 10. Hose Assembly 5. Connection Latches 16. Gulper Floor Tool 11. 2 Piece Chrome Tube 6. Rear Wheel 17. Outrigger Attachment Technical Information Model: WD20LSSO 240V ~ 50HZ 1100W MAX 1000W NOM Noise Level: 75dbA... - Page 5 16. Star Knob 5. Fixed Support 11. Handle Grip 17. Fixed Tube 6. Nut 12. Protective Cover NOTE: Items #1 - #4 and Items #6 - #10 will be pre-assembled. 6. 7. 8. PULLMAN 20L WET & DRY VACUUM WITH OUTRIGGER WD20LSSO...
- Page 6 ASSEMBLY The cleaner should be switched off and disconnected from the mains power supply before you start to assemble. 1. Disconnect latches on side of machine and remove the canister lid. 2. Remove blue plastic cover inside and underneath the tank. 3.
- Page 7 4. For storage, the handrail can also be folded down over the lid of the cleaner. Part 2 1. Insert the bend tube pre-assembly into the hose inlet on the cleaner. PULLMAN 20L WET & DRY VACUUM WITH OUTRIGGER WD20LSSO...
- Page 8 ASSEMBLY (WITH GULPER OUTRIGGER) Part 2 (Continued) 2. Install the fixed support pre-assembly onto the cleaner and connect the bend tube assembly. 3. Insert the Gulper Floor Tool into the Outrigger Assembly. 4. Turn locker to the left to secure the Gulper Floor Tool.
-
Page 9: Cable Restraint
2. Feed loop up through cable restraint opening. 3. Place extension cord over top of hook. Pull down on cord to lock on hook. 4. Pull down on the extension cord firmly to ensure it does not slip. PULLMAN 20L WET & DRY VACUUM WITH OUTRIGGER WD20LSSO... - Page 10 ASSEMBLY (WITH HOSE) Part 1 1. Connect the 2-piece chrome tube together. 2. Connect the handle on the hose to the tube. 3. Connect the tube to the Gulper Floor Tool or Wet Pick Up Floor Tool.
- Page 11 2. Start the cleaner by pressing the On/Off switch. IMPORTANT! The On/Off switch is equipped with a water-proof cover. If the water-proof cover is broken, please contact your nearest Pullman agent for service/repair. PULLMAN 20L WET & DRY VACUUM WITH OUTRIGGER...
- Page 12 ACCESSORIES The Gulper Floor Tool is ideal for cleaning on carpets and hard floors. Carpet Hard Floors The wet pick-up tool is ideal for wet applications. Fitting the dusting brush and crevice tool To fit the accessories to the tube, gently insert the tube into the top of the dusting brush or crevice tool.
-
Page 13: Operation
MAINTENANCE WORK. IF PROPER CARE IS TAKEN TO MAINTAIN YOUR CLEANER, MOTOR MAINTENANCE IS UNNECESSARY. HOWEVER WE RECOMMEND THAT YOUR CLEANER IS SERVICED ONCE A YEAR. 1. Remove the mesh from around the HEPA Filter. PULLMAN 20L WET & DRY VACUUM WITH OUTRIGGER WD20LSSO... -
Page 14: Cleaning The Tank
MAINTENANCE (CONTINUED) 2. Twist the locking knob with an anti- clockwise force to remove the filter. 3. Wash and clean the HEPA Filter and mesh carefully using luke warm water. 4. Dry by airing. 40°C 24hr 5. Place the filter and mesh back into the cleaner. -
Page 15: Troubleshooting
For customer service or product enquiries please contact 1800 815 270 PRODUCT NUMBER PRODUCT DESCRIPTION 33151805 HEPA Filter 32200833 Dust Bag 32200842 Cloth Filter 31151795 Handle Assembly 20L 31151796 Outrigger Assembly 33151804 Tank 20L 33500397 Castor Wheel 33500396 Rear Wheel PULLMAN 20L WET & DRY VACUUM WITH OUTRIGGER WD20LSSO... -
Page 16: Conditions Of Warranty
Conditions of warranty Your Pullman cleaner has a decide to repair or replace the cleaner, it will do so one year parts and labour at its own cost. warranty against product International Cleaning Solutions Pty Ltd is unable defects and failures when...
Need help?
Do you have a question about the WD20LSSO and is the answer not in the manual?
Questions and answers