Table of Contents
Advertisement
Advertisement
Table of Contents

Subscribe to Our Youtube Channel
Related Manuals for TEFAL MultiCook Advanced 45 in 1


Summary of Contents for TEFAL MultiCook Advanced 45 in 1
- Page 1 MultiCook Advanced 45 in 1...
- Page 3 Fig.1 Fig.2 Fig.3a Fig.3b 10cups MAX. Fig.4 Fig.5 Fig.6 Fig.7 cups MAX. Fig.8 Fig.9 Fig.10 Fig.11 Fig.12 Fig.13 Fig.14 Fig.15 Fig.16 Fig.17 Fig.18...
- Page 4 IMPORTANT SAFEGUARDS SAFETY INSTRUCTIONS Read and follow the instructions for use. Keep them safe. • This appliance is not intended to be operated by means of an external timer or a separate remote- control system. • This appliance shall not be used by children from 0 year to 8 years. • This appliance can be used by children aged from 8 years and above if they have been given supervision or instruction concerning use of the appliance in a safe way and if they understand the hazards involved.Cleaning and user maintenance shall not be made by children...
- Page 5 physical, sensory or mental capabilities, or lack of experience and knowledge, unless they have been given supervision or instruction concerning use of the appliance by a person responsible for their safety. • Children should be supervised to ensure that they do not play with the appliance. • As this appliance is for household use only, it is not intended for use in the following applications and the guarantee will not apply for: − Staff kitchen areas in shops, offices and other working environments − Farm houses − By clients in hotels, motels and other residential type environments − Bed and breakfast type environments • If your appliance is fitted with a removable power cord: if the power cord is damaged, it must be replaced by a special cord or unit available from an authorised service centre.
- Page 6 • Use a damp cloth or sponge with washing-up liquid to clean the accessories and parts in contact with food. Rinse with a damp cloth or sponge. Dry accessories and parts in contact with food with a dry cloth. • If the symbol is marked on the appliance, this symbol means “Caution: surfaces may become hot during use”.
- Page 7 • Cooking appliances should be positioned in a stable situation with the handles (if any) positioned to avoid spillage of the hot liquids. • Do not get face and hands close to the steam outlet. Do not obstruct the steam outlet. • For any problems or queries please contact our Customer Relations Team or consult our web site. • For your safety, this appliance complies with the safety regulations and directives in effect at the time of manufacture (Low-voltage Directive, Electromagnetic Compatibility, Food Contact Materials Regulations, Environment…).
- Page 8 • Do not let the power cord hang where children may reach it. • Do not leave the power cord close to or in contact with sources of heat or sharp edges. • Always plug the appliance into an earthed socket. • Do not use an extension lead. If you accept liability for doing so, only use an extension lead which is in good condition, has an earthed plug and is suited to the power of the appliance. • Do not unplug the appliance by pulling on the cord. Using • Use a flat, stable, heat-resistant work surface away from any water splashes.
-
Page 9: Protect The Environment
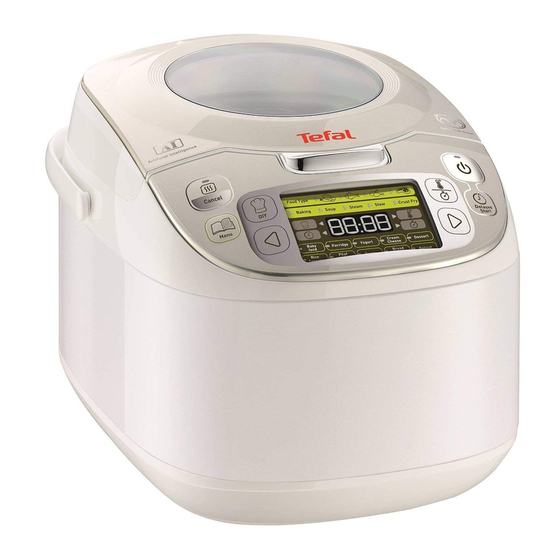
• The bowl and the heating plate should be in direct contact. Any object or food inserted between these two parts would interfere with the correct operation and may damage the appliance. • Do not place the appliance or bowl near a heat source or in a hot oven, as serious damage could result. • Do not put any food or water into the appliance until the bowl is in place. • Respect the levels indicated in the recipes. • Should any part of your appliance catch fire, do not attempt to put it out with water. To smother the flames use a damp teatowel. • Any intervention should only be made by an approved service centre with original spare parts. Protect the environment • Your appliance has been designed to run for many years. However, when you decide to replace it, remember to think about how you can contribute to protecting the environment. - Page 10 CONTROL PANEL DESCRIPTION 1 Lid 13 Function indicators 2 Inner lid a Baking function 3 Removable inner bowl b Soup function 4 Lid opening button c Steam function 5 Handle d Stew function 6 Power cord socket e Crust/Fry function 7 Rice spoon f Baby food function 8 Soup ladle g Porridge function 9 Measuring cup h Yogurt function 10 Steam basket i Cream cheese function 11 Power cord j Dessert function...
- Page 11 BEFORE THE FIRST USE Unpack the appliance • Remove the appliance from the packaging and unpack all the accessories and printed documents. • Open the lid by pushing the opening button on the housing – fig.1. Read the Instructions and carefully follow the operation method. Clean the appliance • Remove the bowl – fig.2, the inner lid and the pressure valve – fig.3a and 3b. • Clean the bowl, the valve and the inner lid with a sponge and washing up liquid. • Wipe the outside of the appliance and the lid with a damp cloth. • Dry off carefully.
- Page 12 Never place your hand on the steam vent during cooking, as there is a danger of burns – fig.10. Whilst cooking, if you wish to change the selected cooking function because of an error, press «“CANCEL” button» key and re-choose the function you want.
- Page 13 MENU KEY • In standby mode the display panel shows ‘----’, press the «Menu» key to cycle through the following functions: Baking Soup Steam Stew Crust/Fry Baby food Porridge Yogurt Cream cheese Dessert Rice/Cereals Pilaf/Risotto Pasta Bread rising Reheat. • The screen displays the default cooking time of each function (except for Rice/Cereals, Pilaf/Risotto). ”Start” button light flickers and the selected function lights up. Note: If you want to cancel the “beep” sound hold the “Menu” button down for 5 seconds.
- Page 14 SOUP FUNCTION • Press «Menu» key to select function «Soup». The screen displays the default cooking time, the “Start” light flashes red. Then press «<» or «>» to select the food type : Vegetables, Fish, Poultry or Meat. • Press «Temperature / Timer» key to select the time setting function and then press «<» and «>» to change the cooking time. • Press «Start» key. The appliance enters into “Soup” mode, the “Start” light stops flashing and the screen displays the remaining cooking time. • At the end of cooking, the appliance will sound three “beeps” and will enter into keep warm mode with the “Cancel/Keep Warm” light illuminated and the screen will display the length of time the appliance has been in keep warm mode.
- Page 15 STEW FUNCTION • Press «Menu» key to select function «Stew». The screen displays the default cooking time, the “Start” light flashes red. Then press «<» or «>» to select the food type : Vegetables, Fish, Poultry or Meat. • Press «Temperature / Timer» key to select the time setting function and then press «<» and «>» to change the cooking time. Press again «Temperature / Timer» to change the temperature by pressing «<» and «>» to alter the cooking temperature to 90°C or 100°C. • Press «Start» key. The appliance enters into “Stew” mode, the “Start” light stops flashing and the screen displays the remaining cooking time. • At the end of cooking, the appliance will sound three “beeps” and will enter into keep warm mode with the “Cancel/Keep Warm” light illuminated and the screen will display the length of time the appliance has been in keep warm mode.
- Page 16 BABY FOOD FUNCTION • This function is to prepare baby food by cooking the food in order to have a suitable texture for young children. • Press «Menu» key to select function «Baby food». The screen displays the default cooking time, and the “Start” light flashes red. • Press «Temperature / Timer» key to select the time setting function and then press «<» and «>» to change the cooking time. • Press «Start» key. The appliance enters into “Baby food” mode, the “Start” light stops flashing and the screen displays the remaining cooking time. • At the end of cooking, the appliance will sound three “beeps” and will enter into keep warm mode with the “Cancel/Keep Warm” light illuminated and the screen will display the length of time the appliance has been in keep warm mode.
- Page 17 YOGURT FUNCTION • Press «Menu» key to select function «Yogurt». The screen displays the default cooking time, and the “Start” light flashes red. • Press «Temperature / Timer» key to select the time setting function and then press «<» and «>» to change the cooking time. • Press «Start» key. The appliance enters into “Yogurt” mode, the “Start” light stops flashing and the screen displays the remaining cooking time. • At the end of the cooking time, the appliance will sound three “beeps” and will return to standby mode. These is no keep warm at the end of the cooking. Use for making yogurt in oven-proof glass containers. TIPS FOR MAKING YOGURT • You can either make a large batch of natural yogurt directly in the bowl (maximum quantity of 1 litre of milk), in a 17-cm diameter soufflé dish or make natural yogurt in individual oven-proof glass containers. The 45in1 bowl fits about four yogurt containers, depending on their size.
- Page 18 • Press the “Start” button. The display will count down in one hourly intervals. • The delayed start function is not available with the “Yogurt” function. • At the end of the cooking time, the appliance will “beep” several times. • There is no keep warm function at the end of the yogurt programme. • Chill the yogurt in the refrigerator for at least 4 hours before serving. Ideally leave for 24 hours. This helps the yogurt to thicken slightly. • Homemade yogurts do not contain the thickeners and stabilisers contained in commercially produced yogurt and are often thinner in consistency. Sometimes homemade yogurt has nutritious clear whey on top which can be stirred back in. For thicker consistency yogurt add skimmed milk powder (see recipes in recipe book).
- Page 19 • Untreated raw milk (farm milk): It is imperative that this type of milk is boiled for a fairly long time and it is dangerous not to do this. After boiling let it cool down to 36°C before using for yogurt making. Using yogurt as a culture starter made from raw farm milk is not recommended.
- Page 20 Fermentation time • Your yogurt will need between 6 and 12 hours of fermentation, depending on the basic ingredients and the result you are after. Fluid Firm Sweet Acidic • Once the yogurt heating process is finished, the yogurt should be cooled completely, covered with a lid or cling film and placed in a refrigerator for at least 4 hours or preferably longer before consuming. • When covered, natural yogurts will keep for a maximum of 7 days in the refrigerator, depending on the freshness of the milk. Yogurts with jam or additional ingredients will keep for up to 3 days. • A clear liquid (whey) may form on top of the yogurt and this is best stirred back in. Alternatively you can pour it off. CREAM/CHEESE FUNCTION • This function is to make soft cheese. Preferably use full cream whole milk (see recipe book for recipes). • Press «Menu» key to select function «Cream cheese». The screen displays the default cooking time “0:40”. The “Start” lights flashes red.
- Page 21 DESSERT FUNCTION • Press «Menu» key to select function «Dessert». The screen displays the default cooking time, the “Start” lights flashes red. • Press «Temperature / Timer» key to select the time setting function and then press «<» and «>» to change the cooking time. Press again «Temperature / Timer» to change the temperature by pressing «<» and «>» to alter the cooking temperature to 100°C, 120°C, 140°C or 160°C. • Press «Start» key. The appliance enters into “Dessert” mode, the “Start” light stops flashing and the screen displays the remaining cooking time. The appliance beeps when it reaches the selected temperature. • There is no Keep Warm at the end of the Dessert programme. RICE/CEREALS FUNCTION • Pour the required quantity of well washed rice into the bowl using the measuring cup provided – fig.8. Then fill with cold water up to the corresponding «CUP» mark on the inside of the bowl – (see cooking guide page 19 and 20) fig.9.
- Page 22 RECOMMENDATIONS FOR BEST RICE COOKING (Rice/ Cereals and Pilaf/Risotto functions) • Before cooking, measure the rice with the measuring cup and rinse the rice, except risotto rice. • Put the rinsed rice into the bowl and distribute evenly around the whole surface of the bowl. Fill with water to the corresponding water cup mark printed on the inside of the bowl (see cooking guide) • The water quantity can be adjusted to cook the rice according to your taste, firm or soft. • When the rice is ready and the “Cancel/Keep Warm” light illuminates, stir the rice and leave it in the appliance on keep warm for a few minutes longer in order to get perfect rice with separated grains. This table below gives a guide to cook rice: COOKING GUIDE FOR WHITE RICE* – 10 cups Measuring cups Weight of white Water level in Serves of white rice rice the bowl (+ rice) 300 g 2 cup mark 3 – 4...
- Page 23 COOKING GUIDE FOR OTHER TYPES OF RICE Measuring Weight Water level in Type of rice Serves cups of rice of rice the bowl (+ rice) Round white 870 g 6 cup mark 7 - 8 rice (Italian rice - often a 1450 g 10 cup mark 10 - 12 stickier rice) 887 g 6 cup mark 7 - 8 Whole grain Brown rice 1480 g 10 cup mark 10 - 12 870 g 6 cup mark 7 - 8 Risotto rice* (Arborio type) 1450 g 10 cup mark 10 - 12 736 g 5 cup mark...
- Page 24 • Press the “Temperature/Timer” key to select the time setting function and press the “<” and “>” to change the pasta cooking time. • Press the “Start” key. The appliance enters into “Pasta” cooking mode, the “Start” light illuminates and the screen displays the remaining cooking time. The appliance heats up the water and when it reaches temperature it “beeps”. • Add the pasta to the water, stir well and close the lid. Press “Start” key again and the timer begins to count down. During pasta cooking, the lid must be closed. • At the end of the cooking, the appliance “beeps” three times. Remove the pasta and drain off the water. Note: There is no keep warm function after the pasta programme. Approximate Weight Water level...
- Page 25 *For ‘al dente’ firmer texture pasta reduce the cooking time by 1 or 2 minutes. For dried regular and wholewheat pasta the cooking time is usually the same as the cooking time stated on the packet. For chilled fresh pasta the cooking time is usually slightly longer than stated on the packet. BREAD RISING FUNCTION • This function is to prove bread dough at 40°C after manually kneading it and before baking it in a conventional oven or in the MultiCook using “Baking” function (see details below). • Press «Menu» key to select function «Bread rising». The screen displays the default cooking time, the “Start” light flashes. • Press «Temperature / Timer» key to select the time setting function and then press «<» and «>» to change the rising time.
- Page 26 REHEAT FUNCTION • This function is intended to reheat cooked food only. Do not use for reheating frozen food. • Press «Menu» key to select function «Reheat». The screen displays the default cooking time, the “Start” flashes. • Press «Temperature / Timer» key to select the time setting function and then press «<» and «>» to change the reheating time. • Press «Start» key. The appliance enters into “Reheat” cooking mode and the “Start” light illuminates and the screen displays the remaining reheating time. • At the end of cooking, the appliance will sound three “beeps” and will enter into keep warm mode with the “Cancel/Keep Warm” light illuminated and the screen with display the length of time the appliance has been in keep warm mode.
- Page 27 1.2 Automatic keep warm: The appliance will “beep” three times and automatically enter the “keep warm” mode at the end of the cooking time (except Yogurt, Cream cheese, Dessert and Pasta functions). The “Cancel/Keep warm” key will illuminate and the screen will display the length of time the appliance has been in keep warm mode. If you want to cancel the automatic keep warm function operating after a cooking programme, before starting the selected cooking programme hold down the “Cancel”...
- Page 28 Note: • Certain cooking programmes are defined as fully automatic and the temperature and/or cooking time cannot be adjusted. • When using the DIY function your appliance memorises the last temperature and cooking time for the next use. • To protect the appliance there is a temperature/time setting restriction on DIY function: Between 40-100ºC, the cooking time range is 1 min –...
- Page 29 ON COMPLETION OF COOKING • Open the lid – fig.1. • When removing the cooking bowl or steam basket always use oven gloves. • Serve the food using the spoon provided with your appliance and reclose the lid. • 24 hours is the maximum keep warm time. • Press «Cance/Keep Warm» key to finish keep warm status. • Unplug the appliance. MISCELLANEOUS INFORMATION • The appliance has a memory function. In case of power failure, the appliance will memorise the cooking state right before the failure, and it will continue the cooking process if the power is resumed within...
- Page 30 Taking care of the bowl For the bowl, carefully follow the instructions below: • Do not cut food in the cooking bowl. • Make sure you put the bowl back into the appliance after each use. • Use the spoon provided or a wooden spoon and not a metal one to avoid damaging the bowl surface – fig.14. • To avoid any risk of corrosion, do not pour vinegar into the bowl. • The colour of the bowl surface may change after using for the first time or after longer use. This change in colour is due to the action of steam and water and does not have any effect on the use of the appliance, nor it is dangerous for your health, it is perfectly safe to continue using it.
- Page 31 TECHNICAL TROUBLESHOOTING GUIDE Problem Causes Solutions Control panel Check the power cord is Appliance not lights off and no plugged in the socket and plugged in. heating. on at the Mains. Problem with the Control panel connection of the Send to authorised lights off and indicator light or service centre for repair. heating. indicator light is damaged. Open and close the lid Lid is badly closed. again. Stop cooking and unplug the appliance. Check Micro pressure valve the valve is assembled Steam leakage not well positioned or correctly (two parts during using assembled incorrectly. locked together) and well positioned in it’s seating. Lid or micro pressure Send to authorised valve gasket is service centre for repair.
- Page 32 Problem Causes Solutions Read the section”Keep Automatic warm” in the instructions. keep warm The keep warm The automatic keep fails (no keep program has warm does not operate warm mode accidentally been with functions Yogurt, after cooking cancelled by the user Cream cheese, Dessert program or when setting the and Pasta. product stays appliance (see section If the problem persists on cooking “Keep Warm” page 24) send to an authorised program). service centre for repair. Temperature sensor on Send to an authorised lid is damaged service centre Stop the appliance and restart the program. Temperature sensor If the problem continues, under the bowl is please send to the damaged authorised service centre for repair.
- Page 33 TEFAL/T-FAL INTERNATIONAL GUARANTEE : COUNTRY LIST ﺍﻟﺟﺯﺍﺋﺭ ﻭﺍﺣﺩﺓ ﺳﻧﺔ )0)41 28 18 53 www.tefal-me.com ALGERIA 1 year GROUPE SEB ARGENTINA S.A. 2 años Billinghurst 1833 3° 0800-122-2732 ARGENTINA C1425DTK 2 years Capital Federal Buenos Aires ՓԲԸ "Գրուպպա ՍԵԲ", ՀԱՅԱՍՏԱՆ...
- Page 34 09 622 94 20 Kutojantie 7, 02630 Espoo FINLAND 2 years FRANCE GROUPE SEB France 1 an Continentale + Service Consommateur Tefal 09 74 50 47 74 112 Ch. Moulin Carron, TSA 92002 1 year Guadeloupe, Martinique, 69134 ECULLY Cedex Réunion, Saint-Martin...
- Page 35 한국어 1588-1588 1 year 서울시 종로구 청계천로 35 서린빌딩 KOREA 2 층 110-790 ﺍﻟﻛﻭﻳﺕ ﻭﺍﺣﺩﺓ ﺳﻧﺔ 24831000 www.tefal-me.com 1 year KUWAIT GROUPE SEB POLSKA Sp. z o.o. LATVJA 2 gadi 6 616 3403 ul. Bukowińska 22b, 02-703 LATVIA 2 years Warszawa ﻟﺑﻧﺎﻥ...
- Page 36 C/ Almogàvers, 119-123, Complejo SPAIN 2 years Ecourban, 08018 Barcelona 115400400 SRI LANKA 1 year www.tefal-me.com TEFAL SVERIGE SUBSIDIARY OF SVERIGE 2 år GROUPE SEB NORDIC 08 594 213 30 Truckvägen 14 A, 194 52 Upplands SWEDEN 2 years Väsby...
- Page 37 Beybi Giz Plaza Dereboyu Cad. TURKEY 2 years Meydan Sok., No: 28 K.12 Maslak ﻭﺍﺣﺩﺓ ﺳﻧﺔ ﺍﻻﻣﺎﺭﺍﺕ ﺍﻟﻌﺭﺑﻳﺔ ﺍﻟﻣﺗﺣﺩﺓ 8002272 www.tefal-me.com 1 year GROUPE SEB USA 800-395-8325 U.S.A. 1 year 2121 Eden Road, Millville, NJ 08332 ТОВ «Груп СЕБ Україна»...
- Page 38 TEFAL/T-FAL INTERNATIONAL GUARANTEE Date of purchase: ....../ Date d'achat / Fecha de compra / Data da compra / Data d'acquisto / Kaufdatum / Aankoopdatum / Købsdato / Inköpsdatum / Kjøpsdato /...
- Page 39 p. 1 – 29 p. 30 – 54 NC00127858...
Need help?
Do you have a question about the MultiCook Advanced 45 in 1 and is the answer not in the manual?
Questions and answers
как переключится с функции жарки на тушение