Datavideo DAC-60 Instruction Manual
Hd/sd-sdi to vga converter
Hide thumbs
Also See for DAC-60:
- Quick start manual (17 pages) ,
- Instruction manual (16 pages) ,
- Quick start manual (17 pages)
Table of Contents
Advertisement
Quick Links
Advertisement
Table of Contents

Related Manuals for Datavideo DAC-60


Summary of Contents for Datavideo DAC-60
-
Page 2: Table Of Contents
2. SYSTEM SETUP ..............10 3. MODE SELECTION ............. 11 VGA O ............... 11 UTPUT ORMAT TV S ............... 11 CREEN ODES 4. DAC-60 CENTER UTILITY ............ 14 ............... 14 NFORMATION ISPLAY ................15 IDEO ETTING ............... 15 ICTURE ETTING ........... - Page 3 Disclaimer of Product & Services The information offered in this instruction manual is intended as a guide only. At all times, Datavideo Technologies will try to give correct, complete and suitable information. However, Datavideo Technologies cannot exclude that some information in this manual, from time to time, may not be correct or may be incomplete.
-
Page 4: Fcc Compliance Statement
AC adapter. If you are not sure of the type of power available, consult your Datavideo dealer or your local power company. Do not allow anything to rest on the power cord. Do not locate this unit where the power cord will be walked on, rolled over, or otherwise stressed. -
Page 5: Warranty
Certain parts with limited lifetime expectancy such as LCD Panels, DVD Drives, Hard Drives are only covered for the first 10,000 hours, or 1 year (whichever comes first). Any second year warranty claims must be made to your local Datavideo office or one of its authorized Distributors before the extended warranty expires. -
Page 6: Disposal
Disposal For EU Customers only - WEEE Marking This symbol on the product or on its packaging indicates that this product must not be disposed of with your other household waste. Instead, it is your responsibility to dispose of your waste equipment by handing it over to a designated collection point for the recycling of waste electrical and electronic equipment. -
Page 7: Connections And Controls
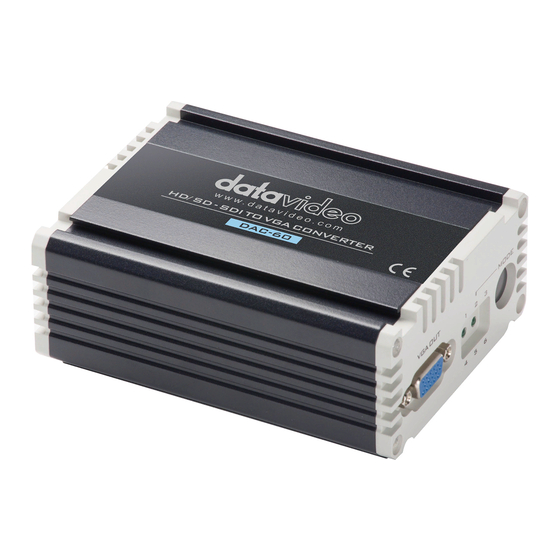
1. Connections and Controls Front Panel HD/SD - SDI Input & Output (bypass) SDI provides video signals for professional applications and allows long distance signal transmission. Left BNC connector: HD/SD-SDI Input Right BNC connector: Loop Thru Output Power Switch Switches the power On / Off. -
Page 8: Rear Panel
DC In Socket Connects the supplied 12V PSU to this socket. The connection can be secured by screwing the outer fastening ring of the DC In plug to the socket. Connects to PC for Firmware Upgrade; please see the Firmware Upgrade section for details. - Page 9 The LEDs display the VGA output format; please see Mode Selection section for details of the LED display. Mode Select Press to select VGA Output Format (Please see the Mode Selection section for more details). Press and hold the MODE button for 3 seconds to enter TV SCREEN MODE, and then press this button again to switch screen ratio mode.
-
Page 10: System Setup
3. Connect a VGA display to the VGA port. 4. Connect an optional SDI device to the SDI BNC output connector. 5. Connect the +12V DC power adapter to the converter. 6. Turn on the DAC-60 Converter power switch to start displaying the video on the VGA display. -
Page 11: Mode Selection
VGA output formats and aspect ratios. VGA Output Format The DAC-60 provides the user with nine VGA output format presets as listed in the table below. The presets can be selected by pressing the MODE button. Resolution LED Indication ●○○... - Page 12 Given that the source is 1920x1080 (16:9), the pictures below provide an illustration as to how the video source will be displayed in different TV Screen modes if the output format is set to 800x600 (4:3). Source = 1920x1080 (16:9) Full Screen Mode Source = 1920x1080 (16:9) Output = 800x600 (4:3)
- Page 13 Dot by Dot Mode Source = 1920 x 1080 (16:9) Output = 800 x 600 (4:3) Optimal Ratio Mode Source = 1920 x 1080 (16:9) Output = 800 x 600 (4:3)
-
Page 14: Dac-60 Center Utility
4. DAC-60 Center Utility The DAC-60 Center Utility allows the user to set the output format as well as image parameters such as brightness, contrast, hue and saturation. To use the utility, please first copy the DAC-60 Center.exe utility software from the supplied CD to your Windows computer. -
Page 15: Video Setting
Video Setting Click on the Video tab to enter the video setup. • Set the aspect ratio and output format then click Apply. • Picture Setting Click the Proc AMP tab to adjust the picture settings. • • Set the Brightness, Contrast, Hue and Saturation values. -
Page 16: Restore To Factory Defaults
Restore to Factory Defaults Click the Setting tab to access the restore factory defaults window. • Set the OSD Hide Function Enable/ Disable. • Click the Factory Default button to reset the DAC-60 to factory defaults. •... -
Page 18: Firmware Upgrade
5. Firmware Upgrade Firmware is upgradable in the field using the integrated USB port. Step 1 – Connect the DAC-60 to the PC using a USB cable. Connect the supplied 12V PSU to DC IN socket and turn off the power. - Page 19 Step 6 – Close the “Datavideo Upload Firmware” program Note: The latest Firmware updates and Software applications for the DAC- 60 can be obtained from your local Datavideo office or dealer. A list of regional Datavideo offices is provided at the rear of this manual.
-
Page 20: Specifications
6. Specifications 720 x 480 i / 720 x 576 i 1280 x 720 50p/60p/59.94p Supported Input Video 1920 x 1080 50i/60i/59.94i Formats 1920 x 1080 24p/25p/30p 1920 x 1080 50p/60p/59.94p SD-SDI (SMPTE 259M) SDI Formats HD-SDI (SMPTE 292M) 3G-SDI (SMPTE 494M/495M) 800 x 600 1024 x 768 (XGA projector) 1280 x 800 (WXGA projector) -
Page 21: Service And Support
Service and Support...
Need help?
Do you have a question about the DAC-60 and is the answer not in the manual?
Questions and answers