Advertisement
Quick Links
HermanMiller
™
Renew
Table Installation
Base product number (DU)
Y
How to assemble
your table
Illustrations and specifi cations are based on the latest product information available at the time of publication.
The right is reserved to make changes in design and specifi cations at any time, without notice, and also to discontinue
products.
For more information about our products and services or to see a list of dealers,
For assistance: Please visit us at www.hermanmiller.com/product-instructions or call 888-443-4357
© 2015 Herman Miller, Inc., Zeeland, Michigan Printed in U.S.A. Part No. 1bc4vh - E.
TM
Renew is among the trademarks of Herman Miller, Inc.
Notice:
Some of the parts have been wrapped to protect them during shipping. Remove the plastic
wrap before assembling the table.
Assemble products on a protective surface.
Tools Required
Philips-Recess Bit
Power Driver
Size: #2
Use extension bit if required, Magnetic bits are recommended.
Not all tools are used on all tables.
IMPORTANT SAFETY INSTRUCTIONS
When using an electrical furnishing, basic precautions should always be followed, including
the following:
Read all instructions before using this furnishing.
DANGER
- To reduce the risk of electric shock always unplug this furnishing from the
electrical outlet before cleaning.
WARNING
- To reduce the risk of burns, fi re, electric shock, or injury to persons:
Close supervision is necessary when this furnishing is used by, or near children, invalids, or
disabled persons.
Sitting or standing on product may cause risk of personal injury (use for chairs, tables
consider obvious misuse of product).
Use this furnishing only for its intended use as described in these instructions. Do not use
attachments not recommended by the manufacturer.
Never operate this furnishing if it has a damaged cord or plug, if it is not working properly, if
it has been dropped or damaged, or dropped into water. Return the furnishing to a service
center for examination and repair.
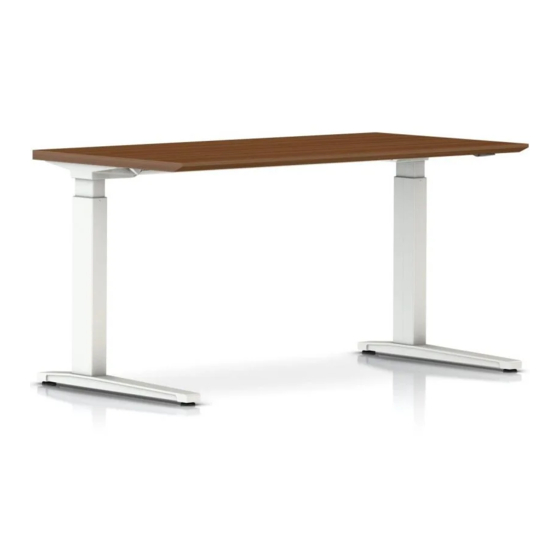
HermanMiller Renew
TM
Table (Height Adjustable - Electrical)
Hex/Allen
Square-Recess Bit
Wrench Size:
Size: #2
5mm and
8mm
SAVE THESE INSTRUCTIONS
Parts Included
AD
Logic Unit
AE
Clamp
AF
Screw
B
C
Leg
G
C Leg Foot
N
Machine
M
Screw
Torx Bit
Hardware Kit
Size: T30
T
Lock Washer
Note: Not all the parts shown above are applicable for all the tables.
Failure to fully tighten screws (bolts) may cause injury by causing Renew tables to collapse.
Tighten screws (bolts) until they stop plus a quarter turn.
Periodically check to make sure legs are properly aligned. Failure to do so may cause risk of
personal injury.
If using power drive set on low torque.
Keep the cord away from heated surfaces.
Never drop or insert any object into any opening.
Do not use outdoors.
Do not operate where aerosol (spray) products are being used or where oxygen is being
administered.
This furnishing is intended for commercial use
control box rating: 4.8A, 120V
Max FPDU rating: 15A, 120V
Duty cycle: 1min on, 18min off
1
90° Work Surface
Extended Corner Work Surface
Oval Work Surface
Leg with
Extended
AA
D
Peg
Hidden Power
Corner Leg
Foot
Assembly
J
H
Wire Cover
Cable Collector
Tapping Hex
P
R
S
Glide
Head Screw
W
X
V
Fastener
Tapping Screw
Socket
120° Work Surface
Rectangular Work Surface
A
Work Surface Options
E
F
Support Rail
T Leg Foot
K
Switch
L
Retainer Kit
Separates user power
cables from table
power cables
AB
AC
Tapping Screw
Cable Clamp
Velcro
Y
Button Head
Z
Screw
Control Box
Part no. 1bc4vh rev F
Assembly Instructions
Advertisement

Related Manuals for HermanMiller renew


Summary of Contents for HermanMiller renew
-
Page 1: Important Safety Instructions
IMPORTANT SAFETY INSTRUCTIONS When using an electrical furnishing, basic precautions should always be followed, including Failure to fully tighten screws (bolts) may cause injury by causing Renew tables to collapse. the following: Tighten screws (bolts) until they stop plus a quarter turn. -
Page 2: Grounding Instructions
2.1 For C-leg fi nd the qty(4) pre-drilled holes located on more towards back of the work surface. For T-leg use the center pre-drilled holes. 2.2 Ensure switch cable is properly positioned under top casting. Part no. 1bc4vh rev E. HermanMiller Renew Table (Height Adjustable - Electrical) Assembly Instructions... - Page 3 (User/Front edge side) and screw it down to the Work Surface (A) with Tapping Screws (W). 4.2 Switch cable should go through rail cable tie hole as shown. Rear edge side User/Front edge side Part no. 1bc4vh rev E. HermanMiller Renew Table (Height Adjustable - Electrical) Assembly Instructions...
- Page 4 Install the fi rst clip 6” from the control box, then every 18” along the cord. Note: Use of the Velcro provided will make the control box removable without tools. Part no. 1bc4vh rev E. HermanMiller Renew Table (Height Adjustable - Electrical) Assembly Instructions...
- Page 5 Conn. 4 Conn. 3 Conn. 4 6a.5 Plug Conn. 3 into the control box installed in step 6 6a.6 Plug Conn. 4 into any receptacle on Y1425 Part no. 1bc4vh rev E. HermanMiller Renew Table (Height Adjustable - Electrical) Assembly Instructions...
- Page 6 High Density Cable Trough Installation 8.1 Install qty (2) Grommets into Cable Collector. 8.2 Install qty (2) clips into corners of Cable Collector. Discard remaining 2 clips. Part no. 1bc4vh rev E. HermanMiller Renew Table (Height Adjustable - Electrical) Assembly Instructions...
- Page 7 To disengage control box from table either lower the HD wire tray, or use fi nger access hole provided in the standard wire cover to remove cable management, then pull control box from underside of work surface. Part no. 1bc4vh rev E. HermanMiller Renew Table (Height Adjustable - Electrical) Assembly Instructions...
Need help?
Do you have a question about the renew and is the answer not in the manual?
Questions and answers