Advertisement
Quick Links
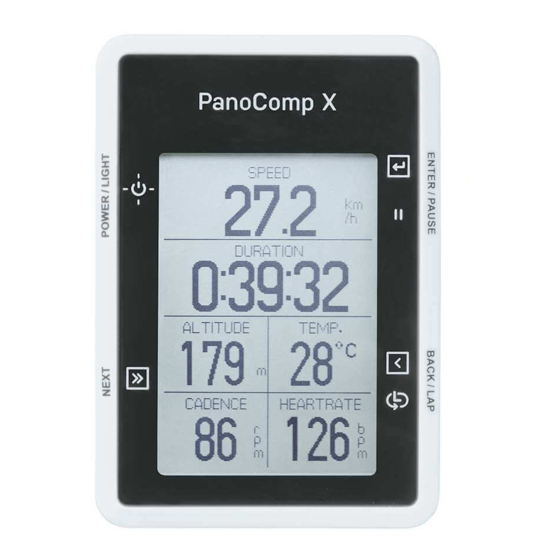
PANOCOMP X WIRELESS
Speed
Current Speed
Average Speed
Max Speed
Distance
Trip Distance
Odometer
Time
Ride Time
Total Time
12/24 hr Clock
Timer
Cadence
Current Cadence
Average Cadence
Max Cadence
Heart Rate
Current Heart Rate
Average Heart Rate
Max Heart Rate
Heart Rate Max Limit Alarm
Other
Customize Display
Temperature
Grade
Altitude (Barometer)
Calories
Training
Remote Display
Backlight
Incoming Call Alert
Export ride data to Strava
Auto Pause
Battery Indicator
User's Guide
EN
Advertisement

Related Manuals for Topeak PANOCOMP X


Summary of Contents for Topeak PANOCOMP X
- Page 1 PANOCOMP X WIRELESS User’s Guide Speed Heart Rate Current Speed Current Heart Rate Average Speed Average Heart Rate Max Speed Max Heart Rate Heart Rate Max Limit Alarm Distance Other Trip Distance Odometer Customize Display Temperature Time Grade Ride Time...
- Page 2 33°c 21:30 Let’s Ride PanoComp X Mount (Fits ø 31.8 mm handlebars only). KEYS Press to turn the computer on. Press and hold for 2 sec to turn off. Press to switch on/off the backlight. Select to view the setup menu.
- Page 3 1. Start PanoComp X Setting in PanoBike+ app or in PanoComp X, see section 3.3 on how to pair PanoBike+ app to PanoComp X. 1.1 Settings from PanoBike+ app : • Debut screen > Select language > transfer profile from PanoBike+ app. >...
- Page 4 (iOS device) Enter pairing code displayed on PanoComp X into smartphone. (Android device) Enable location function before pairing PanoComp X with PanoBike+ app. • After pairing is complete, PanoComp X will return to the Let's Ride screen. NOTE If PanoBike+ app pairing is skipped at PanoComp X start screen, after profile...
- Page 5 Cycle between Metric and Imperial, confirm selection. 8. Set Height: Repeat sequence to complete height setting. 9. Weight : Repeat sequence to complete weight information. 2. Start Ride • Press POWER to turn on PanoComp X. • Select the riding mode.
- Page 6 2.1 Three user customizable screens. Screen 1 Screen 2 Screen 3 NOTE To modify your customizable screens, see Section 3.1.1 "Customizing the Data Pages" for more information. 2.2 Pause • If Auto Pause is set to off, press PAUSE when you want to suspend recording your ride.
- Page 7 2.2-1 “Save Ride” If you select Save Ride, a summary of your ride will be displayed and the ride data will be saved. Press any button to return to the Let's Ride screen. 2.2-2 “Discard Ride” If you select Discard Ride, your ride data will be deleted and cannot be retrieved.
- Page 8 3. Setting Your PanoComp X Ride Settings 3.5 Profile 1. Customize Display 1. Gender 2. Auto Pause 2. Height 3. Back Light 3. Weight 4. Lap 4. Birth Year 3.2 Connect Sensor 5. Max.Heart Rate 1. Find Additional Sensors 3.6 System 3.3 Bluetooth...
- Page 9 3.1.1.2 Data field • Press NEXT to choose number of fields to display on customized page. • 3 to 8 fields can be selected. • Press ENTER to confirm number of fields to display. 3.1.1.3 Select and customize each data field 19 different data metrics.
- Page 10 3.1.2 Auto Pause When Auto Pause is engaged, PanoComp X will automatically pause timer when bike stops. Timer will restart once movement is detected. • Settings > Ride Settings > Auto Pause > On / Off. • Press NEXT to cycle between options.
- Page 11 3.1.4 Lap Switch on auto lap function, PanoComp X will put a lap mark by setting distance automatically, which helps riders to compare and analyze performance. • Settings > Ride Settings > Lap > Manual / Auto 10 km / Auto 5 km.
- Page 12 3.2.1.2 Set wheel size DETERMINE WHEEL CIRCUMFERENCE METHOD A) measure wheel circumference. Access wheel size settings screen: Wheel Settings > Circumference = mm x 3.14 Connect Sensor > (Sensor Name) > Set Wheel Size. • Press NEXT to cycle digits. •...
- Page 13 3.2.2 Connect with heart rate sensor • Moisten the belt contacts and wear to connect heart rate sensor. Distance between sensor and PanoComp X should be less than 1m(3ft) when pairing. • Connect sensor > additional sensor > select the device.
- Page 14 • Turn on PanoBike+ app, tap the "Sensors" ( ) icon, tap the "+" symbol to start the pairing process. • Smartphone: (iOS device) Enter pairing code displayed on PanoComp X into smartphone. (Android device) Enable location function before pairing PanoComp X with PanoBike+ app.
- Page 15 • Settings > Bluetooth > Notification > On or Off. 3.3.3 Repair PanoBike+ app • If PanoComp X is connected to Phone A, delete its connection with PanoBike+ app, then repair with new connection to Phone B. Delete the connection between PanoComp X & smartphone •...
- Page 16 PanoComp X: Settings > Bluetooth > Forget Device. • Smartphone: (Android device) From system settings, delete PanoComp X connection with Bluetooth. (iOS device) Settings > Bluetooth > PanoComp X > Forget Device. PanoBike+: SENSORS > PanoComp X > DELETE SENSOR.
- Page 17 3.4 Tones • Settings > Tones > Key Tones / Warning Tones. • Sub menu selections On / Off. 1. Key Tones : On / Off. 2. Warning Tones : • Max. Heart Rate • Max. Cadence • Min. Cadence •...
- Page 18 4. Barometer : Calibrate: Key in altitude manually. Auto Calibrate : The system will calibrate automatically. 5. Factory Reset : Select to delete all records and reset settings in PanoComp X to factory defaults. 6. Version : Check the current version.
-
Page 19: Important Note
• DISTANCE/(UNITS) • DURATION • CALORIES BURNED IMPORTANT NOTE PanoComp X can store up to 100hrs of ride data. When memory is nearly full, an alert screen "Memory is Full" will display. When data exceeds memory capacity, ALL ride data will be automatically erased. To... - Page 20 4.2 Rides • Individual Rides Press NEXT to scroll through individual rides. Press ENTER to select ride. • Summary - Check all data for single record Press ENTER to display detail information. Press NEXT to scroll through screens. • LAP: Detailed Lap Information •...
- Page 21 Heart Rate zone using manual PanoBike+ app > Settings > Zones > Heart Rate Zones. Zone5 - 95~100% You should only train in this zone if you are very fit, and only for very short periods of time. Lactic acid develops quickly as you are operating in oxygen debt to the muscles.
- Page 22 4.3 Ride Archive Number of rides archived (1000 maximum). NOTE: If maximum number of rides has been reached, the oldest record will be overwritten. You can also delete unwanted ride information to free up archive space. 4.4 Delete Data 4.4.1 Trip Press NEXT to scroll through individual rides.
- Page 23 5. Set Goal Setting a ride goal will show a percentage of goal in a bar graph on PanoComp X screen during ride. 5.1 Set Duration 5.2 Set Distance 5.3 Set Calories "Set Goal" "Main Goal" screen. screen. Press NEXT to access other...
- Page 24 (1 - 999) you want to ride as a goal. When the distance is reached, an alert screen with ride summary will display on the PanoComp X screen for 4 seconds and continue to record your activity until you press ENTER to pause the ride recording.
- Page 25 fitness device. NOTE: • Distance between sensors and PanoComp X should not exceed 1m(3ft) when pairing. • Before pairing PanoBike+ app to PanoComp X, turn on “Bluetooth” in “Settings” on smartphone. • Select Settings > Select system : iOS or Android •...
- Page 26 Strava and share it on Facebook, and the Dual Mode Technology allows you to use either your smartphone during your ride, or use a compatible PanoComp X bike computer during your ride and sync your phone afterwards to upload and analyze your ride data.
- Page 27 7. How to update PanoComp X firmware PanoComp X will indicate if a firmware update is available. Follow the on-screen instructions to update the firmware to ensure PanoComp X functions properly. 7.1 Connection to PanoBike+ app (FIRMWARE UPDATE) 1. PanoComp X must be paired with PanoBike+ app (See Section 3.3 for more information).
- Page 28 PanoComp X must display one of the four main screens to upload ride data to the PanoBike+ app. 9. Remote monitor mode When PanoComp X is paired with the PanoBike+ app and you start recording your ride with the app, the PanoComp X screen will change to remote monitor mode automatically allowing you to save your smartphone battery.
- Page 29 PanoComp X returns to the main screen automatically. 9.1.4 If the PanoBike+ app is disconnected from PanoComp X during a ride, a "Disconnected" alert screen is displayed on PanoComp X. Press any button to return to the main screen.
-
Page 30: Battery Charging
USB power bank. Standard charging time hr (approx) ATTENTION 1. PanoComp X can be charged while riding by using a portable USB power bank. 2. Automatic Shutdown: PanoComp X will automatically shutdown after 10mins if no ride activity is detected in these modes: Let's Ride, Set Goal and Remote Monitor. -
Page 31: Fcc Information
FCC INFORMATION This device complies with Part 15 of the FCC Rules. Operation is subject to the following two conditions: 1. This device may not cause harmful interference. 2. This device must accept any interference received, including interference that may cause undesired operation. Note: This equipment has been tested and found to comply with the limits for a Class B digital device, pursuant to part 15 of the FCC Rules. -
Page 32: Warranty
* The specifications and design are subject to change without notice. Please contact your Topeak dealer with any questions. For USA customer service call : 1-800-250-3068 www.topeak.com * Bluetooth®...
Need help?
Do you have a question about the PANOCOMP X and is the answer not in the manual?
Questions and answers