Table of Contents
Advertisement
Quick Links
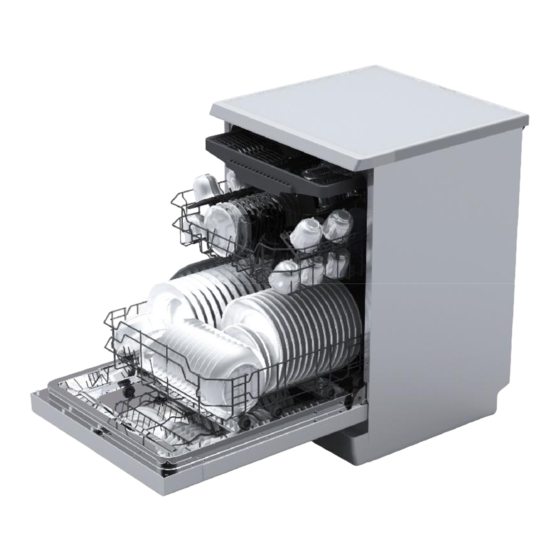
Dish Washer
MDWFS014LSO
OWNER'S MANUAL
Inside you will find many helpful hints on how to use and maintain
Dish Washer cooler properly. Just a little preventive care on your part
can save you a great deal of time and money over the life of your
Dish Washer
. You will find many answers to common problems in the
"
Frequently asked questions . If you read this section you may not
"
need to call for service.
Advertisement
Table of Contents

Related Manuals for Midea MDWFS014LSO


Summary of Contents for Midea MDWFS014LSO
- Page 1 Dish Washer MDWFS014LSO OWNER'S MANUAL Inside you will find many helpful hints on how to use and maintain Dish Washer cooler properly. Just a little preventive care on your part can save you a great deal of time and money over the life of your Dish Washer .
- Page 2 Dea r Cu stomer, Control Panel...........6 Ple ase care fully rea d this manual bef ore using the Dishw asher Feat ures........6 dishwasher, it will help you to use and maintain the dishwasher properly. Keep it to refer to it at a later date. Pass it on to any sub sequent owner of the applianc e.
- Page 3 When using your dishwasher, follow the precautions listed below: This appliance is intended to be used in household and similar applications such as: -staff kitchen areas in shops, offices and other working environments; -farm houses; -by clients in hotels, motels and other residential type environments;...
- Page 4 This appliance must be earthed. In the event of a malfunction or breakdown, earthing will reduce the risk of an electric shock by providing a path of least resistance of electric current. This appliance is equipped with a cord having an equipment-earthing conductor and a grounding plug.
- Page 5 2) Warning: Knives and other utensils with sharp points must be loaded in the basket with their points down or placed in a horizontal position. Check that the detergent powder is empty after completion of the wash cycle. Do not wash plastic items unless they are marked dishwasher safe or the equivalent.
- Page 6 Dispose of the dishwasher packaging material correctly. All packaging materials can be recycled. Plastic parts are marked with the standard international abbreviations: for polyethylene, e.g. sheet wrapping material for polystyrene, e.g. padding material POM polyoxymethylene, e.g. plastic clips polypropylene, e.g. Salt filler Acrylonitrile Butadiene Styrene, e.g.
- Page 7 For detailed operating method read the corresponding conte nt on the instruction manual. Switch on the appliance Press the Power switch button to switch on the appliance, Open the door. With each wash cycle. Compartment Fill the detergent dispenser For programs with pre-wash only. (Follow the user instructions!) Check the rinse aid level Electric indicator on control panel (if provided).
- Page 8 To get the best perform ance from your dishwasher, read all operating instructions before using it for the first tim e. 1. On/Off Button: to switch O n/O ff the a ppliance; 6.Start /Pause button: To start the selected washing Child lock function: press Delay button and Half-load program or pause the washing program when th e bu tton simultaneousl y to lock the pro gram;...
-
Page 9: Adjusting Salt Consumption
Before using you r dishwasher for the first time : Set the water softener Add 1.5Kg dishw asher salt an d then full fill the salt con tainer with w ater Fill the rinse aid dispenser Fill in detergent The water softener must be set m anually, using the water hard ness dial. The water softener is des igned to rem ove minerals and salts from the water, which would have a detrim ental or adverse effect on the operation of the app liance. -
Page 10: Rinse Aid Dispenser
Always u se the salt intended for use with dishwasher. The salt co ntain er is located beneath the lowe r basket and sh ould be filled as explained in t he foll owing: Attention! Only use salt spe cif ically desi gne d for t he use i n d ishw ashers! Every other type of salt n ot speci fically d esig ned fo r the u se in a d ishwa sher, espe cially tab le salt, will damage the w ater sof tene r. -
Page 11: When To Refill The Rinse Aid Dispenser
When to Refill the Rinse Aid Dispenser If there is no rinse-aid warning ligh t in the c ontrol panel, you can est imate the am ount from the colour " " of the optical level indicator C located ne xt to the cap. When th e rinse-aid c ontainer is full, the whole indicator will be dark .As the rinse -aid diminishes, the size of the dark dot de creases. -
Page 12: Concentrated Detergent
Detergents There are 3 sorts of d etergents 1.With phosphate and with ch lorine 2.With phosphate and without chlorine 3.Withou t phosphate and without chlorine Normally new pulverised detergent is with out phosphate. T hus the water softener fu nction of phospha te is not given. -
Page 13: Fill In Detergent
Fill in Detergent Fill the detergent dispenser w ith detergen t. The marking indicates the dosing levels , as illustrate d on the righ t: The pla ce o f main wash cycle de terg ent placed. The pla ce o f pre-wa sh cycle deterge nt placed. Plea se o bserve the m anufact urers do sing and storage Recomm endations as stated on the detergent pac kagi ng. - Page 14 Consider buying utensils which are identified as dishwasher-proof. Use a mild detergent that is described as 'kind to dishes'. If necessary, seek further information from the detergent manufacturers. For particular items, select a program w ith as low a temperature as possible. To prevent damage, do not take gla ss a nd c utlery out of the dishwasher immediately after the program has ended.
-
Page 15: Adjusting The Upper Basket
The u pper basket is designed to hold m ore delicate We suggest that you place large items and the most and lighter dishware such as glasses, coffee and di fficult to clea n ite ms are to be placed into the lo wer tea cups and saucers, as well as plates, sm all bowls basket: su ch a s pots, pans, lids, se rving dishes and and shallow pans (as long as they are not too dirty). - Page 16 Means : need to fill rinse into the Rinse-Aid Dispenser. ℃ Pre-wash (45 ) Auto Auto sensing wash, lightly, ℃ Autowas h(45-55 ) 5/30g norm ally or heavily soiled 10~15 Rinse 0.9~1.5 3i n1 crockery, with or with out ℃ Rinse (65 ) dried-on food Drying...
-
Page 17: Unloading The Dishwasher
When you press the Start/Pause button to pause during washing, the running indicator will stop blinking and the dishwasher will mooing every minute unless you press the Start/Pause button to start. Premise: A cycle that is underway can on ly be modified if it has only been running for a short time. Otherwise, the detergent may have already be en released, a nd the appliance may have already drained the wash water. -
Page 18: Filter Assembly
The filter prevents larger remnants of food or other objects from getting inside th e pump. The residues may block the filter, in this case they must be rem oved . The filter system consists of a coarse filter,a flat (Main filter) A nd a microfilter(Fine filter). -
Page 19: Cleaning The Filter
Remarks: - Inspect the filters for blo cking a fter e very time the dishwa sher has been used. - By unscrew ing the coarse filter, you can rem ove the filter system . Re move any foo d remna nts and clean the filters under running water. - Page 20 After Every Wash When not in Use for a L ongTime It is recommend that you run a was h cy cle with the After every wash, turn off the water supply to the dishwasher empty an d the n remove the plug from the appliance and leave the door slightly op en so that sock et, turn off the wa ter supp ly and leave the door of m oisture and odours are not tra pped inside.
- Page 21 C onnect the cold water supply hose to a threaded 3/4(inch) connector and make sure that it is fastened tightly in place. If the water pipes are new or have not been used for an extended period of time, let the w ater run to make sure that the water is clear.
-
Page 22: Water Outlet
How to Drain Excess Water From Hoses If the sink is 1000 higher from the floor, the excess water in hoses cann ot be drained dire ctly into the sink. It will be necessary to drain excess w ater from hoses into a bo wl o r suitable containe r that is held outside and lower th an the sink. - Page 23 Fuse blown, or the Replace fuse or reset circuit breaker. Remove any other circuit breaker acted appliances sharing the same circuit with the dishwasher Power supply is not Make sure the dishwasher is turned on and the door is closed securely. turned on Make sure the power cord is properly plugged into the wall socket.
- Page 24 The dishes were not See notes in " Loading the Dishwasher Baskets ". loaded correctly. The program was Select a more intensive program. not powerful enough. See" Wash Cycle Table . " Not enough detergent Use more detergent, or change your detergent. was dispensed.
- Page 25 Height : 845mm Width : 598 mm Depth : 610mm with th e door closed Water pressure: 0.04-1.0MPa Power supply: see rating label Capacity: 14 place settings...
- Page 27 Cutlery basket could be have 5 positions: M ode 1 Position one: lift the left basket up, both left and right baskets are sideling. Mode 2 Position two: adjust the left basket to lower position, left basket is flat and right basket is sideling. Mode 3 Position three: lift the right basket up, both left and right baskets are flat.
- Page 28 E-WASTE MANAGEMENT GUIDELINES PROPER HANDLING AND/OR RECYCLING OF THE DISH WASHER Under the E-Waste (Management & Handling) Rules, 2011 (hereafter referred to as the “E-Waste Rules”), it is incumbent for all consumers, including the purchaser of this dish washer, to properly recycle and dispose of all electrical and electronic equipment through authorized recyclers.
- Page 29 Product Warranty Terms & Conditions (Dishwasher) CARRIER MIDEA INDIA PRIVATE LIMITED (hereinafter referred to as the "Company"), hereby warrants to the original domestic purchaser (here in after called the "Purchaser") of the product (as detailed within the Warranty Registration Card and here in after referred to as the "said unit") that the said unit is free from defects in materials...
- Page 30 iii. Noise or vibration that is considered normal for product operations like warning beeps, water shower sound, utensil sound etc. iv. Correcting the installation, for example leveling the product, adjustment of inlet tap/drain hose etc v. Normal maintenance which is recommended by the user’s manual vi.
- Page 31 Address: Product Name: Model No : Sr. No of the unit : Dealer Name & Address: Signature of the dealer with seal: Carrier Midea India Pvt. Ltd. Customer Copy Invoice No. : Date of Purchase: Customer Name: Address: Product Name: Model No : Sr.
Need help?
Do you have a question about the MDWFS014LSO and is the answer not in the manual?
Questions and answers