Advertisement
Quick Links
Advertisement

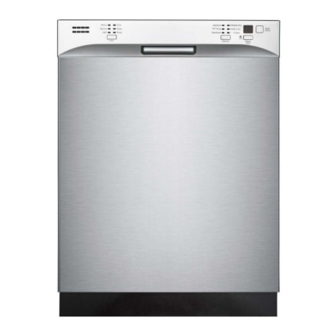
Summary of Contents for Midea M24DBF6501SS
- Page 1 24inch tall tub Dishwasher M24DBF6501SS M24DBF6501BB M24DBF6501WW...
- Page 2 Table of Contents Important Safety Instructions--------------------2 Features of your new dishwasher ------------- Operating Instructions-------- ------------------ - Preparing and loading dishes 8 12 ---------------- - Care & cleaning------------------ 13 15 --------------- Troubleshooting------ 16 17 -----------------------...
- Page 3 Important safety instruction For your safety, the information in this manual must be followed to WARNING minimize the risk of fire explosion or electric shock, and to prevent property damage and personal injury. Proper installation Please install your dishwasher properly follow the installation guide.
- Page 4 Features of your new dishwasher Specification Capacity 14 place settings Dimension x 650 x 85 mm (W x D x H) Weight unpacked 99lb 45kg Power Supply 120volts 60Hz Wash motor Heater 840W Rated power usage Water Feed Pressure 20 ~ 120 psi (138 ~ 828kPa) Rinse Aid Dispenser Top Spray Arm Detergent Dispenser...
- Page 5 Features of your new dishwasher Features Filter System Adjustable Upper Rack Your dishwasher has a multiple Filter System. In the The Upper Rack can be raised or lowered to System there are four filter-meshes .It can separate accommodate loading taller dishes in either rack. The soiled water and clean water in different chambers.
- Page 6 Operating dishwasher Options With the dishwasher door close, you can press When the wash cycle has been selected, you the PRO button to select the wash cycle. A can choose the option by pressing the "Options" light on the display will indicate which cycle button.
- Page 7 Operating dishwasher Delay Start Indicator light To delay the start of a selected cycle, press Delay Start pad until the desired delay time shows in the LED Sanitized indicator it allows you to automatically start your When "sanitize" option is selected, the temperature dishwasher for a 1 to 24 hour delay.
- Page 8 Operating dishwasher NOTE Status Window The time remaining could suddenly increase 01 24 or drop several minutes This means the Smart Sensor has checked the soil level and If the Delay Start option is selected the number determined if additional water fills are needed delay start hours shows in the Status Window If .
- Page 9 Adjustable Upper Rack The upper rack height can be easily adjusted to Upper Rack accommodate loading taller dishes in either rack. To accommodate taller dishes in the bottom rack, there are 2 positions available: 1. Lift the rack for upper postion Lower Rack The upper rack in the upper postion Dish Preparation...
- Page 10 Loading the Upper Rack Loading the Bottom Rack bottom rack is designed to load plates, soup bowls, The upper rack is designed for cups, glasses, small plates, saucers and cookware. The adjustable rack plates, bowls and plastic items marked “dishwasher space will allow you to load maximum 13 inch items.
- Page 11 Preparing and loading dishes Loading the Silverware Basket Adding A Dish The silverware basket could be divided into three To add or remove items after wash cycle starts: separate modules that can be used in both upper and 1 Open door slightly and wait a few seconds until wash lower racks action stops before completely opening.
- Page 12 Preparing and loading dishes Filling the rinse aid dispenser Your dishwasher is designed to use a liquid rinse aid of rinse greatly improves drying performance after the final Rinse Do Not use a solid or bar type rinse aid. Under normal conditions, the rinse aid will last approximately one month, try to keep it full, but do not over fill.
- Page 13 Preparing and loading dishes 3. Close the dispenser cover The amount of the detergent needed depends on the cycle and soil level of dishes, refer to the table below and adjust the recommended amount as necessary for your load. Soft Water Medium Hard Water Hard Water Very Hard Water*...
- Page 14 Cleaning the exterior door and panel 1. Stainless steel panel 2.Control panel Clean the control panel with a lightly dampened cloth, Clean the stainless steel door and handle regularly to clean it gently. remove the debris with cleaning soft cloth. Do not use appliance wax, polish, bleach or products containing chlorine to clean the stainless steel door.
- Page 15 Clean the Fine Filter Take out the Cylinder Filter and remove the Fine Filter from the dishwasher tub bottom. To remove the Fine Filter you must first remove the bottom spray arm as shown below. Flush the Fine Filter by holding it under running water and replace.
- Page 16 Clean the door gasket Air gap Clean the door gasket with a damp cloth to remove If there is an air gap installed with your dishwasher, food particles regularly. make sure it is clean so the dishwasher will drain properly. Air gap is not part of your dishwasher.
- Page 17 Troubleshooting before calling for service Solution Problem Possible cause Door may not be closed properly Shut the door completely make sure it is latched Power supply or power line is not connected Check and connect the power supply Dishwasher won’t start Delay Start option has been selected Refer to “Delay Start”...
- Page 18 Troubleshooting Solution Problem Possible cause Detergent dispenser Add the detergent and rinse aid as indicated by Improper operation of the detergent cover will not shut the manual Water remains in the Previous cycle has not finished or has been Select the proper cycle as introduced by the interrupted dishwasher manual...


Need help?
Do you have a question about the M24DBF6501SS and is the answer not in the manual?
Questions and answers