Table of Contents
Advertisement
Quick Links
Warning notices: Before using this product, please read this manual carefully and keep it for future reference.
The design and specifications are subject to change without prior notice for product improvement.
Consult with your dealer or manufacturer for details.
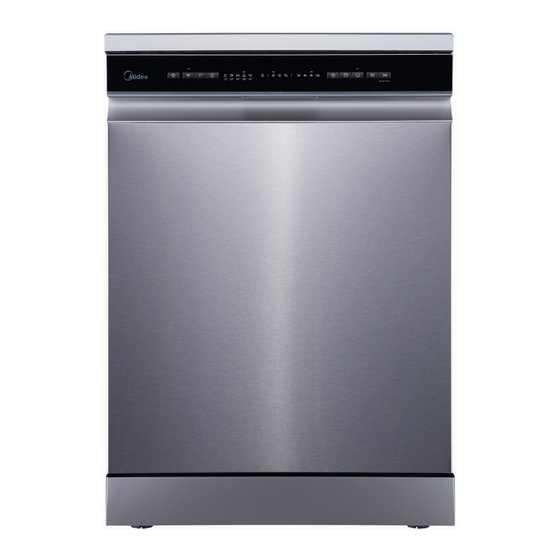
The diagram above is just for reference. Please take the appearance of the actual product as the standard.
MSmartHome
Download the app
& activate product
Dish Washer
USER MANUAL
WQP12-W7633C
Advertisement
Table of Contents

Related Manuals for Midea WQP12-W7633C


Summary of Contents for Midea WQP12-W7633C
- Page 1 Dish Washer USER MANUAL WQP12-W7633C MSmartHome Download the app & activate product Warning notices: Before using this product, please read this manual carefully and keep it for future reference. The design and specifications are subject to change without prior notice for product improvement.
-
Page 2: Table Of Contents
THANK YOU LETTER Thank you for choosing Midea! Before using your new Midea product, please read this manual thoroughly to ensure that you know how to operate the features and CONTENTS THANK YOU LETTER SAFETY INSTRUCTIONS SPECIFICATIONS PRODUCT OVERVIEW QUICK START GUIDE... -
Page 3: Safety Instructions
SAFETY INSTRUCTIONS Intended Use The following safety guidelines are intended to ● prevent unforeseen risks or damage from unsafe or incorrect operation of the appliance. Please check the packaging and appliance on arrival to make sure everything is intact to ensure safe operation. - Page 4 Caution The signal word indicates a hazard with a low degree of risk which, if not avoided, may result in minor or moderate injury. Attention The signal word indicates important information (e.g. damage to property), but not danger. Observe instructions This symbol indicates that a service technician should only operate and maintain this appliance in accordance with the...
- Page 5 DANGER: Risk of Fire/Flammable materials When using your dishwasher, follow the precautions ● ● listed below: Installation and repair can only be carried out by a ● qualified technician. This appliance is intended to be used in household ● and similar applications such as: -staff kitchen areas in shops, offices and other working environments;...
- Page 6 To protect against the risk of electrical shock, do not immerse the unit, cord or plug in water or other liquid. Please unplug before cleaning and maintenance the ● appliance. Use a soft cloth moisten with mild soap, and then use a dry cloth to wipe it again. If the supply cord is damaged, it must be replaced by ●...
- Page 7 operating, there is a risk of water squirting out. Do not place any heavy objects on or stand on the ● door when it is open. The appliance could tip forward. When loading items to be washed: ● 1) Locate sharp items so that they are not likely to damage the door seal;...
- Page 8 To save energy, in stand by mode, the appliance will ● switch of automatically after 15 minutes without any user interaction. The maximum number of place settings to be ● washed is 14. The maximum permissible inlet water pressure is ●...
-
Page 9: Specifications
SPECIFICATIONS Height (H) 845 mm Width (W) 598 mm Depth (D1) 600 mm (with the door closed) Depth (D2) 1175 mm (with the door opened 90°) - Page 10 Product information sheet (EN60436) Supplier's name or trade mark: MIDEA Suppl Supplier's address ( ): ier's address ( ): No.20, Gangqian Rd., Beijiao, Shunde, Foshan, GD P.R.C Model identifier: WQP12-W7633C(SS) General product parameters: Parameter Parameter Value Value Height Rated capacity ( ) (ps)
-
Page 11: Product Overview
PRODUCT OVERVIEW Product IMPORTRANT To get the best performance from your dishwasher, read all operating instructions before using it for the first time. Top spray arm Inner pipe Lower spray arm Salt container Filter assembly Dispenser Upper spray Cup rack Cutlery rack Upper basket Lower basket... -
Page 12: Quick Start Guide
QUICK START GUIDE Please read the corresponding content in the instruction manual for detailed operating method. 1.Install the dishwasher 2. Remove larger residue 3. Load the baskets. from dishes. Avoid pre-rinsing. Inside Outside 4. Fill the dispenser with 5. Select a suitable program detergent and rinse aid. -
Page 13: Product Installation
PRODUCT INSTALLATION WARNING Electrical Shock Hazard Disconnect electrical power before installing dishwasher. Failure to do so could result in death or electrical shock. Attention The installation of the pipes and electrical equipments should be done by professionals. About Power Connection WARNING For personal safety: Do not use an extension cord or an adapter plug with this appliance. - Page 14 WARNING A hose that attaches to a tap can burst if it is installed on the same water line as the dishwasher. If your sink has one, it is recommended that the hose be disconnected and the hole plugged. Connection Of Drain Hoses Insert the drain hose into a drain pipe with a minimum diameter of 4 cm, or let it run into the sink, making sure to avoid bending or crimping it.
- Page 15 How to drain excess water from hoses If the connection to the drain pipe is positioned higher than 1000 mm, excess water may remain in the drain hose. It will be necessary to drain excess water from the hose into a bowl or suitable container that is held outside and lower than the sink. Water outlet Connect the water drain hose.
- Page 16 Type 2: Underneath existing work top (When fitting beneath a work top) In most modern fitted kitchens there is only one single work top under which cabinets and electrical appliances are fitted. In this case remove the work top of the dishwasher by unscrewing the screws under the rear edge of the top (a).
-
Page 17: Operation Instructions
OPERATION INSTRUCTIONS Control Panel Description Power Press this button to turn on your dishwasher. No.1 ● Indicator slowly flashing: Waiting for connection ● Indicator quickly flashing: Connecting Indicator keeping lighted: Connected with your mobile device. If your mobile device(APP) has finished connecting Wi-Fi No.2 with your dishwasher for the first time. - Page 18 Description This option allows you to lock the buttons on the ● control panel, except the Power button, so children cannot accidently start the dishwasher by pressing Child lock No.7 the buttons on the panel. To lock or unlock the buttons on the control panel, press the button for 3 seconds.
- Page 19 Programs The table below shows which programs are best for the levels of food residue on them and how much detergent is needed. It also show various information about the programs. Consumption values and program duration are only indicative except for the ECO program.
- Page 20 Preparing And Loading Dishes Consider buying utensils which are identified as dishwasher-proof. For particular items, select a program with the lowest possible temperature. To prevent damage, do not take glass and cutlery out of the dishwasher immediately after the program has ended. For washing the following cutlery/dishes Are not suitable Cutlery with wooden, horn china or mother-of-pearl handles...
- Page 21 Removing the dishes To prevent water dripping from the upper basket into the lower basket, we recommend that you empty the lower basket first, followed by the upper basket. WARNING Items will be hot! To prevent damage, do not take glass and cutlery out of the dishwasher for around 15 minutes after the program has ended.
- Page 22 LOADING THE BASKETS ACCORDING TO EN60436: Loading the dishwasher to its full capacity will contribute to energy and water savings. 1.Upper basket: Number Item Cups Saucers Glasses Mugs Small pot 2.Lower basket: Number Item Oven pot Dessert plates 7 12 Dinner plates Soup plates Oval platter...
- Page 23 4.Cutlery rack: Number Item Soup spoons Forks Knives 4 4 4 Tea spoons Dessert spoons Information for comparability tests in accordance with EN60436 Serving spoons Capacity: 14 place settings Serving fork Position of the upper basket: lower position Program: ECO Gravy ladle Rinse aid setting: Max Softener setting: H3...
- Page 24 Basket Loading Tips Adjusting the upper basket The height of the upper basket can be easily adjusted to accommodate taller dishes in either the upper or lower basket. To adjust the height of the upper rack, follow these steps: 1. Pull out the upper basket. 2.
- Page 25 Cutlery Rack Used Tips 1. Lift the right basket up, both left and right baskets are flat. 2. Move the right basket from right to left, two basket are overlapping. 3. Remove the right basket from the tray, only has the left basket.
- Page 26 Easy removal of cutlery Using the principle of crank slider mechanism, the cutlery are suspended. Convenient finger goes deep under the knife and fork, and holds several cutlery at a time. Make the most of space It can accommodate dishes such as egg beaters, cups, etc., and does not affect the upper basket.
- Page 27 Loading The Salt Into The Softener NOTE If your model does not have any water softener, you may skip this section. Always use salt intended for dishwasher use. The hardness of the water varies from place to place. If hard water is used in the dishwasher, deposits will form on the dishes and utensils.
- Page 28 Water Softener The water softener must be set manually, using the water hardness dial. The water softener is designed to remove minerals and salts from the water, which would have a detrimental or adverse effect on the operation of the appliance. The more minerals there are, the harder your water is.
- Page 29 Function Of The Rinse Aid And Detergent The rinse aid is released during the final rinse to prevent water from forming droplets on your dishes, which can leave spots and streaks. It also improves drying by allowing water to roll off the dishes. Your dishwasher is designed to use liquid rinse aids. WARNING Only use branded rinse aid for dishwasher.
- Page 30 Filling The Rinse Aid Reservoir The rinse aid is released during the final rinse to prevent water from forming droplets on your dishes, which can leave spots and streaks. It also improves drying by allowing water to roll off the dishes. Your dishwasher is designed to use liquid rinse aids. 1.
- Page 31 Filling The Detergent Dispenser 1. Open the cap by pressing in t 2. . Add detergent into the larger cavi release latch. (A) for main For better cleaning result, especially if you have very dirt items, pour a small amount of detergent onto the door. The additional detergent will activate Press in during the pre-wash phase.
- Page 32 Starting A Program 1. Draw out the lower and upper basket, load the dishes and push them back. It is commended to load the lower basket first, then the upper one. 2. Pour in the detergent. 3. Insert the plug into the socket. The power supply refer to last page ”Product fiche”. Make sure that the water supply is turned on to full pressure.
-
Page 33: App Setup And Operation
APP SETUP AND OPERATION Download the MSmarthome App MSmartHome On an app market (Google Play Store, Apple App MSmartHome app. Download and install it on your phone. You can also download the app by scanning the QR code below. Download the app &... - Page 34 NOTE Make sure your devices are powered on. Keep your mobile phone close enough to your device when you are connecting your device to the network. Connect your mobile phone to the wireless network at home, and make sure you know the password of the wireless network. Check if your wireless router supports 2.4 GHz band and turn it on.
-
Page 35: Cleaning And Maintenance
CLEANING AND MAINTENANCE External Care The door and the door seal Clean the door seals regularly with a soft damp cloth to remove food deposits.When the dishwasher is being loaded, food and drink residues may drip onto the sides of the dishwasher door. - Page 36 3. Larger food remnants can be 4. Reassemble the filters in the reverse cleaned by rinsing the filter under order of the disassembly, replace the running water. For a more thorough filter insert, and rotate clockwise to clean, use a soft cleaning brush. the close arrow.
- Page 37 Caring For The Dishwasher Frost precaution Please take frost protection measures on the dishwasher in winter. Every time after washing cycles, please operate as follows: 1. Cut off the electrical power to the dishwasher at the supply source. 2. Turn off the water supply and disconnect the water inlet pipe from the water valve. 3.
-
Page 38: Troubleshooting
TROUBLESHOOTING Before Calling For Service Reviewing the charts on the following pages may save you from calling for service. Problem Possible reason Solution Fuse blown, or the Replace fuse or reset circuit breaker. ● circuit break tripped. Remove any other appliances sharing the same circuit with the dishwasher. - Page 39 Problem Possible reason Solution The affected items Avoid washing items that are not ● are not corrosion resistant. corrosion resistant in the dishwasher. A program Always run a wash program ● was not run after without any crockery after adding dishwasher salt was salt.
- Page 40 Problem Possible reason Solution Aluminium utensils Use a mild abrasive cleaner to Black or grey ● have rubbed against eliminate those marks. marks on dishes dishes Dishes block Re-loading the dishes properly. Detergent left in ● detergent dispenser dispenser Improper loading Use gloves if detergent residue can ●...
- Page 41 ERROR CODES If there is a malfunction the dishwasher will display an error code. The following table shows possible error codes and their causes. Problem Possible reason Solution The Cloud Wash Longer inlet time. Faucets is not opened, or water ●...
-
Page 42: Trademarks, Copyrights And Legal Statement
Midea may constitute trademark infringement or unfair competition in violation of relevant laws. This manual is created by Midea and Midea reserves all copyrights thereof. No entity or individual may use, duplicate, modify, distribute in whole or in part this manual, or bundle or sell with other products without the prior written consent of Midea. -
Page 43: Disposal And Recycling
DISPOSAL AND RECYCLING Important instructions for environment Compliance with the WEEE Directive and Disposing of the Waster Product: This product complies with EU WEEE Directive (2012/19/EU). This product bears a classification symbol for waster electrical and electronic equipment (WEEE). This symbol indicates that this product shall not be disposed with other household wastes at the end of its service life. -
Page 44: Data Protection Notice
European Economic Area. Further information are provided on request. You can contact our Data Protection MideaDPO@midea.com. To exercise your rights such as right to object your personal date being processed for direct marketing purposes, please contact us via MideaDPO@midea.com. To find further information, please follow the QR Code. -
Page 45: Declaration Of Conformity
Limitation of validity (if any): ......................Supplementary information: Notified body involved:................Technical file held by:. Foshan Shunde Midea Washing Appliances Mfg. Co., Ltd. Place and date of issue (of this DoC): .Foshan/2020-12-25......Signed by or for the manufacturer: ........(Signature of authorised person) Name (in print):.....Ke Ningsheng...... - Page 46 00000000000000 此红框内丝印此用户手册对应的14位物料编码 红色框不需印 刷字体为Gotham-Book 8pt 位置大小严格按图纸操作...
Need help?
Do you have a question about the WQP12-W7633C and is the answer not in the manual?
Questions and answers