Table of Contents
Advertisement
Quick Links
Advertisement
Table of Contents

Related Manuals for Datavideo DAC-50S


Summary of Contents for Datavideo DAC-50S
-
Page 2: Table Of Contents
SERVICE & SUPPORT ................. 16 Disclaimer of Product and Services The information offered in this instruction manual is intended as a guide only. At all times, Datavideo Technologies will try to give correct, complete and suitable information. However, Datavideo Technologies cannot exclude that some information in this manual, from time to time, may not be correct or may be incomplete. -
Page 3: Fcc Compliance Statement
AC adapter. If you are not sure of the type of power available, consult your Datavideo dealer or your local power company. Do not allow anything to rest on the power cord. Do not locate this unit where the power cord will be walked on, rolled over, or otherwise stressed. -
Page 4: Warranty
When the product exhibits a distinct change in performance, indicating a need for service. Warranty Standard Warranty Datavideo equipment is guaranteed against any manufacturing defects for one year • from the date of purchase. The original purchase invoice or other documentary evidence should be supplied at •... -
Page 5: Two Year Warranty
Hard Drives are only covered for the first 10,000 hours, or 1 year (whichever comes first). Any second year warranty claims must be made to your local Datavideo office or one of its authorized Distributors before the extended warranty expires. -
Page 6: Introduction
(R and L). The outputs can be easily connected to analog video monitor or deck devices such as BataCAM and VHS. The DAC-50S is also able to scale down the signal to connect analog output ports to SD analog equipment. -
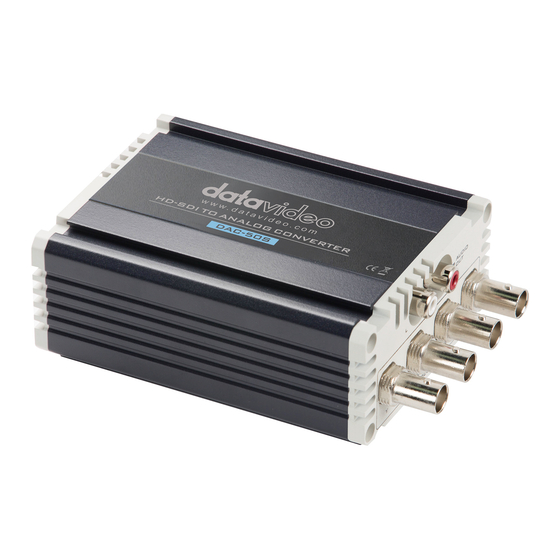
Page 7: Connections & Controls
2. Connections & Controls Rear Panel HD/SD-SDI Input Connects to an HD-SDI input source HD/SD-SDI Output HD-SDI loop-thru output USB Firmware Upgrade Connects to PC for firmware upgrade DC In Socket Connects the supplied 12V PSU to this socket. The connection can be secured by screwing the outer fastening ring of the DC In plug to the socket. - Page 8 DIP Switch System I/O settings DIP Switch Setting SDI Audio De-Embed SDI Audio De-Embed CH1&CH2 CH3&CH4 CH5&CH6 7.5 IRE 0 IRE CH7&CH8 16:9 CH9&CH10 YUV+CV OUT Y/C+2xCV OUT CH11&CH12 SMPTE CH13&CH14 Normal Firmware CH15&CH16 Operation Upgrade NOTE: Given a 16:9 HD video input, if DIP SW5 is set to 16:9, the image displayed on a 4:3 TV monitor will be anamorphic, i.e.
-
Page 9: Front Panel
Front Panel Y Output Port Component video output port U/Pb/CV Output Port Component or Composite video output port V/Pr/C Output Port Component video output port... - Page 10 CV Output Port Composite video output port Audio OUT SDI audio de-embed output via 2 unbalanced analog audio channels.
-
Page 11: Firmware Update
Host Update 1. Set DIP SW8 to ON 2. Connect DAC-50S to the PC using a USB cable (DAC-50S is powered by the USB port so external power source is not required) 3. A USB device connection prompt window will appear on the PC screen (DAC-50S USB) and click “Open device to view files”... -
Page 12: Fpga Update
5. After the new firmware file has been saved in the device, safely remove the USB device VP733 Datavideo Tech USB Device as shown in the diagram below. 6. Update is complete after the device is safely removed, unplug the USB cable and set DIP SW8 to OFF. - Page 13 5. Delete the existing file and copy the latest FPGA firmware file into the device. 6. The firmware update will now start, which takes approximately 2 minutes. 7. After the firmware file is successfully copied into the device, safely remove the USB device.
-
Page 14: Frequently-Asked Questions
4. Frequently-Asked Questions This section describes problems that you may encounter while using DAC-50S. If you have questions, please refer to related sections and follow all the suggested solutions. If problem still exists, please contact your distributor or the service center. -
Page 15: Specifications
6. Specifications Input Interface HD/SD-SDI x 1 (BNC) Component YPbPr x 3 (BNC) Composite x 2 (one is the same connector as U/Pb) (BNC) Output Interface S-Video Y/C x 2 (the same connector as Y and V/Pr) (BNC) Audio L/R x 2 (RCA) HD-SDI loop-through x 1 (BNC) 1080p 50/59.94 Hz 1080i 50/59.94 Hz... -
Page 16: Service & Support
Service & Support...
Need help?
Do you have a question about the DAC-50S and is the answer not in the manual?
Questions and answers