Table of Contents
Advertisement
Quick Links
Download this manual
See also:
Manual
Advertisement
Table of Contents

Related Manuals for SHOWTEC EVENTLITE 6/3


Summary of Contents for SHOWTEC EVENTLITE 6/3
- Page 1 EventLite 6/3 ORDERCODE 44000 Highlite International B.V. Vestastraat 2 6468 EX Kerkrade The Netherlands Phone: +31 45-5667700...
- Page 2 For more information: iwant@showtec.info You can get some of the best quality, best priced products on the market from Showtec. So next time, turn to Showtec for more great lighting equipment. Always get the best -- with Showtec ! Thank you!
-
Page 3: Table Of Contents
Showtec Showtec EventLite 6/3 Product Guide ™ Warning ..................................2 Safety Instructions ..............................2 Operating Determinations ............................. 4 Return Procedure ..............................4 Claims ..................................4 Description of the device ............................5 Overview ................................... 5 Installation ..................................6 Set Up and Operation ..............................6 Sweden 2.4G Wireless communication module .................... -
Page 4: Warning
Your shipment includes: • EventLite 6/3 with IEC cable 1,5m • User manual LED Expected Lifespan LEDs gradually decline in brightness over time. -
Page 5: Eventlite
Leave the device switched off until it has reached room temperature. If your Showtec device fails to work properly, discontinue use immediately. Pack the unit securely (preferably in the original packing material), and return it to your Showtec dealer for service. ... -
Page 6: Operating Determinations
Operating Determinations • This device is not designed for permanent operation. Consistent operation breaks will ensure that the device will serve you for a long time without defects. • The minimum distance between light-output and the illuminated surface must be more than 0.5 meter. -
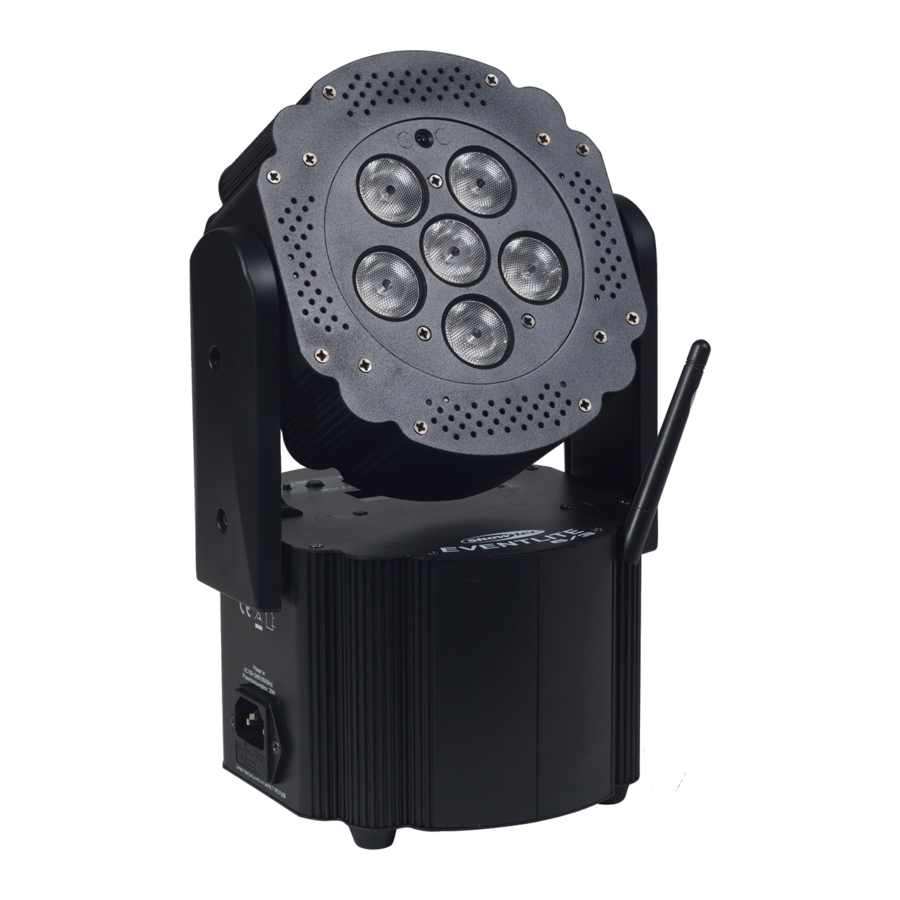
Page 7: Description Of The Device
Description of the device Features The EventLite 6/3 is a LED effect from Showtec Input Voltage (battery charger): AC 100V-240V, 60Hz/50Hz (only power in, no power out) Compact and lightweight Battery: 11.1V, 12AH Power consumption at full output: 30W ... -
Page 8: Installation
Fig. 2 9 10 6) Battery Charger LEDs LCD Display with menu buttons 8) Wireless DMX LED Wireless DMX Unlink button On/Off Installation Remove all packing materials from the EventLite 6/3. Check that all foam and plastic padding is removed. Connect all cables. Do not supply power before the whole system is set up and connected properly. -
Page 9: Sweden 2.4G Wireless Communication Module
Sweden 2.4G Wireless communication module Communication distance: depeninding on the transmitting power or transmitter module Test conditions: W-DMX TRx Transmitter module, 2dBi Antenna, transmitting power 20dBm (100mW) Range: Indoor (approx. through three concrete walls) 60m Outdoor: 250m Wireless DMX connection The wireless receiving module “Pico G4 Receiver, 2.45GHz”, provided by Swedish WIRELESS SOLUTION, only has a 2.45 GHz wireless signal receiving function. - Page 10 Example (Fig 4): The Showtec Operator Air (50726) sends out a wireless signal with 512 channels and the EventLite picks up this signal. It uses the first 5 channels for its own setup and sends the rest of the channels through a DMX cable to the other Compact Pars 7 (42580).
-
Page 11: Disconnect From The Wireless Dmx Signal Transmitter
Disconnect from the Wireless DMX signal transmitter The EventLite can be temporarily disconnected from the wireless DMX signal transmitters. 1. Press and hold the Unlink-button for more than 3 seconds. The display will show the time you are holding the button down. 2. -
Page 12: Fixture Linking
Fixture Linking You will need a serial data link to run light shows of one or more fixtures using a DMX-512 controller or to run synchronized shows on two or more fixtures set to a master/slave operating mode. The combined number of channels required by all the fixtures on a serial data link determines the number of fixtures the data link can support. -
Page 13: Control Modes
Control Modes There are 5 modes: • Static Colors • Built-in programs • Auto Run Programs • Sound-controlled • Master/Slave • DMX512 One EventLite (Built-in Programs + Auto Run + Static colors) When the EventLite is not connected by a DMX-cable and Wireless DMX is switched off, it functions as a stand-alone device. -
Page 14: Multiple Eventlite's (Dmx Control+Wireless Dmx Control)
Multiple EventLite’s (DMX Control+Wireless DMX control) Plug the end of the electric mains power cord into a proper electric power supply socket or use the Eventlite with its built-in battery but without the powercable. Use a 3-p XLR cable to connect the EventLite’s. -
Page 15: Control Panel
Control Panel Fig. 7 A. Battery indicator LEDs F. Up Button B. LCD Display G. Down Button C. WDMX indicator LED Wireless DMX Unlink button D. MODE button I. ON/OFF E. SETUP Button DMX Control Mode The fixtures are individually addressed on a data-link and connected to the controller. When a DMX signal is present, the green LED (C) will blink. -
Page 16: Menu Overview
Menu overview... -
Page 17: Main Menu Options
Main Menu Options Press the MODE button to scroll through 6 options of the menu: 1. DMX 512 Address 2. Master/Slave 3. Static Color 4. Built-in Programs 5. Auto Run 6. Sound-controlled 1. DMX 512 Address When a DMX signal is present, the DMX LED will light up. With this menu you can set the DMX address and the personality of the EventLite. -
Page 18: Creating A Static Color
3. Creating a static color With this menu you can set the Static Colors (R,G,B) of the EventLite. Press the MODE button on the EventLite, until the display shows: Use SETUP to change the static colors (Red, Green, Blue). Use the UP/DOWN buttons to change the value from 000-255. You can combine RED, GREEN and BLUE to create an infinite range of colors (0-255). -
Page 19: Dmx Channels
DMX Channels 2 Channels Channel 1 – Colors, Built-in Programs, Sound 10-19 20-29 Red+Green 30-39 Green 40-49 Green+Blue 50-59 Blue 60-69 Red+Blue 70-79 Red+Green+Blue 80-89 Program 1 90-99 Program 2 100-109 Program 3 110-119 Program 4 120-129 Program 5 130-139 Program 6 140-149 Program 7... -
Page 20: Maintenance
3. If all of the above appears to be O.K., switch the unit on again. 4. If you are unable to determine the cause of the problem, do not open the EventLite 6/3, as this may damage the unit and the warranty will become void. - Page 21 See the table below for more problem solving. Problem Probable cause(s) Remedy One or more No power to the fixture • Check that power is switched on, fixtures are the powercable is ok, the cable is completely dead. connected and/or the battery is charged Fixtures reset The controller is not connected.
-
Page 22: Product Specification
Minimum distance Minimum distance from flammable surfaces: 0,5m Minimum distance to lighted object: 1m Max. ambient temperature t : 40°C; Max. housing temperature t : 80°C Design and product specifications are subject to change without prior notice. Website: www.Showtec.info Email: service@highlite.nl...
Need help?
Do you have a question about the EVENTLITE 6/3 and is the answer not in the manual?
Questions and answers