Q-See QT5116 User Manual
H.264 dual stream network dvr 8 channel (200fps)/16 channel (240fps) digital video recorder
Hide thumbs
Also See for QT5116:
- User manual (90 pages) ,
- User manual (34 pages) ,
- User manual (49 pages)

Related Manuals for Q-See QT5116


Summary of Contents for Q-See QT5116
-
Page 1: User Manual
H.264 Dual Stream Network DVR 8 Channel (200fps)/16 Channel (240fps) Digital Video Recorder USER MANUAL Model Numbers: QT518 & QT5116 www.q-see.com Rev 6/11/2010... - Page 2 CONTACT US QT518 & QT5116 User Manual Please contact a Q-See support representative first regarding any additional information you need help with regarding product features, specification or assistance with setup. Please contact us using the following methods with questions about your Q-See product.
- Page 3 6. Accessories Make sure to only use accessories recommended by Q-See. Before installation, check the package to verify that all the components are included. Contact your local retailer ASAP if something is broken in your package.
- Page 4 Damage caused by acts of nature (e.g., earthquake, fire, etc). Equipment damage caused by the maintenance of personnel not authorized by Q-See. Product sold over 12 months ago. In order to fulfill the terms of your warranty, you must complete the registration process after purchasing our product.
-
Page 5: Customer Information Card
Purchase Date Distributor The material in this document is the intellectual property of Q-See. No part of this manual may be reproduced, copied, translated, transmitted, or published in any form or by any means without our company’s expressed written consent. -
Page 6: Table Of Contents
TABLE OF CONTENTS QT518 & QT5116 User Manual TABLE OF CONTENTS 1. INTRODUCTION ..................................... 1 1.1 DVR Introduction ....................................1 1.2 Main Features ....................................1 2. GETTING STARTED ..................................3 2.1 Installing Hard Drive ..................................3 2.1.1 Installing DVD Writer (Optional) ..............................4 2.2 Front Panel Instructions .................................. - Page 7 TABLE OF CONTENTS QT518 & QT5116 User Manual 4.2.9 User Configuration ................................... 41 4.2.10 Tools Configuration ................................42 5. MANAGING THE DVR ................................... 43 5.1 Formatting the Hard Disk ................................43 5.2 Updating Firmware ..................................43 5.3 Load Default Setup ..................................44 5.4 Check System Information ................................
-
Page 8: Introduction
INTRODUCTION QT518 & QT5116 User Manual 1. INTRODUCTION 1.1 DVR Introduction This DVR uses high performance video processing chips and an embedded Linux system. It utilizes many advanced technologies, such as standard H.264 with low bit rate, Dual Stream, SATA interface and VGA output. This DVR system supports mouse controlled navigation and also can be accessed through IE browser with full remote control, mobile viewing by cell phones, etc. - Page 9 INTRODUCTION QT518 & QT5116 User Manual ALARM 8/16 channel alarm input and 4 channel alarm output available Supports scheduling for motion detection and sensor alarm Supports pre-recording and post recording Supports linked channel recording once motion or sensor alarm is triggered on designated channels...
-
Page 10: Getting Started
GETTING STARTED QT518 & QT5116 User Manual 2. GETTING STARTED Check the unit and the accessories immediately after opening your system. Please disconnect the power before connecting to other devices. 2.1 Installing Hard Drive This device supports 8 SATA hard drives Calculate HDD capacity according to the recording settings. -
Page 11: Installing Dvd Writer (Optional)
GETTING STARTED QT518 & QT5116 User Manual 2.1.1 Installing DVD Writer (Optional) The writer must be one of the compatible devices listed in “Appendix C - Compatible Devices” This device is only for backup Step 1: Unscrew and open the top cover Step 2: Connect the power and data cables. -
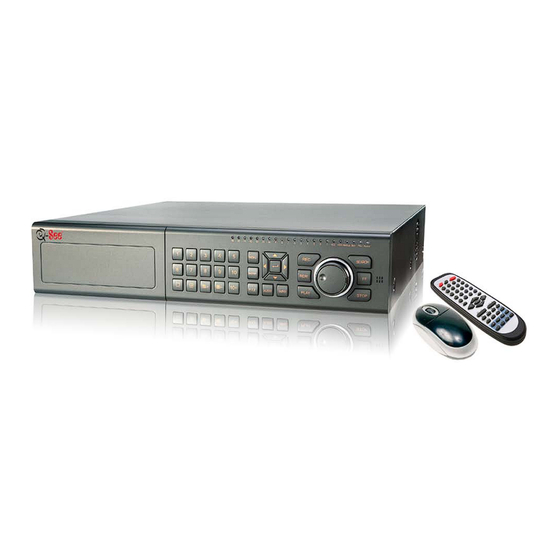
Page 12: Front Panel Instructions
GETTING STARTED QT518 & QT5116 User Manual 2.2 Front Panel Instructions An illustration of the Front Panel interface is shown as Fig 2.5: Fig 0.5: Front Panel Item Name/Symbol Description MULTI-SCREEN BUTTON Change display screen settings (single, 4, 8 and 16 screen) -
Page 13: Rear Panel Instructions
GETTING STARTED QT518 & QT5116 User Manual 2.3 Rear Panel Instructions An illustration of the rear Panel interface for the 8 channel is shown as Fig 2.6: Fig 0.6: Rear Panel for 8 Channel ITEM NAME/SYMBOL DESCRIPTION Connect to monitor as an AUX output to display one channel. Only video display, no menu... - Page 14 GETTING STARTED QT518 & QT5116 User Manual An illustration of the rear panel interface for the 16 channel is shown as Fig 2.7 Fig 0.7: Rear Panel for 16 Channel ITEM NAME/SYMBOL DESCRIPTION SPOT OUT Connect to monitor as an AUX output channel by channel. Only video display, no menu show...
-
Page 15: Installing Sensor And Alarm (Optional)
GETTING STARTED QT518 & QT5116 User Manual 2.3.1 Installing Sensor and Alarm (Optional) Depending on your model number, this DVR has 8 or 16 channel alarm inputs and 4 channel alarm outputs. The alarm input is triggered by electric level (High: 5V/Low: 0V). Users can connect external sensors, such as gas, smoke or infrared detectors. -
Page 16: Remote Control
Step 2: Place batteries making sure the poles are correct (+ and -) and replace battery cover. If the remote does not work check the following prior to contacting Q-See for a replacement remote control: 1. Check the pole position of the batteries 2. -
Page 17: Control With Mouse
GETTING STARTED QT518 & QT5116 User Manual 2.5 Control with Mouse 2.5.1 Connect Mouse DVR supports PS/2 or USB mouse through the ports on the rear panel, please refer to Figs 2.6 and 2.7 Numbers 5 and 6. Note: If mouse is not detected or doesn't work, follow these steps: 1. - Page 18 GETTING STARTED QT518 & QT5116 User Manual Also supports mouse drag. To set motion detection area using this feature: click customized, hold left button and drag to set motion detection area. Set schedule: hold left button and drag to set schedule time In playback: Click left button to choose the options.
-
Page 19: Basic Functions
BASIC FUNCTIONS QT518 & QT5116 User Manual 3. BASIC FUNCTIONS 3.1 Power On/Off Before you power up the unit, please make sure all the connections are good. 3.1.1 Power On Step 1: Connect the power supply and turn on the power button on the rear panel Step 2: The system will show the screen illustrated in Fig 3.1 System Loading. -
Page 20: Power Off
BASIC FUNCTIONS QT518 & QT5116 User Manual The symbols seen on the preview screen are explained as follows: Symbol Meaning Symbol Meaning Live audio enabled Live audio disabled Manual recording Scheduled recording Motion detection recording Alarm recording Current working HDD... -
Page 21: Login And User Management
BASIC FUNCTIONS QT518 & QT5116 User Manual 3.2 Login and User Management Users can login and logout of the DVR system. Users cannot do any other operations except changing the multi-screen display once logged out. Admin has full control over DVR. - Page 22 BASIC FUNCTIONS QT518 & QT5116 User Manual Add and Delete Users This unit has a default user permissions including: Administrator, Two User Groups, Advanced User and Normal User. This system supports one administrator and up to 15 users total. The administrator can add or delete other users and change their group levels to enable various permission functions.
-
Page 23: Recording
BASIC FUNCTIONS QT518 & QT5116 User Manual To Delete a user, the Administrator should follow these steps: Step 1: Choose a user from the list of Users and the system will display their setting and permission levels. Click on the Delete button to delete the intended user. A security window will appear as shown in Fig 3.7 Delete User confirming the deletion of this user. -
Page 24: Manual Recording
BASIC FUNCTIONS QT518 & QT5116 User Manual Step 2:Set Video quality, Frame rate and Resolution. Step 3:Check Audio if you input audio and want to record. Check Time stamp to record date and time information. Step 4: Enable recording function for cameras in Record option. -
Page 25: Motion Detection Recording
BASIC FUNCTIONS QT518 & QT5116 User Manual Step 3: Press the Add button to select the date if you want a special schedule for a certain day. A window will appear as shown in Fig 3.10 Calendar. Fig 3.10: Calendar Step 4:Select the date and set the schedule time. - Page 26 BASIC FUNCTIONS QT518 & QT5116 User Manual Fig 3.12: Motion Detection Area Setup Step 3: Enter Trigger configuration, see Fig 3.13: Alarm Out Setup. Fig 3.13: Alarm Out Setup Step 4: Select alarm out and recording channels. This will trigger cameras to record once motion is detected.
-
Page 27: Alarm Recording
BASIC FUNCTIONS QT518 & QT5116 User Manual 3.3.5 Sensor Alarm Recording (Optional) This unit supports recording channels and PTZ linking after an alarm sensor has triggered recording. Step 1: Enter ALARM configuration, see Fig 3.14 Sensor Alarm Setup. Select cameras Fig 3.14: Sensor Alarm Setup... - Page 28 BASIC FUNCTIONS QT518 & QT5116 User Manual Time Search: Enter Search configuration, select Time search. A window will appear as Fig 3.15 Calendar Search. If there are recordings during a day, the date will be highlighted. Fig 3.15: Calendar Search Step 1: Choose a day to do a time search as illustrated in Fig 3.16 Time Search.
- Page 29 BASIC FUNCTIONS QT518 & QT5116 User Manual Fig 3.17: Playback Event Search: STEP 1: Enter Search---->Event search. The calendar window will appear like that of time search STEP 2: Choose a day to find events for as shown in Fig 3.18 Event Search.
-
Page 30: Backup & View
BASIC FUNCTIONS QT518 & QT5116 User Manual 3.5 Backup & View This unit supports backup to USB Flash or hard drive through the USB port on the front panel. Users can also make backup to PC by IE browser via internet (refer to 6.3.1). - Page 31 BASIC FUNCTIONS QT518 & QT5116 User Manual Step 5: Press the OK button and the system will begin to write the video files you selected to the backup device, and display a process bar as shown below: Step 6: The system will display a “Backup complete” message after it is finished backing files up as shown below: Check &...
- Page 32 BASIC FUNCTIONS QT518 & QT5116 User Manual Step 2: Click Browse to choose the folder which contains the video backup (see Fig 3.22 Choose Backup Folder Fig 3.22: Choose Backup Folder Step 3: Select the fie and click OK to generate a Backup Data Search dialog box as shown in Fig 3.23 Backup Data Search.
- Page 33 BASIC FUNCTIONS QT518 & QT5116 User Manual Step 6: Once the conversion process is 100% complete, the files are ready to be viewed and users can use any third party application to view the files. Step 7: An image of the Super Player application, along with a brief explanation of the functions related to this program can be seen in Fig.
-
Page 34: Ptz Control
BASIC FUNCTIONS QT518 & QT5116 User Manual 3.6 PTZ Control Connect speed dome cameras to the DVR using the RS485 connection first (see 2.3 Rear Panel Instructions). Make sure the speed dome has a protocol this DVR supports and the parameters have been set according to the specifications called for in the camera’s manual. - Page 35 BASIC FUNCTIONS QT518 & QT5116 User Manual Step 4: Click the “Set” button to the right of the Cruise field (as shown in Fig 3.26) to set cruise tracks as shown in Fig 3.28 Set Cruise. Choose the preset, set the time of every preset. Click + button to add the preset to the left preset for cruise track.
-
Page 36: Main Menu Guide
MAIN MENU GUIDE QT518 & QT5116 User Manual 4. MAIN MENU GUIDE 4.1 Menu Navigation Device Name & ID Video Format Language BASIC Date & Time Setup Live Audio Switch Authorization Check Switch Video Quality Frame Rate Record Switch RECORD... -
Page 37: Main Menu Setup
MAIN MENU GUIDE QT518 & QT5116 User Manual 4.2 Main Menu Setup Right click on the mouse or press on the ENTER button on the DVR’s front panel to access the system’s Control Bar functions as illustrated in Fig. 4.1 Control Bar. -
Page 38: Basic Configuration
MAIN MENU GUIDE QT518 & QT5116 User Manual 4.2.1 Basic Configuration From the Pop-Up Menu illustrated in Fig 4.3 System Setup, select Basic and a user interface for all the Basic functions available will appear as illustrated in Fig 4.4 Basic Configuration. -
Page 39: Live Configuration
MAIN MENU GUIDE QT518 & QT5116 User Manual 4.2.2 Live Configuration From the Pop-Up Menu illustrated in Fig 4.3 System Setup, select Live and a user interface for all the Live settings will appear as illustrated in Fig 4.5 Live Configuration. -
Page 40: Record Configuration
MAIN MENU GUIDE QT518 & QT5116 User Manual 4.2.3 Record Configuration From the Pop-Up Menu illustrated in Fig 4.3 System Setup, select Record and a user interface for Record functions available will appear as illustrated in Fig 4.7 Record Configuration. -
Page 41: Schedule Configuration
MAIN MENU GUIDE QT518 & QT5116 User Manual 4.2.4 Schedule Configuration From the Pop-Up Menu illustrated in Fig 4.3 System Setup, select Schedule and a user interface for all the Schedule functions available will appear as illustrated in Fig 4.8 Schedule Configuration. -
Page 42: Motion Configuration
MAIN MENU GUIDE QT518 & QT5116 User Manual Here users can set sensor type, alarm trigger and alarm time. The following are the definitions of each option. Device Type: NC and NO (Normal Close and Normal Open). Set the value according to the alarm signal level of the sensors. - Page 43 MAIN MENU GUIDE QT518 & QT5116 User Manual Here users can set motion sensitivity, detection area and alarm out. The following are the definitions of each option: Enable: Enable motion detection. Trigger: Setup similar with that of sensor alarm, but linked speed domes need to use different channels, i.e. if users enable motion detection on camera 1, the linked speed domes must be cameras 2-16.
-
Page 44: Network Configuration
MAIN MENU GUIDE QT518 & QT5116 User Manual 4.2.7 Network Configuration This unit supports DHCP, PPPoE and DDNS. To access these functions, from the Pop-Up Menu illustrated in Fig 4.3 System Setup, select Network and a user interface for all the Network functions available will appear as illustrated in Fig 4.13 Network Configuration. - Page 45 MAIN MENU GUIDE QT518 & QT5116 User Manual Fig 4.14: DDNS Configuration The information you can input and adjust in the DDNS Configuration section as shown in Fig 4.14 are as follows: Server: Select DDNS server. User Name and Password: Input registered information from DDNS provider.
- Page 46 MAIN MENU GUIDE QT518 & QT5116 User Manual To: Click on this icon, a window will appear as shown in Fig 4.16 To Configuration. Fig 4.16: To Configuration In the Input field, enter the email address where you want to send this notification to. For example, you can input your yahoo email address or any other email you use where you think it would be helpful to receive email alerts to.
-
Page 47: Configuration
MAIN MENU GUIDE QT518 & QT5116 User Manual 4.2.8 P.T.Z Configuration From the Pop-Up Menu illustrated in Fig 4.2, select PTZ and a user interface for PTZ Configuration will appear as illustrated in 4.18 PTZ Configuration. Here users can set protocol, baud rate, address, presets and auto cruise track. -
Page 48: User Configuration
MAIN MENU GUIDE QT518 & QT5116 User Manual Cruise, Name: select a cruise track and rename it. Click Set in Cruise row. A window will appear as 4.20 PTZ Control. Fig 4.20 PTZ Control Note: DVR has 128 presets and 32 cruise tracks total 4.2.9 User Configuration... -
Page 49: Tools Configuration
MAIN MENU GUIDE QT518 & QT5116 User Manual 4.2.10 Tools Configuration From the Pop-Up Menu illustrated in Fig 4.2, select Tools and a user interface for the Tools Manager will appear as illustrated in 4.22 Tools Manager. Here the administrator can add or delete users or change their level of authorization. -
Page 50: Managing The Dvr
Click OK to continue and a progress bar will display as shown below. 5.2 Updating Firmware The DVR currently only supports updates through USB. Get the firmware from the Q-See website and ensure that you are running the latest firmware version. Refer to Fig 5.1 Disk Manager to check the USB information. -
Page 51: Load Default Setup
MANAGING THE DVR QT518 & QT5116 User Manual Step 3: A window will appear reminding the user that default settings will automatically be loaded once the upgrade (update) is complete. Click the OK button to begin the process and the progress bar displaying the update progress will appear on screen as shown below. - Page 52 MANAGING THE DVR QT518 & QT5116 User Manual Step 3: Click System, the window below will display. Check firmware version and the recording parameters will appear as shown below in Fig 5.4 System Information. Fig 5.4: System Information Step 4: Return to the previous menu, click Network. The window below will display. Check IP address, DVR Mac address, network video quality.
-
Page 53: Check System Log
MANAGING THE DVR QT518 & QT5116 User Manual 5.5 Check System Log This unit logs system events. It records its working state and operation automatically, and it divides the record to two groups; events and operations. Table 5.1 Details of System Log Files enumerates the details associated with each Group. -
Page 54: Check On-Line Network Users
MANAGING THE DVR QT518 & QT5116 User Manual Step 4: Right click the mouse to return to the previous menu. Click Operation to search operation Log as shown in Fig 5.7 Operation Log. . Fig 5.7: Operation Log Step 5: The operation is similar to searching events log. -
Page 55: Lock & Delete Files
MANAGING THE DVR QT518 & QT5116 User Manual 5.7 Lock & Delete Files Users can lock or delete every video file in the system’s log. Locking a file will prevent it from being inadvertently deleted or written over by the system. However, it is possible to delete all locked files by formatting the hard drive. -
Page 56: Remote Surveillance
REMOTE SURVEILLANCE QT518 & QT5116 User Manual 6. REMOTE SURVEILLANCE 6.1 Accessing the DVR Accessing the DVR from a computer attached to the same router: If you are only going to access the DVR from a computer that is attached to the same router as the DVR you only need to setup the information in the NETWORK settings using either the DHCP option or assigning a static IP following the instructions below. -
Page 57: Static Ip
REMOTE SURVEILLANCE QT518 & QT5116 User Manual 6.2.2 Static IP: You will need to setup the network settings on the DVR to match the settings of the router that you attach the DVR to. To get the router settings you would go to the run option on a computer attached to the same router as the DVR and type cmd and hit OK to bring up a command prompt (Fig 6.3), then type ipconfig at the prompt (RED arrow on Fig 6.3) -
Page 58: Pppoe
REMOTE SURVEILLANCE QT518 & QT5116 User Manual For the DVRs IP address you would enter the same first 3 sets of numbers as the gateway and select a fourth set of numbers that is different then any other device attached to the same router. If the IP address of your computer in the ipconfig (BLUE arrow in Fig 6.3) was a single or two digit number you should be ok with any three digit number less... -
Page 59: Myq-See Ddns
Once you have enabled Port Forwarding, you can configure your DDNS information by following these steps: a. Using a computer that is connected to the same network as your Q-See DVR, use your IE Browser to go to http://myq-see.com. b. Click on the New User? Link at the bottom of the page (http://myq-see.com/reg.asp). - Page 60 REMOTE SURVEILLANCE QT518 & QT5116 User Manual d. The next screen will ask you to create a domain name. Domain names must start with an (a-z) or (0-9) and cannot contain a hyphen. Once you choose your domain name, click on the [Request Domain] button.
- Page 61 REMOTE SURVEILLANCE QT518 & QT5116 User Manual e. Once you have completed steps a-d, go to Menu>System>Network (Red box in Fig 6.8), then select the Network icon (Red box in Fig 6.8), this will display the NETWORK screen shown in Fig 6.9.
-
Page 62: Port Forwarding
REMOTE SURVEILLANCE QT518 & QT5116 User Manual 6.3 Port Forwarding To access the DVR from a remote computer over the internet you would then need to forward port 80 and 2000 on the router the DVR is attached to, to the IP address of the DVR. You can get instructions on how to do this for most popular routers by going to the www.portforward.com website. -
Page 63: Setting Up Internet Explorer
REMOTE SURVEILLANCE QT518 & QT5116 User Manual 6.4 Setting Up Internet Explorer To access the DVR through Internet Explorer: once you have setup the network settings on the DVR to match the settings of your router and forwarded the ports needed by the DVR (for remote access over the internet), you need to modify your browser controls. - Page 64 REMOTE SURVEILLANCE QT518 & QT5116 User Manual To connect to the DVR from the remote computer you would then open an Internet Explorer browser window and enter the internet IP of your router that you got by going to www.myipaddress.com.
-
Page 65: Using The Remote Access Software
REMOTE SURVEILLANCE QT518 & QT5116 User Manual 6.5 Using the Remote Access Software When you connect to the DVR through a browser window to enter remote preview, you will see the following screen: Fig 6.19: Remote Preview Interface Symbol and Function Definitions: ... - Page 66 REMOTE SURVEILLANCE QT518 & QT5116 User Manual , are the function blocks. When one is active, the button will show orange. Snap Pictures: Step 1: Click on a channel to choose. Click the button, a window will appear as in Fig 6.20 Preview Snap.
- Page 67 REMOTE SURVEILLANCE QT518 & QT5116 User Manual PTZ control: Click P.T.Z to enter the interface shown in Fig 6.21 Remote PTZ Control. Click on a channel to select the speed dome. Fig 6.21: Remote PTZ control ① Move the speed dome.
- Page 68 REMOTE SURVEILLANCE QT518 & QT5116 User Manual Set Cruise: Select this function to set the Cruise function and the window below will appear: Fig 6.23: Set Cruise Double click the Add button to add presets for the selected cruise. Click the preset, a menu will pop up. Users can select presets to add.
-
Page 69: Remote Playback And Backup
REMOTE SURVEILLANCE QT518 & QT5116 User Manual 6.6 Remote Playback and Backup 6.6.1 Remote Playback Click Search to enter the playback and backup block as shown below. Users can remotely playback, backup and manage video files using this function. This DVR supports remote time search, event search and one channel playback. -
Page 70: Remote Backup
REMOTE SURVEILLANCE QT518 & QT5116 User Manual Search by Event: Step 1: Click Event search, the window below will display: Fig 6.26: Remote Event Search Step 2: Select the date, channel and event type. Then click Search. All the files found will be listed in left area. -
Page 71: Remote Menu Configuration
REMOTE SURVEILLANCE QT518 & QT5116 User Manual Step 3: Select files in left file area. Holding down the shift button while you click on the files allows you to select multiple files at once. Step 4: Click Backup to backup remotely. A progress screen will show as shown below: Note: the backup file is AVI format. -
Page 72: Remote Dvr Management
REMOTE SURVEILLANCE QT518 & QT5116 User Manual 6.8 Remote DVR Management 6.8.1 Check System Log Remotely Users can check the system log remotely. For the details of system log, please refer to Table 5.1 Details of System Log. Step 1: Click Search---->Log, the window below will appear. Event log search is the default interface. -
Page 73: Lock & Delete Files Remotely
REMOTE SURVEILLANCE QT518 & QT5116 User Manual 6.8.2 Lock & Delete Files Remotely Users can lock and delete video files through the network. Step 1: Click Search---->Playback---->File manager, the window below will appear: Fig 6.31: Remote File Manager Step 2: Select the date and channels, click Search. All the files found will be listed in the day in left area. -
Page 74: Mobile Surveillance
MOBILE SURVEILLANCE QT518 & QT5116 User Manual 7. MOBILE SURVEILLANCE This DVR supports mobile surveillance by PDA or smart phones with Win mobile and symbian OS on 3G networks. Below are the details of the compatible OS versions. Please check the Symbian version information before using mobile view. -
Page 75: Phones With Windows Mobile Pro
MOBILE SURVEILLANCE QT518 & QT5116 User Manual 7.1 Phones with Windows Mobile Pro Step 1: First you will need to activate network access on the mobile phone and then run “Internet Explorer”. Step 2: Input the DVR’s IP address and then setup the connection as shown below: Step 3:Click on the software name. - Page 76 MOBILE SURVEILLANCE QT518 & QT5116 User Manual Step 5:Input the server’s address, ID and password respectively in the columns of “Server”, “User” and “Password”, and click “Go” to log on the DVR. It will show the picture if accessed successfully.
-
Page 77: Phones With Symbian
MOBILE SURVEILLANCE QT518 & QT5116 User Manual 7.2 Phones with Symbian Please use the smart phones with Symbian versions supported by this unit. Step 1:First enable the network access on the mobile phone. Then run Web browser. Step 2:Input the DVR’s IP address in a new-built bookmark. Click this bookmark to connect to the DVR. - Page 78 MOBILE SURVEILLANCE QT518 & QT5116 User Manual Step 7:Click System setting--->Login Setting to enter login interface. Step 8:Input the DVR’s address, ID and password respectively. Then save. Notice: About Access point, there may be different access points in different countries or from service providers.
-
Page 79: For Iphone Mobile Clients
MOBILE SURVEILLANCE QT518 & QT5116 User Manual 7.3 For iPhone Mobile Clients At present, the software only supports versions of iPhone OS 2.2 and above, If your iPhone firmware is lower, please upgrade it. Below is the setup method for iPhone mobile clients: Step 1:Enter into App Store function of iPhone... - Page 80 MOBILE SURVEILLANCE QT518 & QT5116 User Manual Step 4: Enter your iTunes Store password, click “OK”will display below interface Note: the first time you operate please enter your user ID; if you do not have a Store account, you need to setup one.
- Page 81 MOBILE SURVEILLANCE QT518 & QT5116 User Manual Step 7: Click Live View, the default Cam1 picture will be displayed. Click to capture picture. Step 8: On function interface, click Image View to view the captured picture. Click to switch to next or previous picture.
- Page 82 MOBILE SURVEILLANCE QT518 & QT5116 User Manual Live View After successfully installing SuperCam software, Click on System Setting (Pic 1), and then input DVR’s IP address or Domain name, User name and password to log in (Pic 2). If connected successfully, it will go to Live View of CH1 as default (Pic 3), please choose other desired channels from channel button underneath.
-
Page 83: Product Specifications
PRODUCT SPECIFICATIONS QT518 & QT5116 User Manual 8. PRODUCT SPECIFICATIONS QT518 ITEM DEVICE PARAMETER SPECIFICATION COMPRESSION COMPRESSION FORMAT Standard H.264 Baseline VIDEO VIDEO IN COMPOSITE 1.0V p-p/75Ω, BNC x 8 VIDEO OUT COMPOSITE 1.0V p-p/75Ω, BNC x 2 S-Videox1, VGAx1... - Page 84 PRODUCT SPECIFICATIONS QT518 & QT5116 User Manual QT5116 ITEM DEVICE PARAMETER SPECIFICATION COMPRESSION COMPRESSION FORMAT Standard H.264 Baseline VIDEO VIDEO IN COMPOSITE 1.0V p-p/75Ω, BNC x 16 VIDEO OUT COMPOSITE 1.0V p-p/75Ω, BNC x 2 S-Videox1, VGAx1 DISPLAY RESOLUTION 720*576 (PAL),...
-
Page 85: Appendix A: Faq's
APPENDIX A: FAQ’S QT518 & QT5116 User Manual APPENDIX A: FAQ’s The DVR does not start after connecting the power, what is wrong? a. The power adapter may have been damaged, or is not providing enough power. Please change the adapter. - Page 86 123456), or you can use the digital keys on the front panel, or the digital keys on the remote control. How do I upgrade the firmware on the DVR? After you download the new firmware from the Q-See website at www.q-see.com, copy it onto a USB flash drive. Then select “upgrade” in the menu.
-
Page 87: Appendix B: Calculate Recording Capacity
APPENDIX B: RECORDING CAPACITY QT518/QT5116 User Manual APPENDIX B: CALCULATE RECORDING CAPACITY Users can calculate the hard drive size needed according to the time saving specification and DVR recording settings listed below. Below is an estimated table outlining hard drive space used when the DVR is configured at various settings. -
Page 88: Appendix C: Compatible Devices
APPENDIX C: COMPATIBLE DEVICES QT518/QT5116 User Manual APPENDIX C: COMPATIBLE DEVICES COMPATIBLE USB DRIVES (AFTER TESTING) BRAND CAPACITY 512MB, 1G, 2GB NETAC KINGSTON AIGO SMATTER VIDER SANDISK COMPATIBLE SATA CD/DVD WRITERS (AFTER TESTING) BRAND CAPACITY SAMSUNG TS-H653B LITE-ON DH-20A6S01C 81 |... - Page 89 DISCLAIMER The material in this document is the intellectual property of our company. No part of this manual may be reproduced, copied, translated, transmitted, or published in any form or by any means without our company’s prior written permission. Our products are being continually improved and we reserve the right to make changes without notice to the system and its operating software.
Need help?
Do you have a question about the QT5116 and is the answer not in the manual?
Questions and answers