Q-See QT Series User Manual
Qt series nvrs
Hide thumbs
Also See for QT Series:
- User manual (89 pages) ,
- Remote monitoring setup manual (78 pages) ,
- Manual (48 pages)

Related Manuals for Q-See QT Series


Summary of Contents for Q-See QT Series
-
Page 1: User Manual
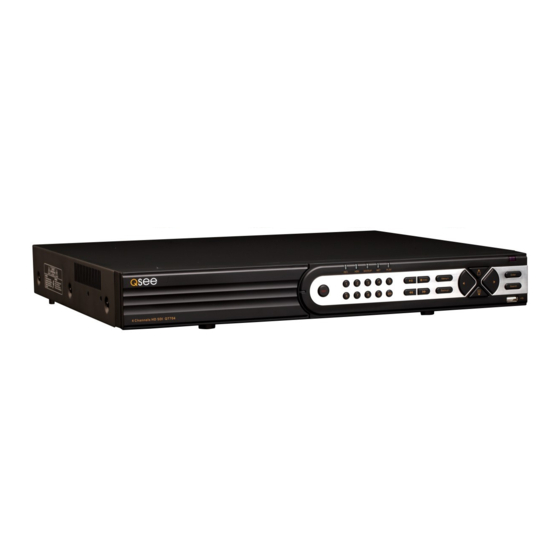
QT SERIES NVRS BACKUP PLAY Menu/+ Enter /ESC 0/10+ Backup/- Search HD NVR QT8316 USER MANUAL... - Page 2 Permanent upgrading service is provided for the software and is available at www.Q-See.com. Be certain to make the most of your warranty by completing the registration form online. In addition to warranty and technical support benefits, you’ll receive notifications of product...
-
Page 3: About This Manual
We encourage you to visit our website at www.Q-See.com to check for the latest firmware updates and product announcements. -
Page 4: Table Of Contents
TABLE OF CONTENTS 1. INTRODUCTION For Your Safety Features 2. CONNECTIONS AND CONTROLS 2.1 Connections 2.2 Mouse 2.3 Remote Control 2.4 Video Display Connecting a Video Display Multiple Monitors and Spot Out 2.5 IP Cameras Using the POE Ports On Your Local Network Over the Internet Camera Placement Additional Considerations... - Page 5 7.2 Alarm Output 7.3 Alarm Configuration Sensor Motion Video Loss Other Alarm Alarm Out 8. HARD DISK DRIVE 8.1 Installation/Removal 8.2 Calculating the Recording Capacity of a Hard Drive APPENDIX A.1 Troubleshooting Q-SEE PRODUCT WARRANTY Questions or Comments? Contact Us...
- Page 6 This page intentionally blank...
-
Page 7: Introduction
CHAPTER 1 FOR YOUR SAFETY To prevent damage to your Q-See product or injury to yourself or to others, read and understand the following safety precautions in their entirety before installing or using this equipment. Keep these safety instructions where all those who use the product will read them. -
Page 8: Features
FEATURES This NVR uses high-performance video processing chips and an embedded Linux operating system for quality image recording and ease of use. It utilizes numerous advanced technologies including the industry-standard H.264 compression to deliver high-quality, smooth videos and dual stream capability for remote viewing. A SATA hard-drive interface offers upgradability and two video ouputs allows for the choice of viewing on a VGA monitor or a standard TV. - Page 9 ALARM 1-4 channel alarm output and up to 16-channel (depending on model ) alarm input available Supports scheduling for motion detection and sensor alarm Supports pre-recording and post recording Supports linked channels recording once motion or alarm is triggered on designated channel SECURITY Customize user rights: log search, system setup, two way audio, file management,...
-
Page 10: Connections And Controls
CONNECTIONS AND CONTROLS CHAPTER 2 2.1 CONNECTIONS The illustrations below show the ports found on the back of your NVR. Their location will DC 48V DC 48V DC 12V DC 12V differ by model, but their function will be the same. The Connections and Specifications sheet that came with your recorder will show the layout of your recorder’s connectors along with any extra information that may apply to your model. - Page 11 RS232 RS232 RS232 Depending on your model, your NVR may have one or more of these ports as well: AUDIO AUDIO AUDIO Standard RCA-type connectors. Audio In ports are for connecting microphones which have been located near a AUDIO camera to capture audio. The Audio Out port is to connect to a speaker.
-
Page 12: Mouse
2.2 MOUSE The mouse is the default tool for navigating through the menus. We have found that the majority of our customers prefer to operate their systems using the USB mouse because of its ease of use and flexibility and our manual is set up with this in mind. Certain functions can also be performed using the controls on the front panel of your NVR. -
Page 13: Remote Control
2.3 REMOTE CONTROL The remote control allows you to perform most of the day-to-day functions from a short distance. It functions as a typical remote control with additional buttons allowing you to navigate through menus and control functions. We recommend that you configure your NVR using the mouse controls, reserving the remote control for operations such as live viewing, file search and playback. - Page 14 -/-- Multi Next Audio SPOT ENTER Menu Exit IRIS+ P.T.Z. Focus Zoom IRIS- Preset Cruise Wiper Light Track Clear Fn 2 INFO Snap Search Backup Zoom PICTURE 2-3...
- Page 15 Item Button Function Soft power down switch. Use this before un- POWER plugging the NVR Begin recording Numbers Input numbers in fields or select camera Not functional at this time Multi- Choose multi-screen display mode Screen Next Switch to next live view group Switch to sequential channel display Audio Enables Audio in Live View Mode...
-
Page 16: Video Display
2.4 VIDEO DISPLAY QT-Series NVRs can use a television or a 19” or larger monitor as a main video display. Certain models also provide the option of using a high definition display, such as an HDTV. A video display is not needed for day to day use of your NVR if you are only monitoring it remotely via a mobile device or using a computer, but one is needed for initial setup. -
Page 17: Multiple Monitors And Spot Out
Changing Display Resolution BASIC BASIC You can adjust the NVR to optimize its output System System Date & Time Date & Time to best match the capabilities of your monitor Device Name Device Name EDVR EDVR or HD display through the following steps: Device ID Device ID Video Format... -
Page 18: Ip Cameras
2.5 IP CAMERAS What makes Internet Protocol (IP) or Network cameras different is that they each have a little computer processor inside them that allows them to talk to the NVR over a network - including the Internet. There are three ways you can connect your cameras to your NVR: 1. -
Page 19: On Your Local Network
• To view video from networked cameras, you will need to have the NVR search for the camera on the network. STEP 1. Connect the camera to a POE Injector, such as Q-See’s QAPE model. STEP 2. Plug the injector into a power outlet. - Page 20 STEP 6. Select a camera or cameras from the list by checking the box to its left. Click Refresh, if the camera you’re looking for does not appear. STEP 7. Click OK to return to the Device Manager window. PICTURE 2-14 STEP 8.
-
Page 21: Over The Internet
PICTURE 2-17 STEP 1. Connect the camera to a POE Injector, such as Q-See’s QAPE model. STEP 2. Plug the injector into a power outlet. STEP 3. Use a network cable to connect the injector to a network port. - Page 22 CONFIRMING THAT PORTS ARE OPENED Like your NVR, your cameras feature UPnP technology that allows them to communicate with the network and through to the Internet. Two “ports” (think of them as doorways through the firewall) are used; 85 and 9008. You will want to verify that these have been automatically opened by using an online tool at www.canyouseeme.org using the same computer.
- Page 23 STEP 10. Return to your NVR. Select IP Camera from the Main Menu. Click on Add. IP Camera PICTURE 2-21 STEP 11. Check the box titled Enable. PICTURE 2-22 STEP 12. Enter the camera’s information: IP address: Shown on CanYouSeeMe.org Server Port: 85 User Name: admin Password: 123456...
-
Page 24: Camera Placement
CAMERA PLACEMENT When installing your camera, it is important to select a proper site not only for field of view, but for other considerations as well: Distance from viewing/recording device. The further the camera is from the NVR or monitor, the higher the chances of signal degradation. The camera’s power supply should be located as near to the camera as possible when the distance exceeds 200’... -
Page 25: Additional Considerations
Because your camera is weatherproof, it requires less protection than weather-resistant cameras and it can be placed in more exposed locations if needed. Keep in mind that most Q-See cameras are designed to operate between -40°F to 122°F (-40°C to 50°) with a relative humidity of up to 95%) and consider wind chill and other environmental factors when selecting your location. -
Page 26: Basic Functions
BASIC FUNCTIONS CHAPTER 3 3.1 POWER ON/OFF Before turning on the NVR, ensure that all connections are good. POWER ON AND LOGIN Connect the power supply and the NVR will power up. The LED labelled POWER on the front will illuminate and the NVR will display the live image from Channel 1. Before you can proceed, you will need to log into the NVR. -
Page 27: The Control Bar
3.2 THE CONTROL BAR When a user is logged in, pressing the ESC button on the NVR or right-clicking on the screen with the mouse will display the CONTROL BAR on the bottom of the screen. Move Screen Display Dwell Zoom Record Control Bar... -
Page 28: Display Mode
DISPLAY MODE By clicking on the display mode buttons on in the Control Bar you can quickly configure how your cameras’ video feeds are displayed. The settings here will temporarily override the default configuration made in the Main Monitor tab in the Live menu (see Section 4.2 Live Configuration) until the system reboots. - Page 29 Picture in Picture If you wish to only monitor two channels at a time, use the Picture-in-Picture mode. The icon for this display mode is shown at the far right of Picture 3-4. None None PICTURE 3-6 PICTURE 3-7 Clicking on the Picture-in-Picture button will open a pop-up window (Picture 3-6) allowing you to select which channel will be the main video feed.
-
Page 30: Live Viewing And Recording
3.3 LIVE VIEWING AND RECORDING SWITCHING VIDEO OUTPUT As described in Section 2.4 Video Display, the NVR is normally configured to output video signal to a 19” or larger monitor through the VGA port on the back. LIVE VIEWING The normal mode of the NVR is to display the live feed from the cameras. Configuring which channels will be displayed, naming the cameras and other display settings will be covered in SECTION 4.2. -
Page 31: Quick Playback
3.4 QUICK PLAYBACK Pushing the playback button on the NVR or remote will enable you to play back what has been recently recorded by launching Quick Playback. Playback Button Clicking on the Playback button within the Control Bar will begin the Quick Playback process as well. - Page 32 PLAYBACK CONTROL BAR The controls operate in a similar fashion to those of a conventional NVR or other video playback device but with a few additional commands available to you: Play/ Play/ Frame Frame Rewind Rewind Screen Display Screen Display Zoom Color Zoom Color Trim Backup...
- Page 33 Playback Progress Bar: The slider moves along the Playback Progress Bar as the video plays. Moving this with the mouse will go to another segment of the video. You can move to another point in a single video by first clicking on that channel and then moving the slider to the desired time.
-
Page 34: Main Menu Setup
MAIN MENU SETUP CHAPTER 4 4.1 BASIC CONFIGURATION This chapter is intended to help you get your NVR up and running before you activate any advanced features which are covered in later chapters. You can use the mouse, remote control and the buttons on the front of the NVR to operate your system, but for convenience, we will be discussing operations using the mouse. - Page 35 BASIC MENU There are three tabs covering System, Date & Time and Daylight Savings Time (DST). System Tab The following settings can be changed in this menu: Device Name: This will display when you access the NVR remotely via your BASIC BASIC mobile device, a web browser or...
- Page 36 Date & Time Tab Set date, time, time format and related configurations in this menu. To maintain the integrity of recorded video, you should set IMPORTANT! the NVR to the correct date and time before making changes in other menus. Setting the correct date and time before proceeding is essential to maintaining the integrity of your video records - especially for purposes of evidence.
-
Page 37: Live Configuration
4.2 LIVE CONFIGURATION Live configuration includes four submenus: Live, Main Monitor, Spot and Mask. Live Tab Use this menu to set camera names and adjust picture colors, brightness, hue saturation and contrast for optimal picture results. LIVE LIVE You can individually name cameras by Live Live Main Monitor... - Page 38 Spot Tab This allows select feeds to be viewed on a separate monitor that is connected to the NVR but may be in another room, for example. There will be no menu access on this auxiliary display. The channel groups in the Spot monitor can be different than those in the main monitor.
-
Page 39: Record & Cameras
4.3 RECORD & CAMERAS Depending on your model, your NVR will record at 720p and/or 1080p resolution. There are five sets of options; Enable, Record Bitrate, Time, Stamp and Recycle Record. Enable Tab Select some or all of the cameras to record to the NVR. - Page 40 Time Tab You can set the length of time the NVRs record an event before and after a motion detection or alarm is triggered as well as how long an individual record is preserved. Pre-alarm record time: This sets the length of time showing events prior to a motion detection or sensor-triggered event that is included in the record.
- Page 41 Snap Tab In this tab, you can configure how many still images are taken, the quality of the images and the timing between them when the Snapshot button is pushed on the Control Bar. RECORD RECORD Enable Enable Record Bitrate Record Bitrate Time Time...
-
Page 42: Schedule Configuration
4.4 SCHEDULE CONFIGURATION Your NVR is configured to record whenever motion is detected. If this is your desired setting then you will not need to make any changes. However, you may configure each channel to record at specific times based on time of day, motion detection or other sensor input. There are three tabs;... -
Page 43: Network Configuration
Remote Monitoring Guide which is on the disk that came with your system or which can be downloaded from our website at www.Q-See.com/Support. The four tabs in this window are Network, Sub-Stream, Email and Other Settings. If you will only be monitoring the NVR from another computer on your network, you will only need to use the first three tabs. - Page 44 Obtain IP Address Automatically – Clicking this box will obtain the IP address, subnet mask, and gateway IP from the router. PPPOE – Selecting this enables Point-to-Point Protocol over Ethernet (PPPoE) which allows you to directly connect your NVR to the Internet through your modem. Do not use this unless you are connected to a modem instead of a router.
- Page 45 EMAIL This tab allows you to set how your NVR will send out e-mail alerts. You will be able to send e-mail alerts to three addresses. NOTE! Depending upon your settings, the system can generate a lot of e-mail alerts. For that reason, we recommend setting up a dedicated e-mail address specifically for the system to send alert notices.
- Page 46 NVMS software which is covered in their own Device ID Device ID manuals. The free software is included either on the CD that came with your system, or it can be downloaded from www.Q-See.com/ custhelp along with the manuals. Default Default Apply...
- Page 47 Service (DDNS). This will give you a domain name that can be linked to your IP address and will automatically – and invisibly – forward remote connections to your network when the IP address changes. NETWORK NETWORK Q-See offers DDNS for free at MyQ-See. Network Network Email Email...
-
Page 48: User Management
4.6 USER MANAGEMENT USER ACCOUNTS AND PASSWORDS You can set up accounts for each individual user and grant them control of select parts of the surveillance system. An administrator account is already created on the NVR. Additional accounts can be created for users but only one administrator account is allowed. NOTE! The Admin account cannot be deleted. - Page 49 4.7 ADVANCED In this set of commands, the user can erase all the settings, import or export data files to and from the NVR and control who can remotely access the NVR through three submenus: Reset, Import/Export and Block/Allow List. RESET Clicking on this option will open a warning dialogue asking you to confirm that you wish...
-
Page 50: Time Search
4.8 FILE SEARCH, PLAYBACK AND MANAGEMENT Access the recordings on the NVR, play them back and backup the recordings to an external storage device. Four submenus appear in this section: Time Search, Event Search, File Management and Image. PICTURE 4-34 NOTE! Throughout this window, if the screen resolution is VGA 800*600, the time search interface will show a Hide button. -
Page 51: Event Search
EVENT SEARCH Selecting this tab will bring up a list of recorded events. Your NVR is configured by default to record when motion is detected. You can choose whether to display events triggered by Motion, Sensor or both. These files are saved as events. Select the date you wish to search and click Image the Search button. -
Page 52: Image
IMAGE This tab functions much as the Event Search tab by allowing you to search for and view the still images captured when you click on the Snapshot icon on the Control Bar. These images are stored on the NVR’s hard drive just as with video files. Select the date to search, along with the start and end times to search between. -
Page 53: Backup
BACKUP CHAPTER 5 This NVR supports backing up files to USB flash drives and USB hard drives through the USB port on the front panel. Remote backups can be performed over the Internet. Refer to Section 2.4 Remote Backup in the Remote Monitoring Guide. NOTE! External USB hard drives used for backing up data will need to be in the FAT32 format. -
Page 54: Backing Up A File
BACKING UP A FILE Selecting BACKUP in the Main Menu will open the Backup configuration window. The search for files to backup is much like the method used to search for files to play back as was covered in the previous chapter. Set the start and end times as well as channel(s) you wish to back up. -
Page 55: Playing Back A Video File On A Computer
PLAYING BACK A VIDEO FILE ON A COMPUTER Windows PC - You may play AVI formatted files using Windows Media Player, QuickTime, DIVXplayer or other media players. The files can be opened and played in a similar manner to any other media file. The Superplay.msi program is a PC-only application and is saved onto the same drive as video files when the Backup Player option is selected. -
Page 56: Nvr Management
NVR MANAGEMENT CHAPTER 6 6.1 INFORMATION PICTURE 6-1 This window enables the user to monitor the status of the system, its network connection, online users, history and events through five submenus: System, Event, Log, Network and Online Users. INFORMATION INFORMATION System System Event... -
Page 57: Event Information
EVENT INFORMATION This window lists recorded events. This list can be searched by date, time, type of event and channel. PICTURE 6-4 LOG INFORMATION This window lists user activity within the system. PICTURE 6-5 This record can be searched by type of operation, date and time, and etcetera. It can also be exported to external USB storage devices using the backup function. -
Page 58: Online User Information
ONLINE USER INFORMATION Information on remote users currently connected is displayed in this window. PICTURE 6-7 Refresh – Updates the list of online users Disconnect – The Administrator can disconnect a selected user from the NVR. That PC will not be able to access the device for five minutes thereafter. You can also permanently block a user by using the Block/Allow list in the Advanced menu. -
Page 59: Disk Management
6.3 DISK MANAGEMENT This window displays information on the drive or drives mounted within the NVR including size, available space and status. DISK The Disk tab shows the capacity of the hard drive, its type and status. The drive can be set to read only, which will DISK MANAGEMENT DISK MANAGEMENT Disk... -
Page 60: Firmware Upgrade
USB port. PICTURE 6-12 Firmware upgrades are available from Q-See at www.Q-See.com/Support and may be found by looking up your specific model. Firmware should only be upgraded to fix a specific problem or add features as ongoing development may result in features being replaced or changed. -
Page 61: Logoff
6.5 LOGOFF Logging out of the NVR is recommended when there are multiple users or when physical access to the NVR is not restricted. Clicking on the Logoff icon will bring up a window asking for confirmation. After logging off, a user can log back in by clicking on the Menu icon and entering their user name and password. -
Page 62: Alarms
ALARMS CHAPTER 7 Many QT Series NVRs feature connections for external alarms – both input and output. Please consult Chapter 2 Connections and Controls to determine whether your model includes this feature and where the connection block is located. The alarm connector block shown in is only a representation and your actual connector may look different. -
Page 63: Alarm Output
7.2 ALARM OUTPUT The alarm output port should not be directly connected to a higher power load (greater than 1A) to avoid high current which may damage the relay. Use the co-contactor to establish the connection between the alarm output port and the load. •... -
Page 64: Alarm Configuration
7.3 ALARM CONFIGURATION Alarm configuration allows the NVR to begin recording based on input from other remote sensors such as infrared motion detectors or contact alarms which are connected to it. There are five submenus; Sensor, Motion, Video Loss, Other, and Alarm Out. SENSOR In this window you can setup optional external sensors to cause the NVR to begin recording. -
Page 65: Motion
To Record allows you to determine which cameras will begin recording. Cameras can be set to record individually, in blocks, or all cameras can be activated. To PTZ activates preset, cruise or track functions on selected Pan-Tilt-Zoom cameras. Depending on your model of PTZ camera, one of up to 128 pre-set actions can be engaged. -
Page 66: Video Loss
Test your settings by moving something or someone through the grid area in the camera’s view. Motion should not be detected outside of this area but you should see a yellow humanoid figure appear in the screen once the NVR detects movement within the grid. -
Page 67: Alarm Out
ALARM OUT Set how the alarms are handled and transmitted in this window. This controls any device attached to the ALARM OUT port on the back of the NVR. There are three tabs; Alarm Out, Schedule and Buzzer. Alarm Out Tab You can set the relay alarm out name as well as the hold time. -
Page 68: Hard Disk Drive
HARD DISK DRIVE CHAPTER 8 Your NVR uses a standard desktop or 3.5” SATA (Serial Advanced Technology Attachment) hard disk drive and will support drives up to 3TB (terabytes). These drives are the current industry standard and may be purchased wherever computer parts are sold. Depending on where you purchased your NVR, your hard drive may already be installed. - Page 69 STEP 4. Connect the power and data cables. Press firmly, but do not force them onto the pins or you may damage them. The connectors are HARD DRIVE HARD DRIVE “keyed” to ensure they are connected in the proper position. STEP 5.
-
Page 70: Calculating The Recording Capacity Of A Hard Drive
8.2 CALCULATING THE RECORDING CAPACITY OF A HARD DRIVE While the physical data capacity of a hard drive is fixed, how much video you can record upon it depends on your recording configurations. Higher quality recordings will take up more space on the drive and setting the NVR to record for more frequently will fill it up more rapidly. -
Page 71: Appendix
APPENDIX A.1 TROUBLESHOOTING 1. The NVR does not start after connecting the power, what is wrong? a. The power adapter may have been damaged, or is not providing enough power. Please change the adapter. b. The NVR may not be getting enough power from the outlet or surge protector it is attached to. - Page 72 PICTURE A-1 How do I upgrade the firmware on the NVR? After you download the new firmware from the Q-See website at www.Q-See.com/ Support and copy it onto a USB flash drive. Then select Upgrade in the menu. Do not turn the system power off during the upgrade process! WARNING! Doing so may damage the chipset and prevent the NVR from starting.
- Page 73 11. What are the PC configurations for 16-channel real time access with fully open mainstream channel? PC MODULE PARAMETERS Intel Core(TM)2 Duo CPU E4600 500G 1GB Video RAM, Full Direct Draw Support Windows XP(SP2 above)/ VISTA/Win7/8, Mac OSX 10.7, 10.8, 10.9 DIRECTX 12.
-
Page 74: Q-See Product Warranty
Q-SEE PRODUCT WARRANTY Q-See is proud to back all of our products with a conditional service warranty covering all hardware for 12 months from the date of purchase. Additionally, our products also come with a free exchange policy that covers all manufacturing defects for one month from the date of purchase. -
Page 75: Questions Or Comments? Contact Us
QUESTIONS OR COMMENTS? CONTACT US PRODUCT SUPPORT, DOWNLOADS, FIRMWARE UPDATES & MANUALS 24/7 Technical Resource Data Base Live Chat (M-F, 6am - 7pm Sat & Sun 9am - 5pm PST) www.Q-See.com/Support... - Page 76 Digital Peripheral Solutions, Inc. 8015 E. Crystal Drive Anaheim, CA 92807...
Need help?
Do you have a question about the QT Series and is the answer not in the manual?
Questions and answers