Table of Contents
Advertisement
Full HD 1080p Indoor
1080p Indoor/Outdoor
Pan & Tilt
Wi-Fi Camera
Security Wi-Fi Camera
with Siren
Waiting for
Raul's pic
Model AWF61
Model AWF33-S2
User Guide
User Guide
Please read these instructions completely
Wireless Made Simple.
Please read these instructions completely
Wireless Made Simple.
before operating this product.
before operating this product.
Advertisement
Table of Contents

Related Manuals for ALC AWF61


Summary of Contents for ALC AWF61
- Page 1 1080p Indoor/Outdoor Pan & Tilt Wi-Fi Camera Security Wi-Fi Camera with Siren Waiting for Raul’s pic Model AWF61 Model AWF33-S2 User Guide User Guide Please read these instructions completely Wireless Made Simple. Please read these instructions completely Wireless Made Simple.
-
Page 3: Table Of Contents
Connecting to the Internet ....................11 Connecting Via the Android App ..................12 Connecting Via the Apple App ..................14 Connecting Using Ethernet Cable ..................19 ALC SightHD App Icons ....................25 To Take Snapshots ......................28 To View and/or Take Videos ....................30 Motion Recordings ......................31 To Play Videos .........................32... -
Page 4: Important Safety Instructions
IMPORTANT SAFETY INSTRUCTIONS PRODUCT SAFETY: When used in the directed manner, this unit has been designed and manufactured to ensure your personal safety. Improper use of this product can result in potential electrical shock or fire hazards. Please read all safety and operating instructions carefully before installation and use, and keep these instructions handy for future reference. - Page 5 IMPORTANT SAFETY INSTRUCTIONS WARNING: STRANGULATION HAZARD: Infants have STRANGLED in power cords. Keep power cords more than 3 feet away from cribs, bassinets, play yards, and other safe sleep environments for infants. IMPORTANT SERVICE SAFETY INSTRUCTIONS Damages caused by non-compliance with this operating manual will void the warranty! Read and Follow Instructions - All the safety and operating instructions should be read before the product is operated.
- Page 6 IMPORTANT SAFETY INSTRUCTIONS 10. Attachments - Do not use attachments unless recommended by the product manufacturer as they may cause a hazard. 11. Water and Moisture - Do not use receivers or video monitors near water — for example, near a bath tub, wash bowl, kitchen sink or laundry tub, in a wet basement, near a swimming pool and the like.
-
Page 7: Introduction
After unpacking, you will have the following items: Camera AC Adapter Antenna Camera Bracket Extension Cable 1080p Indoor/Outdoor Wi-Fi Camera Model AWF61 Quick Start Guide Please read these instructions completely Wireless Made Simple. before operating this product. Screw/Anchor Kit Quick Start Guide MicroUSB to RJ-45 Cable... -
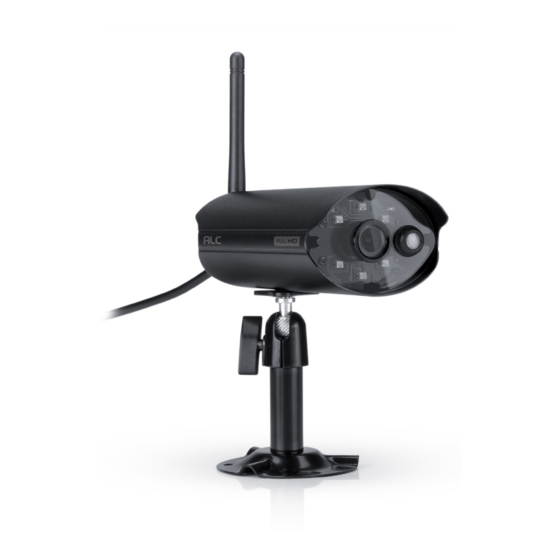
Page 8: Getting To Know Your Camera
INTRODUCTION Getting to Know Your Camera FRONT Link Status Power Status Passive Infrared Infrared Sensor LEDs x6 Mounting Socket REAR Power Antenna Pigtail Connector Microphone microSD Slot microUSB Jack Cloud When an SD card is inserted and the Cloud option is activated (see page 44), recorded videos will automatically be transferred onto the cloud. -
Page 9: Installation
INSTALLATION Installation Tips WARNING: Weatherproof, IP66 rated cameras are suitable for outdoor installation. However, if possible, it is recommended to install in a location that provides some shelter from the elements, such as beneath roof eaves. • Before you install the camera, plan where and how it will be positioned, and where you will route the cable that connects the camera to the power adapter. -
Page 10: Installing The Camera
INSTALLATION Installing the Camera IMPORTANT: Please set up the camera first before mounting and stay in close range with the camera during setup. If not mounting, but just using on a flat surface (desk, table, etc.), skip to step 4. Secure the multi-position Camera Bracket to a stable surface, ceiling or wall using the three screws. - Page 11 INSTALLATION Installing the Camera Screw Antenna clockwise into rear of camera. To record videos you must insert a MicroSD card, not included. The MicroSD Slot is located under the flap on the rear of the camera. microSD Slot A Class 10 microSD card is required. This camera supports up to 128GB microSD card.
-
Page 12: Remote Access
REMOTE ACCESS Overview This camera allows you to view live video from an iPhone , iPad , iPod Touch or Android ® ® ® smartphone or tablet. Free apps are available through the Apple App Store or the Android Market/Google Play. Up to three remote users can access live video at the same time as long as they have the Device ID (DID) Code and Security Code. -
Page 13: Connecting To The Internet
Download the ALC SightHD App as follows: APPLE DEVICE: From your iPhone or iPad, go to the App Store and search for ALC SightHD. ANDROID DEVICE: From your Android smartphone or tablet device, go to Google Play and search for ALC SightHD. -
Page 14: Connecting Via The Android App
(allow the camera up to 90 seconds to boot up). When the green Link Status indicator begins blinking, the camera is ready to be set up. Launch the ALC SightHD App and the Setup Wizard screen will appear. Tap “+” to add new system. Tap WiFi Cameras. - Page 15 REMOTE ACCESS Connecting Via the Android App The Manage Wi-Fi Network pop-up box will appear. Select your home network from the pull down menu, and then enter your home network’s Wireless Password. Tap OK. Tap Live View; “Waiting for system to connect Countdown”...
-
Page 16: Connecting Via The Apple App
REMOTE ACCESS Connecting Via the Apple App Plug camera into an electrical outlet and the red Power Status indicator will light (allow the camera up to 90 seconds to boot up). When the green Link Status indicator begins blinking, the camera is ready to be set up. - Page 17 REMOTE ACCESS Connecting Via the Apple App When asked for a password, enter, “12345678”. Tap Join to connect. Now Launch the ALC SightHD App and the Setup Wizard screen will appear indicating the setup instructions. Tap “+” to start the Wizard.
- Page 18 REMOTE ACCESS Connecting Via the Apple App The Apple Device will now search for the camera. Once the screen indicates the camera is connected, Tap Live View. ‘HD-000011’ has been connected. — 16 —...
- Page 19 REMOTE ACCESS Connecting Via the Apple App The Apple device will scan and detect the camera. Once found, the screen will show a Live View briefly before moving to a set up screen. You will then be requested to change your password if this is the first time accessing the camera.
- Page 20 REMOTE ACCESS Connecting Via the Apple App The system will reboot the camera, please give it up to 90 seconds, until the App finishes the count down from 90. Tap still image for live video. If camera does not connect, tap Reconnect icon.
-
Page 21: Connecting Using Ethernet Cable
REMOTE ACCESS Connecting Using Ethernet Cable Launch the ALC SightHD App and the Setup Wizard screen will appear. Tap “+” to add new system. Tap WiFi Cameras. Tap on For Existing System at the bottom of screen. — 19 —... - Page 22 REMOTE ACCESS Connecting Using Ethernet Cable Tap on Search in top, left corner. Select the DID Code (your Camera). Enter the Default Security Code, 123456 and tap Save. Tap the Checkmark to Save. — 20 —...
- Page 23 REMOTE ACCESS Connecting Using Ethernet Cable Tap on Play button. Enter a new Security Code and confirm. You must remember what the Security Code is. Tap OK. — 21 —...
- Page 24 REMOTE ACCESS Connecting Using Ethernet Cable Tap on Edit Setting at the bottom of the screen, then Setting, then Advanced. Enter the default Admin password, 123456 and tap OK. — 22 —...
- Page 25 REMOTE ACCESS Connecting Using Ethernet Cable Tap on Base Settings and go down to Wi-Fi Setting and tap on it. Tap on the first line to pull up the list of available Wi-Fi networks and select your Wi-Fi. — 23 —...
- Page 26 REMOTE ACCESS Connecting Using Ethernet Cable Enter your Wi-Fi password. Tap OK. Unplug the Ethernet cable from the camera. The camera will reboot during the 90 second countdown and will be connected to your Wi-Fi after this process is complete. —...
-
Page 27: Alc Sighthd App Icons
REMOTE ACCESS ALC SightHD App Icons Main Screen A still picture (or two arrow icons) will appear when on the main screen. Tap the still screen to access the live video screen. See the next page for icon descriptions. Live View Screen The following icons appear when on the Live View Screen. - Page 28 REMOTE ACCESS ALC SightHD App Icons Icon Icon Description Add System Tap this icon to enter the setup wizard; see page 12 for Android and page 14 for Apple. See page 19 if connecting using an Ethernet cable. Edit Setting Tap this icon to access the App’s options.
- Page 29 REMOTE ACCESS ALC SightHD App Icons Icon Icon Description Snapshot Tap to capture screen images. The snapshots will be saved into the camera roll of your mobile device. See page 28 for more details. Record Tap to record and tap again to stop recording.
-
Page 30: To Take Snapshots
REMOTE ACCESS To Take Snapshots From the Main screen, tap to remote view your camera system. Tap the SNAPSHOT icon to take a snapshot of the current image; “Snapshot is successful” will appear briefly. To View Snapshots FOR iOS: Your snapshots will be named with the time stamp and saved into the Camera Roll >... - Page 31 REMOTE ACCESS To Take Snapshots PINCH AND ZOOM: To zoom in or out, use the simple pinch and zoom gesture with this app. — 29 —...
-
Page 32: To View And/Or Take Videos
REMOTE ACCESS To View and/or Take Videos From the main screen, tap to remote view your camera system. Tap the Record icon to start recording (the recording icon appears at the top-right corner). The App will record for 1 minute. See page 32 to playback videos. -
Page 33: Motion Recordings
REMOTE ACCESS To View and/or Take Videos PINCH AND ZOOM: To zoom in or out, use the simple pinch and zoom gesture with this app. Motion Recordings If set to Software Sensitivity when motion is detected on the video camera, the camera will automatically record for one minute and then stop recording. -
Page 34: To Play Videos
REMOTE ACCESS To Play Videos From the main screen, tap the Edit Setting icon. Tap the Event icon; the “Select Event Filter” pop-up will appear. For Apple, see note below. APPLE: You must tap the Search (Magnifying glass) icon to bring up the Event’s screen. - Page 35 REMOTE ACCESS To Play Videos Select the desired Start Time/Date of the videos you want to view by tapping on the respective option (date or time) and then tapping “+” or “-” to adjust. When finished, tap Done. Repeat for Stop Time/Date, then tap OK;...
- Page 36 REMOTE ACCESS To Play Videos Tap the video name once to play the video clip. When playing back a video, tap the Pause icon to pause the video. Tap again to resume. DOWNLOAD A VIDEO: To download a video to your Android or Apple device, press and hold the file name and it will download to your device.
-
Page 37: To Delete Videos
REMOTE ACCESS To Delete Videos Access the Events List as shown on pages 32-33. Tap the Edit Icon. ANDROID: Select the file you wish to delete (a check mark will appear in the box to the right of the selected file) then tap the Delete One icon. - Page 38 REMOTE ACCESS To Delete Videos To delete all files, tap the Delete All icon. A pop-up box will appear asking you to confirm; tap Yes. — 36 —...
-
Page 39: Information Screen Options
REMOTE ACCESS Information Screen Options From the main screen, tap the Information icon; a pop-up will appear. To view information (Version, etc.), tap About. — 37 —... - Page 40 Launch Settings/System Preferences from your Home screen on the Apple device. Tap Notification Center; a list of Apps will appear. Scroll down to find “ALC SightHD” App and click on it. The Setting screen displays. Turn the notification ON or OFF as desired.
- Page 41 REMOTE ACCESS Information Screen Options To Setup the Pin Lock, tap Setup PIN Lock. TIP: Setting a PIN Lock code will prevent others from activating the app and viewing your camera images. Tap the Enable Lock When Starting switch to enable, or disable the Pin Lock.
- Page 42 REMOTE ACCESS Information Screen Options Using the keyboard, enter a four digit code. Then confirm this exact code. Now that the Pin is set and enabled, whenever the App is opened you must enter this code. — 40 —...
-
Page 43: Setting Screen
REMOTE ACCESS Setting Screen From the main screen, tap the Edit Setting icon. Tap the Setting icon; the System Information Screen will appear. — 41 —... - Page 44 REMOTE ACCESS Setting Screen On this screen you can change the name of your System (camera) and access the Advanced Settings menu. — 42 —...
-
Page 45: Advanced Settings
REMOTE ACCESS Advanced Settings From the main screen, tap the Edit Setting icon. Tap the Setting icon; the System Information Screen will appear. — 43 —... - Page 46 REMOTE ACCESS Advanced Settings Tap on the Advanced icon. Enter your Admin password (Default was 123456 unless it was changed), then tap OK. See the following pages for descriptions of advanced settings. — 44 —...
- Page 47 REMOTE ACCESS Advanced Settings Tap on Base Settings and the Base setting options will appear. Perform the following on this screen: ADMIN PASSWORD: Tap to change the Admin Password from the default 123456. Admin Password is used to get into this screen. DEVICE SECURITY CODE: Tap to change the Security Code which is used to access the camera.
- Page 48 REMOTE ACCESS Advanced Settings Tap on Video Setting and the Video setting options will appear. Perform the following on this screen: VIDEO QUALITY: Tap to set the Video Quality. Tapping Better Streaming (VGA) will allow for faster video streaming, but the picture will not be as clear.
- Page 49 REMOTE ACCESS Advanced Settings MOTION MASK: This option is only visible when the Software option under Detect Mode has been activated. This feature will allow you to mask areas of the screen from detecting motion and activating the motion detector recording for that area.
- Page 50 REMOTE ACCESS Advanced Settings Tap on SD Card Setting and the SD Card setting options will appear. Perform the following on this screen: FORMAT SD CARD: Tap and then confirm to format the MicroSD card inserted in the camera. OVERWRITE SD CARD: Tap this switch to activate.
-
Page 51: Cloud Account Setup
REMOTE ACCESS Cloud Account Setup The AWF61 has a feature that will automatically upload recorded video files from the cameras MicroSD card to either Google Drive or Dropbox . To use this feature you must already have ® ® an existing Google Drive or Dropbox account. - Page 52 REMOTE ACCESS Cloud Account Setup On the Sign in screen, tap Create. To create your Cloud account, enter a valid email address and create a password. Agree to the privacy policy. Enter the verification code and tap Submit. — 50 —...
- Page 53 REMOTE ACCESS Cloud Account Setup After creating the account, a welcome screen appears. Tap OK to dismiss the message. When the Device List appears, tap on the desired option; Google Drive or Dropbox, to create the binding. — 51 —...
- Page 54 REMOTE ACCESS Cloud Account Setup To confirm binding, tap on the Dropbox or Google Drive icon. Now, you will need to sign in onto your Google Drive or Dropbox account. Enter your email and password and tap Sign in. Congratulations! Your Cloud setup is complete.
-
Page 55: Maintenance
MAINTENANCE Cameras When dust and grime builds up on the camera lens and glass, it will affect the night vision capability. The infrared light reflects off of the dust and grime, limiting the camera’s “vision.” Use a microfiber cloth to regularly clean the camera or when night vision video is cloudy or unclear. —... -
Page 56: Troubleshooting
TROUBLESHOOTING If you have any trouble with your system, try these simple steps which should handle most common issues. Problem Possible Solution Make sure the camera’s power is on. Make sure your network supports DHCP protocol. Make sure the camera and mobile device are on the The App cannot locate the camera. -
Page 57: Factory Default/Reset
TROUBLESHOOTING Problem Possible Solution The camera’s infrared LEDs shine invisible light that reflects off of surfaces such as glass and will cause white A white image appears at light. Place the camera on the other side of the window night. to improve the night vision or place it in a well-lit area (recommend to install a security lamp to improve lighting). -
Page 58: Product Specifications
PRODUCT SPECIFICATIONS Camera Communication Range ..............500 ft (150 M) in open space Camera Resolution Single Camera ................. 1920x1080 Operating Temperature ...............14°F ~ 122°F (-10°C ~ 50°C) Operating Voltage ....................DC 5V, 1.5A Current Consumption ..................500 mA (MAX) Night Vision ........................65ft Dimensions .............. -
Page 59: Warranty
WARRANTY One-Year Limited Warranty — 57 —... - Page 60 WARRANTY — 58 —...
- Page 61 Wireless Made Simple. ALCWireless.com 050917_v2...
- Page 62 Wireless Made Simple. ALCWireless.com...
Need help?
Do you have a question about the AWF61 and is the answer not in the manual?
Questions and answers