Table of Contents
Advertisement
Advertisement
Table of Contents

Related Manuals for Topcon Net-G5


Summary of Contents for Topcon Net-G5
- Page 2 Net-G5 Operator’s Manual Part Number 1004636-01 Rev C ©Copyright Topcon Positioning Systems, Inc. August, 2015 All contents in this manual are copyrighted by Topcon Positioning Systems, Inc. All rights reserved.
-
Page 3: Table Of Contents
Using Topcon Software With Your Receiver ........ - Page 4 Net-G5 Web Interface Ports ........
- Page 5 Managing Files ............. 36 Downloading and Deleting Files .
-
Page 6: Preface
TPS. Windows® is a registered trademark of Microsoft Corporation. The Bluetooth® word mark and logos are owned by Bluetooth SIG, Inc. and any use of such marks by Topcon Positioning Systems, Inc. is used under license. Other product and company names mentioned herein may be trademarks of their respective owners. -
Page 7: License Agreement
License Agreement Use of any computer programs or software supplied by TPS or downloaded from a TPS website (the “Software”) in connection with the receiver constitutes acceptance of these Terms and Conditions in this Manual and an agreement to abide by these Terms and Conditions. The user is granted a personal, non-exclusive, non- transferable license to use such Software under the terms stated herein and in any case only with a single receiver or single computer. -
Page 8: Manual Conventions
User supplied text or variable Type guest, and click Enter. Mono Italic Topcon Reference Manual. Reference to another manual or help document Refer to the Further information to note about system configuration, maintenance, or setup. Supplementary information that can have an adverse affect on system operation, system performance, data integrity, measurements, or personal safety. -
Page 9: Introduction
GPS, GLONASS, SBAS, BeiDou, and Galileo. The Net-G5 can receive and process multiple signal types (including the latest GPS L2C, L5, GLONASS C/A L2, and GALILEO signals) improving the accuracy and reliability of the solution, especially under difficult job-site conditions. -
Page 10: Receiver Features
Rover is a long distance from the nearest reference station. The Topcon Receiver Utility (TRU) is hardware configuration software for receivers and peripheral devices. You can install it on personal computers and data controllers. You can download the TRU software from the Topcon Help TotalCare website (www.topconcare.com). -
Page 11: Getting Technical Support
Before contacting a Topcon customer representative about any problems with the receiver, see “Troubleshooting” on page 37 for some solutions that may fix the issue. Contact your local Topcon dealer or visit the Topcon Total Care Web site (www.topconcare.com) for technical support. -
Page 12: Getting Acquainted
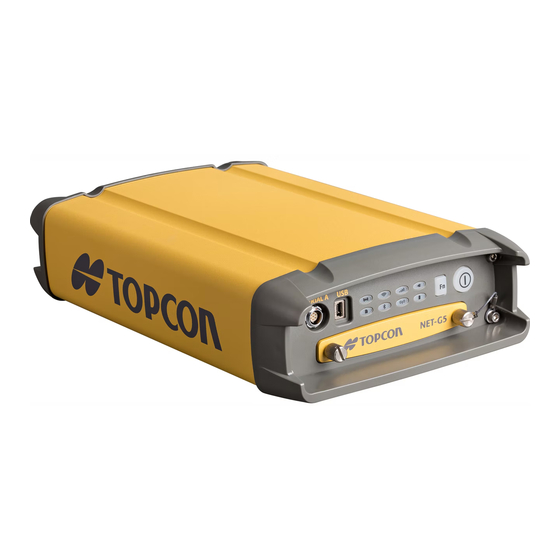
Getting Acquainted • • • • • • The Net-G5 receiver enclosure is fully sealed and incorporates the GNSS receiver board, antenna, internal batteries, memory storage, and wireless communication devices. A flexible user interface enables you to connect the receiver with various external devices, such as computers, network devices, sensors, frequency sources, etc. -
Page 13: Back Panel View
Table 1. Font Panel Ports • FN Button – Turns data recording on and off. • Power Button – Turns the receiver on and off; puts the unit in Sleep mode. • SIM Card Slot – Resides on the front panel under the door and connects the SIM card to the receiver board to provide cellular connectivity. -
Page 14: Cables And Power Supply
Cables and Power Supply The Net-G5 package includes standard communication and power cables. Table 3 lists these cables. Table 3. Receiver Package Cables Cable Description Cable Illustration USB Cable Connects the receiver to an external device (controller or computer) for high-speed data transfer and receiver configuration. -
Page 15: Sd Card (Memory)
Figure 5: Inserting an SD Card Formatting the SD Card The Net-G5 requires an external SD card formatted for the FAT32 file system. You can format the SD card using the internal disk management application provided by Microsoft; however, this application cannot create partitions larger than 32 GB. -
Page 16: Internal Batteries
Internal Batteries The Net-G5 receiver was designed with internal, non-removable batteries, so there is no battery door or connectors to worry about. These batteries, when fully are easily charged using the supplied power adapter or an external power source. See “Internal Batteries” on page 14 for more information. -
Page 17: Display Panel
Display Panel • • • • • • The Net-G5 receiver has a highly-visible display panel with single-button operation. The LED display panel enables you to control receiver power and data recording. The LEDs display the status of the satellite tracking, recording/memory capacity, wireless connections, and power. -
Page 18: Function Button
Function Button Table 5. Function Button Features FUNCTION PRESS BUTTON LED DESCRIPTION RECEIVER IS OFF Power Off Press button No action. RECEIVER IS ON Start/Stop Data 1-5 seconds • REC LED is green indicating data logging has started. Logging • REC LED blinks green each time data is written to the receiver’s memory. -
Page 19: Recording Led
Recording LED The memory LED indicates if data is being written to memory and displays how much memory the receiver has available for recording. Table 7. Recording LED Patterns Display Function Description Greater than 50% File logging is in progress. Each blink indicates data is being written to memory. -
Page 20: Cellular Status
Cellular Status Table 10. Cellular LED Patterns LED Color Description The cellular modem is starting up. The cellular modem is transmitting or receiving data. Battery LED The Battery LED indicates the remaining charge of the internal batteries. When an external power source is utilized, the LED turns green and begins to blink if the batteries begin to charge. -
Page 21: Managing Power
Power LED will briefly blink yellow before shutting down. Using External Power Sources The Net-G5 receiver is designed to draw power from external power sources before drawing power from the internal backup batteries. You can connect the receiver to an external power source, such as a vehicle battery, with 9 V to 28 VDC to operate the receiver. -
Page 22: Checking Power Status
Figure 7: Connect the Receiver to a Power Source Checking Power Status You can check the receiver’s power status using the PWR LEDs or available Topcon software. The power LEDs on the receiver indicate the following power status: Solid Green – power within the acceptable range (6–28 V DC) is present on both PWR1 and PWR2 ports and •... -
Page 23: Charging The Backup Batteries
– To disconnect the cable, turn the lock counter-clockwise, and then gently remove the cable. Connect the receiver to a different power source. • Power supplied to the receiver should match the specifications provided by Topcon on the product. Failure to comply with these specifications may damage the receiver. P/N: 1004636-01... -
Page 24: Configuring The Receiver
• Using the Web Interface The Net-G5 includes a built-in Web server that allows you to configure and monitor the receiver via a Web browser. The following Web browsers are recommended for accessing the receiver: Windows Internet Explorer 6.0 or later •... - Page 25 ipaddress port number is the receiver’s IP address; is the port number you should specify if set to a number other than the default port number (port 80 for HTTP, and port 443 for HTTPS). Once the information is entered, the main page displays. Figure 8: Vanguard Web Interface –...
-
Page 26: Net-G5 Web Interface Ports
Net-G5 Web Interface Ports Although not necessary for functionality, you can configure the following ports to use with the Net-G5 Web interface. TCP 80 - HTTP • TCP 8888 - web socket • TCP 21 - FTP • TCP 23 - Telnet •... -
Page 27: Updating Firmware
Update Firmware Using TRU The following describes how to update firmware on the Net-G5 using a network connection. You can also update the firmware using a Bluetooth, USB or a serial connection. To connect the receiver with a computer using a USB connection, you will need to install a USB driver. - Page 28 4. Right-click in the Select Network Device screen, and click Add (Figure 12). The Network Connection screen appears. Figure 12: Select Add to Add a Device 5. Enter the appropriate information for Friendly Name, IP Address or Host Name, TCP Port, and Password, then click OK (Figure 13).
-
Page 29: Load The Firmware
7. Click Connect (Figure 14). Figure 14: Connect to the Device Load the Firmware 1. In TRU, click File Explorer. The File Explorer screen appears. 2. Click the Files tab. 3. Right-click in the File Explorer screen, and click Open in Windows ExplorerSD Card (Figure 15). An instance of Windows Explorer will open. - Page 30 4. Open the b310.update folder in Windows Explorer, and delete any content in the folder (Figure 16). Figure 16: Delete the Contents from the b310.update folder 5. Open another instance of Windows Explorer and locate the appropriate *.tar file (Figure 17). Figure 17: Locate the Firmware File 6.
-
Page 31: Verify Firmware Upload
%%set,update,yes 9. Enter in the command prompt, and click Send (Figure 18). Figure 18: Send the Update Command During installation, the Power LED will blink yellow-green. After installation, the Power LED will be solid green. Once the Power LED is solid green, close the Terminal screen and click DeviceDisconnect in TRU. Verify Firmware Upload 1. -
Page 32: Update Firmware Using An Sd Card
The Net-G5 receiver typically ships with an OAF as per initial purchase of the receiver kit configuration. There are several upgrade options available with the receiver that can extend the receiver’s functionality to better suit your job requirement. -
Page 33: Checking The Receiver's Oaf
Checking the Receiver’s OAF To use TRU to view the status of the receiver’s options: Topcon Receiver Utility TRU) Online Help 1. Connect the receiver to a computer and open TRU. See the more information about connecting the receiver to a computer. -
Page 34: Loading An Oaf
Loading an OAF Topcon dealers provide customers with OAF files. For any OAF related questions, e-mail Topcon at options@topcon.com and include the receiver’s ID and serial number. To obtain these numbers, see “Viewing Receiver Information” on page 18. To load a new OAF: 1. - Page 35 Topcon’s TRU initially checks to see if the selected file is compatible with the currently connected receiver. If you chose a file not intended for this receiver, the Upload OAF window displays an error icon next to the Receiver ID and disables the Upload the File to the Receiver button.
- Page 36 7. Click Connect (Figure 25). The TRU main window appears. Figure 25: Connect to the Receiver 8. Click Options (Figure 26). The Receiver Options window displays. Figure 26: Click Options P/N: 1004636-01 About the OAF...
- Page 37 In the Receiver Options window (Figure 27), ensure the following are correct: If you uploaded a universal OAF, make sure the expiration date is still valid. • If you uploaded a customer OAF, make sure the correct customer file is loaded. •...
-
Page 38: Resetting The Receiver (Clearing The Nvram)
5. When the Tracking Status LED blinks orange, release the Function button. You can also use TRU to clear the NVRAM: 1. Connect the receiver to a computer, and open TRU. See the Topcon Receiver Utility TRU) Online Help more information about connecting the receiver to a computer. -
Page 39: System Setup
System Setup • • • • • • For a typical permanent or semi-permanent Reference Station setup, place the Net-G5 receiver in a secure location with access to power and communication links as required. Survey the antenna location very accurately, making sure the receiver is free of signal obstructions and interference (RF, multipath, etc.). -
Page 40: Step 2: Measure Antenna Height
Step 2: Measure Antenna Height The location of the antenna relative to the point being measured is very important for both surveys in which the elevation of the point is important and in surveys for horizontal location only. Horizontal surveys are often larger in area than can reliably fit on a flat plane;... -
Page 41: Step 3: Collecting Data
After the survey completes, data the receivers collect can be downloaded onto a computer and processed using post-processing software (for example, Topcon Tools). P/N: 1004636-01 Step 3: Collecting Data... -
Page 42: Analyzing Signal-To-Noise Ratio
Analyzing Signal-to-Noise Ratio Knowing the strength and reliability of the ranging signal transmitted from the satellites will help determine the quality of the satellite signals. Use Table 6-1 to help estimate signal quality from a satellite vehicle. Table 6-1. Typical SNR Values C/A channel P1 channel P2 channel... -
Page 43: Collecting Data
The Net-G5 is also compatible with any Topcon field software for configuration and recording raw data. Using the Vanguard Web Interface The Net-G5 includes a built-in Web server that allows you to configure and monitor the receiver via a Web browser. the following Web browsers are recommended for accessing the receiver: Windows Internet Explorer 6.0 or later... -
Page 44: Managing Files
TRU to download or delete files, see the , which is available in the software. If you use the Net-G5 as a reference station in a network, you can use TopNet+ or the Vanguard web interface for downloading files. P/N: 1004636-01... -
Page 45: Troubleshooting
Check the software. Make sure the most current software version is downloaded onto the computer and the most • current firmware is loaded into the receiver. Check the Topcon website for the latest updates. Check Topcon Technical Support (www.topconsupport.com) or Topcon Total Care (www.topconcare.com) for the •... -
Page 46: Receiver Problems
• – If you are using a USB cable connection, make sure the USB driver, included on the Software CD, is installed on the computer. You can also download the driver from the Topcon support Website at www.topconcare.com. Generic problems: The receiver port used for connection is not in Command mode. - Page 47 The receiver does not start logging data The receiver does not have a memory card installed or the memory option is disabled or expired. • Topcon Receiver Utility (TRU) Online – Make sure the memory option is enabled. For details, see the Help The memory card does not have free space.
-
Page 48: Bluetooth Problems
Bluetooth Problems The following are some of the most commonly encountered error messages and other problems. TRU error message: Can’t find receiver The receiver is turned off. • – Ensure the receiver has power and is turned on. Bluetooth is not turned on; the BT LED is off. •... -
Page 49: Tru Problems
Always make sure the receiver is completely dry before storing it. Dry any moisture with a soft, clean cloth. • Getting Customer Support If the troubleshooting hints and tips in this operator’s manual fail to remedy the problem, contact Topcon Customer Representative. For contact information, see “Getting Technical Support” on page 3. P/N: 1004636-01... -
Page 50: Specifications
Table 7 lists the receiver’s general specifications. Table 7. General Receiver Specifications Physical Enclosure Aluminum, IP67 rated extrusion Color Topcon Yellow and Topcon Grey Dimensions (mm) W: 150 mm x H: 60 mm x D: 200 mm Weight (g) < 2.0 kg (with internal batteries) Antenna... - Page 51 Alternate Test Method of Classic Pulse; 40g, 11ms duration. Technology Topcon Vanguard™ ASIC technology Fence Antenna™ Technology Topcon advanced Multipath Rejection (AMR) Integrity Monitoring (RAIM) Topcon Automatic File Rotation Mode (AFRM) Universal Tracking Channels Power Internal Batteries 2S x 4P, 7.2v, 1200 mAh Battery charging <5 hours...
- Page 52 <20 sec. First-Fix (TTFF) a. Vanguard ASIC includes two dedicated channels for L-Band signal tracking. The Net-G5 receiver does not support L- Band signal tracking. b. CMR/CMR+ is a third-party proprietary format. Use of this format is not recommended and performance cannot be guaranteed.
-
Page 53: Safety Warnings
The owner should periodically test this product to ensure it provides accurate measurements. Inform TPS immediately if this product does not function properly. Only allow authorized Topcon warranty service centers to service or repair this product. P/N: 1004636-01 Safety Warnings... -
Page 54: Regulatory
Regulatory • • • • • • The following sections provide information on this product’s compliance with government regulations for use. FCC Compliance This equipment complies with FCC radiation exposure limits set forth for uncontrolled equipment and meets the FCC radio frequency (RF) Exposure Guidelines in Supplement C to OET65. This equipment has very low levels of RF energy that it deemed to comply without maximum permissive exposure evaluation (MPE). -
Page 55: European Community Declaration Of Conformity With R&Tte Directive 1999/5/Ec
This is a Class A product. In a domestic environment this product may cause radio interference in which case the user may be required to take adequate measures. Declaration of Conformity (R&TTE Directive 1999/5/EC) esky (Topcon) tímto prohlašuje, že tento (Net-G5) je ve shod se [Czech] základními požadavky a dalšími píslušnými ustanoveními smrnice 1999/5/ES. - Page 56 (Topcon) declara que este (Net-G5) está conforme com os [Portugues] requisitos essenciais e outras disposições da Directiva 1999/5/CE. Slovensko (Topcon) izjavlja, da je ta (Net-G5) v skladu z bistvenimi [Slovenian] zahtevami in ostalimi relevantnimi doloili direktive 1999/5/ES. Slovensy (Topcon) týmto vyhlasuje, že (Net-G5) spa základné požiadavky [Slovak] a všetky príslušné...
-
Page 57: Weee Directive
모델 이름 (Model Name): Net-G5 제조연월 (Year of manufacture): 2014 제조자 및 제조국가 (Manufacturer and country of origin):Topcon, USA 인증자 식별 부호 (Applicant Code): T8S Korean KC-EMC Class A Statement 이 기기는 업무용 (A 급 ) 전자파 적합기기로서 판매자 또는 사용자는 이 점을 주의하시기 바라며 , 가정외의... -
Page 58: Korean Kc-Cellular Modem Compliance
Korean KC-Cellular Modem Compliance This optional integrated cellular modem (PHS8-K) reference application complies with the requirements of the Korean Communications Commission (KCC). The certificate granted in accordance with KCC has the identifier: KCC-CRM-QIP-PHS8K. Japan Radio Law and Telecommunications Business Law Compliance Bluetooth and Wi-Fi Module Compliance The integrated Bluetooth and Wi-Fi module TiWi-BLE reference application described on page 72 (General Details - Communication) complies in accordance with the provisions of Article 38-24 paragraph 1 of Japan Radio... -
Page 59: Glossary
Phase Center of Antenna – The point from which the electromagnetic radiation spreads spherically outward, with the phase of the signal being equal at any point on the sphere. Pocket-3D – Field controller software by Topcon that supports both GNSS and TS. P/N: 1004636-01... - Page 60 Static Survey – Typically uses a network or multiple baseline approach for positioning. This method provides the highest accuracy and requires the longest observation times. Topcon Receiver Utility (TRU) – Hardware configuration software for receivers and peripheral devices. TRU is available from the Topcon Total Care Website (topconcare.com).
Need help?
Do you have a question about the Net-G5 and is the answer not in the manual?
Questions and answers