HP MSM765 zl Installation Manual
Mobility controller
Hide thumbs
Also See for MSM765 zl:
- Reference manual (244 pages) ,
- Installation and getting started manual (48 pages) ,
- Datasheet (16 pages)
Table of Contents
Advertisement
HP MSM765 zl Mobility Controller
Installation Guide
Abstract
This document describes how to install and initially configure the MSM765 zl Premium Mobility Controller (J9370A). This
product is hereafter referred to as controller. See also the MSM Controllers Configuration Guide.
HP Part Number: 5998-7937
Published: June 2015
Edition: 1
Advertisement
Table of Contents

Related Manuals for HP MSM765 zl


Summary of Contents for HP MSM765 zl
- Page 1 HP MSM765 zl Mobility Controller Installation Guide Abstract This document describes how to install and initially configure the MSM765 zl Premium Mobility Controller (J9370A). This product is hereafter referred to as controller. See also the MSM Controllers Configuration Guide. HP Part Number: 5998-7937...
- Page 2 © Copyright 2013, 2015 Hewlett-Packard Development Company, L.P. The information contained herein is subject to change without notice. The only warranties for HP products and services are set forth in the express warranty statements accompanying such products and services. Nothing herein should be construed as constituting an additional warranty. HP shall not be liable for technical or editorial errors or omissions contained herein.
-
Page 3: Table Of Contents
Configure the switch for the controller..................12 Initial controller configuration....................15 Restarting and resetting the controller..................18 4 Support and other resources..............20 Online documentation......................20 Contacting HP........................20 HP websites...........................20 Typographic conventions......................20 A Replacing hardware components..............21 Replacing or removing a controller....................21 Replacing the disk drive......................21 Replacing the flash card......................22... -
Page 4: Preparing For Installation
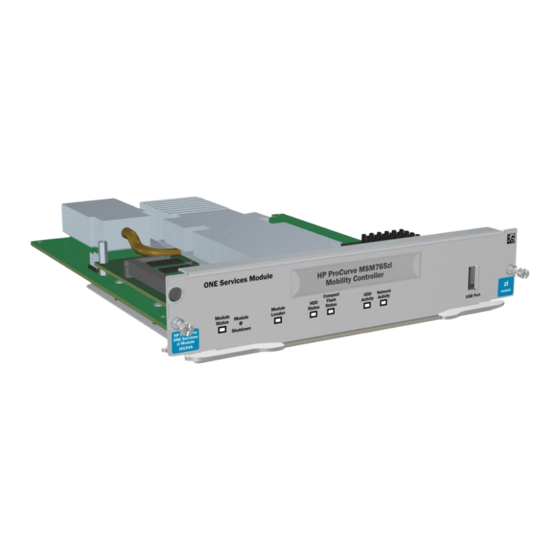
1 Preparing for installation The MSM765 zl Mobility Controller is a Services zl Module-based WLAN controller which plugs into switches such as the 5400 zl and 8212 zl. New switches must be prepared according to their documentation. Identifying controller components... -
Page 5: Switch Leds
2. Test LED 3. Module Status LEDs Serial numbers Serial numbers are required when contacting HP or a reseller for warranty assistance or for coverage under a service agreement. For future reference, record the serial and product numbers in the warranty booklet. - Page 6 The controller ships as a bundle. From a warranty perspective, a bundle consists of two separate hardware components: Controller Disk drive See the provided warranty information for coverage details for each hardware component. The disk drive serial number is found on its bottom. Figure 4 Locating the disk drive serial number 1.
-
Page 7: Installation Precautions
Installation precautions Static electricity can severely damage the electronic components on the controller. When handling and installing the controller, follow these procedures to avoid damage from static electricity: Handle the controller by its bulkhead or edges and avoid touching the components and the circuitry on the board. -
Page 8: Installing
2 Installing WARNING! This is a general procedure. It is the installer’s responsibility to perform the installation in accordance with local electrical code and regulations. A maximum of four controllers can be installed in the same chassis. Under certain conditions, a maximum of three controllers are supported in the 5406 zl chassis. -
Page 9: Verifying The Controller Is Installed Correctly
Verifying the controller is installed correctly When the controller is installed properly, it undergoes a self test that takes a few seconds. This happens both when the switch is powered-on after installing the controller and when the controller is installed while the switch already has power. The LEDs help determine if the controller has passed the self test, as described in the following table. -
Page 10: Initially Connecting And Configuring
(A different screen may appear if another session was already open.) Press any key to continue. The switch CLI prompt appears. It looks similar to this: HP Switch 5406zl# If instead, the switch menu is shown, return to the top-level menu and then exit to the CLI by selecting Command Line (CLI) on the Main Menu. -
Page 11: Activate The Controller
The controller must be activated and booted before its own CLI can be used. The controller uses the Service OS CLI on the controller for activation. The controller ships with an HP MSM765 zl Software Activation License Registration Card in the box. The License Registration ID is printed on this card. -
Page 12: Install The Product License Key
Register the controller license Register the controller license as follows: Go to www.hp.com/networking/mynetworking and sign in. New users must first create an account. Select the My Licenses tab at the top of the page. In the Order number or Registration ID field, enter the License Registration ID either from the registration card received with the controller or from a previous uninstall. - Page 13 This procedure assumes that there are Ethernet port modules installed in slot A, and that the controller is installed in slot C. Sample VLAN IDs and names are used. You will need to adjust the procedure according to slots chosen and VLAN IDs and names used. About controller ports The controller features two ports, Internet and LAN.
- Page 14 Add two VLANs, one for the Internet port and another for the LAN port. For example, use VLAN ID 10 with name MSM765_Int for the Internet port and VLAN ID 20 with name MSM765_LAN for the LAN port: Select Back to return to the VLAN Menu. Select VLAN Port Assignment.
-
Page 15: Initial Controller Configuration
13. Select Save when done, and then select Return to Main Menu. Initial controller configuration Determine switch index of the controller The starting point for this procedure is the switch CLI prompt that looks like this: HP Switch 5406zl# Initial controller configuration... - Page 16 Exit the switch CLI config context by pressing Ctrl+z. The switch CLI prompt changes so that it now looks like this: HP Switch 5406zl# Assign an IP address to the LAN port via the CLI To successfully connect to the controller and configure it via its web interface, you must first assign an IP address to the controller LAN port using the switch CLI.
- Page 17 192.168.1.1/24 NOTE: For proper functioning of the MSM765 zl, the LAN port must not be left at its default address of 0.0.0.0, even if it is not connected to your network. If you do not intend to connect the LAN port, assign a dummy IP address to it (for example, 1.0.0.1).
-
Page 18: Restarting And Resetting The Controller
If you are using the Advanced UI, see Working with controlled APs in the MSM Controllers Configuration Guide. Restarting and resetting the controller Restarting the controller HP recommends that you use the web interface to restart the controller as follows: Simplified UI Select Views > Home > Summary > Restart. Advanced UI Select Controller >>... - Page 19 Resetting a controller to factory defaults HP recommends that you use the web interface to reset the controller to factory defaults as follows: Simplified UI Select Views > Software Settings > Backup & Restore > Restore. Under Restore to Factory Defaults, select Restore to Factory Defaults.
-
Page 20: Support And Other Resources
4 Support and other resources Online documentation You can download documentation from the HP Support website at: www.hp.com/support/manuals. Search by product number or name. Contacting HP For worldwide technical support information, see the HP support website: www.hp.com/networking/ support Before contacting HP, collect the following information:... -
Page 21: A Replacing Hardware Components
A Replacing hardware components Replacing or removing a controller HP highly recommends that the controller be shut down before removing or replacing it. The Shutdown button on the controller front panel is not enabled. The CLI shutdown command is not supported. Instead, you can effectively shut down a controller as follows: In the management tool, save your work and wait until any pending configuration changes are complete. -
Page 22: Replacing The Flash Card
Figure 7 Replacing the controller disk drive 1. Controller retaining screws 3. Disk drive retaining screws 2. Extractor handles 4. Disk drive to be slid back Replacing the flash card The following procedure describes replacing the Flash Card in the controller. The controller may be removed while the switch is powered on. - Page 23 Figure 8 Replacing the controller flash card 1. Controller retaining screws 3. Flash disk being removed 2. Extractor handles 4. Flash disk being inserted Replacing the flash card...
-
Page 24: B Uninstalling A License
"y" to the confirmation prompt. The full sequence looks like this: HP Switch 5406zl# services a 1 HP Switch 5406zl(services-module-A:HD)# HP Switch 5406zl(services-module-A:HD)# license uninstall activation 0 Are you sure you want to uninstall the license? (y/n) y Note: You must enter the following uninstall verification key... - Page 25 MY Networking license management portal to complete the uninstall procedure. SG922XXXXZ-V-D3WMQ8D-KH9XXXX-YCT73HR-6FXXXHP HP Switch 5406zl#(services-module-A:HD)# Save a copy of the Uninstall Verification Key. NOTE: This key must be entered on the My Networking portal to complete the uninstall process. This step cannot be skipped.
Need help?
Do you have a question about the MSM765 zl and is the answer not in the manual?
Questions and answers