Table of Contents
Advertisement
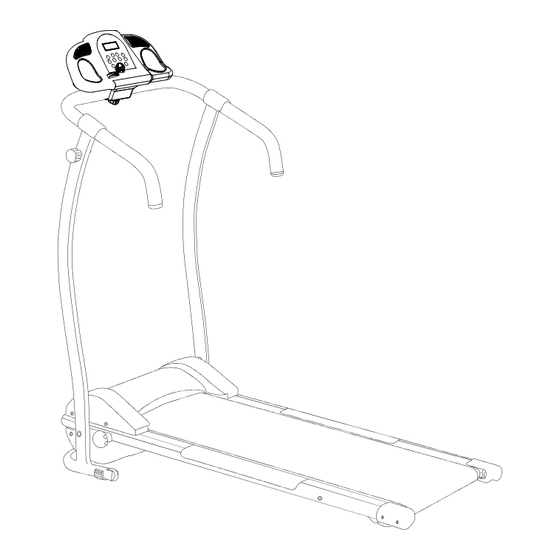
PACER TREADMILL
OWNER'S MANUAL
Product may vary slightly from the item pictured due to model upgrades
Read all instructions carefully before using this product. Retain this owner's manual for future
reference.
NOTE: This manual may be subject to updates or changes. Up to date manuals are available through our website at www.lifespanfitness.com.au
Advertisement
Table of Contents

Related Manuals for LSG PACER TREADMILL


Summary of Contents for LSG PACER TREADMILL
- Page 1 PACER TREADMILL OWNER’S MANUAL Product may vary slightly from the item pictured due to model upgrades Read all instructions carefully before using this product. Retain this owner’s manual for future reference. NOTE: This manual may be subject to updates or changes. Up to date manuals are available through our website at www.lifespanfitness.com.au...
-
Page 2: Table Of Contents
TABLE OF CONTENTS IMPORTANT SAFETY INSTRUCTIONS IMPORTANT ELECTRICAL INFORMATION IMPORTANT OPERATING INSTRUCTIONS PARTS LIST ASSEMBLY INSTRUCTIONS OPERATION GUIDE MAINTENANCE INSTRUCTIONS WARRANTY PACER... -
Page 3: Important Safety Instructions
1. IMPORTANT SAFETY INSTRUCTIONS WARNING - Read all instructions before using this treadmill. It is important your treadmill receives regular maintenance to prolong its useful life. Failing to regularly maintain your treadmill may void your warranty. Danger – To reduce the risk of electric shock disconnect your treadmill from the electrical outlet prior to cleaning and/or service work. - Page 4 The pulse sensors are not medical devices. Various factors, including the user’s movement, may affect the accuracy of heart rate readings. The pulse sensors are intended only as exercise aids in determining heart rate trends in general. Use the handrails provided; they are for your safety. ...
-
Page 5: Important Electrical Information
2. IMPORTANT ELECTRICAL INFORMATION WARNING! Route the power cord away from any moving part of the treadmill including the elevation mechanism and transport wheels. NEVER remove any cover without first disconnecting AC power. NEVER expose this treadmill to rain or moisture. This treadmill is not designed for use outdoors, near a pool, or in any other high humidity environment. -
Page 6: Important Operating Instructions
3. IMPORTANT OPERATING INSTRUCTIONS Understand that changes in speed and incline do not occur immediately. Set your desired speed on the display console and release the adjustment key. The display will obey the command gradually. Use caution while participating in other activities while walking on your treadmill, such as watching television, reading, etc. -
Page 7: Parts List
4. PARTS LIST 1 x Emergency stop switch 1 x 5# Alan key 1 x M8 Locking screw 1 x M12 Locking screw 2 x Plastic Cover Control panel Safety Key Handrail Running Belt PACER... -
Page 8: Assembly Instructions
5. ASSEMBLY INSTRUCTIONS STEP 1: 1. Open the carton 2. Extract the treadmill from the plastic bag PACER... - Page 9 STEP 2: 1. Screw the M12 locking screw into the hole STEP 3: 1. Screw the M8 locking screw into the upper frame PACER...
- Page 10 STEP 4: 1. Assemble handrail with screw (original 4pcs screw is on the handrail) by Alan key ,then assemble signal line and plastic cover ( Photo). PACER...
- Page 11 STEP 5: 1. Put the protection of magnetic into the control panel (Photo 5) PACER...
-
Page 12: Operation Guide
6. OPERATION GUIDE 1. OVERVIEW 2. FUNCTIONS 1. Program training: Manual mode, P1-P12 pre-set program functions 2. Display: Speed, Time, Distance, Calories 3. Speed:1-10km/h 3. KEY FUNCTIONS 1. Program Key: When the treadmill is stopped, use this key to select one of the preset programs (manual, P1-P12) 2. - Page 13 7. Safety Key: By removing the safety key, the window will display “-“ and the treadmill will beep. The display window will return to its default state once the safety key is replaced. 4. OPERATION Starting the belt: 1. Press the start key. The belt will start moving at its lowest speed (1km/h), the pre-set program time is 60minutes.
- Page 14 Using the 12 automatic programs (P1-P12) 1. Press the PROGRAM key until you reach the desired program 2. The default pre-set time of 30minutes will blink on the display. Use the speed adjustment keys to change this to your desired program time. This can be set between 5 and 60minutes. 3.
-
Page 15: Maintenance Instructions
7. MAINTENANCE INSTRUCTIONS Reasonable cleaning/lubricating should be made to extend the life time of this unit. Performance is maximized when the belt and mat are kept as clean as possible. WARNING: THE MAT/DECK FRICTION MAY PLAY A MAJOR ROLE IN THE FUNCTION AND LIFE OF YOUR TREADMILL AND THAT IS WHY WE RECOMMEND YOU CONSTANTLY LUBRICATE THIS FRICTION POINT TO PROLONG THE USEFUL LIFE OF YOUR TREADMILL. -
Page 16: How To Check The Running Mat For Proper Lubrication
TAKE CARE TO PROTECT CARPETS AND FLOOR in case of leakages. This product is a machine that contains moving parts which have been greased / lubricated and could leak. Belt/Deck/Roller Lubrication The mat/deck friction may play a major role in the function and life of your treadmill and that is why we recommend you constantly lubricate this friction point to prolong the useful life of your treadmill. - Page 17 3. Feel the underside surface of the running mat. If the surface is slick when touched, then no further lubrication is needed. If the surface is dry to the touch, apply a suitable silicone lubricant. We recommend that you use a silicone based spray to lubricate your Lifespan treadmill. This can be purchased directly from us or any hardware store.
-
Page 18: Adjusting The Running Belt
5. Adjusting the Running Belt Place treadmill on a level surface. Run treadmill at approximately 4km/h, checking the running condition. If the belt has drifted to the right: Whilst the treadmill is running at 4km/h, carefully turn the right adjusting bolt 1/4 turn clockwise. - Page 19 NOTE: When properly tightened, you should be able to peel the very edge of the side of the belt up approximately 2 inches. However this is a rough reference and not all treadmills are the same. Some treadmills that have longer belts may give different measurements for correct belt tightness.
-
Page 20: Warranty
8. WARRANTY AUSTRALIAN CONSUMER LAW Many of our products come with a guarantee or warranty from the manufacturer. In addition, they come with guarantees that cannot be excluded under the Australian Consumer Law. You are entitled to a replacement or refund for a major failure and compensation for any other reasonably foreseeable loss or damage.
Need help?
Do you have a question about the PACER TREADMILL and is the answer not in the manual?
Questions and answers