Table of Contents
Advertisement
Quick Links
Stride M3 Treadmill
USER MANUAL
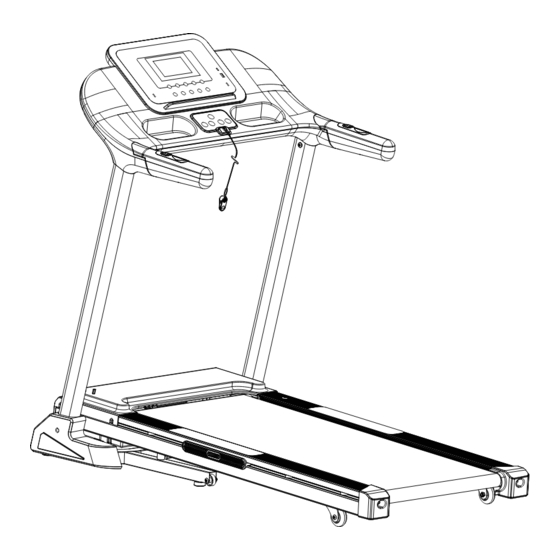
Product may vary slightly from the item pictured due to model upgrades.
Read all instructions carefully before using this product.
Retain this owner's manual for future reference.
NOTE:
This manual may be subject to updates or changes. Up to date manuals are available through our
website at www.lsgfitness.com.au
Advertisement
Table of Contents

Related Manuals for LSG Stride M3


Summary of Contents for LSG Stride M3
- Page 1 Stride M3 Treadmill USER MANUAL Product may vary slightly from the item pictured due to model upgrades. Read all instructions carefully before using this product. Retain this owner’s manual for future reference. NOTE: This manual may be subject to updates or changes. Up to date manuals are available through our...
-
Page 2: Table Of Contents
TABLE OF CONTENTS Important Safety Instructions ....... 03 II. Important Electrical Information ......05 III. -
Page 3: Important Safety Instructions
I. IMPORTANT SAFETY INSTRUCTIONS WARNING: Read all instructions before using this treadmill. It is important your treadmill receives regular maintenance to prolong its useful life. Failing to regularly maintain your treadmill may void your warranty. DANGER To reduce the risk of electric shock disconnect your treadmill from the electrical outlet prior to cleaning and/or service work. - Page 4 • The treadmill is intended for in-home use only and is not suitable for commercial environments. • To disconnect, turn all controls to the off position, remove the safety key, and then remove the plug from the outlet. • The pulse sensors are not medical devices. Various factors, including the user’s movement, may affect the accuracy of heart rate readings.
-
Page 5: Important Electrical Information
II. IMPORTANT ELECTRICAL INFORMATION WARNING! • Route the power cord away from any moving part of the treadmill including the elevation mechanism and transport wheels. • NEVER remove any cover without first disconnecting AC power. • NEVER expose this treadmill to rain or moisture. This treadmill is not designed for use outdoors, near a pool, or in any other high humidity environment. -
Page 6: Important Operating Instructions
III. IMPORTANT OPERATING INSTRUCTIONS • Understand that changes in speed and incline do not occur immediately. Set your desired speed on the computer console and release the adjustment key. The computer will obey the command gradually. • Use caution while participating in other activities while walking on your treadmill, such as watching television, reading, etc. -
Page 7: Parts List
IV. PARTS LIST M5x10 Flat Gasket x 8 M8x16 Hex Bolt x 2 Hex Bolt x 6 M8x60 Curved Gasket x 2 Hex Bolt x 4 TOOL KIT Allen Key x 1 Safety Key x 1 PARTS LIST |... -
Page 8: Assembly Instructions
V. ASSEMBLY INSTRUCTIONS STEP 1 First, connect the Signal Wire from the computer to the Signal Wire from the upright frame. Next, secure the upright frame into the stabilizer with M8x16 Hex Bolt (S3), Flat Gasket (S2) and M8x60 Hex Bolt (S4), as pictured. - Page 9 STEP 3 Secure the cover to the upright frame with one Hex Bolt (S1) both sides, tighten the bolts with Multi Hex Tool with Allen Key provided. ASSEMBLY INSTRUCTION |...
-
Page 10: Folding Instructions
VI. FOLDING INSTRUCTIONS FOLDING & UNFOLDING TREADMILL Fold: Lift the deck up from point A until it clicks for the hydraulics. Unfold: Press onto point B with your foot until it unlocks the hydraulics. The deck will then slowly lower. TRANSPORTING To move the treadmill, first you must put this in the folded position and unplug the power cable. -
Page 11: Operation Guide
VII. OPERATION GUIDE A. OVERVIEW NOTE: Always stand on the side rails when you start the treadmill, never start the treadmill while you are standing on the running belt. QUICK START: Press the START button on the computer to begin exercising. The running belt starts moving with an initial speed of 1.0 KPH. - Page 12 INCLINE ▲: To increase incline level adjustments during all training periods on different training modes. INCLINE ▼: To decrease incline level adjustments during all training periods on different training modes. INSTANT INCLINE (3 / 6 / 9 / 12 ): Used to reach desired incline level more quickly.
- Page 13 TRAINING IN MANUAL PROGRAM MODE You may pre-set target TIME or DISTANCE in STOP mode before training. Only one of the functions can be pre-set. To set TIME press the MODE button on the computer console until you see the split window of TIME begin blinking.
- Page 14 EMERGENCY STOP EMERGENCY STOP KEY Before beginning a workout session ensure that the EMERGENCY STOP KEY is placed onto the Computer Console and the Safety Clip is securely attached to an article of your clothing. If you fall the clip will pull out the EMERGENCY STOP KEY from the Computer Console and the running belt will stop immediately for emergency stop, helping to prevent injury.
-
Page 15: Maintenance Instructions
VIII. MAINTENANCE INSTRUCTIONS Reasonable cleaning/lubricating should be made to extend the lifetime of this unit. Performance is maximized when the belt and mat are kept as clean as possible. WARNING: • The mat/deck friction may lay a major role in the function and life of your treadmill and that is why we recommend you constantly lubricate this friction point to prolong the useful life of your treadmill. - Page 16 We recommend lubrication of the deck according to the following timetable: • Light use (less than 3 hours per week) every 6 months. • Medium use (3-5 hours a week) every 3 months. • Heavy use (more than 5 hours per week) every 6-8 weeks. See below procedures for lubricating: 1.
- Page 17 5. ADJUSTING THE RUNNING BELT The running belt is pre-adjusted to the running deck at the factory, but after prolonged use it can stretch and require readjustment. To adjust the belt, turn on the main power switch of the treadmill and let the belt run at a speed of 6-8 KPH.
-
Page 18: Exercise Guide
IX. EXERCISE GUIDE PLEASE NOTE: Before beginning any exercise program, consult your physician. This is important especially if you are over the age of 45 or individuals with pre-existing health problems. The pulse sensors are not medical devices. Various factors, including the user’s movement, may affect the accuracy of heart rate readings. - Page 19 COOL DOWN Finish each workout with a light jog or walk for at least 1 minute. Then complete 5 to 10 minutes of stretching to cool down. This will increase the flexibility of your muscles and will help prevent post- exercise problems.
-
Page 20: Troubleshooting
X. TROUBLESHOOTING PROBLEM POTENTIAL CAUSES CORRECTIONS 1. Treadmill not plugged in. 1. Plug the power cord into a wall outlet. 2. Safety Tether Key is not correctly 2. Reinstall the Safety Tether Key. installed. Treadmill will not 3. Reset the circuit breaker, or call an 3. -
Page 21: Hand Pulse Technology
XII. HAND PULSE TECHNOLOGY This product comes equipped with hand pulse sensors which are used to pick up tiny EKG/ECG signals that run through the body when your heart beats. These electrical EKG/ECG signals are very small and must be amplified 1000 times to make the signal viable for the computer to display your pulse. To ensure proper operation: •... - Page 24 WWW.L S GF ITNE SS .C OM .A U...
Need help?
Do you have a question about the Stride M3 and is the answer not in the manual?
Questions and answers