Table of Contents
Advertisement
Quick Links
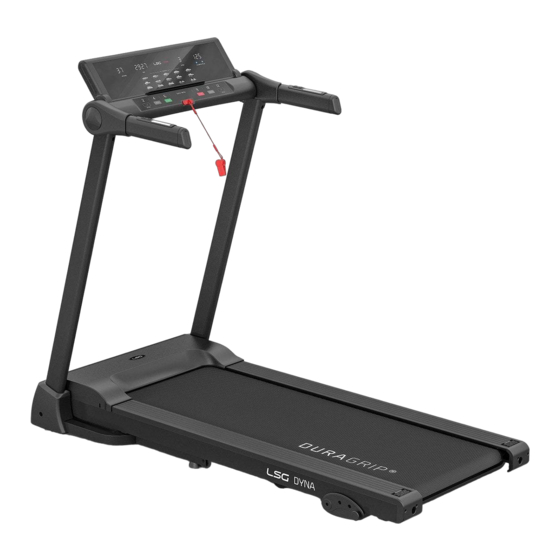
Dyna Treadmill
USER MANUAL
Product may vary slightly from the item pictured due to model upgrades.
Read all instructions carefully before using this product.
Retain this owner's manual for future reference.
NOTE:
This manual may be subject to updates or changes. Up to date manuals are available through our
website at www.lsgfitness.com.au
Advertisement
Table of Contents

Related Manuals for LSG Dyna


Summary of Contents for LSG Dyna
- Page 1 Dyna Treadmill USER MANUAL Product may vary slightly from the item pictured due to model upgrades. Read all instructions carefully before using this product. Retain this owner’s manual for future reference. NOTE: This manual may be subject to updates or changes. Up to date manuals are available through our...
-
Page 2: Table Of Contents
TABLE OF CONTENTS Important Safety Instructions ....... 03 II. Important Electrical Information ......05 III. -
Page 3: Important Safety Instructions
I. IMPORTANT SAFETY INSTRUCTIONS WARNING: Read all instructions before using this treadmill. It is important your treadmill receives regular maintenance to prolong its useful life. Failing to regularly maintain your treadmill may void your warranty. DANGER To reduce the risk of electric shock disconnect your treadmill from the electrical outlet prior to cleaning and/or service work. - Page 4 • The treadmill is intended for in-home use only and is not suitable for commercial environments. • To disconnect, turn all controls to the off position, remove the safety key, and then remove the plug from the outlet. • The pulse sensors are not medical devices. Various factors, including the user’s movement, may affect the accuracy of heart rate readings.
-
Page 5: Important Electrical Information
II. IMPORTANT ELECTRICAL INFORMATION WARNING! • Route the power cord away from any moving part of the treadmill including the elevation mechanism and transport wheels. • NEVER remove any cover without first disconnecting AC power. • NEVER expose this treadmill to rain or moisture. This treadmill is not designed for use outdoors, near a pool, or in any other high humidity environment. - Page 6 DANGER Improper connection of the equipment-grounding conductor can result in risk of electric shock. Check with a certified electrician if you are in doubt as to whether the product is properly grounded. Do not modify the plug provided with the product. If it will not fit the outlet, have a proper outlet installed by an electrician.
-
Page 7: Important Operating Instructions
III. IMPORTANT OPERATING INSTRUCTIONS • Understand that changes in speed and incline do not occur immediately. Set your desired speed on the computer console and release the adjustment key. The computer will obey the command gradually. • Use caution while participating in other activities while walking on your treadmill, such as watching television, reading, etc. -
Page 8: Assembly Instructions
IV. ASSEMBLY INSTRUCTIONS PARTS LIST Description Specification Qty Description Specification Qty Main Frame Bolt M8*45 5#Allen Wrench Safety Key Bottle Cage Oil Bottle Bolt 4.2*19 Lock Washer Bolt M8*16 Wrench with Screwdriver Left Base Cover Bottle Cage Right Base Cover FIXING TOOLS: 5# Allen Wrench 5mm Wrench with Screwdriver... - Page 9 STEP 1 STEP 2 Open the carton and remove the parts. Hold the Computer frame and rotate the Place the Main Frame on the level ground. handlebars downward. Use the 5# Allen wrench (13), bolt (51) and lock washer (64) to secure the computer frame onto the right and left upright.
- Page 10 STEP 5 STEP 6 1. Use #5 Allen wrench (13), Bolt (70) and lock 1. Use wrench with screwdriver (12), bolt (19) to washer (64) to lock the upright (3) into the secure the left base cover into the base main frame.
-
Page 11: Folding Instructions
V. FOLDING INSTRUCTIONS PULLING UP PULLING DOWN Pull up the base frame at position (A) until you Support place A with hand and press on B the hear the sound that the air pressure bar (B) is place of air pressure bar. The base frame will locked into the round tube. -
Page 12: Operation Guide
VI. OPERATION GUIDE 1. DISPLAY WINDOW 2. LCD WINDOW DISPLAY DETAILS DIST: Show running distance. TIME: Show running time. SPEED: Show speed. During the start-up process, a 3 second countdown is displayed: 3, 2, 1. PULSE: Show heartbeat data.1. When there is a heartbeat, the heartbeat value is displayed; when there is no heartbeat, the character ‘P’... - Page 13 3. BUTTON FUNCTION 1. "PROG" button: Press this button to choose program from manual mode—P1----P15---FAT. 2. "MODE" button: 2.1 When machine in standby state, press this button to choose the mode: manual mode, time count down mode, distance count down mode, calories count down mode. 2.2 When machine is in FAT mode, the choose sequence is "Sex", "Age", "Height", "Weight".
- Page 14 III. Inner Install Program Press ‘PROG’ button to choose the inner install program from P1----P15. When set the program, the time window will show default data and glitter, press SPEED button to set the running time. Each program has been divided into 20 sections, Each exercise time=the setting time/20. Press ‘START’, the machine will run at the first section speed.
- Page 15 7. SLEEP FUNCTION Stopped for more than 2 minutes without any operation, the system is reset to standby state and the backlight is off. When it is more than 10 minutes, the system turns off all displays and enters a sleep mode.
-
Page 16: Exercise Guide
VII. EXERCISE GUIDE WARM UP STAGE If you are over 35 years old or have health problem, also it`s your first time do exercise, please consult with your doctor or professional people. Before you use the motorized treadmill, please learn how to control the machine first, know well how to start, stop, adjust the speed and so on. - Page 17 EXERCISE FREQUENCY The cycle time: 3-5times/teek, 15-60mins/times. Make up the schedule of workout scientific, not only for your hobby. You can control the running intensity through adjusting the velocity and incline of treadmill. We suggest that you don’t set the incline at first; improve the incline is the effective way to strengthen the exercise’s intensity.
- Page 18 WARM UP INSTRUCTION Before exercise, it is better to do stretching exercises. Warm muscles stretch more easily, spend the first of 5 ~ 10 minutes to warm up. Then in accordance with the following methods to stop and do stretching exercises - do five times, each leg every time 10 seconds or more time to do it again after the end of the exercise.
-
Page 19: Running Belt Adjustment
VIII. RUNNING BELT ADJUSTMENT WARNING: ALWAYS UNPLUG THE TREADMILL FROM THE ELECTRICAL OUTLET BEFORE CLEANING OR SERVICING THE UNIT. CLEAN: General cleaning the unit will greatly prolong the treadmill. Keep treadmill clean regularly. Be sure to clean the exposed part of the deck on either side of the walking belt and the side rails. - Page 20 Running Belt Board 1. We suggest that you should cut off the power for 10Mints after keep running 2HS, so that it’s good for maintain the treadmill. 2. For avoiding the slipping during running , the belt not too loose; for avoiding the more abrasion between the roller and belt and maintain the machine’s good running ,the belt not too tight.
-
Page 21: Center The Running Belt
IX. CENTER THE RUNNING BELT Place treadmill on a level surface. Run Treadmill at approximately 3.7-5mph, checking the running condition. If the belt has drifted to the right, Unplug the If the belt has drifted to the left, pull out of the safety lock and power switch, turn the right safety lock and switch, turn the left adjusting adjusting bolt 1/4 turn clockwise, then start... -
Page 22: Exploded Diagram
X. EXPLODED DIAGRAM | EXPLODED DIAGRAM... -
Page 23: Parts List
XI. PARTS LIST Description Specs Description Specs Left Upright Computer Top Cover Right Upright Computer Top Cover Computer Bracket Barb Cushion Bolt ST4.2*25 Magnetic Ring Rubber Pad Brown Single Wire Bolt Bolt ST4.2*30 Front Roller Motor Bottom Cover Back Roller Barb Cushion 2 Cylinder Bolt... -
Page 24: Troubleshooting
Description Specs Description Specs Bolt ST4.2*9.5 Bolt ST4.2*12 Bottle Cage Bolt M8*12 Bottle Cage Bolt M6*65 Bolt 4.2*9 XII. TROUBLE SHOOTING GUIDE Code Reason Solution Message wire is broken or not 1. Check if the computer and bottom connected well control board wire connect well. - Page 25 Code Reason Solution Show "----" 1. The safety key is not at the 1. Check if the safety key is at the appointed site. appointed site. 2. The safety key is not connected 2. Check if the safety key sensor board well or broken.
-
Page 26: Warranty
XIII. WARRANTY AUSTRALIAN CONSUMER LAW Many of our products come with a guarantee or warranty from the manufacturer. In addition, they come with guarantees that cannot be excluded under the Australian Consumer Law. You are entitled to a replacement or refund for a major failure and compensation for any other reasonably foreseeable loss or damage. - Page 28 W W W. LS GF I T NE S S . C O M . AU...
Need help?
Do you have a question about the Dyna and is the answer not in the manual?
Questions and answers