Advertisement
Table of Contents
- 1 Table of Contents
- 2 Important Safety Instructions
- 3 Important Electrical Information
- 4 Important Operating Instructions
- 5 Assembly Instructions
- 6 Folding Instructions
- 7 Operation Guide with Program Chart
- 8 Exercise Guide
- 9 Maintenance Instructions
- 10 Exploded Diagram
- 11 Parts List
- 12 Warranty
- Download this manual
Advertisement
Table of Contents

Related Manuals for LSG VULCAN M2


Summary of Contents for LSG VULCAN M2
- Page 1 VULCAN M2 TREADMILL OWNER’S MANUAL Product may vary slightly from the item pictured due to model upgrades Read all instructions carefully before using this product. Retain this owner’s manual for future reference.
-
Page 2: Table Of Contents
TABLE OF CONTENTS IMPORTANT SAFETY INSTRUCTIONS IMPORTANT ELECTRICAL INFORMATION IMPORTANT OPERATING INSTRUCTIONS ASSEMBLY INSTRUCTIONS FOLDING INSTRUCTIONS OPERATION GUIDE WITH PROGRAM CHART EXERCISE GUIDE MAINTENANCE INSTRUCTIONS EXPLODED DIAGRAM PARTS LIST WARRANTY... -
Page 3: Important Safety Instructions
1. IMPORTANT SAFETY INSTRUCTIONS WARNING - Read all instructions before using this treadmill. It is important your treadmill receives regular maintenance to prolong its useful life. Failing to regularly maintain your treadmill may void your warranty. Danger – To reduce the risk of electric shock disconnect your treadmill from the electrical outlet prior to cleaning and/or service work. - Page 4 The pulse sensors are not medical devices. Various factors, including the user’s movement, may affect the accuracy of heart rate readings. The pulse sensors are intended only as exercise aids in determining heart rate trends in general. Use the handrails provided; they are for your safety. Wear proper shoes.
-
Page 5: Important Electrical Information
2. IMPORTANT ELECTRICAL INFORMATION WARNING! Route the power cord away from any moving part of the treadmill including the elevation mechanism and transport wheels. NEVER remove any cover without first disconnecting AC power. NEVER expose this treadmill to rain or moisture. This treadmill is not designed for use outdoors, near a pool, or in any other high humidity environment. -
Page 6: Important Operating Instructions
3. IMPORTANT OPERATING INSTRUCTIONS Understand that changes in speed and incline do not occur immediately. Set your desired speed on the computer console and release the adjustment key. The computer will obey the command gradually. Use caution while participating in other activities while walking on your treadmill, such as watching television, reading, etc. -
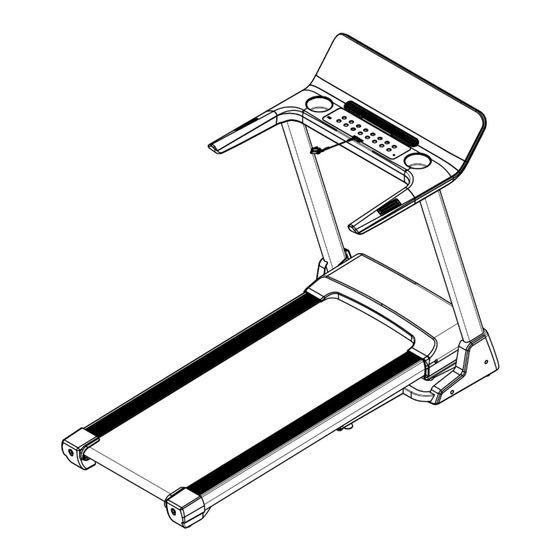
Page 7: Assembly Instructions
4. ASSEMBLY INSTRUCTIONS PART LIST Specification Nos. Specification Nos. DES. DES. Main frame 16 Wrench with screwdriver S =13, 14, 15 Panel assembly Bolt M8*45 Left base cover Bolt M6*15 Right base cover Bolt M8*20 Power Wire Screw ST4.2*20 Oil bottle Flat washer Safety key Arc washer... - Page 8 STEP 1: 1. Open the carton. 2. Extract the parts listed above. 3. Place the Main Frame onto level ground. Warning: Use 2 people to remove treadmill from the box to avoid injury. STEP 2: 1. Refer to picture A/B: Fold the computer and upright up in the direction of the arrow.
- Page 9 STEP 3: 1. Connect the communication lines C and D one by one. 2. Then put the panel assembly (7) into console board assembly (6) and lock the bolt (40), Spring washer (24), Flat washer (20) into panel assembly (7). STEP 4: 1.
- Page 10 STEP 5: 1. Place the safety key (62) on the computer. Warning: Check all bolts are fastened and secured as per instructions before turning on machine.
-
Page 11: Folding Instructions
5. FOLDING INSTRUCTIONS Folding: Pull up the base frame at position (A) until you hear the sound that the air pressure bar (B) is locked into the round tube. Unfolding: Support place A with hand and using your feet, apply pressure to the air pressure bar B to unlock the folding mechanism. -
Page 12: Operation Guide With Program Chart
6. OPERATION GUIDE 1. OVERVIEW 2. LCD WINDOW DISPLAY 1. LCD WINDOW DISPLAY DETAILS: INCILNE and CALORIES: Show Incline and calories. When the corresponding icon is lit, the corresponding element is displayed. TIME: Show running time. SPEED: Show speed. PULSE and DISTANCE: Show pulse data and running distance. When the corresponding icon is lit, the reading with be displayed. - Page 13 “START” button: Press this button to start the machine. The machine will run at the lowest speed or at the speed of default program after 3 seconds time count down. “STOP” button: Press this button to stop the machine, the machine will slow the speed still stop. “SPEED+/-”: Adjust the speed.
- Page 14 4.3. INNER INSTALL PROGRAM: Press ‘PROG’ button to choose the preset program from P1----P15. When the program is selected the time window will show default data and blink. Press SPEED+/- or INCLINE+/- button to set the running time. Each program has been divided into 16 section. Each exercise time = the setting time/16. Press ‘START’, the machine will run at the first section speed and incline data.
- Page 15 HEIGHT (-3-) 170 CM 100—240 CM WEIGHT (-4-) 70KG 20—160KG BMI reference (BMI) <19 Under weight 19--26 Normal weight 26--30 Over weigh >30 Obesity 7. SLEEP FUNCTION Stopped more than 10 minutes, the system turns off all displays and enters a sleep mode. Press any key to wake up.
- Page 16 11. DATE TABLE: Setting time/16= interval running time TIME PROGRAM SPEED INCLINE SPEED INCLINE SPEED INCLINE SPEED INCLINE SPEED INCLINE SPEED INCLINE SPEED INCLINE SPEED INCLINE SPEED INCLINE SPEED INCLINE SPEED INCLINE SPEED INCLINE...
- Page 17 SPEED INCLINE SPEED INCLINE SPEED INCLINE SPEED INCLINE SPEED INCLINE SPEED INCLINE SPEED INCLINE SPEED INCLINE SPEED INCLINE SPEED INCLINE SPEED INCLINE SPEED INCLINE SPEED INCLINE SPEED INCLINE SPEED...
- Page 18 INCLINE SPEED INCLINE 10 10 12 8 SPEED INCLINE SPEED INCLINE 10 8 SPEED 10 10 10 7 10 10 6 INCLINE SPEED INCLINE SPEED INCLINE SPEED INCLINE SPEED INCLINE SPEED INCLINE SPEED INCLINE 10 10 12 8 SPEED INCLINE SPEED INCLINE SPEED...
- Page 19 SPEED INCLINE SPEED INCLINE SPEED INCLINE SPEED INCLINE SPEED INCLINE SPEED INCLINE SPEED INCLINE 10 10 12 8 SPEED INCLINE SPEED INCLINE 10 8 SPEED 10 10 10 7 10 10 6 INCLINE SPEED INCLINE SPEED INCLINE SPEED INCLINE SPEED INCLINE SPEED...
- Page 20 INCLINE SPEED INCLINE 10 10 12 8 SPEED INCLINE SPEED INCLINE SPEED INCLINE SPEED INCLINE SPEED INCLINE SPEED INCLINE SPEED INCLINE SPEED INCLINE SPEED INCLINE SPEED INCLINE SPEED INCLINE 10 10 12 8 SPEED INCLINE SPEED INCLINE 10 8...
- Page 21 SPEED 10 10 10 7 10 10 6 INCLINE SPEED INCLINE SPEED INCLINE SPEED INCLINE SPEED INCLINE SPEED INCLINE SPEED INCLINE 10 10 12 8 SPEED INCLINE SPEED INCLINE SPEED INCLINE SPEED INCLINE SPEED INCLINE SPEED INCLINE SPEED INCLINE SPEED...
- Page 22 INCLINE SPEED INCLINE SPEED INCLINE SPEED INCLINE 10 10 12 8 SPEED INCLINE SPEED INCLINE 10 8 SPEED 10 10 10 7 10 10 6 INCLINE SPEED INCLINE SPEED INCLINE SPEED INCLINE SPEED INCLINE SPEED INCLINE SPEED INCLINE 10 10 12 8 SPEED INCLINE SPEED...
-
Page 23: Exercise Guide
7. EXERCISE GUIDE PLEASE NOTE: Before beginning any exercise program, consult your physician. This is important especially if you are over the age of 45 or individuals with pre-existing health problems. The pulse sensors are not medical devices. Various factors, including the user’s movement, may affect the accuracy of heart rate readings. - Page 24 maximum performance. Breathe regularly and deeply as you exercise. Cool Down Finish each workout with a light jog or walk for at least 1 minute. Then complete 5 to 10 minutes of stretching to cool down. This will increase the flexibility of your muscles and will help prevent post-exercise problems. Workout Guidelines Target Zone This is how your pulse should behave during general fitness exercise.
-
Page 25: Maintenance Instructions
8. MAINTENANCE INSTRUCTIONS Reasonable cleaning/lubricating should be made to extend the lifetime of this unit. Performance is maximized when the belt and mat are kept as clean as possible. WARNING: THE MAT/DECK FRICTION MAY PLAY A MAJOR ROLE IN THE FUNCTION AND LIFE OF YOUR TREADMILL AND THAT IS WHY WE RECOMMEND YOU CONSTANTLY LUBRICATE THIS FRICTION POINT TO PROLONG THE USEFUL LIFE OF YOUR TREADMILL. - Page 26 Belt/Deck/Roller Lubrication The mat/deck friction may play a major role in the function and life of your treadmill and that is why we recommend you constantly lubricate this friction point to prolong the useful life of your treadmill. You should apply lubrication after approximately the first 30 hours of operation.
- Page 27 4. How to check the running mat for proper lubrication: 1. Disconnect the main power supply. 2. Fold the treadmill up into the storage position. 3. Feel the underside surface of the running mat. If the surface is slick when touched, then no further lubrication is needed. If the surface is dry to the touch, apply a suitable silicone lubricant.
- Page 28 NOTE: When properly tightened, you should be able to peel the very edge of the side of the belt up approximately 2 inches. However, this is a rough reference and not all treadmills are the same. Some treadmills that have longer belts may give different measurements for correct belt tightness. Simply, if the belt begins to slip during use, this is an indication that the belt still needs tightening.
- Page 29 6. Replacing Motor Brushes After extended use, the motor brushes in your treadmill motor will wear down, and this can lead to motor failure. It is important that you maintain your motor by replacing the brushes on either side of the motor when they are worn down.
- Page 30 4c. Remove the clip, noting the direction in which it 4b. Some treadmill motors may use a push clip instead. In this case, gently push the clip inwards was originally placed, and put it safely aside. and then up to release it from its latch. 5.
- Page 31 9a. Release the clip back into its position. 9b. If your motor uses a push clip, replace the push clip by pushing it inwards and then down so that it engages the catch. 10. Check that the motor brush is held firmly in place 11.
-
Page 32: Exploded Diagram
EXPLODED DIAGRAM... -
Page 33: Parts List
10. PARTS LIST DESCRIPTION SPECS. DESCRIPTION SPECS. Main frame Bolt M10*55 Base frame Distance sleeve Incline frame Cushion Left upright Isolation nylon pad Right upright Motor up cover Computer bracket Motor bottom cover Panel assembly Panel cover Left rotating plate Panel top cover Right rotating plate Panel bottom cover... - Page 34 Lock washer Left base cover Spring washer Right base cover Spring washer Transport wheel Screw ST4.2*20 Foot Pad Lock washer Oil bottle Screw ST4.2*20 Running board Screw ST4.2*25 DC motor Screw ST4.2*9 Incline motor Screw ST4.2*20 Single wire Screw ST4.2*50 Pulse wire Bolt M10*50...
-
Page 35: Warranty
11. WARRANTY AUSTRALIAN CONSUMER LAW Many of our products come with a guarantee or warranty from the manufacturer. In addition, they come with guarantees that cannot be excluded under the Australian Consumer Law. You are entitled to a replacement or refund for a major failure and compensation for any other reasonably foreseeable loss or damage. You are entitled to have the goods repaired or replaced if the goods fail to be of acceptable quality and the failure does not amount to a major failure. - Page 36 TROUBLESHOOTING CODE REASON SOLUTION The controller detects that the Check whether there is something blocking the motor, motor load current is maintained reduce the load of running belt or let the running belt run at the maximum set value for 3 empty to see if the display returns E1 error, and replace consecutive seconds.
- Page 37 before starting to see if the electronic watch returns E31, and replace the controller if there is any error Check whether there is anything that forcibly makes the motor rotate in the opposite direction, check whether the The controller detected that the motor is installed normally, make sure that there is no motor was running in the problem, and see whether the electronic watch returns...
Need help?
Do you have a question about the VULCAN M2 and is the answer not in the manual?
Questions and answers