
Subscribe to Our Youtube Channel
Related Manuals for Coffee Queen ORIGINAL LINE A


Summary of Contents for Coffee Queen ORIGINAL LINE A
- Page 1 ORIGINAL LINE A USER MANUAL Machines with automatic water filling UM_EN Part No.: 1764024_01...
-
Page 2: Table Of Contents
CONTENT ORIGINAL LINE A CONTENT ................................ 2 GENERAL ................................4 Introduction ................................4 Warnings ..................................4 Precautions ................................4 Intended use ................................4 Facts & weight ................................5 General function description..........................5 OVERVIEW OF COMPONENTS ......................6 Front view ..................................6 A-2 ....................................6 DA-4 ....................................7 Thermos A .................................8 Mega Gold A................................9... - Page 3 CONTENT ORIGINAL LINE A POSSIBLE SOLUTION ..........................22 Fault and solution ..............................22 DIMENSION ..............................23 A-2 .................................... 23 DA-4 ..................................24 Thermos A ................................25 Mega Gold A................................26 Serving Station ............................... 27 Some important information may appear in textboxes seen below...
-
Page 4: General
GENERAL ORIGINAL LINE A Introduction Thank you for choosing a ORIGINAL LINE coffee brewer. We hope you enjoy it ! Read the user guide before using the machine. Always keep this guide close at hand for future This guide contains important instructions for reference. -
Page 5: Facts & Weight
GENERAL ORIGINAL LINE A Facts & weight FACTS DA-4 Thermos A Mega Gold A 428, 205, 410 428, 410, 410 557, 205, 410 655, 205, 445 Height, Width, Depth Thermos/decanter volume 1.8 L 2x1.8 L 2.2 L 2.5 L 220-230V 1N... -
Page 6: Overview Of Components
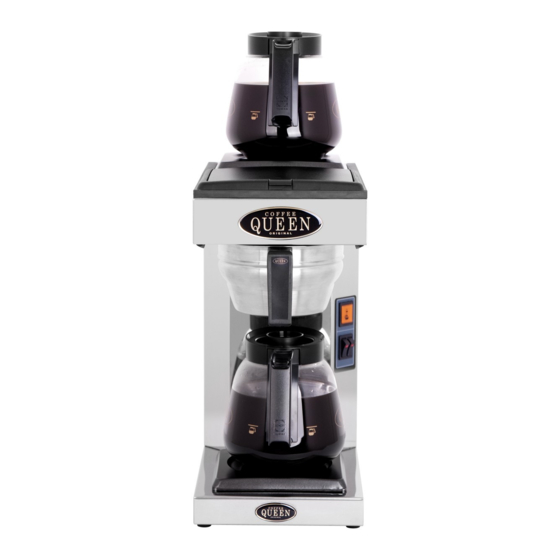
OVERVIEW OF COMPONENTS ORIGINAL LINE A Front view Glass decanter Upper hot plate Tank Lid Filiter Holder Power Switch Display Glass decanter Lower hot plate... -
Page 7: Da-4
OVERVIEW OF COMPONENTS ORIGINAL LINE A Front view DA-4 Glass decanters Upper hot plates Tank Lid Filiter Holder Brewing lamp Power Switch Glass decanters Lower hot plates... -
Page 8: Thermos A
OVERVIEW OF COMPONENTS ORIGINAL LINE A Front view Thermos A Tank Lid Filiter Holder Power Switch Display Carry Handle Thermos... -
Page 9: Mega Gold A
OVERVIEW OF COMPONENTS ORIGINAL LINE A Front view Mega Gold A Tank Lid Filiter Holder Power Switch Carry Handle Display Serving Station Tap for Coffee Drip Tray Insert Drip Tray... -
Page 10: Function
OVERVIEW OF COMPONENTS ORIGINAL LINE A Function A-2, DA-4 ON-OFF button for display ON-OFF button and lower hot plate. For upper hot plate. Shows the number of cups. Display is blinking when brewing. Increase the number of cups. Decrease the number of cups. -
Page 11: Mega Gold A, Thermos A
OVERVIEW OF COMPONENTS ORIGINAL LINE A Function Mega Gold A, Thermos A ON - OFF button. Shows the number of cups. Display is blinking when brewing. Increase the number of cups. Decrease the number of cups. Starts brewing. During a brewing you may press this button to stop the brew process. -
Page 12: Installation And Start-Up
INSTALLATION AND START-UP ORIGINAL LINE A Positioning Min. 10cm Min. 10cm Place the machine on a flat horizontal surface that will support the weight of the machine. Make sure air is able to circulate behind the machine Note (minimum 10cm). -
Page 13: Electrical Connection
INSTALLATION AND START-UP ORIGINAL LINE A Electrical connection A-2, THERMOS A, MEGA GOLD A IMPORTANT! Connect the plug to a separate earthed wall socket. 110-120V / 220-230V 50-60Hz, 10 Amp. DA-4 The brewer is not reconnectable and may only be installed to the electric supply network with a voltage that is stated on the brewer and shall be carried out by an authorized electrician. -
Page 14: First Time Start-Up
INSTALLATION AND START-UP ORIGINAL LINE A First time start-up IMPORTANT! First time you use the machine do the first brewing with water only. Slide the filter holder into position without filter and coffee. Turn on the power switch(A). Select 12,15 or 17 cups by adjusting button. -
Page 15: Operation
OPERATION ORIGINAL LINE A Brewing with coffee Recommended powder amount is 60g/L Add coffee (restaurant / catering ground coffee). Make sure that the Place a 90mm filter in the filter holder. coffee is evenly spread. Slide the filter holder into position. - Page 16 OPERATION ORIGINAL LINE A Place the thermos or decanter under the filterholder. Choose number of cups for your brewing by using the buttons described below. - Press the button to increase number of cups - Press the button to decrease number of cups When you have selected your desired number of cups press the button to start brewing.
-
Page 17: To Keep Temperature And Aroma
OPERATION ORIGINAL LINE A To keep temperature and aroma Tips for keeping coffee hot Pre-heat the serving station, start a brewing with only water into the serving station. When brewing is complete let it stand for about 1 hour. Pour out the water. -
Page 18: Cleaning And Care
CLEANING AND CARE ORIGINAL LINE A Rinse thermos, decanter and serving station Before each brewing, rinse the thermos, decanter or serving station with fresh tap water. When cleaning the outside, use a soft rag with liquid cleaning agent to prevent scratches. -
Page 19: Daily Cleaning
CLEANING AND CARE ORIGINAL LINE A Daily cleaning Wash the thermos, decanter(B) and the filter holder with liquid solution for coffee machines. Always remove the filter immediately and clean the filter holder daily, coffee will get moldy. Clean the spray nozzle(A) and the surrounding area. -
Page 20: Cleaning Serving Station
CLEANING AND CARE ORIGINAL LINE A Cleaning serving station Disassemble the level tube and clean it every week with the enclosed brush. Take off the main lid and clean the mixer tube(A). Cleaning of serving station 2.5 L Fill the serving station with hot water. ( Full IMPORTANT! brewing without coffee and filter ). -
Page 21: Programming
PROGRAMMING ORIGINAL LINE A Adjust water amount Adjust amount of brew water Press the buttons at same time in 5 seconds. The buzzer beeps twice. Display shows 0. - Press the button to increase amount of water. - Press the button to decrease amount of water. -
Page 22: Possible Solution
POSSIBLE SOLUTION ORIGINAL LINE A Fault and solution FAULT POSSIBLE SOLUTION IMPORTANT! Check plug connection to wall socket. All maintenance Check fuse in plug. Power switch does not lit and installations Check if hot plate becomes warm, if so must be done replace power switch. -
Page 23: Dimension
DIMENSION ORIGINAL LINE A Model 595mm 205mm 410mm 428mm 578mm 360mm... -
Page 24: Da-4
DIMENSION ORIGINAL LINE A DA-4 Model DA-4 410mm 410mm 428mm 595mm 578mm 360mm... -
Page 25: Thermos A
DIMENSION ORIGINAL LINE A Thermos A Model Thermos A 557mm 205mm 410mm 708mm 360mm... -
Page 26: Mega Gold A
DIMENSION ORIGINAL LINE A Mega Gold A Model Mega Gold A 655mm 205mm 445mm 390mm 806mm... -
Page 27: Serving Station
DIMENSION ORIGINAL LINE A Serving Station Model Serving Station 205mm 273mm 436mm 400mm 105mm... - Page 28 For the warranty to be valid the conditions for maintenance must have been followed according to our instructions, proper precaution has been made and warranty claim been issued without delay. The affected equipment may not be used during awaiting service if there is any risk that the damage or defect would worsen.
Need help?
Do you have a question about the ORIGINAL LINE A and is the answer not in the manual?
Questions and answers