Table of Contents
Advertisement
Quick Links
Advertisement
Table of Contents

Related Manuals for Lenze PositionServo 940


Summary of Contents for Lenze PositionServo 940
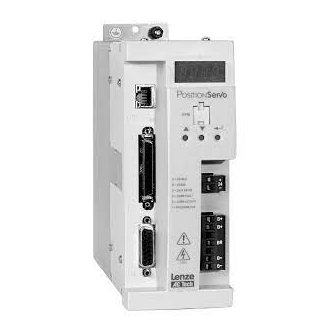
- Page 1 PositionServo with MVOB Users Manual Valid for Hardware Version 2...
- Page 2 Lenze AC Tech Corporation. The information and technical data in this manual are subject to change without notice. Lenze AC Tech makes no warranty of any kind with respect to this material, including, but not limited to, the implied warranties of its merchantability and fitness for a given purpose.
-
Page 3: Table Of Contents
Contents Introduction..............5 Safety Information . - Page 4 Contents Parameters ..............38 Drive Identification .
- Page 5 Contents Compensation ............. 56 5.9.1 Velocity P-gain (proportional).
- Page 6 1 Model PositionServo: After reception of the delivery, immediately check whether the scope Type E94P or E94R of supply matches the accompanying papers. Lenze- AC Tech does 1 Mounting Instructions (English) not accept any liability for deficiencies claimed subsequently. 1 MotionView CD ROM including:...
-
Page 7: Introduction
Table 3: Legal Disclaimers Claim Description Identification Nameplate CE Identification Manufacturer Lenze controllers are unambiguously In compliance with the EC Lenze AC Tech Corporation designated by the contents of the Low-Voltage Directive 630 Douglas Street nameplate Uxbridge, MA 01569 USA... -
Page 8: General Drive Information
Claims on modifications referring to controllers that have already been supplied cannot be derived from the information, illustrations, and descriptions. • The specifications, processes and circuitry described in these instructions are for guidance only and must be adapted to your own specific application. Lenze does not take responsibility for the suitability of the process and circuit proposals. • The specifications in these Instructions describe the product features without guaranteeing them. -
Page 9: Feedback
Basic-like language designed to be very intuitive and easy to implement. For programming details, refer to the PositionServo Programming Manual. All PositionServo related manuals can be downloaded from the Technical Documentation section on the Lenze website (http://www.lenze.com). On each PositionServo drive, there is an Electronic Programming Module (EPM), which stores all drive setup and tuning gain settings. -
Page 10: Part Number Designation
Introduction Part Number Designation The table herein describes the part number designation for the PositionServo drive. The available filter and communication options are detailed in separate tables. 1.4.1 Drive Part Number Electrical Products in the 94x Series P = PositionServo Model 940 with Encoder Feedback R = PositionServo Model 941 with Resolver Feedback Drive Rating in Amps: 020 = 2 Amps... -
Page 11: Option Part Number
Introduction 1.4.3 Option Part Number E94Z Electrical Option in the 94x Series A = Communication or Breakout Module Module Type: Communication: Breakout: CAN = CANopen COMM Module HBK = Motor Brake Terminal Module RS4 = RS485 COMM Module TBO = Terminal Block I/O Module DVN = DeviceNet COMM Module SCA = Panel Saver I/O Module PFB = PROFIBUS COMM Module... -
Page 12: Technical Data
Technical Data Technical Data Electrical Characteristics Single-Phase Models 1~ Mains 1~ Mains Rated Peak Type Mains Voltage Current Current Output Output (doubler) (Std.) Current Current E94_020S1N_~ 120V or 240V E94_040S1N_~ E94_020S2F_~ E94_040S2F_~ 120 / 240V (80 V -0%...264 V +0%) E94_080S2F_~ 15.0 E94_100S2F_~... -
Page 13: Power Ratings
Technical Data Electrical Specifications applicable to all models: Acceleration Time Range (Zero to Max Speed) 0.1 … 5x10 RPM/sec Deceleration Time Range (Max Speed to Zero) 0.1 … 5x10 RPM/sec Speed Regulation (typical) ± 1 RPM Input Impedance (AIN+ to COM and AIN+ to AIN-) 47 kΩ... -
Page 14: Fuse Recommendations
Technical Data Fuse Recommendations AC Line Miniature AC Line Input Fuse DC Bus Input Type Input Fuse Circuit Breaker or Breaker (5) (6) Fuse (1ø/3ø) (1ø/3ø) (N. America) Amp Ratings E94_020S1N_~ M20/M10 C20/C10 20/10 E94_040S1N_~ M32/M20 C32/C20 30/20 E94_020S2F_~ E94_040S2F_~ E94_080S2F_~ E94_100S2F_~ E94_020Y2N_~... -
Page 15: Connections And I/O
Technical Data Velocity Reference ± 10 VDC or 0…10 VDC; 12-bit; scalable Regulation ± 1 RPM Velocity-Loop Bandwidth Up to 200 Hz* Speed Range 5000:1 with 5000 ppr encoder Position Reference 0…2 MHz Step & Direction or 2 channels quadrature input; scalable Minimum Pulse Width 500 nanoseconds Loop Bandwidth... -
Page 16: Positionservo Dimensions
Technical Data PositionServo Dimensions dia = 4.57 4.57 Dimensions in mm S923 Type A (mm) B (mm) C (mm) D (mm) Weight (kg) E94_020S1N_~ E94_040S1N_~ E94_020S2F_~ E94_040S2F_~ E94_080S2F_~ E94_100S2F_~ E94_020Y2N_~ E94_040Y2N_~ E94_080Y2N_~ E94_100Y2N_~ E94_120Y2N_~ E94_180T2N_~ E94_020T4N_~ E94_040T4N_~ E94_060T4N_~ E94_090T4N_~ The first “_” equals “P” for the Model 940 encoder based drive or “R” for the Model 941 resolver based drive. The second “_”... -
Page 17: Clearance For Cooling Air Circulation
Technical Data Clearance for Cooling Air Circulation >25mm >3mm >25mm S924 S94H201E_13426446_EN... -
Page 18: Installation
Installation Installation Perform the minimum system connection. Refer to section 6.1 for minimum connection requirements. Observe the rules and warnings below carefully: DANGER! Hazard of electrical shock! Circuit potentials are up to 480 VAC above earth ground. Avoid direct contact with the printed circuit board or with circuit elements to prevent the risk of serious injury or fatality. -
Page 19: Wiring
0.25 in (6 mm) around the screw hole of the enclosure. Lenze recommends the use of the special PositionServo drive cables provided by Lenze. If you specify cables other than those provided by Lenze, please make certain all cables are shielded and properly grounded. -
Page 20: Emi Protection
Therefore, reducing EMI is of primary concern not only for servo control manufacturers such as Lenze, but the user as well. Proper shielding, grounding and installation practices are critical to EMI reduction. -
Page 21: Heat Sinking
Installation NOTE The ground connection from the filter must be wired to solid earth ground, not machine ground. If the end-user is using a CE-approved motor, the AC filter combined with the recommended motor and encoder feedback cables (maximum cable length of 10m), is all that is necessary to meet the EMC directives listed herein. -
Page 22: Interface
PLC or host controller, power to the drive, and feedback from the motor. Prefabricated cable assemblies may be purchased from Lenze to facilitate wiring the drive, motor and host computer. Contact your Lenze Sales Representative for assistance. -
Page 23: P2 - Ethernet Communications Port
3.2. The other end should be properly terminated at the motor shield. Feedback cable shields should be terminated in a like manner. Lenze recommends Lenze cables for both the motor power and feedback. These are available with appropriate connectors and in various lengths. Contact your Lenze representative for assistance. -
Page 24: P3 - Controller I/O
P3 - Controller I/O P3 is a 50-pin SCSI connector to interface with the front-end of the controller. It is strongly recommended that OEM cables be used to aid in satisfying CE requirements. Contact your Lenze representative for assistance. P3 Pin Assignments (Controller Interface) -
Page 25: P4 - Motor Feedback
All conductors must be enclosed in one shield with a jacket around them. Lenze recommends that each and every pair (for example, EA+ and EA-) be twisted. In order to satisfy CE requirements, use of an OEM cable is recommended. -
Page 26: P5 - 24 Vdc Back-Up Power Input
Interface P4B Pin Assignments (Resolver Feedback - E94R Drives) Name Function Ref + Resolver reference connection Ref - No Connection Cos+ Resolver Cosine connections Cos- Sin+ Resolver Sine connections Sin- PTC+ Motor PTC Temperature Sensor PTC- STOP! Use only 10 V (peak to peak) or less resolvers. Use of higher voltage resolvers may result in feedback failure and damage to the drive. -
Page 27: Connector And Wiring Notes
Interface 4.1.7 Connector and Wiring Notes Note 1 - Buffered Encoder Outputs Each of the encoder output pins on P3 is a buffered pass-through of the corresponding input signal on P4, Refer to section 4.2.2 “Buffered Encoder Outputs”. This can be either from a motor mounted encoder or an encoder emulation of the resolver. -
Page 28: P8 - Iso 13849-1 Safety Circuit (Option)
Interface 4.1.8 P8 - ISO 13849-1 Safety Circuit (option) If installed, the ISO 13849-1 Safety Circuit connector, P8, is located on the bottom of the PositionServo. P8, a 6-pin quick-connect terminal block. P8 Pin Assignments (ISO 13849-1 Safety Function) Name Function Bypass Voltage ISO 13849-1Bypass Voltage (+24VDC) - Page 29 Interface Operation of the ISO 13849-1 Safety Circuit ISO 13849-1 Cat 3, PL d designates that the enable function of the drive be designed in such a way that a single fault in any of the parts of this enable circuit cannot lead to a loss of this safety function. The ISO 13849-1 safe torque off function has been designed and certified as meeting the requirements of this standard.
- Page 30 Interface Evaluation and Testing of the ISO 13849-1 Safety Circuit As part of the regulations for ISO 13849-1 safety circuit provision must be made for the user to periodically test the safety circuits and that testing should be capable of identifying a single fault. The PositionServo drive uses the safety status output (Pin 3) in conjunction with the display of the drive to allow the testing of the safety circuits.
- Page 31 Interface Guidance of setting up the drive to allow testing on the ISO 13849-1 circuit: External Reference: If the drive is getting its command signal from an external reference then Parameters should be set accordingly. From the Parameter Folder: From the Digital IO Folder: In this mode your external analog input will command movement.
- Page 32 Interface Test Action Drive Display Safety Status Output Failed Test Step Indication Indication Indication Deactivate Safety ‘F EF’ ‘Activated’ No Trip on display (F_EF) = Safety Input 2 failed to deactivate. Input 2. Set Input A3 Status Output Deactivated = Safety Input 1 Failed to activate to Enable Set Input A3 to disable ‘Dis’...
-
Page 33: Digital I/O Details
Interface Digital I/O Details 4.2.1 Step & Direction/Master Encoder Inputs (P3, pins 1-4) A master encoder with quadrature outputs or a step and direction pair of signals can be connected to the PositionServo to control position in the external positioning operating mode. These inputs are optically isolated from the rest of the drive circuits and from each other. -
Page 34: Buffered Encoder Output (P3, Pins 7-12)
Interface 4.2.2 Buffered Encoder Output (P3, pins 7-12) There are many applications where it is desired to close the feedback loop to an external device. This feature is built into the PositionServo drive and is referred to as the “Buffer Encoder Output”. If a motor with encoder feedback is being used, the A+, A-, B+, B-, Z+ and Z- signals are directly passed through the drive through pins 7-12 with no delays, up to a speed of 2MHz. -
Page 35: Digital Inputs
Interface 4.2.4 Digital Inputs IN_Ax, IN_Bx, IN_Cx (P3.26-30, P3.31-35, P3.36-40) The PositionServo drive has 12 optically isolated inputs. These inputs are compatible with a 5 - 24V voltage source. No additional series resistors are needed for circuit operation. The 12 inputs are segmented into three groups of 4, Inputs A1 - A4, Inputs B1 - B4, and Inputs C1 - C4. -
Page 36: Analog I/O Details
Interface Analog I/O Details 4.3.1 Analog Reference Input AIN1+, AIN1- (P3.24 and P3.25) The analog reference input can accept up to a ±10V analog signal across AIN1+ and AIN1-. The maximum limit with respect to analog common (ACOM) on each input is ±18VDC. The analog signal will be converted to a digital value with 12 bit resolution (11-bit plus sign). -
Page 37: Analog Output
Interface 4.3.2 Analog Output AO (P3.23) The analog output is a single-ended signal (with reference to Analog Common (ACOM) which can represent the following motor data: • Not Assigned • Phase R Current • Iq Current • RMS Phase Current •... -
Page 38: Modbus Rtu Support
Interface 4.4.3 Modbus RTU Support The RS485 interface is configured through the MotionView program. When configured for Modbus operation, the baud rate for RS485 is set using the parameter “RS485 baud rate”. Modbus RTU requires 8 data bits. The Modbus RTU slave interface protocol definitions can be found on the MotionView CD in “Product Manuals”, P94MOD01. -
Page 39: Profibus Dp Interface
Interface 4.4.6 PROFIBUS DP Interface An optional PROFIBUS DP communication module (E94ZAPFB1) is available for the PositionServo drive. Installed in Option Bay 1 as P24, the PROFIBUS DP module is optically isolated from the rest of the drive’s circuitry. The PROFIBUS module is a female DB-9 connector. Refer to the PS PROFIBUS Communications Reference Guide (P94PFB01) for detailed information. -
Page 40: Parameters
Parameters Parameters The PositionServo drive has many programmable features accessible via the universal software MotionView. This chapter covers the drive’s programmable features and parameters in the order they appear in the Parameter Tree of MotionView. Programmable parameters are divided into folders. Each folder contains one or more user adjustable parameters. -
Page 41: Drive Identification
Parameters Drive Identification At the top of the Node Tree, click the Drive name [E94P 240V 04Amp ...]. The drive ID string, device family, firmware revision, vector processor revision, hardware revision, MotionView OnBoard revision, motor database revision, indexer compiler revision, serial number, drive name and group ID are displayed as illustrated herein. -
Page 42: Motor
Parameters Motor The motor folder displays the data for the currently selected motor. A motor may be selected from the database or a custom motor may be configured. 5.2.1 Motor Setup Select the [Motor] folder in the right-hand “Parameter View Window”. To select a new motor click the [Change Motor] button. -
Page 43: Using A Custom Motor
Parameters NOTE To help prevent the motor from drawing to much current and possibly overheating it is recommended that the drive’s “Current Limit” be checked against the motors “Nominal Phase Current” and set accordingly. 5.2.2 Using a Custom Motor Follow these instructions to load a custom motor from a file or create a new custom motor. From the Parameter tree select the [Motor] folder. -
Page 44: Autophasing
Parameters NOTE Save the file even if the autophasing feature will be used and some of the final parameters are not known. After autophasing is completed, the corrected motor file can be updated before loading it to memory. Click [Close] to exit from the Motor Parameters dialog. MotionView will prompt to autophase/not autophase the custom motor. -
Page 45: Custom Motor Data Entry
Parameters Click [Save File] to save the completed motor file (use same filename as the initial data in step 1). Click [Update Drive] to load the motor data to the drive. 5.2.5 Custom Motor Data Entry A Custom Motor file is created by entering motor data into the “Motor Parameters” dialog box. This box is divided up into four sections: Electrical constants, Mechanical constants, Feedback and Gain Scaling. - Page 46 Parameters NOTE If the phase current rating is not given, use this equation to obtain the nominal continuous phase-to-phase winding current: In = Continuous Stall Torque / Motor Torque Constant (Kt) The same force x distance units must be used in the numerator and denominator in the equation above. If torque (T) is expressed in units of pound-inches (lb-in), then Kt must be expressed in pound-inches per Amp (lb-in/A).
- Page 47 Parameters S912 The Halls Order is obtained as follows: 1. Look at the “Vrs” Output Voltage and determine the Hall Voltage that is lined up with (or in phase with) this voltage. To determine which Hall Voltage is in phase with the Vrs Output Voltage draw vertical lines at those points where it crosses the horizontal line (zero).
- Page 48 Parameters B leads A for CW This is the encoder phase relationship for CW/CCW shaft rotation. When you obtain the diagram for your motor phasing similar to shown above, it’s assumed by the software that the motor shaft rotates CW when looking at the rear of the motor.
-
Page 49: Parameters
Parameters Parameters Parameters List - Top Parameters List - Bottom S94H201E_13426446_EN... -
Page 50: Drive Mode
Parameters 5.3.1 Drive Mode The PositionServo has 3 operating mode selections: Torque, Velocity and Position. For Torque and Velocity modes the drive will accept an analog input voltage on the AIN1+ and AIN1- pins of P3 (refer to section 4.3.1). This voltage is used to provide a torque or speed reference. For Position mode the drive will accept step and direction logic signals or a quadrature pulse train on pins P3.1- P3.4. -
Page 51: Drive Pwm Frequency
Parameters 5.3.3 Drive PWM Frequency This parameter sets the PWM carrier frequency. Frequency can be changed only when the drive is disabled. Maximum overload current is 300% of the drive rated current when the carrier is set to 8kHz. It is limited to 250% at 16kHz. -
Page 52: Motor Temperature Sensor
Parameters 5.3.9 Motor Temperature Sensor This parameter enables / disables motor over-temperature detection. It must be disabled if the motor PTC sensor is not wired to either P7.1-2 or to the resolver feedback input (P4 or P11). 5.3.10 Motor PTC Cutoff Resistance This parameter sets the cut-off resistance of the PTC that defines when the motor reaches the maximum allowable temperature. -
Page 53: Master Encoder Input Type (Position Mode Only)
Parameters 5.3.12 Master Encoder Input Type (position mode only) This parameter sets the type of input for position reference the drive expects to see. Signal type can be step and direction [Step & Direction] type or quadrature pulse-train [Master Encoder]. Refer to section 4.2.1 for details on these inputs. -
Page 54: Communication
Parameters Communication The Communication folder contains four sub-folders: Ethernet, RS-485, CAN and PROFIBUS plus sub-sub folders to program the parameters specific to the communication type. Select the Fieldbus used from the pull-down menu (None, CANOpen Simple 301, DeviceNet or PROFIBUS). NOTE Ethernet is always enabled regardless of the fieldbus selected. -
Page 55: Analog I/O
Parameters Analog I/O 5.5.1 Analog Output The PositionServo has one analog output with 10-bit resolution on P3 pin 23. The signal is scaled to ±10V. The analog output can be assigned to the following functions: • Not Assigned • Phase current RMS •... -
Page 56: Analog Input Dead Band
Parameters 5.5.6 Analog Input Dead Band Allows the setting of a voltage window (in mV) at the reference input AIN1+ and AIN1- (P3 pins 24 and 25) such that any voltage within that window will be treated as zero volts. This is useful if the analog input voltage drifts resulting in motor rotation when commanded to zero. -
Page 57: Brake Release Delay
Parameters The inhibit function allows input A3 to inhibit (prevent) power being applied to the motor but does not provide the enable or disable command for the drive. This function is typically used in a centralized system where the drive’s internal programming determines when the drive should enable or disable (these statements are executed within the drive programming). -
Page 58: Position Limits
Parameters Position Limits 5.8.1 Position Error Specifies the maximum allowable position error in the primary (motor mounted) feedback device before enabling the “Max error time” clock. When using an encoder, the position error is in post-quadrature encoder counts. When using a resolver, position error is measured at a fixed resolution of 65,536 counts per motor revolution. -
Page 59: Position P-Gain (Proportional)
Parameters 5.9.3 Position P-gain (proportional) Position P-gain adjusts the system’s overall response to position error. Position error is the difference between the commanded position of the motor shaft and the actual shaft position. By adjusting the proportional gain, the bandwidth of the drive is more closely matched to the bandwidth of the control signal, ensuring more precise response of the servo loop to the input signal. -
Page 60: Set Default Gains
Parameters 5.9.10 Set Default Gains Click the [Set Default Gains] button to access the Default Gains parameter. Selecting [Set Default Gains] will reset the gains to the default values in the motor file. 5.9.11 Feedback and Loop Filters Hardware Version 2 provides for the use of 1 feedback filter and 2 cascaded loop filters. Loop filters are identical in structure and operation. -
Page 61: Tools
Parameters 5.10 Tools The [Tools] folder contains two action buttons: Oscilloscope and Parameter I/O View. These tools allow the user to perform real-time diagnostics. 5.10.1 Oscilloscope The Oscilloscope tool provides a real-time display of the different electrical signals inside the PositionServo drive. -
Page 62: Parameter & I/O View
Parameters Signal Name The user can customize the information presented on the Scope tool by choosing the drop-down box in each channel. The set of available signals depends on the drive mode. Refer to the Oscilloscope Parameters table for the list of the signals. Scale Scale sets the sensitivity of the display. -
Page 63: Faults
Parameters To edit a parameter’s value, double click the [Decimal] field of the parameter. When the text is double- clicked, the background color will change. The parameter value will stop updating allowing you to change the value. However, if the interface device or user’s program manipulates the value of the parameter, then your change will be overwritten in a concurrent manner. -
Page 64: Monitor
Parameters NOTE The [Clear Faults] operation will disrupt motion and the program being executed. It is recommended not to clear faults while running an application. 5.12 Monitor The Monitor window displays common diagnostic information for the drive’s status. Click the [Set on Top] box to keep the Monitor displayed while manipulating other screens in MotionView. -
Page 65: Operation
Operation Operation This section offers guidance on configuring the PositionServo drive for operations in torque, velocity or position modes without requiring a user program. To use advanced programming features of PositionServo please perform all steps below and then refer to the PositionServo Programming Manual for details on how to write motion programs. -
Page 66: Positionservo Ethernet Port Configuration
Operation NOTE For any PC that will need regular configuration to communicate with a PositionServo Drive and if the default PC Ethernet port on your computer is already being used for another purpose (such as email, web browsing, etc,) then it may be more convenient for the operator to add an additional Ethernet port to the PC. - Page 67 Operation It is most common for the PositionServo drive IP address to be left at its default value (192.168.124.120) and to configure the PC Ethernet port to communicate on this subnet. If more than one drive needs to be connected to the PC at any one time then the IP_4 parameter can be accessed via the keypad and changed to provide a unique IP address on the network for each drive.
-
Page 68: Configuring The Pc Ip Address (Windows Xp)
Operation 6.2.1.3 Configuring the IP Address Automatically (Dynamic Address) When connecting a PositionServo drive onto a network domain with a DHCP enabled server (where all devices have dynamic IP addresses assigned by the server) the IP address of the PositionServo drive can also be assigned automatically by the server. - Page 69 Operation Start Menus - Windows XP Category (Default) View Classic View One of the following screens will be displayed, depending on the user’s configuration of Windows XP software. Control Panel Displays - Windows XP Category (Default) View Classic View S94H201E_13426446_EN...
- Page 70 Operation Regardless of the Windows XP viewing mode the following [Network Connections] screen will appear. Hereafter all configuration screens are the same regardless of selected Windows XP viewing mode. Select the connection you wish configure. [Local Area Connection] is typically the standard or local Ethernet port on the PC (the port supplied with the PC), with any additional hardwire ports displayed as [Local Area Connection x] (with x being a numerical value).
-
Page 71: Initial Connection To The Drive
Operation Select [Use the following IP address]. The IP address and Subnet mask text boxes can now be edited. Enter an IP address for the PC. This IP address will need to be unique to the PC (different to any other device on the network) but still allow communication on the same subnet that the drive is set to. -
Page 72: Launching Motionview & Communicating To The Ps Drive
Operation Physically connect the Drive to the PC: To connect directly between a PC and a PositionServo drive it is recommended that a CAT 5e crossover cable be connected between the P2 port on the PositionServo drive and the Ethernet port on the PC. PC/Laptop Drive Ethernet Port... - Page 73 Operation MotionView OnBoard Splash Screen WARNING Statement on Initial MotionView Display Once MotionView has launched, verify motor is safe to operate, click [YES, I have] then select [Connect] from the Main toolbar (top left). Initial MotionView Display S94H201E_13426446_EN...
- Page 74 Operation The Connection dialog box will appear. Connection Dialog Box Select [Discover] to find the drive(s) on the network available for connection. NOTE [Discover] may fail to find the drive’s IP address on a computer with both a wireless network card and a wired network card.
-
Page 75: Parameter Storage And Epm Operation
Never install or remove the EPM module while the drive is powered. Most Lenze-AC Tech products use the EPM for memory storage on the drive. The memory size of the EPM is denoted by its color and drive format structure. The PositionServo drive uses a white EPM module. When the drive is powered up it checks the format style of the EPM in the EPM port. -
Page 76: Configuration Of The Positionservo
Operation Configuration of the PositionServo Regardless of the mode in which the user wishes to operate, he must first configure the PositionServo for his particular motor, mode of operation, and additional features if used. Drive configuration consists of following steps: • Motor Selection • Mode of operation selection • Reference source selection (Very Important) -
Page 77: Position Mode Operation (Gearing)
Operation Position Mode Operation (gearing) In position mode the drive will follow the master reference signals at the 1-4 inputs of P3. The distance the motor shaft rotates per each master pulse is established by the ratio of the master signal pulses to motor encoder pulses (in single loop configuration). -
Page 78: Drive Tuning
Operation Drive Tuning The PositionServo Drive will likely require some tuning of its gains parameters in order to achieve best performance in the application in which it is being applied. Only when the drive is placed in Torque Mode are the gain values not required to be tuned. -
Page 79: Manually Tuning The Drive In Velocity Mode
To load the TuneV program file to the drive, select [Indexer Program] in the MotionView Parameter Tree. Select [Import] on main toolbar. Navigate to [C:\Lenze-ACTech\MVOB\Programming_Examples]. If during the installation of the Documentation CD files a different default directory was selected, then navigate to that directory. - Page 80 Operation Oscilloscope Settings Open the [Tools] folder in MotionView and select the [Oscilloscope] tool. Click the [Set on Top] box to place a checkmark in it and keep the scope on top. In the Scope Tool Window make the following settings: Channel 1: Signal = “Commanded Velocity”...
- Page 81 Operation Gain Scaling set OK Motor Velocity resembles Commanded Velocity. Motor Velocity is reasonably close with a slight overshoot. Gain Scaling set too HIGH Motor Velocity shows significant overshoot following the acceleration periods. Gain Scaling set significantly too HIGH Motor Velocity exhibits instability throughout the steady state Commanded Velocity.
- Page 82 Operation Step 2: Fine Tuning the Velocity P-Gain Slowly alter the Velocity P-Gain (increase and decrease) and observe the motor velocity waveform on the oscilloscope. As the P-Gain increases the gradient of the velocity during acceleration and deceleration will also increase as will the final steady state velocity that is achieved. The application of too much P-Gain will eventually result in an overshoot in the motor velocity, and further increases will result in larger overshooting to the point that instability (continuous oscillation) occurs.
- Page 83 Operation I-Gain set OK No error between Commanded steady state velocity and Actual steady state velocity with excellent stability. I-Gain set too HIGH Additional overshoot and oscillations are starting to occur. Steady state velocity regulation Step 4: Check Motor Currents Finally check the motor currents on the Oscilloscope.
-
Page 84: Manually Tuning The Drive In Position Mode
To load the TuneP program file to the drive, select [Indexer Program] in MotionView. Select [Import] on main toolbar. Navigate to [C:\Lenze-ACTech\MVOB\Programming_Examples]. If during the installation of the Documentation CD files a different default directory was selected, then navigate to that directory. Click on the [TuneP.txt] file and select [Open]. - Page 85 Operation Editing the Position Tuning Program The Tune Position Program performs trapezoidal moves in the forward and reverse direction separated by a defined pause (or time delay). The Accel, Decel, and MaxV variables within the TuneP program define the ramps and steady state velocity that will be used to execute the motion commands.
- Page 86 Operation Compensation Folder Open the [Compensation] folder in MotionView. Leave the Velocity P-Gain and Velocity I Gain unchanged, as they should already have been setup during velocity tuning. Do not adjust the Gain Scaling Parameter during this procedure. Set the [Position P-gain] to a low value (e.g. 100) and set the [Position I-Gain] and [Position D-Gain] to 0. Gain Tuning The system should now be ready to start tuning the position loop.
- Page 87 Operation Further Increased Position P-Gain Shows very good reduction to the maximum error but with additional oscillations starting to occur. Step 2: Setting the Position D-Gain Slowly increase the D-Gain while watching the position error waveform on oscilloscope Channel 1. As the D-Gain is increased, the position error oscillation caused by the P-Gain, should start to decrease.
- Page 88 Operation Step 4: Check Motor Currents Set the oscilloscope channel 2 to ‘Phase Current RMS’ Channel 2: Signal = “Phase Current RMS” Scale = as appropriate to peak current limit set in drive parameters (MotionView) Timebase: = as appropriate to the “Period” of the moves being generated Trigger: = Ch1 Rising Edge Level:...
-
Page 89: Upgrading Firmware
Operation In this particular example maximum error in pulses is 95.0. The time this peak error occurs can be read from the oscilloscope at approximately ½ of a division with each division equal to 100ms, hence the error pulse lasts approximately 50mS. Suitable settings for position error within this application might be as follows, although looser or tighter limits could be applied depending on the requirements of the application. -
Page 90: Quick Start Reference
Quick Start Reference Quick Start Reference This section provides instructions for External Control, Minimum Connections and Parameter Settings to quickly setup a PositionServo drive for External Torque, Velocity or Positioning Modes. The sections are NOT a substitute for reading the entire PositionServo User Manual. Observe all safety notices in this manual. Quick Start - External Torque Mode Mandatory Signals: These signals are required in order to achieve motion from the motor. -
Page 91: Quick Start - External Velocity Mode
Quick Start Reference Optional Parameter Settings: These parameters may require setting depending on the control system implemented. Folder / Sub-Folder Parameter Name Description Parameters Resolver Track PPR for simulated encoder on 941 Resolver drive IO / Digital IO Output 1 Function Set to any pre-defined function required Output 2 Function Set to any pre-defined function required... - Page 92 Quick Start Reference Mandatory Parameter Settings: These parameters are required to be set prior to running the drive. Folder / Sub-Folder Parameter Name Description Parameters Drive Mode Set to [Velocity] Reference Set to [External] Enable Velocity Accel / Decel Limits Enable Ramp rates for Velocity Mode Velocity Accel Limit Set required Acceleration Limit for Velocity command...
-
Page 93: Quick Start - External Positioning Mode
Quick Start Reference Quick Start - External Positioning Mode Mandatory Signals: These signals are required in order to achieve motion from the motor. Connector-Pin Input Name Description P3-1 Position Reference Input for Master Encoder / Step-Direction Input P3-2 Position Reference Input for Master Encoder / Step-Direction Input P3-3 Position Reference Input for Master Encoder / Step-Direction Input P3-4... - Page 94 Quick Start Reference Mandatory Parameter Settings: These parameters are required to be set prior to running the drive Folder / Sub-Folder Parameter Name Description Parameters Drive Mode Set to [Position] Reference Set to [External] Step Input Type Set to [S/D] or [Master Encoder]. (S/D = Step + Direction) Set ‘Master’...
-
Page 95: Diagnostics
Diagnostics Diagnostics Diagnostic Display Apply power to the drive and wait until “ ” shows on the display. For anything other than “ ”, refer to the chart below before proceeding. Drive Display Fault Remedy EPM missing Insert EPM -EP- Format EPM Reformatting EPM FEP? -
Page 96: Diagnostic Leds
Diagnostics Display Description Ehternet DHCP Configuration: 0=”dHCP” is disabled; 1=”dHCP is enabled. dHCP IP Adress Octet 4 IP_4 IP Adress Octet 3 IP_3 IP Adress Octet 2 IP_2 IP Adress Octet 1 IP_1 Displays the motor ptc resistance in ohms Displays the voltage on Drive Analog Input 1 (Ain1) ain1 Displays the voltage on Drive Analog Input 2 (Ain2) -
Page 97: Faults
Diagnostics Faults 8.4.1 Fault Codes Faults in the drive are immediately shown on the drive display. The fault condition is also recorded to the drive trip log and the DFaults register inside the drive. The various trip conditions, as they appear on the display of the drive are listed in the table below. - Page 98 Diagnostics Fault Code (Display) Fault Description Byte code interpreter error; May occur when program is missing the closing END Unknown statement; when subroutine has no RETURN statement; or if data in EPM is corrupted at F_26 byte code run-time Attempt to execute motion while drive is disabled. Drive programming error (error in drive Drive disabled F_27 source code).
-
Page 99: Fault Event
Diagnostics 8.4.2 Fault Event When the drive encounters any fault, the following events occur: • Drive is disabled • Internal status is set to “Fault” • Fault number is logged in the drive’s internal memory for later interrogation • Digital output(s), if configured for “Run Time Fault”, are asserted •... - Page 100 Diagnostics Problem Ready LED is on but motor does not run. Suggested Solution If in Torque or Velocity mode: Reference voltage input signal is not applied. Reference signal is not connected to the PositionServo input properly; connections are open. In MotionView program check <Parameters> <Reference> set to <External> For Velocity mode only: In MotionView check <Parameters>...
- Page 102 Lenze Americas Corporation • Lenze AC Tech Corporation 630 Douglas Street • Uxbridge, MA 01569 • USA Sales: (800) 217 9100 • Service (508) 278 9100 www.lenze.com S94H201E-e1...
Need help?
Do you have a question about the PositionServo 940 and is the answer not in the manual?
Questions and answers