Table of Contents
Advertisement
Quick Links
BHT-700BB-CE
BHT-700BWB-CE
BHT-700BWBG-CE
Operator's Guide
■
Usage Precautions ..................................1
■
Wireless Equipment.................................3
■
Product Contents Check..........................4
■
Proper Care of the BHT ...........................6
■
Components and Functions.....................7
■
Input Method..........................................15
■
Preparation ............................................16
■
Step 1 Charging.....................................16
■
Step 2 Attaching the Stylus ....................21
■
Step 3 Turning ON the Power ................22
■
Scanning Barcodes ...............................25
■
Turning ON/OFF the Backlight ..............27
■
Changing the Default Settings ...............29
■
Transmitting Data ..................................35
■
Battery Power Level Indicator................41
■
Replacing the Battery Cartridge.............42
■
Using the BHT after Long Periods .........45
■
Resetting and Full Resetting..................46
■
Troubleshooting Guide...........................48
Advertisement
Table of Contents

Related Manuals for Denso BHT-700BB-CE


Summary of Contents for Denso BHT-700BB-CE
-
Page 1: Table Of Contents
BHT-700BB-CE BHT-700BWB-CE ■ Usage Precautions ........1 BHT-700BWBG-CE ■ Wireless Equipment.........3 ■ Product Contents Check......4 ■ Proper Care of the BHT ......6 Operator’s Guide ■ Components and Functions.....7 ■ Input Method..........15 ■ Preparation ..........16 ■ Step 1 Charging........16 ■ Step 2 Attaching the Stylus ....21 ■... - Page 2 This manual contains only the basic details required for operation. Please refer to the User’s Manual for further details on general operation. The User’s Manual can be downloaded free of charge from the DENSO WAVE Web site (QBnet). Microsoft, ActiveSync, Windows and the Windows logo are trademarks or registered trademarks of Microsoft Corporation of the US or other countries.
-
Page 3: About This Manual
DENSO WAVE. Related Manuals The following manuals can all be downloaded free of charge from the DENSO WAVE Web site (QBnet). • BHT-710BB-CE/710BWB-CE User’s Manual... - Page 4 DENSO WAVE. (2) The use of DENSO WAVE's products in a manner for which they were not intended nor designed. (3) The modification of DENSO WAVE's products by parties other than DENSO WAVE.
- Page 5 Series systems or software, and sample programs. Product related queries can be sent in by e-mail. E-mail inquiries * Please note that these privileges may be subject to change without prior notice. How to Register Access the URL below and follow the instructions provided. http://www.denso-wave.com/en/adcd/support/...
- Page 6 SAFETY PRECAUTIONS Be sure to observe all these safety precautions. Strict observance of these warning and caution indications are a MUST for preventing accidents which could result in bodily injury and substantial property damage. Make sure you fully understand all definitions of these terms and related symbols given below, before you proceed on to the text itself.
- Page 7 Handling the battery cartridge • Never disassemble or heat the rechargeable battery cartridge, nor put it into fire or water; doing so could cause battery-rupture or leakage of battery fluid, resulting in a fire or bodily injury. • Do not carry or store the battery cartridge together with metallic ballpoint pens, necklaces, coins, hairpins, etc.
- Page 8 Handling the rechargeable cartridge • Never charge a wet or damp rechargeable battery cartridge. Doing so could cause the batteries to break, generate heat, rupture or burn. Handling the BHT • If smoke, abnormal odors or noises come from the BHT, immediately turn off the power, pull out the battery cartridge, and contact your nearest dealer.
- Page 9 • In environments where static electricity can build into significant charges (e.g., if you wipe off the plastic plate with a dry cloth), do not operate the BHT. Doing so will result in malfunction or machine failure. • Touch (tap) the LCD only with the stylus that comes with the BHT. Using the tip of a pen or any pointed object will result in a damaged or broken LCD.
- Page 10 Declaration of Conformity (For European Union) Hereby, DENSO WAVE INCORPORATED, declares that this BHT-700BB-CE , BHT-700BWB-CE , BHT-700BWBG-CE is in compliance with the essential requirements and other relevant provisions of Directive 1999/5/EC. (BHT700BB-CE and BHT700BWBG-CE can't be used in North America)
- Page 11 Federal Communication Commission Interference This equipment has been tested and found to comply with the limits for a Class B digital device, pursuant to Part 15 of the FCC Rules. These limits are designed to provide reasonable protection against harmful interference in a residential installation.
- Page 12 waves. This device is designed and manufactured not to exceed the emission limits for exposure to radio frequency (RF) energy set by the Federal Communications Commission of the U.S. Government. The exposure standard for wireless mobile devices employs a unit of measurement known as the Specific Absorption Rate, or SAR.
- Page 13 enhancements may not ensure compliance with FCC RF exposure guidelines. If you do no t use a body-worn accessory and are not holding the device at the ear, position the handset a minimum of 1.5 cm from your body when the device is switched on.
- Page 14 in IC RSS-102 and had been tested in accordance with the measurement methods and procedures specified in IEEE 1528. This equipment should be installed and operated with minimum distance 1.5cm between the radiator and your body. MEMO...
-
Page 15: Usage Precautions
Usage Precautions If the BHT is left with the battery cartridge discharged or with no battery cartridge loaded, or if the battery cartridge is replaced incorrectly, data stored in the BHT may be lost. By performing a full reset (refer to “Resetting and Full Resetting”), all data stored in the RAM will be lost. - Page 16 Usage Precautions Usage environment restrictions ● Do not use the BHT where it may be exposed to fire, high temperatures, or direct sunlight. (Failure to observe this may result in damage, overheating, explosion, or fire.) * When the BHT is stored in a high-temperature, high-humidity environment of 50 to 60° C, leave to sit in a location at room temperature and normal humidity for at least 1 day prior to use.
-
Page 17: Wireless Equipment
3. If other problems arise due to reasons such as electromagnetic interference from this device to a specified low-power wireless station being used for mobile identification, please contact DENSO WAVE through QBnet (see page iv). 4. This device is equipped with an international roaming function (IEEE802.11a/b/g) that allows suitable channels to be selected within specific countries (excludes the BHT-710BB-CE). -
Page 18: Product Contents Check
Product Contents Check Ensure you have all of the following items prior to use. Contact your dealer in the event that any items are missing or damaged. Handy terminal (BHT-700BB-CE) Operator’s Guide User’s Manual (BHT-700BWB-CE) (this manual) (for BT-700L/700LL) (BHT-700BWBG-CE) (BB and BWBG can’t be used... - Page 19 Product Contents Check ● Handling the headset jack (option) (BHT-700BWBG-CE only) (BWBG can’t be used In North America) When using the optional headset jack, connect the adapter cable provided using the cable holder and screw as shown below. Request Avoid inserting the connector at an angle or pulling the adapter cable strongly.
-
Page 20: Proper Care Of The Bht
Proper Care of the BHT Ensure to turn OFF the BHT before cleaning. ● BHT terminal, charger terminal dirt Periodically wipe any dirt from the BHT or battery terminals with a cotton swab and so on. ● Housing dirt Wipe any dirt from the housing with a dry, soft cloth. -
Page 21: Components And Functions
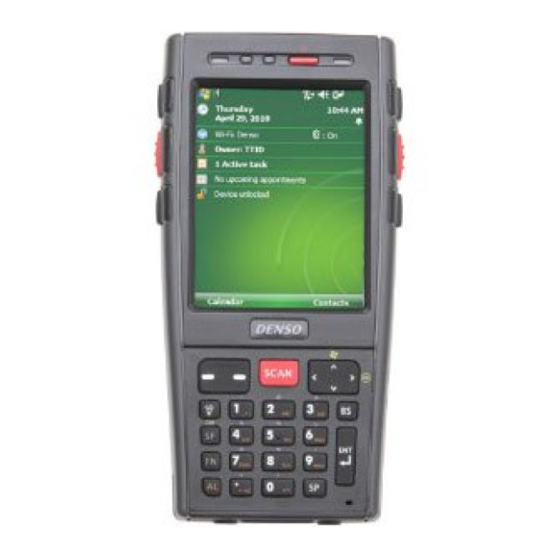
Components and Functions Do not cover this antenna section with metal-evaporated tape or by hand. Doing so may result in communication 27-Keypad failures. ** Provided on the BHT-700BWB-CE only. *** The battery cartridge shown in the drawing is the BT-700L. Indicator LED Illuminates in blue when the BHT has successfully read a bar code. - Page 22 Components and Functions Do not cover this antenna section with 42-Keypad metal-evaporated tape or by hand. Doing so may result in communication failures. ** The battery cartridge shown in the drawing is the BT-700LL. Indicator LED Illuminates in blue when the BHT has Charge LED successfully read a bar code.
- Page 23 Components and Functions Power key 27-Keypad TAB key M1 magic key Trigger switch Trigger switch M2 magic key M3 magic key SCAN key Cursor keys Function keys ESC(Escape) key BS (Backspace) key SF (Shift) key ENT (Enter) key FN (Function mode) SP (Space) key AL (Alphabetical mode) Numerical keys...
- Page 24 Components and Functions Press to scan barcodes. Scan key (This key performs the same function as a full-press of the trigger switch.) Cursor keys Used to move the cursor and select menus. Numerical Used to enter data. keys Tab key Used to enter a tab character.
- Page 25 Components and Functions 42-Keypad Power key TAB key M1 magic key Trigger switch Trigger switch M2 magic key M3 magic key SCAN key Cursor keys Function keys Alphabet keys SF (Shift) key FN (Function mode) ENT (Enter) key ESC (Escape) key NUM (Numerical mode) SP (Space) key BS (Backspace) key...
- Page 26 Components and Functions Press to scan barcodes. Scan key (This key performs the same function as a full-press of the trigger switch.) Cursor keys Used to move the cursor and select menus. Numerical Switches to numerical entry mode. mode key Enter key Press to finalize entered data or execute operations.
- Page 27 Components and Functions Screen Display Depending on user settings and so on, the Windows desktop in the screens in this Operator’s Guide may differ a little from that in the actual BHT screen. Note: The tasktray may also be a little different from that in the actual screens.
- Page 28 Components and Functions Displays when in alphabet entry mode. (The entry mode can be changed by pressing the ALP key.) Pressing a numerical key when in alphabet entry mode displays the letter assigned to that key in this ALP window. Tap this icon while an application is running to display the desktop.
-
Page 29: Input Method
Input Method Using the Stylus The BHT liquid crystal display (LCD) is a touch screen. Buttons, menus displayed on the screen can be selected using the stylus provided. Always perform touch screen adjustments before operating the touch screen. (See page 23.) Touch Screen Operation Select the LCD touch screen buttons and menus and so on using the stylus provided. -
Page 30: Preparation
Preparation Follow the steps below to prepare the BHT for use. First charge the battery. Step 1 Charging (Page 16) Attach stylus Step 2 Attaching the Stylus (Page 21) prevent it from being lost. Preparation Step 3 Turning ON the Power (Page 22) complete. - Page 31 Step 1 Charging Charging with communication unit (CU-733, CU-714) or battery charger (CH-751) * The battery cartridge shown in the drawing is the BT-700L. Disconnect the hand belt. Insert the battery cartridge cover (1) tabs into the BHT and load the cartridge in the direction shown by the arrow (2).
- Page 32 Step 1 Charging Place the BHT on the charger. Red LED ON Point After placing the BHT on the charger The LED illuminates in when using the BHT for the first time or red and when left unused for long periods of time, charging do not remove from the charger for begins.
- Page 33 Step 1 Charging Charging with the battery charger (CH-704) * The battery cartridge shown in the drawing is the BT-700LL. Check battery cartridge terminals and insert the cartridge. Connect the power cable to the CH-704 and connect the plug to a commercial AC power source (100 V AC).
- Page 34 Step 1 Charging Disconnect the hand belt. Insert the battery cartridge cover (1) tabs into the BHT and load the cartridge in the direction shown by the arrow (2). Slide the battery cartridge cover release buttons (1)/(2) direction shown by the arrows and return the hand belt (3) to its original position.
-
Page 35: Step 2 Attaching The Stylus
Step 2 Attaching the Stylus Attach the stylus to prevent it from being lost. Stylus Attachment Attach the stylus as shown below. 27-key pad 42-key pad... -
Page 36: Step 3 Turning On The Power
Step 2 Attaching the Stylus Holding the BHT Insert your hand into the hand belt and hold the BHT as shown below. Step 3 Turning ON the Power It is necessary to perform touch screen calibration and set the date and time when turning ON the BHT power for the first time. - Page 37 Step 3 Turning ON the Power Tap the “+” that displays at the calibration screen in the center with the stylus for approximately 1 second. Next touch the center of the “+” each time it moves. (The “+” mark moves from the center of the screen to the upper left, lower left, lower right and upper right, making a total of 5 positions.)
- Page 38 Step 3 Turning ON the Power Turning the Power OFF Use one of the following three methods to turn OFF the BHT power. (1) Normal power OFF: Press the power key. (2) Turning the power OFF after registry back-up: Hold down the SF key and press the power key.
-
Page 39: Scanning Barcodes
Scanning Barcodes Follow the procedure below to scan barcodes. Procedure Power key Turn the BHT power ON. Bring the barcode reading window to a barcode to be scanned, and press the trigger switch. When the BHT has read the barcode The BHT turns on the illumination successfully, the indicator LED will LED to scan the barcode. - Page 40 Scanning Barcodes When Unable to Successfully Read Barcodes Cause Countermeasure Change the BHT scanning angle and try again. When the illumination LED is focused on the printed surface of Specular the barcode from directly above, reflection there are times when scanning is unsuccessful specular reflection.
-
Page 41: Turning On/Off The Backlight
Turning ON/OFF the Backlight 27-Keypad To turn the backlight ON or OFF, hold down the SF key and press the M3 magic key. Backlight OFF or dim (backlight function disabled) Hold down the SF key and press the M3 magic key. M3 magic key Backlight ON Hold down the SF... - Page 42 Turning ON/OFF the Backlight 42-Keypad To turn the backlight ON or OFF, hold down the SF key and press the M3 magic key. Backlight OFF or dim (backlight function disabled) Hold down the SF key and press the M3 magic key. M3 magic key Backlight ON Hold down the SF...
-
Page 43: Changing The Default Settings
Changing the Default Settings The beeper volume, switching between the beeper and vibrator, touch-screen calibration and backlight settings can be changed at the System Menu or Control Panel. Item Details Beeper volume, Used adjust beeper volume switch between beeper/vibrator beeper/vibrator. switching Touch screen Used to calibrate the touch screen. - Page 44 Changing the Default Settings Double-tap the “Beeper/Vibration” icon at the "Device Settings" menu that displays. Tap the “Volume” tabbed page at the “Beeper/Vibration” menu display the screen on the right. At this screen, use the “Beeper:” spin box to set the beeper volume. The volume can be set between 0 and 5.
- Page 45 Changing the Default Settings (2) Touch Screen Double-tap the “Control Panel” icon at the "Device Settings" menu. Scroll down and double-tap the “Stylus” icon. The “Stylus Properties” screen displays.
- Page 46 Changing the Default Settings Tap the “Calibration” tabbed page. Tab the [Recalibrate] button to display the screen on the right. Follow the instructions displayed on the screen. (See page 23.) (3) Backlight Double-tap the “Backlight” icon at the “Control Panel”.
- Page 47 Changing the Default Settings The “Backlight” screen displays. Tap the “General” tabbed page at the “Backlight” menu to display the screen on the right. Backlight (*1) Set whether to turn ON the backlight when keys are pressed or the screen tapped. Enable: Backlight turns ON.
- Page 48 Changing the Default Settings Tap the “LCD/Keypad” tabbed page at the “Backlight” menu to display the screen on the right. LCD Backlight ON Level Select the brightness from one of the following four levels. (Dark) Low Bright Mid Bright High Bright (Bright) Power Save Level Change the settings for turning OFF the...
-
Page 49: Transmitting Data
Transmitting Data Data gathered by the BHT can be transmitted to the host computer by connector ® communication, infrared communication, Bluetooth communication, wireless communication* or GPRS and EDGE communication**. Infrared communication is used to transmit data to and from BHT units. The data transmission method and BHT setting method will differ depending on the system used, and therefore the system administrator should be contacted for details of operation. - Page 50 Transmitting Data (1) Connector Communication Connector communication can be performed by selecting either an RS-232C connection or USB connection depending on the host computer interface. Connect the host computer and BHT with a dedicated interface cable and perform data communication. Dedicated interface cable Requests...
- Page 51 Transmitting Data (2) Infrared Communication ■ When performing data communication between BHT units Point the BHT infrared communication ports toward each other and perform communication. Requests Ensure that the light path between the BHT and any target stations is not obstructed. Perform communication within the effective infrared emission range (15 cm).
- Page 52 Transmitting Data ® (3) Bluetooth Communication ® This interface permits wireless communications with other Bluetooth -enabled devices. ® Bluetooth communication ® Bluetooth -enabled devices Request Pointing the BHT in the direction of the other device sometimes improves communications over the link.
- Page 53 Transmitting Data (4) Wireless Communication * BHT-700BWB-CE/700BWBG-CE only(BWBG can’t be used in North America) Transmit data to host computer via the wireless LAN access point. To perform wireless communication, it is necessary to configure the wireless local area network (wireless LAN) at the BHT and access point. Wireless communication Wireless LAN access point...
- Page 54 Transmitting Data (5) GPRS and EDGE Communication * BHT-700BWBG-CE only(BWBG can’t be used in North America) The BHT can perform packet data communication using GSM system mobile phone networks via a wireless base station. It is necessary to establish a contract with a service provider and acquire a SIM card in order to perform packet data communication.
-
Page 55: Battery Power Level Indicator
Battery Power Level Indicator The battery power level can be checked at the icon that displays in the tasktray. The battery power displays in three levels. The battery power level indicator is a guideline to notify the operator to charge the battery promptly when discharged. -
Page 56: Replacing The Battery Cartridge
Replacing the Battery Cartridge Battery Cartridge Service Life The battery cartridge is a consumable part and should be replaced after being charged approximately 300 times. The performance of the battery cartridge’s lithium-ion battery will deteriorate gradually with repeated charging, even during normal use. When the battery operation time becomes shorter even after charging for the specified length of time, replace the battery with a new one. - Page 57 ● Used battery cartridges must not be disposed of as combustibles. ● Contact your nearest rechargeable battery recycling center or DENSO WAVE sales office for information on disposal procedures.
- Page 58 Replacing the Battery Cartridge If the Screen Below Displays Following Replacement… Display Handling When the BHT power is turned ON after a long period of no use, it may be necessary to recalibrate the touch screen and reset the date and time. If this message displays, calibrate the touch screen and set the date and time.
-
Page 59: Using The Bht After Long Periods
Using the BHT after Long Periods Data stored in the BHT may be lost and the calendar clock may stop if the BHT is left unused for long periods of time. Take appropriate measures in accordance with the procedure below. Insert a fully charged battery cartridge. -
Page 60: Resetting And Full Resetting
Resetting and Full Resetting Reset Reset the BHT in the following cases. • The BHT makes no response to entry from the touch screen or keys. • Programs in the BHT malfunction for some unknown reason. Reset Method With the BHT power ON, press the reset button at the rear of the BHT Stylus with the stylus provided. - Page 61 Resetting and Full Resetting Full Reset Perform a full reset if the problem persists even after resetting. Full Reset Method With the BHT power OFF, hold down the reset button at the rear of the BHT with the stylus and press the power key. Then release the reset button and power key and press the power key again to fully reset the BHT.
-
Page 62: Troubleshooting Guide
Troubleshooting Guide Problem The BHT power does not turn ON. • Ensure that the battery cartridge has been properly inserted into the BHT. (See page 17.) • Check the battery power level (see page 41) and charge if necessary. • Wipe any dirt from the battery cartridge and BHT terminals. (See page 6.) If the power still does not turn ON after taking the above measures, there is a possibility that the BHT may be broken. - Page 63 Troubleshooting Guide Problem Unable to read barcodes. It may not be possible to read barcodes at the following times. Refer to page 26 and take appropriate measures. • The barcode surface is dirty or curved. • The barcode reading window is dirty. •...
- Page 64 Troubleshooting Guide Message BHT Response Cause Countermeasure The beeper sounds 5 The battery voltage Replace charge times (each beep lasts has dropped to a the battery cartridge. for 0.1 seconds) and level that prevents then the power turns BHT operation when OFF.
- Page 65 MEMO...
- Page 66 MEMO...
- Page 67 4-2-12, Toranomon, Minato-ku, Tokyo, Japan 105-0001 http://www.denso-wave.com/en/index.html?selectlang=1 496487-5551...
Need help?
Do you have a question about the BHT-700BB-CE and is the answer not in the manual?
Questions and answers