Table of Contents
Advertisement
Advertisement
Table of Contents
Troubleshooting

Related Manuals for Mitsubishi FREQROL-SFJ


Summary of Contents for Mitsubishi FREQROL-SFJ
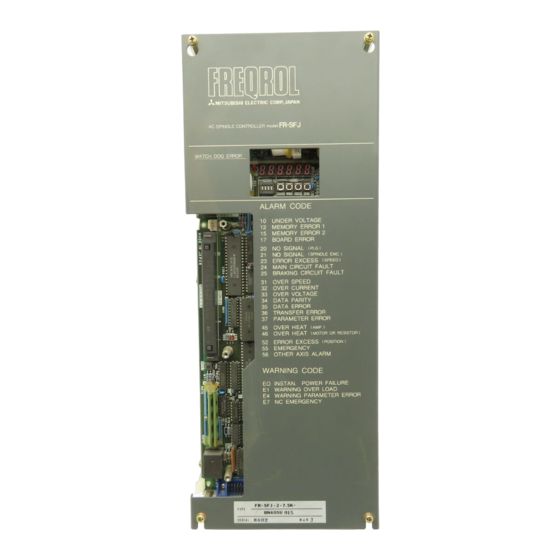
- Page 1 BNP-A282 l-02-A-E ..MAINTENANCE -MANUAL ADVANCED AND EVER ADVANCING...
-
Page 2: Table Of Contents
GENERAL Introduction Safety during maitenance and troubleshooting Storage 2. WIRING External wiring 2 . 2 Parts arrangement 3. ADJUSTMENT Preliminary check Power feeding 3.3 FR-SFJ status display and parameter settings 3.3.1 (A) Status display and parameter setting for ROM version A 3.3.2 (B) Status display and parameter setting for ROM versions after BO 3.4 Spindle control monitor on NC CRT dispaly... -
Page 3: Table Of Contents
6. INSTALLATICN OF ORIENTED SPINDLE STOP POSITION DETECTOR 6.1 Magnesensor l-point oriented spindle stop ..72 7. DISCHARGE RESISTOR UNIT TROUBLESHOOTING General information First step of troubleshooting Second step of troubleshooting 8.4 Alarm and warning table . - Page 4 Introduction AC spindle drive unit, FR-SFJ series, is the inverter use,? to control a machine tool spindle drive AC motor. It is capable of contro.lling widely ranged motor speeds ac- Discharge resistors are connectec t-: curately and quietly. the drive unit to disperse regenerative energy for regenera- tive braking of motor.
- Page 5 might be involved into the running machine. o DO NOT TURN OFF THE POWER IMMEDIATELY AFTER OPERATION IS TERMINATED. THE UNIT SHOULD BE HELD TURNED ON FOR AT LEAST 10 MIN. FOR COOLING THE DISCHARGE RESISTOR UNIT (BY COOLING FAN), AFTER THE OPERATION. IF THE DRIVE UNIT IS TURNED OFF IMMEDIATELY AFTER THE TERMINATION OF OPERATION, THE RESISTOR UNIT COOLING FAN STOPS AND RESIDUAL HEAT, OF RESISTOR UNIT MIGHT CAUSE BURN-...
-
Page 6: Wiring
WIRING External wiring 2.1.1 Control system.where FR-SFJ is not connected to M300 through bus line a. Analog speed reference signal input 2 output... - Page 7 Basic system composition J - 2 -;;I; K - D output 2 Note 1: p o r t i s u s e d f o r s p e e d T h i s i n p u t r e f e r e n c e s i g n a l s e l e c t i o n...
- Page 8 c. Control system equipped with oriented spindle stop func- tion A circuit illustrated below is added to the basic system. (1) Magnesensor type oriented spindle stop (1 point) see- cification (+ motor speed feedback signal output) (For spindle speed display/sync. feed signal) display/sync.
- Page 9 ented spindle stop (4096 points) specification, equip- ped with index function Motor detector signal Option card F - D A 1’ ed display/sync. feed signal position S F - O K J '...
- Page 10 2.1.2 Control system where FR-SFJ is connected to M300 ,through bus line (option card SF-TLJ is used) a. Basic system composition Connection is not required for CON1 signal in usual operation. I/O signal assignment To CNlB of final axis I n d e x 'SF-RSJ' MR-S servo O R C...
- Page 11 b. Control system equipped with oriented spindle stop func- tion A circuit illustrated below is added to the basic system. (1) Motor built-in encoder high-speed sync. TAP and magne- sensor type oriented spindle stop (1 point) specifica- tion ion card Speed display/sync.
- Page 12 (3) Z-phase controlled motor built-in encoder high-speed sync. TAP and multi-point oriented spindle stop spe- cification, equipped with index function Option c a r d A f e e d s i g n a l ‘ S F - 7 1...
- Page 13 2.2 Parts arrangement SFJ-CA card and option card FR-SFJ-2- ::: K FR-SFJ-2- :::K-R SFI-CA card SFJ-CA card O p t i o n CON2 SFJ-CA card c a r d S F J O p t i o n o p t i o n F r o n t p a n e l O p t i o n c a r d CON2...
- Page 14 FR-SFJ- -5.5K...
-
Page 15: Adjustment
ADJUSTMENT Preliminary check Before turning on FR-SFJ, perform the following check: (1) Is the external wiring in conformity with the relevant wiring diagram? (2) Are the motor and the drive unit grounded properly? (3) Are all shielding wires terminated properly? o Is each shield armour connected to the corresponding t e r m i n a l ' ? o Is each shield armour not looped? -
Page 16: Power Feeding
Power feeding Turning on the power Immediately after the FR-SFJ is turned on, see the ?-seg- .ment LED readout at the center of front panel to check conditions: (1) For FR-SFJ connected to M300 through bus 1 .ne 3 4-AC200/220 ON Wait for turning on NC power + NC power is turned on. - Page 17 3 # - A C200~220 Alarm code is displayed in case of failure. Normal operation Power is turned off.
- Page 18 3.3 FR-SFJ status display parameter settings Operation status is displayed by the 7-segment LED readout on card SFJ-CA1 and parameters can be set by DIP switches. Status display and parameter settings depend on ROM version of card SFJ-CA1 card. For ROM version A@ ..(A) 3.
- Page 19 DIP switch setting Function Set position) , i3lC! Initialization of parameters The standard values (manufacturer's) are set for all parameters. User should not use this setting. Meter test mode Speed meter/load meter output (for ROM versions after BO)
- Page 20 Status display and parameter setting for ROM version 3.3.1 (A) and "parameter seLting" are displayed. Display MODE: Display mode can c? selected between ADDRESS and DATA. Value displayed in ADDRESS and DATA can be incremented. DOWN: Value displayed in S E T D O W N ADDRESS and DATA can be decremented.
- Page 21 Display mode Display example and information Parameter address (parameter Parameter No.) and data value are dis- display played in ADD and DATA re- spectively. For methods of setting para- meter, and checking set para- meter, refer to the next page. For details of each parameter, refer to 3.9.
- Page 22 (2) Parameter setting Set parameters with READY signal (SET) turned off. Motor speed is displayed (Fig. 1) when alarm does not occur. DATA Fig. 1 Motor speed display 0 Each time @ switch is pressed, ADDRESS and DATA alternate. Data at the by pressing morH switch.
- Page 23 3.3.1 (B) Status display and parameter setting for ROM versions after "BO" "Operation status", "dia- gnosis", "error alarm", "parameter setting (1) - displayed. Function of each switch is as follows: MODE: Display mode can be changed. Value displayed in ADDRESS and DATA can be incremented.
- Page 24 (2) Readout display mode sequence o Display mode can be selected in the sequence shown above by pressing switch. o Display content can be changed within the same'display or o mode pressing switch.
- Page 25 (3) Operation status display mode In operation status display mode, codes listed below are displayed. Description Code Unit Item Motor speed is displayed. Motor speed Commanded reference motor speed is Reference displayed. speed Pulses Number of 'remaining pulses (delay Position pulses) on deviation counter is control displayed.
- Page 26 Warning No. Name Display Description Warning N o . 'Parameter error No. Name Display Description Parameter Parameter error error No. No. is displayed. (5) Alarm display mode Alarm No. Display Description Alarm No. is Alarm No. displayed. Alarm display For details, refer to a.4 Concurrent alarms are display- ed in the order of AL0 - AL9.
- Page 27 (6) Parameter setting To specify parameter, set "SETl" and "SET2" (machine ready for operation) to "OFF". Unless alarm occurs, speed is displayed in operation DATA status mode by the readout (Fig. 1). Fig. 1 SPEED display Select mode. Mode changes step by step when switch is pressed.
- Page 28 Data rewrite ~~ To rewrite previously set data, press SET switch. When the switch is pressed, ing that data can be rewrit- ten. Set desired data by pressing and/or switches. Value can e incremented by pressing switch, and de- y pressing @j switch.
-
Page 29: When Fr-Sfj Is Connected To M300 Cnc Through Bus Line
Spindle control monitor on NC CRT display . . . when FR-SFJ is connected to M300 CNC through bus line Since display (format, content, etc.) and setting method dif- fer from NC to NC, refer to the instruction manual for your NC system. - Page 30 Description Display True motor speed is displayed in rpm. MOTOR SPEED Load is displayed in ratio(%) to motor rated out- MOTOR LOAD put (capacity). The output rated for 30 min. is 100%. Range of display is from 0 to 120%. If fault occurs with spindle amplifier, alarm SPINDLE ALARM is displayed with code No.
- Page 31 APPENDIX 2 Spindle control alarm list Description Description (Note 1) UNDER VOLTAGE FR-TK SELECT ERROR FR-TK TRANSFER ERROR _ _ _ MEMORY ERROR 1 -____ MEMORY ERROR 2 4 6 0vERtiEAT RESISTO 47 ~ BOARD ERROR NO SIGNAL 1 (PLG) NO SIGNAL 2 (SPINDLE ENC.) ERROR EXCESS...
- Page 32 3.5 Spindle control parameter setting on NC CRT display . . . when FR-SFJ is connected to M300 series CNC through bus line To set spindle control parameters, "SPINDLE SPEC." display is used. 1 slimtl 1000 13 stap 1 There are two types of 264C spindle parameters;...
- Page 33 Setting range Description Parameter (unit) smini Spindle runs at this speed even wlien speed specified by S command is lower than this speed. sori Encoder Gear ratio between spindle gear sgear gear and encoder gear is set ratio...
- Page 34 Parameters sent to FR-SFJ from NC For 9" CRT These parameters are sent from FR-SFJ to NC when FR-SFJ is connected to NC 1 PGI through bus line. 2 100 2 PC2 4400 3 1oc 3 PGC 10.00 1.00 ORS2 4 100 4 ZRZ Although FR-SFJ it-...
-
Page 35: Test Operation
Test operation Connect the motor shaft to the machine shaft directly._ Run the machine and perform the following check: (1) Does the true motor speed meet the given reference speed? If no, make adjustment in accordance with the instruction in 3.7. When it is verified that the motor and machine are in good condition, operate the motor and machine under load condition to check. - Page 36 Note: not displayed with sign (+ or -). When value can be incremented by pressing w bu:t:r., the value is negative (for ROM version AO). (2) Set speed reference signal to the forward run maximum speed and record the motor speed displayed by the 7-seg- ment LED readout of controller (record the speed as N:r If this NZK is not equal to the desired speed Nzr , set determined from the following formula, for parameter...
-
Page 37: Adjustment Of Oriented Spindle Stop Function
3.8 Adjustment of oriented spindle stop function 3.8.1 Oriented spindle stop motions There are three types of oriented spindle stop and one of them can be selected by setting parameter jORS2j. (a) Spindle approaches the stop position in the direction of ratation which is same as that of on-going rotation. - Page 38 When control mode changes to position contrcl mode, dis- speed is decelerated in accordance with the deceleration pattern set by parameter I to stop. set by_ parameter oriented spindle stop complete tion) signal ORA turns on. parameter off, motor speed returns to the previously set reference speed.
- Page 39 b l o c k Speed control block From CONC P o w e r advance Speed feedback signal S p i n d l e m o t o r .
- Page 40 Preparation for adjustment of magnesensor type oriented 3.8.4 spindle stop Parameters parameter", page Parameter Initial T/alue Initial value n a m e G R A 3 - 3 2 7 6 7 / 6 I- 7FFF 6 4 - 7 F F F G R B 3 G R B 4 6 4 - 7 F F F...
- Page 41 Preparation for adjustment of encoder type or stop Parameters For FR-SFJ not connected to M300 For FR-SFJ connected to M300 CNC (NC display "spindle parameter", readout) page Parameter Initial value Initial value name P S T 2 0 4 8 2 0 4 8 - - - ---.
- Page 42 3.8.6 ,Adjustment of oriented spindle stop function Adjustment procedure dle stop function) Since there is no control means (potentiometer or ro- tary switch) for stop position adjustment, stop posi- tion should be adjusted by changing parameter setting as described below. switch.
- Page 43 Speed Normal speed Point at which speed changes to "oriented spindle stop" speed Set the corresponding parameters properly, referring to the following table: Adjustment Overrun at stop Note 1 f: Increase parameter setting. Do not change parameter setting. Long orientation setting.
- Page 44 Momentary servo rigidity can be in- compensation. With increase of creased by increasing this value. This adjustment is valid when bit 4 of parameter ['1RS1 is 1,(-J" "Advance/delay and "PI control" application 3.8.8 Usually, "advance/delay control" is employed. In the case described below, use "PI control" function. o Frictional torque of spindle is large and particularly accurate stop is required.
-
Page 45: Parameter List
3.9 Parameter list Description Parameter Decimal nota- Set "0". 01 NOX Motor type tion Decimal nota- 02 MSL Motor sel- tion ection Decimal nota- Setting is made for number of 03 PLG Position tion encoder pulses. control loop 0: 1024 pulses (encoder oriented encoder spindle stop, sync. - Page 46 range Description Parameter (uni ) f 0: Torque limit H/L, 2 stages 4uxiliary tion input 1 1: Index input o - 7 2: Not used 3: Emergency stop input 4: Torque limit, single stage etc. Torque limit H/L, 2 stages input 2 Index input Not used...
- Page 47 range Parameter Description (uni For details, refer to the Specifi- cation "BNP-A0801-22". Decimal nota- These data are valid when "1" is 11 DTOl Data 1 set for #10 parameter VI. tion 12 DT02 Data 2 13 DT03 Data 3 Speed reference signal selected 14 DT04 Data 4 by speed reference signal select Data 5...
- Page 48 Parameter Description 25 OSP Not used. Set "0". 26 CSP Creep Time taken for oriented spindle speed stop is reduced by increasing this setting. Standard setting: See .Table 1. Position 27 PST Oriented spindle stop posi.tion is Encoder Magne- shift set.
- Page 49 range Parameter Description (uni > f 31 TSP Motor max- The maximum speed of motor is set. 1 - 3276 For parameter setting on NC display 10 - 32760(rpm 32 ZSP Zero speed Speed at which "zero speed" signal 1 - lOOO(rpmj is output is set.
- Page 50 Setting range Parameter Description (unit) is switched. Set "0" when initialization (home Otherwise, set "1". Standard setting: 0 39 GRAl Number of Number of gear teeth for gear 00' These para- gear teeth is converted into hexadecimal (reduction value, and set. set for orient ratio) on 3A GRA2...
- Page 51 Parameter Description Position Type of position detector used in Hexadecimal detector oriented spindle stop function notation is specified. 0: Motor built-in encoder 1: Encoder 2: Magnesensor 12 BSL Hexadecimal assignment notation...
- Page 52 Setting Parameter Description Oriented 7 6 5 4 spindle S p i n d l e stop con- tion trol 1 magnif. combination 2 : I.65 1.95 8. ‘25 Hexadeci- Oriented spindle stop control Parameter marked with * is that set on the NC side...
- Page 53 SFJ-CA1 card Card group No. G52 group No. G53 card CON104 Illustration below shows the part differs from that which of card G52.j 34 6 35 a...
- Page 54 Set to "ON" x: Set to "OFF" Name Description Switch No. Test mode is selected. Test mode Normal s e t t i n g N C parameters ignored (internally set Test mode i n i t i a l i z a t i o n (For ROM versions after "BO") Meter calibra-...
- Page 55 Card group No.: G51 Name Setting Description Standard Watchdog Watchdog alarm is valid. alarm Watchdog alarm is invalid. Power control "High-current" loop gain loop gain setting "Low-current" loop gain Bus interface FR-SFJ is not connected Shown to to M300 series CNC the left through bus line.
- Page 56 Card group No .: G53 (for additional switches to card 2-5: Description Name Setting s e +-;,v Time constant is set to PIN4 Load meter about 400ms (same as that filter for card G52). time con- stant set- Time constant is set to ting about looms.
- Page 57 Check terminal table Description Common U-phase base amplifier drive signal CH2 R6, left V-phase base amplifier drive signal W-phase base amplifier drive signal c-phase base amplifier drive signal v-phase base amplifier drive signal left F-phase base amplifier drive signal 4 CH6 Not used q-phase PWM waveform c-phase PWM waveform...
-
Page 58: Card Sf-Orj
Card SF-ORJ u s e d P I N4 Application PIN4 Check terminal table N o . Common Description control feedback, A phase Position control feedback, B phase Position control feedback, 2 phase Magnesensor output Common (DC) -
Page 59: Card Sf-Tlj
Card SF-TLJ -Not used Not used Card name Check terminal table Common Description Position control feedback, A phase Position control feedback, B phase Position control feedback, Z phase Magnesensor output Magnesensor linear zone output... -
Page 60: Card Sf-Daj
Card SF-DAJ CONS t y p e “ p e n collertor s,E . COO C SF-DA CONCA Card name Check terminal table C o m m o n Description Position control feedback, A phase Position control feedback, B phase C H 3 Position control feedback, 2 phase Magnesensor output... -
Page 61: Addition And Replacement Of Component
ADDITION AND REPLACEMENT OF COMPONENT Before a component is added or replaced, be sure to turn off the main power supply. Addition of option card (SF-ORJ; SF-DAJ and SF-TLJ) When an option card is newly added to FR-SFJ unit having no option card, follow the procedure and cautions described below. -
Page 62: Replacement Of Card
Front panel mounting screws Rating plate Front view Location of option card (View with front panel removed) 5.2 Replacement of card For replacement of card, the front panel should be removed (remove 4 mounting screws>. Card SFJ-CA1 Disengage 6 card locks (0) Card to remove card SFJ-CAl. -
Page 63: Replacement Of Rom
Disengage connectors 1 Disengage all card locks to let float the card. Disengage connectors 4 in this order. To install a new card, perfo rm the re- verse steps. 5 .3 Replacement of ROM ROMs should be handled in pair; ROM1 (16G) and ROM2 (17G). Replace a pair of ROMs. - Page 64 loading failure pin(s) is not put into the socket. o u t s i d e socket Pin bent inside (4) After ttle replacement of ROMs, the corresponding descrip- tion 5.4 Replacement of diode module and transistor module (1) Removal of defective module Disconnect wires from the module and remove the module from the heatsink.
- Page 65 Table 5.1 Clamping torque table Max. clamping Recommended torque clamping torque Model S c r e w s i z e M5 x 0. 8 M 5 X 0 . 8 M 5 X 0 . 8...
- Page 66 of SJ-J type AC spindle motor 5.5 Disassembly and assembly Terminal box cover (1) Remove the cover of terminal box on the top of the fan case. (2) Disconnect the cables and leads coming from the electric enclosure. a) 3 motor main leads (U, V and W).
- Page 67 (2) To assemble, per- form step (1) in reverse order.
- Page 69 (4) To assemble, per- form steps (1) - (3) in the reverse order. lard For frame No. 160 (1) Remove 3 fan case mounting hexagon socket head screws. Pull back the fan case to remove the fan case together with the fan. (2) Remove the hexagon socket head bolts used to install...
- Page 71 Remove two pan- head screws used to Sensor bracket install the sensor bracket to remove Bracket screw the sensor bracket Sensor together with sens- or (take care to prevent hitting of the sensor against the sensor gear). To adjust sensor position, loosen the sensor mounting screw with the...
- Page 72 (7) To remove the sens- gear, screw eye bolts (M8) into the tapped holes and ap ply a tool shown to the right to the bolts. After the removal of the sensor gear, bolts. (8) To install the sensor gear again, it must be shrinkage-fit at temperature with- in 100°C - 15OOC.
- Page 73 ing on the counter- load side, remove the shaft stop ring and apply a bearing remover. The bearing can be removed together with the shaft case cover. Stop'ring for shaft (4) To remove the bear- ing on the load side, apply a bearing re- mover to the inner ring of bearing and...
- Page 74 (7) If press machine is not available, lightly ham- mer the pipe to drive the bearing. Use care not to hammer the outer ring of bear- ing. Hammer is used to install bearing.
-
Page 75: Detector
6.1 Magnesensor l-point oriented spindle stop 6.1.1 Magnet and sensor The sensor generates two types of voltage signal as shown in Fig. 6.1. D i r e c t i o n d i s k R o t a t i n g Output voltage Amplifier Output vol tagc... - Page 76 Spindle is stopped with this signal at OV. LS signal ,..Signal voltage is constant within the zone (width) magnet. This signal is used to verify that spindle remains stopped within the zone of magnet.
- Page 77 6.1.2 Orientation of magnet and sensor head The magnet and sensor head should be installed in the specified orientation. Standard type ..The center reference hole of magnet and the reference notch of sensor standard type head should come on the same side. Refer U N A C C E P T A High-speed...
- Page 78 flat surface of ratating disk. When the magnet is instal- (1) When the magnet is instal- led on the counter-load led on the load side of spindle, the reference hole side of spindle, the ref- of magnet and reference erence hole of magnet and notch of sensor head should reference notch of sensor face outward, as shown in...
- Page 79 UNACCEPTABLE EXAMPLE 1 If the reference hole of magnet and the reference notch of sensor head are not on the same side, intense vibration occurs when the' sensor head is at extremity of the magnet (oriented spindle stop is im- possible Reference hole...
- Page 80 respondingly ..parameter ORS2) Counter-load side -- Load side from "A" Reference ho rence notch ..If the reference notch of UNACCEPTABLE EXAMPLE 2 sensor head is not located properly in re- ference to polarity of the magnet, intense vibration occurs when the, sensor head is at extremity of the magnet, and oriented spindle stop is impossible.
- Page 81 So far as the relationship between location of reference notch of sensor head and the polarity of the magnet is in accordance with the sensor head and the magnet can be installed as shown below. ented spindle stop detecl;or) must be changed correspondingly.) R e f e r e n c e n o t c h View...
- Page 82 Carefully handle to the magnet. Secure the magnet to t;lle spi IIdle wil,ll appropriate screws. For applicable screws, r e f e r the outside view of magrIe t;. A f t e r t h e maj;ne t i s irlst;aI. led, ba s p i n d l e .
- Page 83 6 . 1 . 4 C a u t i o n o n instal1ati.n of serlsor h e a d ( 2 ) Ali.gn t h e c e n t e r l i n e of set~sor h e a d wi ttl the cerlter 0 f magne t .
- Page 84 M a g n e t M a x . g a p Min. g a p A d j u s t a b l e range p l a t e C e n t e r F l a n g e T a b l e 1 Radius (R) mm g a p...
- Page 85 FR-SF unit can be combined with discharge resistor unit listed below. (Controller may be (Controller may be 0.. Applicable damaged.) damaged.) 5.58 applicable OV alarm may occur.) R-UNIT-l and 2 are the standard resistor unit, and R-UNIT-3 is for heavy duty application. CAUTION: Hot air will flow out from the top of unit.
- Page 86 8.1 General information If any trouble occurs with the control system, perform the preliminary check described below and then proceed to the troubleshooting described later. The following preliminary check is very important when you consult with service engineer. Preliminary check: 1.
- Page 87 13. Is supply voltage normal? Does it change from time to time? First step of troubleshooting Perform the following check: Power supply voltage should be 2OOV+:$, 50/60Hz, or In any case, it should not go down below -15% of 200V. o Check if the supply-voltage drops at a specific time everyday.
- Page 88 The most likely troubles or failures with FR-SFJ can be large- ly divided into the following two groups: Control equipment does not work satisfactori- ly when it is turned on for the first time (Ij. Control equipment comes into a standstill Trouble A abruptly or error occurs in oriented spindle stop po-...
- Page 89 8.3 Second step of troubleshooting Remedy Checkup Trouble I As far as the control Control equip- ment does not equipment is handled work satisfac- carefully, this type trouble is quite unl torily when it ikely The most is turned on to occur.
- Page 90 "READY" signal and "speed reference" signal have been input. Remedy Checkup Trouble II (1) Replace blown out (1) Check if fuse was Control equip- fuse. If fuse is blown out or main ment comes into blown out again, circuit no-fuse break- a standstill proceed to "Step er was tripped.
- Page 91 Trouble III Checkup Remedy Control equip- In this case, the compre- ment fails from hensive analysis must be time to time, or accomplished to deter- error occurs in mine the cause (load con- oriented spindle dition, operation mode, stop position. etc.).
- Page 92 Alarm and warning table Motion Description Name Abbr. (Note) This alarm occurs if input sup- UNDER VOL- TAGE ply voltage goes down below the specified level, or if instan- taneous power failure lasting for over 15ms occurs. This alarm occurs if read from, MEMORY ER- ROR 1 or write to internal memory for...
- Page 93 Motion Abbr. Name Description (Note) ERROR This alarm occurs if deviation EXCESS of true motor speed is excessi- vely large from reference speed. MAIN CIR- This alarm occurs if main cir- CUIT FAULT BRAKING This alarm occurs in case of CIRCUIT trouble with braking circuit.
- Page 94 Alarm Motion Name Description (Note) TRANSFER This alarm occurs if data trans- ERROR fer does not go satisfactorily (when FR-SFJ is connected to CNC through bus line). PARAMETER This alarm occurs if set para- ERROR meter value is out of the per- missible range (this check is made when the control system is turned on).
- Page 95 Motion Alarm Description Abbr. Name (Note) OPTION CARD This alarm occurs if "sync. TAP", ERROR "C-axis control" or "index" sig- nal is input though FR-SFJ is not equipped with the correspon- ding option card. This warning arises in case of POWER FAIL- instantaneous supply voltage drop.
- Page 96 Only warning is displayed (operation can be Motion C continued).
- Page 97 (1) UNDER VOLTAGE This alarm appears if voltage under 170V lasts for longer than 15ms. Checkup Remedy Cause This alarm appears when speed Increase capacity of Tower supply capacity is changed or load is exces- input power supply. insufficient sive. Interval bet- AC power supply should be Prolong AC power sup-...
- Page 98 (2) MEMORY ERROR 1 This display appears if read from, or write to the memory in- corporated in the controller cannot be done successfully. Remedy Cause Checkup Visually check that all Load ROM Properly. ROM load&d im- pins of ROM are put into properly the socket properly.
- Page 99 Cause Checkup Remedy Trouble with Check waveform of signal Replace the defecti- encoder. or encoder fed back from encoder, ve encoder or cable. cable using a synchroscope Card SF-ORJ Card SF-DAJ Card SF-TLJ Error in parameter Although the control sys- Set parameter I setting oriented spindle stop...
- Page 100 Cause Checkup Remedy Overload Load (read on load meter) is larger than 120%. Trouble with CON2 Rotate the motor shaft with /Replace the CON2 cable or motor "READY" signal turned off built-in encoder with hand and check speed indication by the LED read- Trouble with card After making sure this alarm Replace the card...
- Page 101 (7) BRAKING CIRCUIT FAULT This alarm occurs if the braking circuit does not func- tion properly.' Remedy Checkup Cause Replace the card Trouble with card Replace the card SFJ-CA1 with a new one to check. SFJ-CA1 Replace the con- Trouble with con- 'If the same alarm occurs trol unit.
- Page 102 Remedy Cause between motor and CON2 is disconnected. Observe the signal from Replace the motor Trouble with motor built-in encoder. CH31 and 32 (common CH) of scope. When motor runs at 1500rpm, the signal should be sinu- soidal-wave signal at the following frequency: 1500 Trouble with posi-...
- Page 103 Cause Checkup Remedy - (open circuit). Trouble with card Replace the card SFJ-CA1 card Replace the card SFJ-CA1 with a new one to check. Trouble with power Replace the power unit IX-PW Trouble with con- Replace the con- trol unit curs again even after the remedy described above.
- Page 104 Remedy Checkup Cause Use power supply Check if AC input supply Power supply capa- of larger capa- (R, S, T) goes down below city insufficient city (refer to the Specifics- tion). Operate FR-SFJ with limited torque and reduc- ed output. {Replace the card Make sure the same alarm is Trouble with card...
- Page 105 Cause Checkup Remedy dle amplifier is discon- nected and the terminal re- sistor is connected to servo axis. Trouble with bus-line Exchange cable for servo Replace the cable axis control with cable for bus-line cable. spindle amplifier to check. Trouble with card Check if alarm disappears if Replace the SF-TLJ...
- Page 106 (13) OVER HEAT AM?. This alarm appears if thermal protector of FR-SFj trips (installed on cooling fan). Checkup Remedy Cause Overload 1. Check motor for load condi- 1. Lighten load. tion. 2. Check motor start/stop fre- 2. Decrease start/stop frequency. High ambient temp- Measure the ambient tempera- If the ambient...
- Page 107 Remedy Checkup Cause Remedy the 24V Check if the alarm disappears 24V power supply power supply wir- when the power is turned on ing. with CONl, CON5, CONC and Jumper pin (Pin 4, CONCA disengaged. 5) settings should, meet input inter- face for speed re- ference and posi- tion reference 12-...
- Page 108 Checkup Remedy Cause 'stopped tional rernedy~./ 2. Replace Check 'if the fan remains Replace the fuse. Fuse biown out stopped due to blown out fuse. If new fuse is blown out again, Check wiring of motor Remedy the wiring./ cooling fan and discharge resistor unit cooling fan (short-circuit, grounding fault, etc.).
- Page 109 Checkup Remedy Cause Encoder type oriented Check if alarm is removed Set parameter spindle stop function when value of parameter OSP properly. adjusted improperly CSP setting is halved. Check if alarm is removed Set time constant Sync. TAP adjusted when sync. TAP command improperly time constant is increas- ed.'...
- Page 110 8.5.1 Troubles that are not displayed by LED readout (1) No alarm display appears, but motor does not start ..Remedv Checkup Cause Check the wiring. Correct or remedy Miswiring or the wiring. wire disconnec- tion Check the input power sup- Use the specified Input power power supply.
- Page 111 Checkup Remedy BSL setting. interface. Oriented spin- Oriented spindle stop sig- stop signal 'nal (ORA) is on. spindle stop signal. ration is impossible), or large sound arises in motor ..-. ~______~_. Remedy Checkup Cause Correct or remedy Check wire connection to the wiring.
- Page 112 (3) True speed does not meet referenced speed Cause Checkup Remedy Adjustment Adjustment is not made for Correct spindle para- improper S-analog speed reference. meter setting {PIG display). External speed Voltage of speed reference Remedy the external reference signal signal from external signal speed reference signal improper source does not change lin-...
- Page 113 check in accordance with (6). (8) "Speed detection" signal is not output (for DIO interface with NC) ..Checkup Remedv Cause Check that "speed detection" Replace the card Trouble with card SFJ-CA1 flag. (external output in DIAGNOSIS mode) turns on when motor speed reaches the preset speed.
- Page 114 Cause Checkup Remedy Dynamic unbal- Large vibration and noise Balance the control occur during coasting of system and motor motor. dynamically. Insulation Disconnect the power cable if insulation resis- resistance de- (R, S, T) and measure in- creased sulation resistance, using creased, identify the 500V megger (each ground- part where insulation...
- Page 115 Remedy Checkup Cause Shield the cable "Speed detection" Signal on CH31 and 32 (CH23 between CON2 and for common) of card SFJ-CA1 signal distorted motor built-in is distorted by noise. by noise encoder (without discontinuity). Use a cable of larger size for mo- tor.
- Page 116 (13) Speed can be controlled normally, but spindle cannot be stopped in position (oriented sindle stop) ..Cause Checkup Remedy Speed can be de- Check if position feedback Replace the posi- creased to "ori- encoder or magnesensor tion detector or is in good condition.
- Page 117 Remedy Checkup Cause Parameter #22 Hunting occurs at Decrease parameter 1x1 and settings to check. stop. Parameter #21 Set these para- meters properly. Check gear ratio settings. Increase speed Servo stiffiness (stability) poor control loop con- stant. Overshoot in Decrease speed speed control control loop con- stant.
-
Page 118: Periodic Inspection
$9. PERIODIC INSPECTION In order to ensure high-performance operation of equipment, and trouble-free long use of equipment, the periodic inspec- tion is particularly important. CAUTION: To prevent accident, make sure the power is inter- rupted completely before starting the inspection. Inspection of control equipment Remedy Check... -
Page 119: Inspection Of Motor
Inspection of motor Check Remedy Frequency Monthly o Check if foreign 1. Sound (noise) sound or intense' vib- and vibratioon ration occurs. If foreign sound or in- tense vibration occurs, perform the following check: 1. Check foundation and installation. 2. Check shaft alignment. 3. - Page 120 Frequency Checkup Remarks 1. Check cooling fan op- eration. 2. Check cooling air passage (between frame and cover). 3. Check load condition. See "Trou- 4. Check control equip- ble shoot- ment. o Check if insulation 3. Insulation Every 6 months resistance is exces- resistance sively low.
-
Page 121: Inspection Of Discharge Resistor Unit
9.3 Inspection of discharge resistor unit Check Remedv Freauencv 1. Check if fan shaft Replace the Cooling fan Weekly Monthly can be rotated fan. smoothly by hand. 2. Check if fan motor runs powerfully. 3. Check if foreign sound arises in bearing. -
Page 122: Parts List
610. PARTS LIST AC spindle controller and motor Spare Spare parts recommended to be replaced every 2 years. Spare parts recommended Spare to be replaced every 5 years. Spare Spare parts recommended to be stored by ma- chine manufacturer. S p a r e Manufac- Remarks S y m b o l... - Page 123 Spare Manufac- Symbol Model Name 13 CONT.tCTOR i 7.5 / 14 ; THERMAL ~ I 15A 50MV BKO-NC6131-H53 25A 50MV BKO-NC6131-H54 32A 5OMV BKO-NC6131-H55 15 CT 38A 50MV BKO-NC6131-H56 TERMINAL 16 i 2.2 1 ELECTRIC / 18 'TERMINAL ~ I I TE-K2-3s ELECTRIC SHIZUKI / 19, FILTER...
- Page 124 Spare Manufac Name Model S e l e c t i o n Remark c ity turer PRINTED 2. 2 POWER BKO-NC6293 BOAHD 7. 5 BOARD OPTION BOARD SONY OPTION BKO-Cl7301113 SONY SONY IRE . OPTION TAMACAWA ROTARY...
- Page 125 S p a r e Name Model Symbol Selection Remarks turer city 2. 2 3. 7 5. 5 9oow 15 OllM RESISTOR 5. 5 9OOW 45 OIIM , 7.5, PULSE 'I‘AMACAW.4 SIGNAL GENERATOR A 90 R6550.7 All2 ' IA-15101 MOTOR B 90 All2 8112...
Need help?
Do you have a question about the FREQROL-SFJ and is the answer not in the manual?
Questions and answers