
Related Manuals for NORDIC SEASON CUSTER GG501799


Summary of Contents for NORDIC SEASON CUSTER GG501799
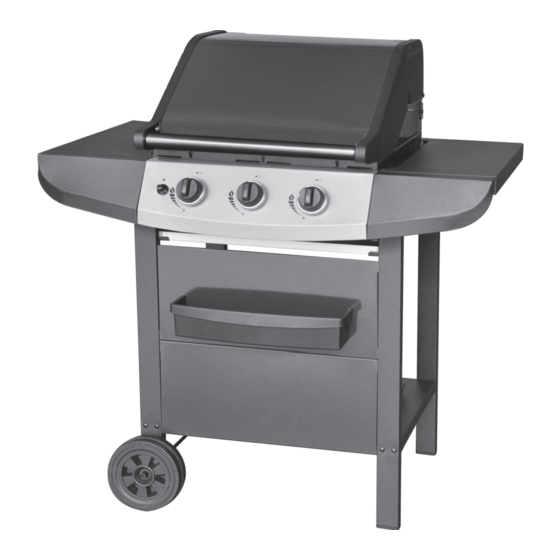
- Page 1 ASSEMBLY, USE Custer AND INSTRUCTION MANUAL GG501799 READ THE OPERATING INSTRUCTIONS BEFORE USING THE APPLIANCE.
-
Page 2: Table Of Contents
Contents Warnings...............3 Technical data ............4 Gas category ............4 Explotion drawing ..........5 Parts list ............. 6 Assembly instructions ..........8 Connecting gas .............15 Leak test ............17 Before using the grill..........18 Tips ..............19 Lighting instructions ..........20 Maintenance ............22 Cleaning ..............22 Troubleshooting ............23 Consumer Contact ..........24... -
Page 3: Warnings
WARNING Failure to follow the instructions provided can imply a risk of serious injury to personnel and fixed installations. Some grill parts can be sharp, we recommend wearing gloves when assembling and lifting. Sharp edges can cause injury. The grill is intended for outdoor use only in well-ventilated areas. Never grill in enclosed spaces or under a roof, due to the danger of the lack of oxygen. -
Page 4: Technical Data
Technical data - Custer 3B Total effect: 8,64 kW (main burner heat input 3 x 2,88 kW ) Total gas consumption: 628 g/h. Hose and regulator (not included): Must be approved according to EN standard. Gas bottle (not included): Use standard bottle approved for use in the Nordic Region, 6 kg recommended. -
Page 5: Explotion Drawing
Explotion drawing... -
Page 6: Parts List
Parts list CODE PART Custer 3 Burner Gas BBQ Hood (Pre-Assembled to Body) HOOD Hood Handle Warming Rack Barbecue Body Burner Control Panel Knob Flame Tamer BODY Cooking Grill Drip Tray Left Bracket Drip Tray Right Bracket Drip Tray Ignition Button Side Shelf Left Side Shelf Panel... -
Page 7: Assembly Instructions
Assembly instructions Please follow these instructions step by step. We recommend two people to assemble the grill to avoid heavy lifting. TOOLS FOR ASSEMBLING (NOT INCLUDED) Ruler Medium size flat blade or Adjustable spanner or Philips/cross-point screwdriver metric spanner set Exercise caution when using electric tools –... - Page 8 A A A A A Attach the Legs (C4,C5,) onto the Bottom Panel (C9) use M6x35 Bolts (D6x8pcs) and M6 Nut (D7x8pcs) as shown. Unscrew the Locknuts (D10) from both ends of the Axle (C11). Slide the axle t hrough the corresponding h oles i n the left l egs. S lide t he W heels (C10) o ver each end of the axle.
- Page 9 Attach the Legs (C4,C5) to the Front Lower P anel (C7) using ST4.0x10 Screws (D1x4pcs) as shown Attach the Legs (C4,C5) to the Front Upper Panel (C6) using ST4.0x10 Screws (D1x4pcs) as shown...
- Page 10 Attach the Basket (C8) onto the Front Upper Panel (C6) as shown. WARNING! Two persons should perform this step, due to heavy lifting. Lay the assembled trolley o n its side. L ay t he B arbecue Body ( B1) on i ts b ack and slide into position between the trolley legs.
- Page 11 Attach t he L eft Side S helf P anel ( C2) onto t he o ther S ide Shelf (C1) u sing M 6x15 B olts (D5x2pcs) and M6 Nuts (D7x2pcs). Attach t he L eft side s helf a ssembly to the barbecue body u sing M 4x10 B olts (D8x2pcs) and M6x15 Bolts (D5x4pcs) as shown.
- Page 12 Attach t he R ight S ide Shelf Panel (C3) o nto the other Side S helf ( C1) using M6x15 Bolts (D5x2pcs) and M6 Nuts (D7x2pcs). Attach the R ight side shelf assembly to the barbecue body u sing M4x10 B olts (D8x2pcs) and M6x15 Bolts (D5x4pcs) as shown.
- Page 13 Attach t he D rip Tray L eft Bracket (B7) t o the barbecue body using M5x15 Bolts ( D2x2pcs), Washers (D3x2pcs) and M5 Nuts (D4x2pcs) as shown. Repeat the above process for the Drip Tray Right Bracket (B8). Insert the Drip Tray (B9) by sliding it underneath the barbecue body.
- Page 14 Carefully lay the Flame Tamer (B5) into the barbecue body ensuring it lies level within the body. Lay the Cooking Grill (B6) into place. Attach the Warming Rack (A3) to Press the Knobs (B4) onto valve stems barbecue body as shown. as shown.
- Page 15 ALWAYS perform a gas leak test before using the grill. ASSEMBLY IS NOW COMPLETE. ALL JOINTS AND CONNECTIONS MUST NOW BE LEAK TESTED BEFORE USING THE GRILL.
-
Page 16: Connecting The Gas
Connecting the gas ALWAYS perform a gas leak test before using the grill. Gas bottle Hose Check the gas hose regularly Connect the gas hose to the gas for cracks, damage and rail inlet on the left hand side of the decay. -
Page 17: Leak Test
IMPORTANT! GAS LEAK TEST ALL JOINTS AND CONNECTIONS MUST NOW BE LEAK TESTED BEFORE USING THE GRILL. Leak test annually, and whenever the gas bottle is removed or replaced. Always perform a leak test in a well-ventilated area. Make a mixed solution (½... -
Page 18: Before Using The Grill
Before using the grill LOCATION Ensure that the grill is placed at least 150cm in all directions from house wall- s,trees, plants and other flammable materials or liquids when in use. Do not place the grill under a roof or overhang.. -
Page 19: Grilling Tips
Grilling tips A CLEAN GRILL WORKS BETTER, causes less smoke and prevents fat catching fire. Burn off thegrill after use by opening the lid and burning all the burners at full power for 10 minutes.Allow the grill to cool, and then brush off ash from flame guards and grates. -
Page 20: Lighting Instructions
Lighting instructions Custer 3B Always open the barbecue hood before MANUAL LIGHTING lighting. If the grill will not light using the Open the gas control valve on the gas bottle normal lighter, use the following or regulator. procedure for manual lighting. Use a long match or lighter. - Page 21 WARNING! Always keep an eye on the grill when in use. Never allow children or others Disconnect the gas bottle when the whorequire supervision near the grill when grill is in use or before moving it. in use. If storing the grill in a garage or This grill is only intended for outdoor basement below ground level, do not store use and must not be used under a roof.
-
Page 22: Maintenance
Maintenance and cleaning MAINTENANCE CLEANING Check that the burners are Use clean water only. A mild washing up burning correctly regularly. liquid can be added for general cleaning. Do not use flammable cleaning agents. Remove the grill grate and flame guards. -
Page 23: Troubleshooting
Troubleshooting PROBLEM POSSIBLE CAUSE SOLUTION Empty gas bottle Replace gas bottle Damaged regulator Check/replace the regulator Burner is blocked Clean the burner Gas supply is blocked Clean gas ventury or hose Burners will not light when using the ignition knob Electrode is broken or dirty Clean the elctrode Ignition knob is broken... -
Page 24: Consumer Contact
If new parts are needed or in the event of a warranty claim, please contact your dealer or consumer contact: CONSUMER CONTACT Nordic Season Products AS 031 189095 support@nordicseason.no www.nordicseason.no Always attach your receipt and product serial number when making a warranty claim. Produced in China for Nordic Season Products AS...
Need help?
Do you have a question about the CUSTER GG501799 and is the answer not in the manual?
Questions and answers