Table of Contents
Advertisement
Quick Links
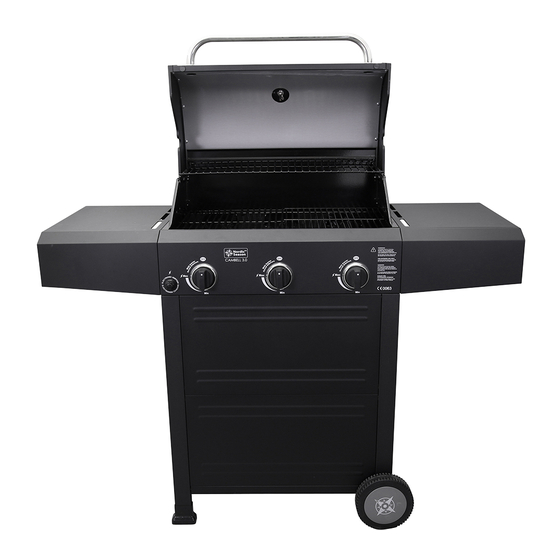
CAMBELL
Max
ASSEMBLY, USE
AND INSTRUCTION MANUAL
GG202020
OFF
OFF
Max
Min
Min
READ THE OPERATING INSTRUCTIONS
BEFORE USING THE APPLIANCE.
FOR OUTDOOR USE ONLY.
WARNING!
ACCESSIBLE PARTS OF
THE GRILL
BECOME VERY HOT DURING
USE.
KEEP CHILDREN AND OTHERS
WHO
NEED SUPERVISION AT
A SAFE DISTANCE.
DO NOT MOVE THE GRILL
OR CONNECTED TO THE
WHILE IN USE
GAS BOTTLE.
OFF
FOR OUTDOOR USE
ONLY
LIGHTING INSTRUCTIONS
ARE LOCATED
ON THE BACK OF THE FRONT
PANEL.
VARNING!
ÅTKOMLIGA DELAR KAN
HÅLL BARN OCH ANDRA
BLI VARMA!
SOM BEHÖVER
TILLSYN BORTA FRÅN GRILLEN
MEDAN DU
ANVÄNDER DEN.
Max
FLYTTA INTE GRILLEN UNDER
ANVÄNDNING
ELLER NÄR DET ÅR ANSLUTET
TILL GAS.
ENDAST FÖR
ANVÄNDNIN G UTOMHUS
TÄND INSTRUKTIONER FINNS
PÅ BAKSIDAN AV FRONT
ATT LÄSA
PANELEN.
Min
!
EN
Advertisement
Table of Contents

Subscribe to Our Youtube Channel
Related Manuals for NORDIC SEASON CAMBELL


Summary of Contents for NORDIC SEASON CAMBELL
- Page 1 ASSEMBLY, USE AND INSTRUCTION MANUAL CAMBELL GG202020 WARNING! ACCESSIBLE PARTS OF THE GRILL BECOME VERY HOT DURING USE. KEEP CHILDREN AND OTHERS NEED SUPERVISION AT A SAFE DISTANCE. DO NOT MOVE THE GRILL OR CONNECTED TO THE WHILE IN USE GAS BOTTLE.
-
Page 2: Table Of Contents
Contents Warnings..............3 Technical data ............4 Gas category ............4 Explotion drawing ............ 5 Parts list ..............6 Hardware ..............7 Assembly instructions ..........8 Gas leak test ............20 Connecting gas ............21 Before using the grill..........22 Grilling tips ............23 Lighting instructions ..........24 Warnings ...............25 Maintenance ............26 Cleaning ...............26... -
Page 3: Warnings
WARNINGS Failure to follow the instructions provided can imply a risk of serious injury to personnel and fixed installations. Some grill parts can be sharp, we recommend wearing gloves when assembling and lifting. Sharp edges can cause injury. The grill is intended for outdoor use only in well-ventilated areas. Never grill in enclosed spaces or under a roof, due to the danger of the lack of oxygen. -
Page 4: Technical Data
Technical data Total effect: 10.55 kW Total gas consumption: 760 g/h. Hose and regulator (not included): Must be approved according to EN standard. WARNING! ACCESSIBLE PARTS OF BECOME VERY HOT DURING THE GRILL KEEP CHILDREN AND OTHERS USE. NEED SUPERVISION AT A SAFE DISTANCE. -
Page 5: Explotion Drawing
Explotion drawing B06 B05... -
Page 6: Parts List
Parts list Code Description Code Description Right Side Shelf Temperature Gauge Electronic Ignition Module Rotate Rod, Lid Fascia, Right Side Shelf Silicone Rubber Bumper, Lid Side Upper Rail Bezel, Lid Handle Right Drip Tray Support Lid Handle Right Front Leg Warming Rack Axle Rod Cooking Grate... -
Page 7: Hardware
Hardware The following screws and washer are supplied with the grill and must be fitted. M4x10 screw x 56 pc AA battery x 1pc M6x13 screw x 16 pc M6 compression washer x 4pc TOOLS FOR ASSEMBLING (NOT INCLUDED) Medium size flat blade or Adjustable spanner or Philips/cross-point screwdriver metric spanner set... -
Page 8: Assembly Instructions
Assembly instructions Please follow these instructions step by step. We recommend two people to assemble the grill to avoid heavy lifting. Left Frame Install (4)M4 X 10 Screws as shown to the leg marked “5A”. Do not fully tighten the screws at this time.(A) Attach Side Upper Rail (marked “1”) to the leg, tighten the screws and attach with another (1)M4 X 10 Screw.(B) - Page 9 Assembly instructions Right Frame Install (2)M4 X 10 Screws as shown to the leg marked “5C”. Do not fully tighten the screws at this time. (A) Attach one end of Side Upper Rail (marked “1”) to the leg, tighten the screws and attach with another (1)M4 X 10 screw.(B) Install (2)M4 X 10 Screws as shown to the leg marked “5D”.
- Page 10 Side Panel Install (4)M4 X 10 Screws as shown to Right Frame,Do not fully tighten the screws at this time. Attach the bottom shelf to Right Frame,install(3) M4 X10 Screws as shown and do not fully tighten the screws at this time. Install (4)M4 X 10 Screws as shown to Left Frame,Do not fully tighten the screws at this time.
- Page 12 Wheels to Cart Turn cart upside down. Assemble Hammer Leg Extenders as shown. Insert Axle Rod through Wheel and other Wheel. Attach with compression washer, nut and hitch pin. Stand cart right side up.
- Page 13 Grill Head to Cart This step requires two people to lift and position grill head on to cart. Remove the tie wraps and packaging material from regulator hose, side burner valve and igniter wire. Pull hose and igniter wire out to side of grill head. Carefully lower the grill head onto the cart.
- Page 14 Left Side Shelf (1) Install the (2)M6 X 13 Screws on the left of Firebox. Do not fully tighten the screws. Place on the Left Side Shelf bracket and pull to its position.
- Page 15 Left Side Shelf (2) Open the Lid, attach the shelf to Firebox as follows: - From inside to outside of firebox with (2)M6×13 Screws and (2)M6 compression washers.(A) Align the Side Fascia and Control Panel, attach them from outside to inside of Firebox with (1)M4×10 screws.
- Page 16 Right Side Shelf (1) Install the (2)M6 X 13 Screws on the right of Firebox. Do not fully tighten the screws. Place on the Right Side Shelf bracket and pull to its position.
- Page 17 Right Side Shelf (2) Open the Lid, attach the shelf to Firebox as follows: - From inside to outside of firebox with (2)M6×13 Screws and (2)M6 compression Washers.(A) Align the Side Fascia and Control Panel, attach them from outside to inside of Firebox with (1)M4×10 Screws.
- Page 18 Heat Diffusers, Cooking Grates and Warming Rack Place Heat Diffusers over burners. Diffusers will fit in firebox in either direction. Fit tabs in firebox front through slots in diffuser tips. Fit diffuser tips between the tabs at the rear of the Firebox.
- Page 19 Drip Tray, Drip Cup and LP Tank Attach Back Rail to the Cart with (4)M4×10 Screws as shown.(A) Hang Drip Cup Clip from bottom of Drip Tray. Place Drip Cup into Drip Cup Clip, and place Match Holder into the Left Frame.(B)
-
Page 20: Gas Leak Test
IMPORTANT! GAS LEAK TEST ALL JOINTS AND CONNECTIONS MUST NOW BE LEAK TESTED BEFORE USING THE GRILL. Leak test annually, and whenever the gas bottle is removed or replaced. Always perform a leak test in a well-ventilated area. Make a mixed solution (½... -
Page 21: Connecting Gas
Connecting the gas ALWAYS perform a gas leak test before using the grill. Hose Gas bottle Check the gas hose regularly Connect the gas hose to the gas for cracks, damage and decay. rail inlet on the left hand side of the Never use a damaged gas hose. -
Page 22: Before Using The Grill
Before using the grill LOCATION Ensure that the grill is placed at least 150cm in all directions from house walls, trees, plants and other flammable materials or liquids when in use. Do not place the grill under a roof or overhang. -
Page 23: Grilling Tips
Grilling tips A CLEAN GRILL WORKS BETTER, causes less smoke and prevents fat catching fire. Burn off the grill after use by opening the lid and burning all the burners at full power for 10 minutes. Allow the grill to cool, and then brush off ash from flame guards and grates. -
Page 24: Lighting Instructions
Lighting instructions Always open the barbecue hood before MANUAL IGNITION lighting. If the grill will not light using Open the gas supply valve on the gas bottle the the ignition button, do the or regulator. following procedure for manual lighting. From the OFF position, push in the control Use a long match or lighter. -
Page 25: Warnings
WARNING! Always keep an eye on the grill when in use. Never allow children or others Disconnect the gas bottle when the whorequire supervision near the grill when grill is in use or before moving it. in use. If storing the grill in a garage or This grill is only intended for outdoor basement below ground level, do not store use and must not be used under a roof. -
Page 26: Maintenance
Maintenance and cleaning MAINTENANCE CLEANING Check that the burners are Use clean water only. A mild washing up burning correctly regularly. liquid can be added for general cleaning. Do not use flammable cleaning agents. Remove the grill grate and flame guards. -
Page 27: Troubleshooting
Troubleshooting PROBLEM POSSIBLE CAUSE SOLUTION Empty gas bottle Replace gas bottle Damaged regulator Check/replace the regulator Burner is blocked Clean the burner Gas supply is blocked Clean gas ventury or hose Burner will not light when using the ignition Electrode is broken or dirty Clean the electrode knob Ignition knob is broken... -
Page 28: Consumer Contact
CONSUMER CONTACT Nordic Season Products AS 031 189095 +47 924 78600 support@nordicseason.no www.nordicseason.no Always attach your receipt and product serial number when making a warranty claim. Produced in China for Nordic Season Products AS.
Need help?
Do you have a question about the CAMBELL and is the answer not in the manual?
Questions and answers