
Related Manuals for Hasselblad H6D


Summary of Contents for Hasselblad H6D
- Page 1 User Guide Version 1.4 170420...
-
Page 2: Table Of Contents
H6D-50c Technical Specifications H6D-100c Technical Specifications Safety Warnings Cautions Disposal ISED Overview The H6D Interaction Displays Main Camera Parts Parts, Components, Buttons and Controls Grip Buttons and Controls Camera Body Buttons and Controls Sensor Unit Viewfinder Lenses Display Information 3.10 Sensor Unit Display and Controls 3.11... - Page 3 Add Favourite Functions to MAIN MENU Screen Remove Favourites FROM the MAIN MENU Screen Display Control Screen Control Screen Description Camera Settings Menu Camera Exposure Settings Increment Step Size Settings Exposure Compensation / Quick Adjust Flash Adjustment ISO and White Balance Camera Exposure Mode Settings www.hasselblad.com...
- Page 4 True Focus and Camera Handling Focus Checking Camera True Focus Methods Activated By True Focus Button Activated By Shutter Release 5.10 Camera Self Timer 5.11 Camera Interval Settings 5.12 Camera Bracketing Settings Bracketing Function 5.13 Camera Live View Settings Live View www.hasselblad.com...
- Page 5 General Settings HTS 5.26 General Settings Language 5.27 General Settings Service 5.28 General Settings Check for Update Update H6D Firmware Procedure 5.29 General Settings About 5.30 Grip Display Navigation Buttons and Controls on Grip Display To Adjust Shutter and Aperture on Grip Grip Display Navigation 5.31...
- Page 6 Histogram Mode - Exposure Browsing Zoom in and out 5.34 Phocus Features in Phocus Phocus Mobile Phocus and Hasselblad Capture Files 5.35 Lenses Remove the Lens Attach the Lens Remove the Lens Cap Attach the Lens Cap Remove the Lens Shade...
- Page 7 HVD 90x / HV 90x & 90x-II viewfinders Angle finder H HM 16-32 Film Magazine Troubleshooting Error Messages Change Language on Sensor Unit from Unknown Language Clean the Lens Glass Remove Dust Remove Smear Clean the Sensor Unit Filter www.hasselblad.com...
-
Page 8: Introduction
INTRODUCTION... -
Page 9: System Requirements
It is recommended that the computer has a USB 3 connector, which allows you to load images more quickly from the camera. A USB CFast card and SD card reader can be used for image transfer from the CFast and SD cards. www.hasselblad.com... -
Page 10: General Technical Specifications
Bright Spherical Acute-Matte type D with sensor format markings. Grid marked type also available as option. A large number of the H6D’s functions can be customized by the user to suit specific styles or situations through the built-in menu Customization system. -
Page 11: H6D-50C
Sensor Dimensions 43.8 × 32.9mm Image Size Stills: RAW 3FR capture 108MB on average. TIFF 8 bit: 154MB; Video: HD (1920 x 1080p), Hasselblad RAW 2,7k Stills: Hasselblad 3FR, 1/4 size JPEG. File Format Video: H.264 Compressed (25 fps), Hasselblad RAW (25 fps) -
Page 12: H6D-100C
Stills: RAW 3FR capture 210MB on average. TIFF 8 bit: 289MB; Video: HD (1920 x 1080p), UHD (3840 x 2160p) Stills: Hasselblad 3FR, JPEG (12.5 MPixel) File Format Video: Hasselblad RAW (UHD, 25 fps), H.264 Compressed (HD, 25 fps) Shooting Mode Single shot stills, Video Colour Definition 16 bit;... -
Page 13: Safety
SAFETY... -
Page 14: Warnings
CMOS sensor protective filter. The CMOS sensor protective and dust. This will help prevent damage to the equipment. filter is very sensitive. This will help prevent damage to the equipment. Caution! Seal all equipment in a plastic bag or similar if you enter damp www.hasselblad.com... -
Page 15: Disposal
Caution! Do not try to remove the glass IR filter from the front of the CMOS (due to dust or similar). This can cause damage to the equipment. Always contact your local Hasselblad Authorized Service Centre. Caution! If you use canned compressed air to clean the glass of IR filter, read the instructions very carefully before use. -
Page 16: Fcc
FCC Radiation Exposure Statement: fréquences utilisées. La valeur SAR la plus élevée pour la H6D-50c / H6D-100c lors This equipment complies with FCC radiation exposure limits set des tests était de 0,024 W / Kg contre une limite de 1.6W/Kg. -
Page 17: Overview
OVERVIEW... -
Page 18: The H6D Interaction Displays
USER GUIDE Overview THE H6D INTERACTION DISPLAYS GRIP DISPLAY FRONT SCROLL WHEEL VIEWFINDER DISPLAY REAR SCROLL WHEEL SENSOR UNIT DISPLAY Sensor Unit Display Viewfinder Display This display is touch sensitive and you can use it in the same way you navigate on a smart phone. Swipe, select, pinch and spread to zoom for example. -
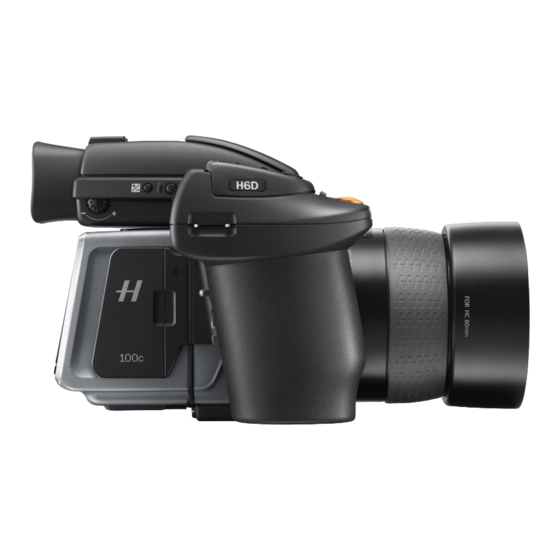
Page 19: Main Camera Parts
USER GUIDE Overview MAIN CAMERA PARTS VIEWFINDER GRIP WITH BATTERY SENSOR UNIT CAMERA BODY LENS LENS HOOD www.hasselblad.com... -
Page 20: Parts, Components, Buttons And Controls
4 Stop Down button 5 Battery grip 1 True Focus button 2 Card Format button 3 AE-L button 4 Camera strap holder 5 Grip lever release button 6 Battery grip locking lever 1 Speaker 2 Product number 3 Sensor unit www.hasselblad.com... - Page 21 6 Accessory port cover 7 Camera strap lug 8 Sensor unit release button 1 Exposure mode / metering mode button 2 Exposure compensation button 3 Eyesight adjustment wheel 4 CFast and SD card slot cover 5 Camera strap lug www.hasselblad.com...
- Page 22 2 Soft button - function depends on screen information. 3 Select button 4 Soft button - function depends on screen information. 5 Browse button - starts display and shows the last image. The user can review images, browse and zoom. www.hasselblad.com...
-
Page 23: Grip Buttons And Controls
Press the button for 1 second to activate the camera. The 4 AF Button H6D start-up logo will appear and then the main screen. Press this button to directly access the autofocus/manual After a few seconds (customizable) the camera will enter focus selection screen from the main screen. -
Page 24: Camera Body Buttons And Controls
Note! Customizable buttons True Focus, AE-L, M.UP and STOP DOWN, are very useful and can save you a great deal of time and effort. See separate sections for full details. www.hasselblad.com... -
Page 25: Sensor Unit
Connector for 3.5 mm Flash Sync output plug. 15 External Power In Connector for External Power input plug. 16 HDMI Connector for Mini HDMI output plug. 17 USB 3 Tethering Plug Connector behind protective door for USB 3 plug. www.hasselblad.com... -
Page 26: Viewfinder
7 Integral Flash Unit Release Button Slide the button towards the rear of the camera to raise the integrated flash. Activation is automatic. 8 Viewfinder Release Button Press towards the front of the camera and lift the viewfinder upwards. Mount protection lid. www.hasselblad.com... -
Page 27: Lenses
3 Focusing Distance Scales 4 Depth of Field Scales 5 Lens Index You can download technical data sheets from the Hasselblad website, www.hasselblad.com. You can download a lens booklet that contains a round up of the available lenses and some general information. -
Page 28: Display Information
Depending on mode, the LCD Aperture can also show other info, such White Balance Shutter Speed Flash indication EV Value Preview images, Histogram, Focus Exposure adjustment Live View and Spirit Level Drive Exposure Mode Light Metering Mode Drive mode www.hasselblad.com... -
Page 29: Sensor Unit Display And Controls
Aperture setting, shutter speed, focus setting, drive mode, exposure mode, ISO, exposure edjustment and white balance can be changed on the Control Screen. EV value, battery status, storage media status and remaining capture counter are for information only and cannot be changed www.hasselblad.com... -
Page 30: Grip Display
4 Accept the selection with a half-press on the shutter relase button Note! Scroll wheel description and direction Arrowheads symbolize which scroll wheel should be used to change setting. Left and right arrow = Front Scroll Wheel. Up and down arrow = Rear Scroll Wheel. www.hasselblad.com... -
Page 31: Viewfinder Display
(Manual mode) (f/3.2) setting symbol (Spot) Warning triangle LED Exposure compensation Shutter speed setting 95 frames remaining Focus Assist LED setting (+1.3 EV) (1/20 seconds) Note! The LED’s will only be visible when activated by the camera or a setting. www.hasselblad.com... - Page 32 VIEWFINDER DISPLAY ACCORDING TO SETTING Exposure and metering mode examples ISO (ISO 400) M = Manual A = Aperture priority S = Shutter priority P = Program Exposure compensation mode AF mode (AF-S) Pv = Program (variable) Center Weighted Centre Spot Spot www.hasselblad.com...
-
Page 33: Re-Assignable Grip Buttons Options
Sets T mode shutter setting. Shutter stays open after first press of shutter release button (toggle function to close again). Cycle Light Meter Mode Selects next light metering mode. Flash Measure Activates manual flash measure function. Expose Provides alternative to shutter release button. www.hasselblad.com... -
Page 34: Shortcuts
Camera activation. Re-activates camera from Display Off mode. 10 AE-L button Re-activates camera from Display Off mode. 12 Stop Down button Zoom-out button. Automatically acts as zoom-in button when in Re-activates camera from Display Off mode. Browse mode. Automatically a value selector when in Menu mode. www.hasselblad.com... -
Page 35: Phocus Overview
Phocus is the Capture Processing and File Management Phocus Mobile is available for iPhone®, iPad® and application aimed primarily at Hasselblad 3F file handling. iPod Touch®. It enables you to connect wireless to Phocus is available for both Mac and Windows. -
Page 36: Battery And Battery Grip
Rechargeable battery grip The environmentally approved Battery grip Li-ion (3043357) is the standard power source for the H6D camera. The H6D requires a power supply for all actions as there is no mechanical reserve facility. It is therefore advisable to keep a reserve rechargeable battery grip at hand. -
Page 37: Battery Charger
Steady Green light: Standby (no battery connected). Steady Yellow light: Charging. Steady Green light: Ready. NOTE! It can take about 6 hours to charge the battery completely up to 100% the first time. See next page for more details and precautions. www.hasselblad.com... -
Page 38: Rechargeable Battery Grip Specification
Take the appropriate measures if this is the case. If you do not intend to use the battery for a while, it is best to store it at room temperature with an approximate 30% to 40% charge. www.hasselblad.com... -
Page 39: Battery Life And Battery Warning
At 60 °C a warning dialogue appears notifying that the sensor unit is temporarily shutting down to allow the unit to cool. The Sensor Unit will be warm quickly if you use Live View Exhausted battery and Video Recording often. warning High temperature warning www.hasselblad.com... -
Page 40: Power & Timeout Modes
Overview 3.19 POWER & TIMEOUT MODES MAIN MENU > GENERAL SETTINGS > POWER & TIMEOUT The H6D Camera can be set to automatically turn off the Sensor Unit Display after a set amount of seconds to save battery. GENERAL SETTINGS: POWER &... -
Page 41: Remove And Attach The Viewfinder
Warning! Failure to do so could cause an intermittent malfunction if the data bus interface connections between the viewfinder and camera body are not positively secured. Note! Do not lift or hold the camera by the viewfinder alone. www.hasselblad.com... -
Page 42: Eyepiece Adjustment
3.22 RUBBER EYE CUP Two rubber eye cups are available for the H6D. The one supplied with the camera is suitable for users who do not intend to use eyeglasses when photographing. -
Page 43: 3.23 Accessory Connection
4 Remove the cover. 5 Attach the Databus cable. 3.24 PC FLASH CONNECTOR A PC connector for non TTL flash synchronisation (3) is located on the left side of the body. It is protected by a captive rubber plug. www.hasselblad.com... -
Page 44: 3.25 Protective Baseplate
(B) while pushing the plate towards the lens. ATTACH THE PROTECTIVE BASEPLATE 1 To attach the Protective Base Plate (A) again, slide it over the camera foot until it stops and the securing catch (B) snaps into place. www.hasselblad.com... -
Page 45: 3.26 Memory Cards
No additional wires or connectors needs to be attached. The recommended type is UDMA/type 4 /60MBs (400x) or better. The H6D is shipped with an 16 GB SDXC SD card, which is capable of holding approximately 75 − 150 captures (according to model). Grip Display View... -
Page 46: To Insert A Memory Card
5 Close the slot cover (A) and slide it forward to lock it. Insert SD card 1 When the card slot cover door is opened, mount the SD card in the SD card slot (C). 2 Close the slot cover and slide it forward to lock it. www.hasselblad.com... -
Page 47: To Remove A Memory Card
Sensor Unit display. MAIN MENU Live View Storage Wi-Fi Display All files on the card may become corrupted (and consequently lost) if you do so and new formatting may also be necessary. Exposure Focus www.hasselblad.com... -
Page 48: Formatting Memory Cards
In either case, you must reformat both CFast cards and SD cards in the sensor unit for H6D use. There are two ways to format cards. Use either the format button on the grip (quickest), or the sensor unit menu. -
Page 49: 3.27 Carrying Strap
3 Slide back the safety collar to ensure the hook remains in the locked position between the small protruding lugs. The collar is purposely a tight fit to avoid unintentionally slipping back and therefore might need some effort to slide. www.hasselblad.com... -
Page 50: 3.28 Remove The Carrying Strap
USER GUIDE Overview 3.28 REMOVE THE CARRYING STRAP 1 Withdraw the safety collar. 2 Detach the freed hook from the strap lug. www.hasselblad.com... -
Page 51: 3.29 Change Lens
6 Attach a lens protection lid on the detached lens to prevent damage. 7 Store the lens with both lens protection lids on and the lens hood (F) inverted over the lens instead of in front of the lens. www.hasselblad.com... -
Page 52: To Prepare
TO PREPARE... -
Page 53: Delivery Check
If not, Sensor unit. proceed to step 6. Sensor unit protection lid. 5 Contact your Hasselblad dealer or distributor and tell them the product number of the item Camera body. missing or damaged. -
Page 54: Set Date And Time
Main Menu. Date and Time Menu Settings Date Set Date by changing year, month and day using the pop up menus. Time Set Time by changing hour and minute using the pop up menus. www.hasselblad.com... -
Page 55: Set Language
5 Close the pop up Menu by a click outside the pop up. Note! If the sensor unit has been set to a language you do not understand (a rented camera, for example), see Chapter Troubleshooting for a solution. www.hasselblad.com... -
Page 56: Connect To A Computer
The camera then sends the capture over the USB connection to the computer, where it is displayed on the computer screen and saved as a 16-bit 3F file in the currently selected folder on the computer hard disk. www.hasselblad.com... -
Page 57: Camera Interval Settings Example
Swipe right or press Menu / EXIT button to get back to Main Menu. Interval Settings Menu Active On or Off. Time Select time between exposures in minutes and seconds. Frames Select number of Frames. Initial Delay Select initial Delay. When Finished Settings for Action When Finished. www.hasselblad.com... -
Page 58: Set Brightness Of The Display
Main Menu. Display Menu Settings Brightness Slide Left or Right to change Brightness. Show Preview Select On or Off. On displays a preview of the capture after every exposure. Mark Overexposure Highlights overexposed areas in the preview images. www.hasselblad.com... -
Page 59: Set Drive Mode
Note! The speed is dependent on the time it takes to save the capture according to equipment. Note! Drive Mode can also be changed from the Control Screen on the rear display. Single drive Continuous drive www.hasselblad.com... -
Page 60: To Use
TO USE... -
Page 61: Navigating The Menus
MAIN MENU Button Screen function Wi-Fi Live View Display Storage Storage 1 MENU button Back to Main Menu Exposure Focus Self Timer 2 Soft button 3 Select button Select 4 Soft button Down 5 Browse button Go to image browse www.hasselblad.com... -
Page 62: The Main Menu
Add Favourite pop up Menu the selected functions icon until an encircled x (C) appears. 2 Press the x within an orange circle (C) to remove the Quality Function. Remove Favourite MAIN MENU Wi-Fi Live View Display Storage Focus Quality Exposure www.hasselblad.com... -
Page 63: Display Control Screen
3 Swipe Up to hide the Control Screen and display the Main Menu. 3 Swipe up 4 Main Menu 4 The Main Menu appears. MAIN MENU Wi-Fi Live View Display Storage See following pages for possible settings. Exposure Focus Self Timer www.hasselblad.com... -
Page 64: Control Screen Description
Shutter value will be automatic and A Mode displayed in grey. S Mode Control Screen For Shutter priority (S) you can change the Shutter value and the Aperture value will be automatic and S Mode displayed in grey. www.hasselblad.com... - Page 65 FOCUS MODE - AF-S Single Focus. - AF-C Continuous Focus. - AF-T True Focus. Manual Focus Single Focus Continuous Focus True Focus - Select ISO value. Aperture - Select Aperture value. This section continues on the next page. Aperture www.hasselblad.com...
- Page 66 - Pv Program Variable. Video Metering Mode - Centre Weighted. Exposure Mode - Spot. EXPOSURE MODE - Centre Spot. Manual Aperture Shutter This section continues on the next page. Program Program Video Variable Metering Mode METER METHOD Centre Weighted Spot Centre Spot www.hasselblad.com...
- Page 67 - Displays the number of remaining Captures. Memory Card - S for SD Card. Remaining - C for CFast Card. Captures 37 down to the right indicates 37 remaining captures on the CFast Card. Memory Card S - SD Card. C - CFast Card. www.hasselblad.com...
-
Page 68: Camera Settings Menu
MAIN MENU > CAMERA SETTINGS Live View Custom Buttons 1 Press the Camera icon on the Sensor Unit display. Configuration 2 The Camera Settings Menu appears. Camera Body Swipe right or press MENU button to get back to Main Menu. www.hasselblad.com... -
Page 69: Camera Exposure Settings
Live View Low Flash Warning: Sync: Normal Custom Buttons Exposure Lock Configuration Camera Body Flash Ready: Lens: Out of Range: AE-L / Quick Adjust Reset After Exposure: Mirror None Extra Mirror Delay: Always Return Mirror: Image Orientation Auto Orientation: www.hasselblad.com... -
Page 70: Increment Step Size Settings
Select the Increment Step Size setting. Flash Low Flash Warning: Exposure Sync: Normal Exposure Lock Exposure Adjust Flash Ready: Lens: Out of Range: AE-L / Quick Adjust Reset After Exposure: Mirror None Extra Mirror Delay: Always Return Mirror: Image Orientation Auto Orientation: www.hasselblad.com... -
Page 71: Exposure Compensation / Quick Adjust
2 Turn the Front Scroll Wheel (A) to set the amount of Exposure compensation EV -1.3 compensation required from +3 EV through -3 EV. Grip Display View Flash Exposure Camera Exposure Viewfinder Display View Exposure compensation EV -1.3 Flash Exposure Camera Exposure www.hasselblad.com... -
Page 72: Iso And White Balance
Sensor Unit are automatically transferred to the grip display. Note! The changes are only displayed on the Sensor Unit when the settings have been saved by halfpressing the shutter release. WHITE BALANCE Cloudy Shade Daylight Tungsten Fluorescent Flash Manual www.hasselblad.com... -
Page 73: Camera Exposure Mode Settings
Controls True Exposure function will be used or not to adjust Out of Range: short shutter speeds for aperture dependency. See more on page 79. AE-L / Quick Adjust True Exposure Reset After Exposure: Mirror None Extra Mirror Delay: Always Return Mirror: Image Orientation Auto Orientation: www.hasselblad.com... -
Page 74: Manual Exposure Mode
(Note: full-stops, half-stops and third-stops are also displayed, according to setting (see increment setting). For example, a setting between f/8 and f/11 will appear as f/9,5 if half-stop is chosen). www.hasselblad.com... -
Page 75: Automatic Exposure Mode
EV and the rear scroll wheel alters the amount of exposure compensation. The compensation appears as a +/- symbol on the grip display and viewfinder display. Note! Aperture and shutter speed settings can both be changed even while the ready light on Sensor Unit is flashing. www.hasselblad.com... -
Page 76: Automatic Exposure - P And Pv Mode
USER GUIDE To Use AUTOMATIC EXPOSURE - P AND PV MODE www.hasselblad.com... -
Page 77: Ae-L Button
(Included are Lo and Hi to signify areas beyond the range of the holding down the AE-L button while choosing the new zone value sensor). and turning the front scroll wheel until zone 6 appears. All new placements will then be zone 6. www.hasselblad.com... -
Page 78: Light Metering Mode
Typically used in the zone system and similar light measuring situations where maximum control is required. Also excellent for tonal comparison measurements. The spot mode can display zones instead of EV's in the viewfinder display. www.hasselblad.com... -
Page 79: True Exposure Explained
1/500s, the effect becomes clearly visible. Automatic You can download a complete explanation of this situation from compensatory measures in speed setting adjustments are www.hasselblad.com. employed. As compensation can only be put into effect where speeds can be adjusted, this prevents the possibility of adjusting the fastest speed of 1/800s or 1/1000, depending on lens www.hasselblad.com... -
Page 80: White Balance Settings - Presets And Manual
There are six White Balance presets plus a Manual Tungsten Fluorescent Flash setting to choose from. Manual Cloudy. Shade. Daylight. Grip Display View Tungsten. White Balance Manual Flourescent. mode selected. Flash. Manual (M WB). Grip Display View White Balance menu with Cloudy mode selected. www.hasselblad.com... -
Page 81: Flash Settings
- Rear sync. Flash triggered just before the shutter closes. Lens: Out of Range: AE-L / Quick Adjust This section continues on next page. Reset After Exposure: Mirror None Extra Mirror Delay: Always Return Mirror: Image Orientation Auto Orientation: www.hasselblad.com... -
Page 82: Flash And Strobe Settings
WARNING! The H6D can be used together with most manual flash units. Only flash units specially adapted for use with the H6D can be However, to make use of a TTL automatic function, it must connected to the hot shoe on the camera. -
Page 83: Integral Flash
Do not use the integral flash (A) together when another external TTL flash unit is connected (and used in TTL or A mode). Note! For full coverage with the integral flash, use 80mm or longer lenses (without a lens shade). www.hasselblad.com... -
Page 84: Separate Flash Unit Connection
Keep the plastic safety cover in place in the Hot Shoe (A) when not in use. WARNING! Only flash units specially adapted for use with the H6D can be connected to the Hot Shoe on the camera. A Hot Shoe... -
Page 85: Flash Measure Of Separate Flash Unit
Diff EV Mirror High = more than 2 EV above. None Extra Mirror Delay: Note! Always Return Mirror: The "Low Flash" warning can be disabled in Camera Settings > Exposure > Flash - Low Flash Warning. Image Orientation Auto Orientation: www.hasselblad.com... -
Page 86: Exposure Lock
Off allows the shutter to be released (1/2000s or 1h08m) if beyond the working range. Allows you to release the camera when either the aperture or shutter speed setting is beyond the work ing range (indicated on the displays by “–”). www.hasselblad.com... -
Page 87: Ae-L / Quick Adjust
Exposure Lock Off keeps both AE-L state and Quick Adjust value even after an Flash Ready: exposure. Lens: Out of Range: AE-L / Quick Adjust Reset After Exposure: Mirror None Extra Mirror Delay: Always Return Mirror: Image Orientation Auto Orientation: www.hasselblad.com... -
Page 88: Mirror Settings
Always Return Mirror Select On or Off. AE-L / Quick Adjust Automatically lowers mirror again for viewing at the end of every mir ror up sequence. Reset After Exposure: Mirror None Extra Mirror Delay: Always Return Mirror: Image Orientation Auto Orientation: www.hasselblad.com... -
Page 89: Image Orientation
Auto. Out of Range: Lock at 0 degrees. Lock at 90 degrees. AE-L / Quick Adjust Lock at 180 degrees. Lock at 270 degrees. Reset After Exposure: Mirror None Extra Mirror Delay: Always Return Mirror: Image Orientation Auto Orientation: www.hasselblad.com... -
Page 90: Camera Quality Settings
Camera Body High. Normal. Colour Profile sRGB. Adobe RGB. Quality Settings Menu H6D 100c Bit Depth H6D 100c only On the H6D you can select between: CAMERA SETTINGS: QUALITY 14 bit. 16 bit. Image Format: RAW + JPG JPG Quality:... -
Page 91: Camera Focus Settings
True Focus in AF-S - Off sets the AF assist illumination to Select True Focus in AF-S mode. When set to remain always inactive. On, a half press on the shutter release will activate True Focus. - On or Off. www.hasselblad.com... -
Page 92: Focusing Distance Calculation
3m (three metres). At an aperture of f/22, the depth-of- field would therefore extend from just over 2m to approximately 4.5m. Note! The depth-of-field is not absolute. Perception of it depends on several factors and so it should be seen only as a rough guide. www.hasselblad.com... -
Page 93: Infrared Focus Setting
If the distance is calculated, a manual distance setting with use of the distance scales together with the infrared mark is made. Note! Please contact your Hasselblad dealer for information about sensor units adapted solely for "near infrared" Photography. www.hasselblad.com... -
Page 94: Focus Assist
Lens Accessories” booklet that accompanies each lens. The button in order to retain the newly automatically made focus booklet can also be downloaded from the Hasselblad website. setting (AF-T can also be used). Additionally see the following note below regarding HCD lenses. -
Page 95: Manual Focus
Note! In manual focus, the infinity and closest distance marks on the lens scale can appear to be positioned beyond the central index. This is only an apparent effect and does not change the focusing range of the lens. www.hasselblad.com... -
Page 96: Autofocus
AF assist light is automatically activated if selected. The operative distance is approximately up to six metres from the camera. AUTOFOCUS CHECK IN MANUAL MODE See page 101 for a description of how to use the advantages of a quick autofocus check while remaining in Manual mode. www.hasselblad.com... -
Page 97: Single Shot Focus
The lens focus continuously, and by momentarily releasing the pressure on the shutter release and then immediately pressing again, you minimize the amount of time needed for the lens to check focus ensuring a split second shot with optimum focus. www.hasselblad.com... -
Page 98: Camera True Focus
Please remember that although True Focus can noticeably improve a demanding shoot it will only work effectively in the specific circumstances it was designed for. www.hasselblad.com... -
Page 99: True Focus And Absolute Position Lock
If a True Focus setting instead of a normal autofocus setting is now made at A and the composition is changed back to B again, the camera will automatically calculate and adjust the focus of 2.5m to approximately 2.4m, which is the actual perpendicular distance. The model’s face remains sharp. www.hasselblad.com... -
Page 100: True Focus And Camera Handling
In browse mode or after a capture you can either double tap on the Sensor Unit Display to zoom in to 100% or spread two fingers apart to zoom in. To zoom out you can double tap again or pinch two fingers together. www.hasselblad.com... -
Page 101: Camera True Focus Methods
If any of the programmable buttons are set to True Focus, they will work exactly like the True Focus button. Note! If focus mode is set to AF-T, the True Focus button will always have the True Focus function. Viewfinder display with True Focus active www.hasselblad.com... -
Page 102: Activated By Shutter Release
6 Wait for the True Focus icon to appear in the viewfinder and the audio confirmation signal. 7 Maintain the half-press (A) and recompose the picture. Press fully to make the capture. The True Focus icon disappears from the viewfinder. Normal Viewfinder display Viewfinder display with True Focus active www.hasselblad.com... -
Page 103: Camera Self Timer
Delay / Mirror Up. Self Timer Settings Mirror Up / Delay. Mirror behaviour Mirror goes down. Mirror remains up. When Finished Exit or Stay. Note! When Self Timer is activated, a Self Timer Icon is displayed on most screens www.hasselblad.com... -
Page 104: Camera Interval Settings
Initial Delay Select initial Delay. None or Interval time 60s, 10s, 2s. When Finished Settings for Action When Finished. Exit or Stay. Note! When Interval Timer is activated, an Interval Timer Icon is displayed on most screens www.hasselblad.com... -
Page 105: Camera Bracketing Settings
3 Frames, results in the capture order: Note! Capture 1 is underexposed (-1/3 EV). When Bracketing is activated, a Bracketing Icon is displayed Capture 2 is correct exposed (0 EV). on most screens. Capture 3 is overexposed (+ 1/3 EV). www.hasselblad.com... -
Page 106: Camera Live View Settings
Orange, Yellow, Cyan, Magenta Peaking Colour dialogue Zoom Level 50%, 100% Selects the zoom level in Live View when you double-tap the screen or press the middle button under the display. This section continuous on the next page. Zoom Level dialogue www.hasselblad.com... -
Page 107: Live View
3 Double click again to Zoom out to display the entire capture. Note! Live View demands higher power consumption than normal operation. Working with Live View will shorten the usage time of the camera when on battery power supply only. Note! AF is not available in Live View. www.hasselblad.com... -
Page 108: Focus In Live View Using Focus Peaking
When the Focus Peaking is active and you adjust the focus manually, the focused area of the subject (magenta in this case) moves in depth as you move the focus. Focus Peaking display when subject parts are in focus www.hasselblad.com... -
Page 109: Live View With Hdmi External Screen
4 To toggle between the overlays, press the soft button marked with a rectangle. Zoom Display Note! Live View demands higher power consumption than normal operation. Working with Live View will shorten the usage time of the Camera when on battery power supply only. www.hasselblad.com... -
Page 110: Camera Custom Buttons
Configuration - None. Camera Body - True Focus. - AF Drive. - AE-L. - Live View - Self Timer. - Bracketing. - Mirror Up. - B-Mode. - T-Mode. - Flash Measure. - Interval. - Cycle LM-Mode. - Expose. www.hasselblad.com... -
Page 111: Camera Configuration Settings
On or Off. AE-L (AE-Lock) when Half-pressed Select On or Off. Allows access to AE- Lock without having to use customizable button assigned to other required functions. Exposure Quick Adjust Select On or Off. www.hasselblad.com... -
Page 112: Camera Body Settings
GENERAL SETTINGS: CAMERA BODY This setting is only used when the sensor Exposure unit is detached from the H6D camera body Quality and used on other cameras (view cameras). Camera Body: Flash Sync This is descibed further in the chapter Focus "View Cameras"... -
Page 113: Video Settings Menu
VIDEO QUALITY SETTINGS Video Quality Settings - H.264. - RAW UHD (50c) / RAW UHD (100c) H.264 Resolution Select the H.264 Resolution. - 1080. - 720. Video Coding H.264 Video Coding. HD Resolution for H6D 50c. UHD Resolution for H6D 100c. www.hasselblad.com... -
Page 114: Video Recording
1 In Video Live View before recording, double click on the screen to zoom in to 50% or 100% depending on setting. 2 Adjust the Focus manually in the zoom-in mode. Video Live View before recording video Video Display when recording video f/2.8 30 00:00 f/2.8 30 00:21 www.hasselblad.com... -
Page 115: General Settings Menu
MAIN MENU > GENERAL SETTINGS Language 1 Press the General Settings icon on Service the Sensor Unit display. About 2 The General Settings Menu appears. Swipe right or press MENU button to get back to Main Menu. Continues on the next Page. www.hasselblad.com... -
Page 116: General Settings Wi-Fi
The Wi-Fi function has one mode of operation, Direct Access. Direct Access is when the camera creates a new Wi-Fi network and an iPhone/iPad(iPod is connected to it. The name of the network contains the camera serial number. For example: “H6D- 50c SQ34000123” www.hasselblad.com... -
Page 117: General Settings Display
Off displays no preview after every capture. Mark Overexposure Select On or Off. If set to On, overexposed areas in the image will alternate between white and black. Active on previews in both 1- and 9-view. www.hasselblad.com... -
Page 118: General Settings Storage
Main Menu. Secondary Slot Usage: None Spirit level Storage Menu Settings Language Format Card Service - Format CFast. About - Format SD. Image Destination - Primary slot: CFast or SD. - Secondary slot usage. See next page for more information. www.hasselblad.com... -
Page 119: Format Cfast And Sd Cards
In either case, you must reformat both CFast cards and SD cards in the sensor unit for H6D use. There are two ways to format cards. The quickest way is to use the Format card button on the grip but if you prefer, you can also use the menu on the sensor unit. -
Page 120: Image And Video Destination
Main Menu. Language Image Destination Service - Primary slot: CFast or SD. - Secondary slot usage: About - None. - Overflow. If Overflow is selected, the camera will automatically switch to the secondary card when the primary card is full. www.hasselblad.com... -
Page 121: General Settings Date And Time
Power & Timeouts Spirit level Date and Time Menu Settings Language Date Set Date by changing year, month Service and day, using the pop up menus. About Time Set Time by changing hour and minute, using the pop up menus. www.hasselblad.com... -
Page 122: General Settings Power And Timeouts
POWER & TIMEOUTS GENERAL SETTINGS GENERAL SETTINGS: POWER & TIMEOUTS Wi-Fi Display Off: 10 sec The H6D Camera can be set to Display automatically turn off the Sensor Unit Power Off: 10 min Display after a set amount of seconds Storage to save battery for example. -
Page 123: Set Display Off Mode
RE-ACTIVATE CAMERA FROM DISPLAY OFF/POWER MODE Do any of the following actions: 1 Press the Shutter Release button half way. 2 Press the STOP DOWN button. 3 Click the ON / OFF button. 4 Press the Mirror Up button. www.hasselblad.com... -
Page 124: General Settings Spirit Level
About turns green. Swipe right or press MENU button to get back to Main Menu. Camera tilted to the left. Camera aligned horizontally and vertically. Camera tilted to the right. Camera tilted up. Camera aligned vertically. Camera tilted down. www.hasselblad.com... -
Page 125: Calibrate Spirit Level
6 Press the Factory settings icon (C). 7 The Factory settings icon (D) is now displayed and the Spirit Level is reset to Calibrate Factory calibration settings. Swipe right or press MENU button to get back to Main Menu. www.hasselblad.com... -
Page 126: General Settings Hts
Storage HTS: Shift, Tilt and Rotation. Rotation: 30º Date & Time Note! Power & Timeouts If an HTS adapter is not used, this menu item is greyed out. Spirit level Language Service About www.hasselblad.com... -
Page 127: General Settings Language
5 Close the pop up menu by tapping outside the pop up menu. Note! If the sensor unit has been set to a language you do not understand (a rented camera, for example), see Chapter Troubleshooting for a solution. www.hasselblad.com... -
Page 128: General Settings Service
CFast card or on the SD Retail Demo Purpose. card. The image sequence number will be reset! 7 Save the chosen selection by Note! pressing EXIT (MENU button). Exit Reset The Storage Deactivation is only active until the camera is restarted. www.hasselblad.com... -
Page 129: General Settings Check For Update
FIRMWARE UPDATE a CFast or SD Card. Do not save the FIRMWARE UPDATE Firmware file in a folder (or subfolder). 3 Insert the CFast or SD Card in the H6D H6D_v1_12_0.cim Camera. H6D_v1_16_0.cim 4 Select General Settings from the Main No Updates available Menu. -
Page 130: General Settings About
Firmware version is listed for Camera Body, Lens and Viewfinder (if attached). Serial number The serial number is displayed here. Refer to your serial number in case Hasselblad Support need it for problem solving. Usage GENERAL SETTINGS: ABOUT: USAGE Licenses Displays the available Licenses. -
Page 131: Grip Display Navigation
B Front Scroll Wheel C WB button D AF button E ISO F MENU and Video button G PLAY and Illumination H ON and OFF button Rear Scroll Wheel Exposure and Flash Compensation button K Exposure mode and Metering mode www.hasselblad.com... -
Page 132: To Adjust Shutter And Aperture On Grip
Rear wheel Quick exposure adjustment of Aperture. In P or Pv mode: Front wheel Aperture and Shutter Speed in combination. Rear wheel Aperture and Shutter Speed in combination. See under Light Metering and Exposure Control/Exposure Method for a complete description. www.hasselblad.com... -
Page 133: Grip Display Navigation
1 Press the ISO button to show the ISO menu. 2 Use the Front Scroll Wheel to scroll up and down between Grip Display Manual available ISO numbers. ISO Screen. ISO 400 3 Half-press or click the ISO button once again to leave the displayed. menu. www.hasselblad.com... - Page 134 Mode the Grip displays some essential settings for example Display when in Video White Balance (WB M selected), H.264 selected, ISO (200), Mode. Aperture (f5.6), Shutter Speed (10), Aperture priority mode (A), battery level, Time (1:21:18) and Memory Card status (SD and CFast inserted). www.hasselblad.com...
- Page 135 Leave the menu by half-press or pressing the EXP button again. Exposure Modes M = Manual. A = Aperture priority. S = Shutter priority. P = Program. Pv = Program (variable). Light Meter Modes Centre Weighted. Centre Spot. Spot. www.hasselblad.com...
-
Page 136: Viewfinder Display Navigation
Warning triangle LED Exposure compensation Shutter speed setting 95 frames Focus Assist LED setting (+1.3 EV) (1/20 seconds) remaining Note! The LED indicator symbols will only be visible when activated by the camera or a setting. Photo: Ian Lawson www.hasselblad.com... -
Page 137: Viewfinder Display Navigation Overview
P = Program Exposure compensation mode Spot. Pv = Program (variable) Change Exposure by scrolling the Front Wheel (A) up and down. Centre Weighted Change Metering mode by scrolling the Rear Scroll Wheel (B) up Centre Spot or down. Spot www.hasselblad.com... -
Page 138: Viewfinder Display Examples
Press the ISO button to display the ISO Settings Menu. Use the Front or Rear Scroll Wheel to scroll left and right between available ISO numbers. Half-press or press the ISO button once again to leave the menu and save the new value. ISO settings, ISO 400 selected. www.hasselblad.com... - Page 139 Temperature in K can be adjusted with the is possible to set values between 2000 K and 10000 K, in Rear Scroll wheel. steps of hundred K. Leave the WB menu by half-pressing or by pressing the WB button again. www.hasselblad.com...
- Page 140 This is the Information Screen with Storage medium missing displayed. Information Screen, Storage medium missing. Frame Count This is the Frame Count with more than 1000 frames left displayed. 1k9 = 1900 images left. Frame Count, more than 1000. 1k9 = 1900. www.hasselblad.com...
-
Page 141: Remove / Attach Viewfinder
(B) on camera body. 3 Press the rear part of the Viewfinder firmly downwards until it clicks into place. 4 Make sure that both sides of the Viewfinder are seated correctly and that it has been firmly attached and locked into position. www.hasselblad.com... -
Page 142: Adjust The Eyepiece
If you normally wear eyeglasses for distance viewing and intend to wear them for camera use then do not remove them for the above procedure. If, on the other hand, you prefer to remove your eyeglasses for camera work, then repeat the above procedure without wearing your eyeglasses. www.hasselblad.com... -
Page 143: Change Focusing Screen
USER GUIDE To Use CHANGE FOCUSING SCREEN The H6D is fitted with a Spherical Acute Matte D Focusing Screen for extreme brightness, clarity and even illumination. An optional accessory screen with a grid pattern is also available. To change the Focusing Screen, remove the viewfinder to access the Focusing Screen. -
Page 144: Preview, Histogram And Browsing
Separate Histogram: Displays three separate histograms Combined for red, green and blue. Histogram ● Luminance Histogram: Displays a Preview Image with a Luminance Histogram. Note! A single tap above the Meta Data toggles overlay information on and off. Separate Histogram Standard Preview Luminance Histogram www.hasselblad.com... -
Page 145: Standard Preview
2 In this Mode you can see an overview of up to 9 captures. 3 If you have more than 9 captures, swipe down at the right side of the Display to scroll through all captures. 4 Select one capture to display information and histogram. www.hasselblad.com... -
Page 146: Histogram Types
Histogram. The RGB info is represented by a White (14:32:08), selected Aperture (f/11), Shutter Speed (1/250), Combined RGB Graph. ISO (100), Exposure adjustment (+/- 0.0), Exposure Mode (A), Meter Method (Centre Weighted), White Balance (Daylight) and Lens info (45mm). www.hasselblad.com... -
Page 147: Histogram Mode - Exposure
Overexposure Histogram display concentrated on the right with few pixels elsewhere indicates a likely overexposure. Many details will be lost in the highlights. www.hasselblad.com... -
Page 148: Browsing
Select Card to Browse On the Touch Display when in 9 View Mode, select the "Folder BROWSE: MEMORY CARDS Up" button in the top left corner, or press the AE-L button when in Browse Mode. Select Card to Browse CFast www.hasselblad.com... - Page 149 To Use ZOOM IN AND OUT Zoomed View The Touch Screen on the H6D Sensor Unit is similar to a Phone or Tablet with touch sensitivity. The following gestures can be used to navigate and control the H6D Camera: Function...
-
Page 150: Phocus
To Use 5.34 PHOCUS Phocus is the Capture Processing and File Management application aimed primarily at Hasselblad 3F file handling. Phocus Mobile offers remote viewing and control when shooting tethered. Phocus mobile is free to download at the Apple App Store for both iPhone and iPad. -
Page 151: Phocus And Hasselblad Capture Files
USER GUIDE To Use PHOCUS AND HASSELBLAD CAPTURE FILES The H6D can capture files and store them as Hasselblad RAW format files or Hasselblad RAW + JPEG formats simultaneously. Hasselblad RAW files are initially stored in the 3FR format which is a proprietary Hasselblad format for in-camera storage of captures. -
Page 152: Lenses
6 Attach a lens protection lid on the detached lens to prevent damage. 7 Store the lens with both lens protection lids on and the lens hood (E) inverted over the lens instead of in front of the lens. www.hasselblad.com... -
Page 153: Attach The Lens
(D) on the camera body. 3 Mount the lens into the camera body (E) and then turn the lens clockwise to lock its position. 4 Make sure the lens is locked to the camera body before using or moving the camera. www.hasselblad.com... -
Page 154: Remove The Lens Cap
2 Pinch the recesses (A) together. 3 Remove the front lens cap. ATTACH THE LENS CAP 1 Insert thumb and index finger into the recesses (A). 2 Attach the front lens cap on the lens until it snaps into place. www.hasselblad.com... -
Page 155: Remove The Lens Shade
1 Place the lens shade on the lens. 2 Make sure that the index on the lens shade (A) aligns with the index on the front of the lens (B). 3 Turn the lens cap clockwise until it snaps into place. www.hasselblad.com... -
Page 156: Filters
As there is no rotation of the front section of the lens when the focus is changed, the filter do not rotate either. This is particularly useful when using polarizing or graduated filters where the orientation is critical. www.hasselblad.com... -
Page 157: To Set Focus Distance
2 Inspect the focus distance scale (A) and turn the manual focus ring (B) to adjust the focus distance. Note! There are two distance scales (in feet and metres) visible through the window on the upper part of the lens barrel. www.hasselblad.com... -
Page 158: Battery
2 Insert the jack plug from the battery charger into the socket on the battery grip (B). 3 Insert the battery charger into a standard (100–240V~/50– 60 Hz) domestic socket. During the charging procedure, the lamp on the charger shows the following: Standby (no battery connected). Charging. Ready. www.hasselblad.com... -
Page 159: Check The Battery Status
Note! You can save battery consumption by changing the Display Off/ Sleep/Power Off settings as well as the brightness settings of Low battery warning the display. Battery Level www.hasselblad.com... -
Page 160: Protective Baseplate
Some larger lenses will require to remove the lens before the baseplate can be removed. ATTACH THE PROTECTIVE BASEPLATE 1 Slip the Protective Base Plate (A) over the camera foot until it stops and the securing catch snaps into place. www.hasselblad.com... -
Page 161: Store The Camera
Caution! Store the equipment in a dry environment. This will help prevent damage to the equipment. Remove battery from Camera Grip when storing the Camera. Attach the Protection Cover Lid when the Camera is not in use. www.hasselblad.com... -
Page 162: View Camera Connectivity
VIEW CAMERA CONNECTIVITY... -
Page 163: View Camera Operation
USER GUIDE View camera connectivity VIEW CAMERA OPERATION The Sensor Unit of the H6D camera can be detached and used on other types of cameras, e.g. View Cameras, with an H System magazine interface. This will enable the use of additional functionality such as extended Tilt and Shift using lenses with large image circle. -
Page 164: Flash Sync Mode
Procedure: 1 Detach the Sensor Unit from the H6D camera body. Be careful not to damage the IR filter in front of the sensor. 2 Attach the Sensor Unit to the View Camera. Follow instructions from the manufacturer. -
Page 165: Pinhole Mode
Pinhole mode can be used when the optical system does not have a flash sync terminal. Procedure: 1 Detach the Sensor Unit from the H6D camera body. Be careful not to damage the IR filter in front of the sensor. 2 Attach the Sensor Unit to the Camera. Follow instructions from the manufacturer. -
Page 166: Video
7 Double tap the screen to zoom in to 50% or 100% (depending on setting) for critical focusing. 8 Start video recording by tapping the button (B) Video Live View Screen 9 Stop video recording by tapping the button (C) ISO 100 00:00 Video recording ISO 100 01:23 www.hasselblad.com... -
Page 167: Accessories
ACCESSORIES... -
Page 168: Accessories Connectivity Diagram
SCA3902 TTL Flash All HC/HCD Adapter lenses, including extension tubes and converters Roll film and Instant mag. View cameras - Flash sync shutters Flash sync input cable Any view camera with Hasselblad H adapter Host Computer with USB 3 running Phocus www.hasselblad.com... -
Page 169: Hc Lens Range
USER GUIDE Accessories HC LENS RANGE HCD 4.8/24mm HCD 4/28mm HC 3.5/35mm HC 3.5/50-IImm HC 2.8/80mm HC 2.2/100mm HC Macro 4/120-IImm HC 3.2/150mm HC 4/210mm HC 4.5/300mm HC 3.5–4.5/50–110mm HCD 4.0–5.6/35–90mm www.hasselblad.com... -
Page 170: Optional Hc Lens Accessories
The Converter H 1.7 X features the same outstanding optical and mechanical quality as all the lenses in the Hasselblad H system. The optical design consists of 6 elements in 4 groups. -
Page 171: Optional Accessories
The camera is firmly held in an exact and repeatable position. Two integrated spirit levels make horizontal positioning of the camera easy. The Tripod quick coupling H fits 1/4” and 3/8” tripod threads and has a safety catch. www.hasselblad.com... -
Page 172: Flash Adapter Sca 3902
All focusing screens are of the Spherical Acute-Matte D type with or without grid and central markings for spot (Ø 7.5 and AF metering area. Grid patterns provide aid in technical, architectural, documentation and other similar fields. H6D-50c (3043336), H6D-50c Grid (3043338) H6D-100c (3043332), H6D-100c Grid (3043334) www.hasselblad.com... -
Page 173: Release Cord H
Includes built-in fill flash and multi- mode light metering system. ANGLE FINDER H (S100A12359A00) Angle finder for the HV 90x and the HVD 90x viewfinders. Enables vertical viewing angle regardless of camera position. Requires a minor modification to the viewfinder eyepiece. www.hasselblad.com... -
Page 174: Hm 16-32 Film Magazine
USER GUIDE Accessories HM 16-32 FILM MAGAZINE The Hasselblad HM 16-32 film magazine is a sophisticated semi-independent unit within the H system. It has its own power supply for individual information storage, LCD panel, illumination, etc. It features: automatic 120/220 compatibility,... - Page 175 When the magazine is attached to the camera, the button on the magazine is inaccessible but you can still illuminate the LCD by pressing the illumination button on the grip instead. www.hasselblad.com...
- Page 176 WHITE = ok ! = exposure CAN be made (magazine cannot be removed from camera) If you attempt to make an exposure when the dark slide is closed, however, you will receive a warning message in the viewfinder and grip LCD’s – ‘The dark slide is closed’. www.hasselblad.com...
- Page 177 After battery replacement, the battery compartment slots), locking it into place by rotating magazine’s parameters return to the default settings (Bar code, it in a clockwise direction until it stops. If you inadvertently 120, Data-on, Count up). www.hasselblad.com...
- Page 178 Press the function selector button repeatedly to successively access: A Film speed (ISO / Bar Code) B Film length (120/220/ Number of frames) C Data (on/off) D Frame counter (count down / count up) E Low-battery warning symbol www.hasselblad.com...
- Page 179 120 or 220 symbol appears. 3 Press either the or the button to change the desired setting. 4 The new setting will be saved automatically after timeout. 5 Return the magazine settings lock to the locked position. www.hasselblad.com...
- Page 180 The low-battery symbol only appears on the magazine LCD when the battery needs changing. Example ● 120 film length set manually ● the film speed (ISO160) has been set manually ● 5 frames already been exposed (with regular 120 film, 11 frames remain) ● the battery is functional www.hasselblad.com...
- Page 181 (the band may need to be moistened to activate the adhesive depending on type). Store exposed films away from strong light sources and contact with sharp objects. Move the remaining empty spool to the take-up spool compartment. www.hasselblad.com...
-
Page 182: Troubleshooting
TROUBLESHOOTING... - Page 183 (which are included with files and folder labels) are updated automatically through a USB3/Phocus connection. These settings are retained for about two consecutive weeks by a small rechargeable cell that is automatically recharged by the main battery or USB3 with regular use. www.hasselblad.com...
-
Page 184: Error Messages
The camera’s processor has now been reset. Remove battery and reinsert it. If the error message is still displayed, do as follows: 1 Write down the error message. 2 Contact your local Hasselblad dealer. Error message Error message 10000:1. Card Error CFast and SD card error message. -
Page 185: Change Language On Sensor Unit From Unknown Language
3 Navigate to the menu item with a Globe icon (number 7 on the list from the top, Language). 4 Scroll down to select your Language. Swipe right or press Menu / EXIT button to get back to Main Menu. www.hasselblad.com... -
Page 186: Clean The Lens Glass
This can cause damage to the equipment. If there is smear on the lens glass, do as follows: 1 If you are not sure how to remove the smear, contact your local Hasselblad Authorized Service Centre. 2 Clean the lens glass with a high quality lens cleaning solution on a tissue. -
Page 187: Clean The Sensor Unit Filter
(due to dust or similar). This can cause damage to the 1 Tear at the notch to break seal. equipment. Always contact your local Hasselblad Authorized 2 Remove an E-wipe from the package and fold the tissue to Service Centre. - Page 188 Victor Hasselblad AB. The H6D Product Images in this User Guide were not taken with a Hasselblad H6D. They are produced in 3D as visualization. They are used for illustrative purposes only and are not intended to represent the image quality produced by a Hasselblad H6D.
Need help?
Do you have a question about the H6D and is the answer not in the manual?
Questions and answers