Sign In
Upload
Download
Table of Contents
Contents
Add to my manuals
Delete from my manuals
Share
URL of this page:
HTML Link:
Bookmark this page
Add
Manual will be automatically added to "My Manuals"
Print this page
×
Bookmark added
×
Added to my manuals
Manuals
Brands
Hasselblad Manuals
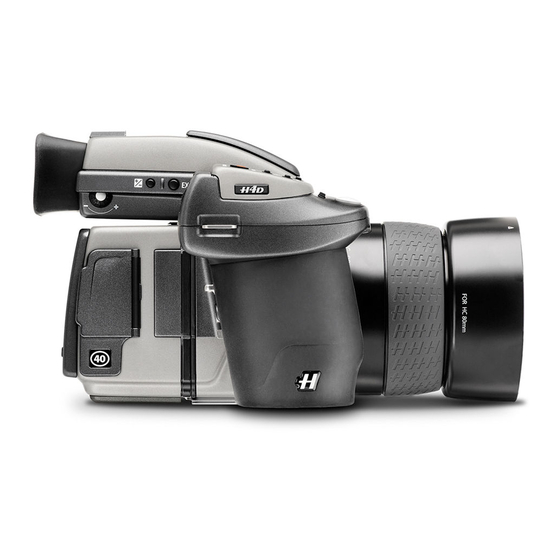
Digital Camera
H4D 40
User manual
Hasselblad H4D 40 User Manual
Hide thumbs
1
Table Of Contents
2
3
4
5
6
7
8
9
10
11
12
13
14
15
16
17
18
19
20
21
22
23
24
25
26
27
28
29
30
31
32
33
34
35
36
37
38
39
40
41
42
43
44
45
46
47
48
49
50
51
52
53
54
55
56
57
58
59
60
61
62
63
64
65
66
67
68
69
70
71
72
73
74
75
76
77
78
79
80
81
82
83
84
85
86
87
88
89
90
91
92
93
94
95
96
97
98
99
100
101
102
103
104
105
106
107
108
109
110
111
112
113
114
115
116
117
118
119
120
121
122
123
124
125
126
127
128
129
130
131
132
133
134
page
of
134
Go
/
134
Contents
Table of Contents
Bookmarks
Table of Contents
Table of Contents
Camera Body
General over View
View Finder
Introduction
True Focus
Instant Approval Architecture
Computer System Requirements
General Overview - Controls and Displays
But Ton Func Tions
Display Information
Grip Display
View F Inder Display
Digital Capture Unit Display
But Tons and Control - Details
Audio Feedback
Camera Body
Carrying Strap
Rechargeable Bat Ter y
Bat Ter y Charger
Charging the Battery
Rechargeable Battery Grip - General
Rechargeable Battery Grip - Precautions
Reserve Lithium-Battery Grip
Battery Life
Bat Ter y Status 23
Power
Standby
Viewfinder Screen
Accessory Connection
PC-Connector
Base Plate
Viewfinder
Par Ts & Components
Attaching And Removing The Viewfinder
Eyepiece Adjustment
Eye Cup
Integral Flash Unit
Lenses
Par Ts & Components
Attaching a Lens
Removing a Lens
Lens Cap
Filters
Lens Shades
Shutter and Aperture Control
Depth-Of-Field Calculation
Depth-Of-F Ield / Visual Preview
Infrared Focus Settings
Focus Assist
Manual Focus
Autofocus
Single
Continuous
True Focus
Light Metering & Exposure Control
ISO & White Balance Button
Metering Method
Exposure Method
Manual Exposure Mode
Automatic Exposure Mode
AE-L but Ton
Exposure Compensation/Quick Adjust
Profiles
6 Profiles 23
Making a Prof Ile 4
Using Prof Iles
DCU - Introduction
7 DCU - Introduction 46 23
Par Ts and Components
Over View of Menu System and Navigation
Over View of Menu Struc Ture
Description of Menu Items
DCU - Initial Settings
8 DCU - Initial Settings 53 26
Setting the Menu Language
Capture Storage
Capture Destination
Compac T Cards
Inserting a Card
Formatting
Tethered to a Computer
DCU - Getting Started
9 DCU - Getting Started 59 28
Settings Check
White Balance / Grey Balance
Media
Browsing Images
Basic Image Browsing
Zooming in and out
Zooming in for more Detail
Thumbnail Views
Preview Modes
Preview Modes
Histogram Mode
Full-Details Mode
Battery-Saver Mode
Full-Screen Mode
Overexposure Indicator
IA a - Instant Approval
Architecture
Using IAA
Default Approval Status
Browsing by Approval Status
Deleting by Approval Status
File Storage
Organizing Work with Batches
Creating a New Batch
Navigating Media and Batches
Deleting Images
Delete
Deleting Several Images from a Batch
Deleting Several Images from a Medium
Transferring Images
Settings
User Interface
Camera
About
Default
Custom Options
DCU - View Cameras
Custom Settings
General Overview of Camera Menu
Self Timer
Bracketing
Bracketing Setting
3 Interval
4 Settings
4.1 Custom Options
4.2 Image Info
Text Setting
4.3 Date & Time
4.4 System Status
Drive
Flash /Strobe
General
Integral F Lash
Flash Measure
Multi Shot
Optional Accessories
Appendix
True Exposure
P & P V Modes
Light Metering Sensitivit y
Technical Specifications
Care, Digital Capture Unit
Problems, Equipment Care and Ser Vice
Advertisement
Quick Links
Download this manual
H4D
User Manual
H4D 40
H4D 50
&
Table of
Contents
Previous
Page
Next
Page
1
2
3
4
5
Advertisement
Table of Contents
Need help?
Do you have a question about the H4D 40 and is the answer not in the manual?
Ask a question
Questions and answers
Related Manuals for Hasselblad H4D 40
Digital Camera Hasselblad H4D-200 MS User Manual
(142 pages)
Digital Camera HASSELBLAD H4D-40 - DATASHEET V3 Datasheet
(8 pages)
Digital Camera HASSELBLAD H4D-40 Datasheet
(8 pages)
Digital Camera HASSELBLAD H4D-40 - BROCHURE V6 Brochure
(8 pages)
Digital Camera HASSELBLAD H4D-40 Manual
H4d series (12 pages)
Digital Camera Hasselblad H4D-200MS User Manual
(5 pages)
Digital Camera Hasselblad H4D-200MS User Manual
(6 pages)
Digital Camera Hasselblad H4D-60 User Manual
Digital camera (140 pages)
Digital Camera Hasselblad H4D-200MS User Manual
(7 pages)
Digital Camera HASSELBLAD H4D-50 Datasheet
(8 pages)
Digital Camera HASSELBLAD H4D-50 - BROCHURE V3 Brochure
(8 pages)
Digital Camera HASSELBLAD H4D-60 - DATASHEET V4 Datasheet
(8 pages)
Digital Camera HASSELBLAD H4D-60 - DATASHEET V5 Datasheet
(8 pages)
Digital Camera HASSELBLAD H4D-60 Datasheet
(8 pages)
Digital Camera HASSELBLAD H4D-50MS - BROCHURE V2 Brochure
(8 pages)
Digital Camera HASSELBLAD H4D-31 - DATASHEET V1 Datasheet
(8 pages)
This manual is also suitable for:
H4d 50
Table of Contents
Save PDF
Print
Rename the bookmark
Delete bookmark?
Delete from my manuals?
Login
Sign In
OR
Sign in with Facebook
Sign in with Google
Upload manual
Upload from disk
Upload from URL


Need help?
Do you have a question about the H4D 40 and is the answer not in the manual?
Questions and answers