Table of Contents
Advertisement
Quick Links
Advertisement
Table of Contents

Related Manuals for Hasselblad H5X


Summary of Contents for Hasselblad H5X
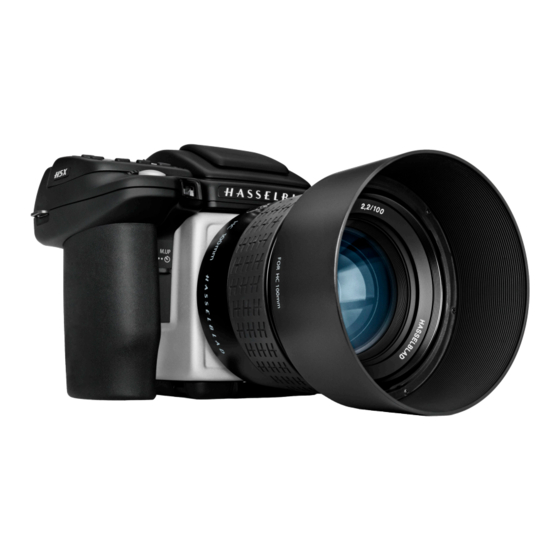
- Page 1 USER MANUAL...
-
Page 2: Introduction
INTRODUCTION... - Page 3 Correction, applied in Phocus at the file primarily at current H1, H2, H2F and H4F users wishing to upgrade to H5 capabilities, the H5X can naturally act as a editing stage, takes a discerning look at any colour backup for H5 users too. In short, you have access to a...
-
Page 4: Table Of Contents
Camera body but tons & controls Digital Using prof iles View f inder Format ting CF cards Changing a prof ile name Display over view Hasselblad work f low Grip display Flash /strobe Phocus View f inder display General Reassignable grip but tons ... -
Page 5: System Requirements
WARNINGS, RESTRICTIONS AND RECOMMENDATIONS • If you want to power the H5X from a PC laptop (as opposed to a Macintosh laptop), you must ensure that the FireWire port on the computer is capable of supplying power. Please note the following: Most recent Macintosh computers are compatible, both desktops and laptops. -
Page 6: Par Ts, Components, But Tons
PARTS, COMPONENTS, BUTTONS AND CONTROLS – OVERVIEW Focus Assist illuminator Mirror Up button Remote release port Stop Down button Battery grip True Focus button Card format button AE-L button button Camera strap lug Grip lever release button Battery grip locking lever Retaining bar Shutter release button Front scroll wheel... -
Page 7: Grip But Tons & Controls
Press the button for 1 second to activate the camera. unlock (this function can be altered to lock all controls The H5X start-up logo will appear and then the main or scroll wheels only in Custom Options #18 on grip). -
Page 8: Camera Body But Tons & Controls
CAMERA BODY BUTTONS AND CONTROLS - DESCRIPTION Note that some of the buttons can be re-assigned to another function. There are three control buttons on the rear of the grip. True Focus button At default setting, activates True Focus (see separate section for description) but also acts as a Zoom-in button when browsing or Selector button when making a setting change on the sensor unit, according... -
Page 9: Viewfinder
VIEWFINDER – (NOT INCLUDED) Hot shoe Exposure mode / metering mode button Connection for automatic flash unit (with SCA 3902 adapter) or for wireless flash connection. The EXP (Exposure) button accesses the exposure and metering mode options screen. Settings are made with Rubber eye cup the front and rear scroll wheels and the appropriate sym- Can be exchanged for another model. -
Page 10: Display Over View
GRIP DISPLAY – OVERVIEW TYPICAL GRIP DISPLAY Flash condition indication Focus setting White balance (No exposure compensation, (Manual setting) (Daylight) normal flash synchronisation) Shutter speed setting Aperture setting (1/125s) (f/8) ISO setting Exposure Value display (200 ISO) (EV 13.0) Capture counter Battery symbols Exposure mode indication Metering method... -
Page 11: Viewfinder Display
VIEWFINDER DISPLAY – OVERVIEW Typical viewfinder display. Note the LEDs will only be visible when activated (by the camera or a setting). Exposure method indication Aperture setting Exposure compensation Metering method (‘aperture priority’ mode) (f/5.6) setting reminder symbol setting (Centre weighted) Focus Assist LED Flash LED True Focus (all mod-... -
Page 12: Reassignable Grip But Tons
REASSIGNABLE GRIP BUTTONS - FUNCTION OPTIONS These four grip buttons by de- True Focus fault are assigned according to name but can be reassigned (in Custom Options #4, #5, #6 and AE-L #7 or by using the Camera Con- figuration tool in Phocus) to var- ious other functions listed here. -
Page 13: Shortcuts
SHORTCUTS Some buttons access shortcuts if used in different ways or contexts. 13 14 Shutter release button – Camera activation True Focus button – Camera activation Re-activates camera from Display Off mode. Re-activates camera from Display Off mode. Shutter release button – Quick save True Focus button –... -
Page 14: General
GENERAL Photo: Ken Hermann © / Hasselblad Masters... -
Page 15: Carrying Strap
RECHARGEABLE BATTERY GRIP The environmentally approved Battery grip Li-ion (3043356) is the standard power source for the H5X camera. The H5X requires a power supply for all actions as there is no me- chanical reserve facility. When working untethered, it is therefore advisable to keep a reserve rechargeable battery grip at hand. -
Page 16: Charging The Battery
CHARGING THE BATTERY With the battery removed from the camera, insert the jack N o t e plug from the battery charger into the socket on the battery grip. Insert the battery charger into a standard (100–240V~ It can take about 6 hours /50–60 Hz) domestic socket. -
Page 17: Battery Status
POWER MODES on the battery. This is the normal mode when transporting The H5X can be set at three active modes − ON, Display Off or storing the camera or where there might be a risk of inad- and Sleep. In these active modes, battery consumption is vertently activating the camera. -
Page 18: Viewfinder Screen
VIEWFINDER SCREEN The H5X is fitted with a Spherical Acute-Matte D viewfinder the viewfinder screen replacement indentation and press screen for extreme brightness, clarity and even illumina- downwards until the screen snaps into position. Try to avoid tion. An optional accessory screen with a grid pattern is also touching either surface of the screen with bare fingers. -
Page 19: At Taching /Removing The View F Inder
RUBBER EYE CUP Two rubber eye cups are available for the H5X. The one sup- plied is suitable for users who do not intend to use eyeglass- es when photographing. The second shorter eye cup is for those who either prefer to position their eye further from the viewfinder and those who wish to wear eyeglasses. -
Page 20: Hm 16-32 Film Magazine
HM 16-32 FILM MAGAZINE (OPTIONAL ACCESSORY) Photo: Denis Rouvre © / Hasselblad Masters... -
Page 21: Par Ts & Components
HM 16-32 FILM MAGAZINE (OPTIONAL ACCESSORY) The Hasselblad HM 16-32 film magazine is a sophisticated semi-independent unit within the H system. It has its own power supply for individual information storage, LCD panel, illumination, etc. It features: automatic 120/220 compatibility,... -
Page 22: Change Up / Down But Ton
CHANGE UP /CHANGE DOWN BUTTON Can alter the settings ‘upwards’. For example, to increase the film speed setting. Toggle action. Can alter the settings ‘downwards’. For example, to decrease the film speed set- ting. Toggle action. FUNCTION SELECTOR Selects the four functions that can be changed on the magazine. -
Page 23: Film Tab Holder
FILM TAB HOLDER Holds an ID tab from the film roll pack as a reminder of the type of film loaded. Remember to change it if you change film type! FILM HOLDER KEY Secures the film holder in the magazine. Fold out the key and turn counter-clock- wise 90°... -
Page 24: At Taching / Removing The Magazine
ATTACHING AND REMOVING THE MAGAZINE You cannot remove a magazine from the camera body if the magazine darkslide is not in place, (when the magazine darkslide indicator on the magazine shows white). Neither can you withdraw the magazine darkslide when the magazine is not attached to the camera. -
Page 25: Film Speed Set Ting/Barcode
FILM SPEED SETTING / BARCODE The film speed (ISO / ASA) can be set automatically or manu- ally. Automatic setting uses a Barcode (only some films have this feature, notably Fujifilm). This is the default setting. Film settings (ISO / film length) are automatic only if the magazine is set at Barcode automatic. -
Page 26: Data Imprint Setting
DATA IMPRINT SETTING Data imprinting can be activated or deactivated through the magazine menu. To access data setting: 1) Ensure the magazine settings lock is in the unlocked Manual film speed setting. 220 film length setting. position. 2) Press the button until the Data symbol appears. -
Page 27: Film Loading
FILM LOADING The film magazine can be loaded either on or off the cam- era. Regularly check the interior of the magazine and re- move dust, particles or any scraps of paper from previous rolls of film. Load and unload film magazines away from di- rect light sources. -
Page 28: Digital
DIGITAL Photo: Frank Meyl © / Hasselblad Masters... -
Page 29: Format Ting Cf Cards
(typically by way of Phocus) to obtain complete development. If developed in Phocus, 3FR files become Hasselblad 3F files – denoted by each file now bearing the suffix “.fff”. If developed by other RAW proces- sors, the 3FR files are not converted to 3F but can be exported directly to TIFF, PSD etc according to requirements. -
Page 30: Phocus
Phocus combines with Hasselblad Natural Color Solution the result is exactly what you would expect from Hasselblad – (HNCS) and Digital Auto Correction (DAC) to provide ultimate simply stunning image quality. -
Page 31: Lenses & Focus Modes
LENSES & FOCUS MODES Photo: Joachim Schmeisser © / Hasselblad Masters... -
Page 32: At Taching/Removing A Lens
ATTACHING A LENS REMOVING A LENS Depress the lens release button and Remove the front protective cover keep it depressed while rotating the on the camera body by depressing lens counter-clockwise until it stops and the lens release button and keep- lift it out. -
Page 33: Depth-Of-F Ield Preview
FOCUS ASSIST As well as the conventional view on the focusing screen to ensure a sharp image, the H5X also features an LED focus assist capability appearing as two arrowheads Lens focus setting too to the right of the viewfinder display (except for lenses with a maximum aperture far beyond the distance of f/6.7 or smaller). - Page 34 However, a warning is dis- played which disappears after confirmation. T i p To expand your range of lenses, consider using a CF adapter to allow you to use most of the lenses from the Hasselblad V- system.
-
Page 35: Manual Focus
MANUAL FOCUS There is both a Manual focus mode setting and a manual override capability. Front scroll Manual focus is a specific setting that you actively make, whereas manual over- wheel ride is always available as a temporary override of an autofocus setting. SAVE In Manual focus mode, focusing is carried out by rotating the focusing ring in the conventional manner. -
Page 36: Single Shot
SINGLE SHOT At Single Shot setting (AF S), the shutter release will be blocked until the camera finds the optimum focus setting. This ensures that no captures can be made that are not finely focused. However, this delay will normally be only a fraction of a second in good lighting conditions with a clear focusing pattern. -
Page 37: True Focus, Absolute Position Lock
True Focus uses yaw rate technology and by way of the Absolute Position Lock (APL) processor, logs camera movement as the basis for an extremely rapid compensatory focus reset without any shutter lag. The H5X’s firmware then further perfects the focus using the precise data retrieval system found on all HC/HCD lenses. -
Page 38: True Focus And Camera Handling
TRUE FOCUS AND CAMERA HANDLING To obtain the maximum benefit from True Focus you should ✘ try to work within the requirements of the system. This might need a little practice but it will improve the accuracy of the measurements and thereby provide better results. Firstly, try to remain as still as possible when making the first True Focus measurement and wait for the audio signal or ready light to show green again before continuing. -
Page 39: True Focus, Four Methods
FOUR TRUE FOCUS METHODS ACTIVATED BY SHUTTER RELEASE BUTTON – TRUE FOCUS RETAINED MENU > SETTINGS > CUSTOM OPTIONS > # 31 In this mode the autofocus function is effectively converted into the True Focus function. That is, focus is set by half-pressing the shutter release button. - Page 40 FOUR TRUE FOCUS METHODS – CONT ACTIVATED BY TRUE FOCUS BUTTON – AUTOFOCUS DEACTIVATED In this mode the True Focus function is activated by pressing the True Focus button. Normal autofocus is de-activated, therefore, pressing the shutter release button will not reset the focus. Useful when many shots are required with the same focus setting.
-
Page 41: Exposure Control
EXPOSURE CONTROL Photo: Joe Felzman © / Hasselblad Masters... -
Page 42: Iso & White Balance
ISO & WHITE BALANCE Front scroll wheel – presets and manual MAN. ISO/WB 1. Press ISO/WB. & SAVE FRONT scroll wheel to select ISO setting. 2. Turn the REAR scroll wheel to select WB (Daylight, 3. Turn the Shade, Cloudy, Flash, Fluorescent and Tungsten). -
Page 43: Exposure Setting Modes
EXPOSURE SETTING MODES In manual mode, aperture is set by the front scroll wheel and Exposure can be controlled either manually or by using one the shutter speed by the rear scroll wheel unless set other- of four automatic modes. These have the following designa- wise in Custom Options #26. - Page 44 AUTOMATIC EXPOSURE – A, S, P, PV Automatic exposure provides a choice of two ways of con- Programmed variable: Pv - This mode is very similar to trolling shutter speed and aperture settings semi-auto- Programmed, except with the additional parameters of lens matically and two ways fully automatically: focal length being automatically taken into account.
-
Page 45: Ae-L But Ton
above procedure and then turning the rear scroll wheel until Alternatively, you can also pre-set the initial zone reading in you see the new desired zone value in the viewfinder dis- order to save time and effort where there is no freely avail- play. -
Page 46: Fixed Exposure Compensation
FIXED EXPOSURE COMPENSATION SETTING Front scroll 1) Press the ‘±’ button on the viewfinder. wheel 2) Turn either the Front scroll wheel Rear scroll wheel on the grip to increase or decrease the amount Save of compensation in 1/3 EV steps. 3) The amount is displayed in the viewfinder as both an EV figure complete with a ‘minus’... -
Page 47: Menu
MENU Photo: Tom D. Jones © / Hasselblad Masters... -
Page 48: Navigating Menu And Set Tings
OVERVIEW OF NAVIGATING MENU AND SETTINGS Navigating the menu and accessing the settings on the grip is achieved by pressing the buttons surrounding the display and turning the scroll wheels. Note that some of the buttons are modal and so have several functions which is indicated by the designation that appears closest to that particular button when navigating. -
Page 49: Overview Of Menu
GENERAL OVERVIEW OF MENU Text setting Self timer options Bracketing options Interval Settings options options Custom Options System status Drive These arrows signify the FRONT scroll wheel is used to select these options. These arrows signify the REAR scroll wheel is used to make settings changes. -
Page 50: Self Timer
These provide the integral finess- es that make the H5X a powerful and sophisticated tool to satisfy a variety of professional demands. There are five functions: Self timer, Bracketing, Interval, Settings and Drive. - Page 51 SELF TIMER SETTING – continued Front scroll wheel 1) Press MENU on grip. ENTER 2) Turn Front scroll wheel until Self Timer appears. SAVE MENU 3) Press ENTER. Front 4) Turn scroll wheel to access the options, that are: Rear scroll wheel Delay Mirror sequence...
-
Page 52: Bracketing
BRACKETING options available 2 frames 3 frames 5 frames options available options available 1/3 EV 1/2 EV 1 EV 2 EV 3 EV The bracketing function provides an automatic series of cap- Note the difference in operation between Single and Con- tures;... - Page 53 Rear 7) In turn the scroll wheel to choose the amount of EV variation required: 3, 2, 1, 1/2, 1/3 EV. 8) Press SAVE. Sequence highlighted. Step highlighted. 1/3 EV variation chosen as option. ‘Standard, over, under’ 9) Press ENTER again from the Bracketing screen to activate chosen as option.
-
Page 54: Interval
INTERVAL options available 2 frames – 255 frames options available 2 seconds − 1 hour lance, nature study, etc. The exposure and focus settings (Man- By using the interval setting, you can allow the camera to ual or Auto) will be according to the camera settings at the time take a series of captures automatically over a set period. -
Page 55: Set Tings
SETTINGS > CUSTOM OPTIONS options available CUSTOM OPTIONS sub- settings you can access further items for setting chang- From the Settings screen you can access four main sub-set- es. Look at the main menu chart to get an idea of where all tings: Custom options, Image info, Date &... - Page 56 CUSTOM OPTIONS Stop down function The following is a description of all the Custom Options ac- • Stop Down cessible through the grip display. They are accessed by Menu but can be reassigned to: > Settings > Custom Options. The words and figures in red AF Drive •...
- Page 57 Generates Zone makes the camera behave in message on grip display if attempted. the same fashion as the Hasselblad 205FCC. That is, the central spot No allows the lens shutter and auxiliary is placed over a particular area of...
- Page 58 Rear wheel quick adjust 17 Interval & Self Timer • • No • Exit • Stay Allows rear scroll wheel to make a Allows either the Interval or Self rapid EV adjustment (or EV compen- Timer mode to remain active after sation) in auto-exposure mode.
- Page 59 Aperture control in Manual 26 Always return mirror • • Yes • Front wheel • Rear wheel Selects which scroll wheel changes Automatically lowers mirror again the aperture setting when in Manual for viewing at the end of every mir- ror-up sequence.
-
Page 60: Image Info
SETTINGS > IMAGE INFO In Image info you can compose your own combination of letters, words, symbols, etc to be included in the metadata. The same procedure is also used to change a Profile name. IMAGE INFO SETTING Front scroll wheel 1) Press MENU. -
Page 61: Image Info Tex T Set Ting
IMAGE INFO SETTING Here is an example of how to change existing text (in this case the word ‘Text’ to a copyright symbol plus a photogra- pher’s name -’Jens Karlsson’). See previous section 4.2 Im- age info for procedure description. 1) Start by accessing the Image info screen. -
Page 62: System Status
SETTINGS > SYSTEM STATUS Check component usage and general servicing information as follows: SYSTEM STATUS DISCLOSURE Front scroll wheel 1) Press MENU on grip. ENTER Front scroll wheel until Settings appears. 2) Turn the SAVE MENU 3) Press ENTER. 4) Turn the Front scroll wheel to access System Status. -
Page 63: Drive
DRIVE In Continuous mode, the camera automatically makes cap- There are two drive modes: Single and Continuous. In Single tures and makes ready for the next capture in a continuous mode, a capture is made when the shutter release button is manner as long as you maintain pressure on the shutter re- pressed and the camera is made ready for the next capture. -
Page 64: Profiles
PROFILES Photo: Vicente Ansola © / Hasselblad Masters... -
Page 65: Making A Profile
PROFILES Full auto: normal flash sync, autofocus (single), single drive, The profiles feature allows rapid access to pre-determined programmed exposure, centre weighted metering, -None combinations of settings that increase the speed and secu- rity of workflow. One example might be in a social situation Studio: normal flash sync, manual focus, single drive, manu- where there might be a need for formal outdoor portraiture al exposure, spot metering, - AF... -
Page 66: Using Profiles
USING PROFILES 1) From the main screen, click PROFILES on the grip and the profile screen will appear. ENTER 2) Use the scroll bar to go through the list and highlight the SAVE desired profile. PROFILES Load 3) Press (AF button). -
Page 67: Flash /Strobe
FLASH / STROBE Photo: Olivier Valsecchi © / Hasselblad Masters... -
Page 68: General
IR and similar wireless flash release devices are used. Victor Hasselblad AB can accept no responsibility whatsoever for accidents that might occur or damage caused when Hasselblad equipment is used in combination with third-party backs of any description. -
Page 69: Integral Flash
ACCESS TO CONTROLS Front scroll FLASH FLASH 1. Activate the camera and press the button once. wheel Front 2. Turn the scroll wheel to set the amount of com- pensation required: • from +3EV through -3EV • press to clear the setting quickly if required. -
Page 70: Flash Measure
SEPARATE FLASH UNIT CONNECTION Separate flash units can be electrically connected either by way of the hot shoe accessory holder (see previous warn- ings) on the top of the viewfinder or via a cord to the PC con- nection port on the left hand side of the camera body. -
Page 71: Accessories
ACCESSORIES Photo: Milosz Wozaczynski © / Hasselblad Masters... - Page 72 HC100 (including extension tubes) HV 90x / HVD 90x viewfinders HVM waist-level viewfinder Accessories H5X Camera Optional V system lenses CF lens adapter HV 90x-II viewfinder (not included) GIL GPS receiver – for use with H5D sensor units only...
- Page 73 HC LENS RANGE HCD 4.8/24mm HCD 4/28mm HC 3.5/35mm HC 2.8/80mm HC 2.2/100mm HC 3.5/50-IImm HC 3.2/150mm HC Macro 4/120-IImm HC 4/210mm HC 4.5/300mm HC 3.5–4.5/50–110mm HCD 4.0–5.6/35–90mm Most V system C type lenses with optional CF lens adapter...
-
Page 74: Optional Accessories
GIL (Global Image Locator) (3053300) Improves comfort and security with hand-held photography. Complete The Hasselblad GIL (3053300 ) pro- with quick plate H. vides automatic creation and storage of GPS information for all H-system digital cameras. The data is tagged... -
Page 75: Battery Adapter
13 mm, 26 mm and 52 mm. As the H5X has a TTL light metering system, exposure compensation is au- tomatic. Check www.hasselblad.com for further details about lens shades, endcaps, lens pouches etc or news of new accessories. -
Page 76: Appendix
APPENDIX Photo: Jon Lowenstein © / Hasselblad Masters... -
Page 77: Technical Specifications
Accessory connection Provided with two M5 threads and an electrical connector for accessories. Customization A large number of the H5X’s functions can be customized by the user to suit specific styles or situations through the built-in menu system. User interface Both basic and advanced functions are set using buttons and scroll wheels in conjunction with the grip display and viewfinder display. -
Page 78: Default Set Tings
DEFAULT SETTINGS (DEFAULT PROFILE) A (Aperture priority) GENERAL Exp.mode Centre weighted LM mode Exp. adjust AF-S Focus mode Drive mode Normal (beginning of exp.) Flash sync Flash adjust 10 sec SELF TIMER Delay Mirror up / Delay Sequence Mirror goes down Mirror mode BRACKETING Frames... -
Page 79: True Exposure
Therefore, when using flash/strobe as the main light speeds, e.g. 1/500s, the effect becomes clearly visible. As source, you should set True Exposure to OFF in Custom Hasselblad knows exactly how the shutters behave in HC Options #13 on grip. lenses, automatic compensatory measures in speed setting adjustments are therefore employed. -
Page 80: Problems, Equipment Care And Service
PROBLEMS, EQUIPMENT CARE & SERVICE Loss: Hasselblad equipment is much sought after and you should take The H5X is a very sophisticated camera that relies on much information obvious steps to prevent theft. Never leave it visible in an unattended being passed and processed to and from each modular back to produce car, for example. -
Page 81: Index
INDEX Fixed E xposure compensation Accessories Reassignable grip but tons Accessor y connec tion Flash /strobe Recommended CF cards (H5D only) Flash measure AE-L but ton Removing a lens Focus assist Appendix Removing/at taching sensor unit At taching /removing sensor unit Focus checking Rubber eyecup At taching /removing the view f inder... - Page 82 Victor Hasselblad AB. The images in this manual were not taken with a Hasselblad H5X. They are used for illustrative purposes only and are not intended to represent the image quality produced by a Hasselblad H5X.
Need help?
Do you have a question about the H5X and is the answer not in the manual?
Questions and answers