Table of Contents
Advertisement
Advertisement
Table of Contents

Subscribe to Our Youtube Channel
Related Manuals for Slaughter 6330


Summary of Contents for Slaughter 6330
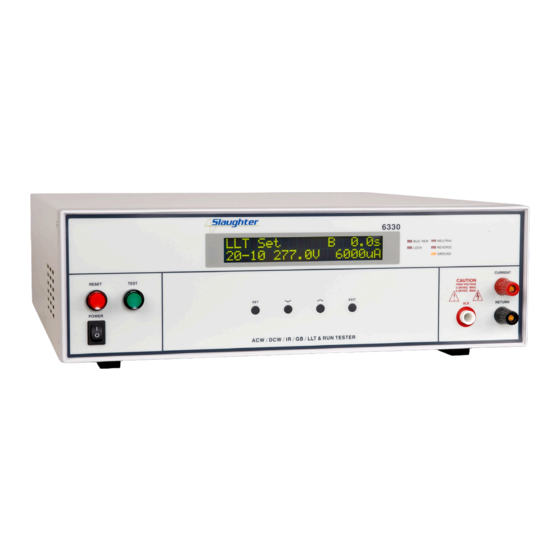
- Page 1 OPERATION AND SERVICE MANUAL Model 6330 MODEL 6330 (AC/DC HIPOT WITH IR, GROUND BOND, FUNCTIONAL RUN AND LINE LEAKAGE TESTERS) SERIAL NUMBER Models © Slaughter Company, Inc., 2014 28105 N. Keith Drive Lake Forest, Illinois, 60045-4546 6330 U.S.A. Item 99-10522-01 Ver 1.13...
-
Page 2: Declaration Of Conformity
DECLARATION OF CONFORMITY Manufacturer: Slaughter Company, Inc. Address: 28105 N. Keith Dr. Lake Forest, IL 60045 Product Name: AC/DC Hipot with IR, Ground Bond, Functional Run and Line Leakage Testers Model Number: 6330 Conforms to the following Standards: Safety: UL 61010-1:2012, UL 61010-2-030:2012 CAN/CSA-C22.2 NO. -
Page 3: Warranty Policy
Warranty Policy Slaughter Company, certifies that the instrument listed in this manual meets or exceeds published manufacturing specifications. This instrument was calibrated using standards that are traceable to the National Institute of Standards and Technology (NIST). Your new instrument is warranted to be free from defects in workmanship and material for a period of (1) year from date of shipment. -
Page 5: Table Of Contents
TABLE OF CONTENTS SECTION 1 OPERATORS MANUAL ................1 SAFETY ...........................2 INTRODUCTION ......................7 SPECIFICATIONS ......................13 CONTROLS ........................21 INSTALLATION ......................25 QUICK START ......................28 OPERATION .........................31 BUS REMOTE INTERFACE: RS-232 ................66 OPTIONS ........................75 SECTION 2 SERVICE MANUAL .................77 CALIBRATION ......................78 PARTS ..........................90... -
Page 7: Section 1 Operators Manual
SECTION 1 OPERATORS MANUAL... -
Page 8: Safety
SAFETY SAFETY PRECAUTIONS REQUIRED FOR HIGH VOLTAGE TESTING! GENERAL This product and its related documentation must be reviewed for familiarization with safety markings and instructions before operation. This product is a Safety Class I instrument (provided with a protective earth terminal). Before applying power verify that the instrument is set to the correct line voltage (115 or 230) and the correct fuse is installed. - Page 9 The instrument and its power cord, test leads, and accessories must be returned at least once a year to a Slaughter Company authorized service center for calibration and inspection of safety related components. Slaughter Company will not be held liable for injuries suffered if the instrument is not returned for its annual safety check and maintained properly.
- Page 10 SAFETY If benches are placed back-to-back, be especially careful about the use of the bench opposite the test station. Signs should be posted: "DANGER - HIGH VOLTAGE TEST IN PROGRESS - UNAUTHORIZED PERSONNEL KEEP AWAY." Power Dielectric Voltage-Withstand Test Equipment must be connected to a good ground. Be certain that the power wiring to the test bench is properly polarized and that the proper low resistance bonding to ground is in place.
- Page 11 SAFETY Do not perform Hipot tests in a combustible atmosphere or in any area where combustible materials are present. TEST OPERATOR Qualifications This instrument generates voltages and currents which can cause harmful or fatal electric shock and must only be operated by a skilled worker trained in its use. The operator should understand the electrical fundamentals of voltage, current, and resistance.
- Page 12 SAFETY When testing with DC, always discharge the capacitance of the item under test and anything the high voltage may have contacted--such as test fixtures--before handling it or disconnecting the test leads. HOT STICK probes can be used to discharge any capacitance in the item under test as a further safety precaution.
-
Page 13: Introduction
INTRODUCTION GLOSSARY OF TERMS (as used in this manual) Alternating Current, AC: Current which reverses direction on a regular basis, commonly in the U.S.A. 60 times per second, in other countries 50 times per second. Breakdown: The failure of insulation to effectively prevent the flow of current, sometimes evident by arcing. - Page 14 INTRODUCTION INTRODUCTION The importance of testing..User safety In an era of soaring liability costs, original manufacturers of electrical and electronic products must make sure every item is as safe as possible. All products must be designed and built to prevent electric shock, even when users abuse the equipment or bypass built- in safety features.
- Page 15 INTRODUCTION For example, a product designed to operate in the range between 100 to 240 volts can be tested between 1,000 to 4,000 volts, or higher. Most "double insulated" products are tested at voltages much higher than the "rule of thumb." Testing during development and prototype stages is more stringent than production line testing because the basic design of the product is evaluated.
- Page 16 INTRODUCTION AC testing disadvantages Again, since AC cannot charge the item under test, reactive current is constantly flowing. In many cases, the reactive component of the current can be much greater than the real component due to actual leakage. This can make it very difficult to detect products that have excessively high leakage current.
- Page 17 INTRODUCTION compensate for this fact, most safety agencies require that the equivalent DC test be performed at a higher voltage than the AC test. The multiplying factor is somewhat inconsistent between agencies, which can cause confusion. The Insulation Resistance Test..Some dielectric analyzers today come with a built-in insulation resistance tester.
- Page 18 INTRODUCTION Line Leakage tests use impedance models called measuring devices (MD’s) to measure how much leakage current is being produced by a DUT under several conditions: normal, reversed input polarity, open neutral, and open ground. Performing a Line Leakage test gives manufacturers the opportunity to know how much leakage current a user will be subjected to under a variety of different circumstances.
-
Page 19: Specifications
SPECIFICATIONS MODEL 6330 FUNCTIONAL SPECIFICATIONS Unless otherwise stated, accuracy's are relative to a laboratory standard measurement. INPUT 115 / 230V selectable, 10 variation Voltage 50 / 60 Hz 5% Frequency Fuse 6.3 A slow blow 250V AC... - Page 20 SPECIFICATIONS 100 – 1000 V DC Output Voltage Range: Resolution: (2 of reading + 5 V) Accuracy: 0 – 1000 V Voltage Display Range: Resolution: (2 of reading + 2 counts) Accuracy: Resistance Display Range: 1 - 1000 M (4 Digit, Auto Ranging) Resolution: 500VDC 1000VDC...
- Page 21 SPECIFICATIONS (0.1 + 0.05 sec) Accuracy: 0 – 100 m Milliohm Offset Range: Resolution: 1 m (2 of setting + 2 m Accuracy: FUNCTIONAL RUN TEST MODE DUT POWER AC Voltage 0 - 277.0 V, Single phase unbalanced, 0 - 30.0 A maximum Current 30 A maximum continuous Power Rating...
- Page 22 SPECIFICATIONS Rating Current 30 A maximum continuous Short Circuit current 50 A < 3 s , Inrush Current 180 A Response DUT Protection time 10 us. SETTINGS HI and LO Limit, uA Range 0-6000 uA, Resolution 1 uA, Hi-Limit 0=OFF Delay Time, second Range 0, 1.0-999.9 (0=continuous), Resolution 0.1 s.
- Page 23 Why use the term “Counts”? Slaughter publishes some specifications using COUNTS which allows us to provide a better indication of the tester’s capabilities across measurement ranges. A COUNT refers to the lowest resolution of the display for a given measurement range. For example, if the...
- Page 24 9. Storage of test program. The 6330 powers up with the same parameters that were used during the last test to avoid operator set up errors. 10. Output voltage fine adjustment.
- Page 25 16. Single Step Test Mode. In this mode, the 6330 can be configured to perform each test individually as a single step. This provides the manufacturers flexibility in configuring their testing procedure.
- Page 26 TEST and RESET keys. When disabled, the operator will be able to toggle between memory locations but not alter them. 23. Fail Stop ON/OFF Mode. This allows the 6330 to be configured to continue testing after detecting a failure. All pass/fail results are displayed at the completion of the test cycle.
-
Page 27: Controls
CONTROLS FRONT PANEL CONTROLS 1. RESET BUTTON: This is a momentary contact switch used to reset the instrument. If an out-of-range reading is detected during a test, the red failure lamp within the button will light. To reset the system for the next test, press and release this button. - Page 28 CONTROLS ) 11. UP ARROW ( : Use this key to increase the numeric values in the setup mode. This key is also used to toggle ON/OFF functions. Also may be used to increase output voltage during a test in 10-volt increments. 12.
- Page 29 Functional Run and Line Leakage testing. This input requires connection to a U.S. style single phase unbalanced power supply. 8. DUT POWER OUTPUT: Provides the line and neutral connections from the 6330 to the DUT during Functional Run and Line Leakage testing. Provides the high voltage connections to the DUT during ACW, DCW and IR testing if the DUT OUTPUT and DUT-HV parameters are turned ON.
- Page 30 CONTROLS 9. GND CONNECTION: This terminal is wired in parallel with the Current Output terminal during a Ground Bond test and may be used in place of the front panel connection. During a Line Leakage test this connection provides a connection to one side of the measuring device (MD).
-
Page 31: Installation
If the shipping carton is damaged, inspect the contents for visible damage such as dents, scratches, or broken meters. If the instrument is damaged, notify the carrier and the Slaughter Company customer support department immediately. Please save the shipping carton and packing material for the carrier’s inspection. Our customer support department will assist you in the repair or replacement of your instrument. - Page 32 INSTALLATION Contents of the Carton Inside the carton should be the following: Description SLA Part Number 6330 Hipot, Continuity, Ground 6330 Compliance Tester Bond, IR, Run and Line Leakage 102-055-913 High Voltage Lead (6ft.) 125-013-001 Input Power Cable (6ft.) Cable Assembly High Current...
- Page 33 Temperature....-40° - 167° F (-40° - 75°C) Altitude......50,000 feet (15,240 meters) The instrument should also be protected against temperature extremes which may cause condensation within the instrument. Field Installation of Options There are no field installable options on the model 6330.
-
Page 34: Quick Start
QUICK START QUICK START This Quick Start Guide assumes the operator has some familiarity with Hipot testing and desires to use the "default" settings on the instrument. The default settings shown will remain in memory unless you choose to override them with your own test program. The instrument default settings are as follows: DEFAULTS Input Voltage:... - Page 35 This test will check for the condition of the ram chips, pcb's and other critical components. In addition, you will see the Slaughter Company name, Model Number, and current software version briefly appear on the LCD readout and then clear itself.
- Page 36 QUICK START to a suitable known good ground before energizing this instrument and then connect the return lead first (black) to the test fixture or item followed by the high voltage output lead. f). Please check your connections to be sure they are making good contact and that the test station or area is clear of debris and other personnel.
-
Page 37: Operation
SETUP PROCEDURE 1. Memory configuration The model 6330 is equipped with 20 memory programs numbered 1 through 20. Each memory location contains 10 separate steps that can be connected sequentially to the next consecutive step. Only one test can be selected for each step. - Page 38 OPERATION 2. To select the Memory location Press the SET key once. The blinking underscore symbol appears directly under digit that represents memory location. The blinking cursor indicates that the parameter is being edited. The display shows: ACW Memory DCW Memory XXX.Xs XXX.Xs XX-XX X.XXkV XX.XXmA...
- Page 39 OPERATION To change the Test type on the model 6330, please press the SET key three times until the display shows: Mode = AC Mode = DC Mode = IR Mode = GND Mode = RUN Mode = LLT Press the Up () or Down () arrow keys to toggle the test selection between AC, DC, IR, GND, RUN, and LLT modes;...
- Page 40 OPERATION attempt to set the value above this limit will cause the instrument to signal an ERROR by producing two short beeps. 5.3. To set the Low Leakage Current Limit Press the SET key until the display shows: LO-Limit = XX.XXmA Use the Up () or Down () arrow keys to enter the leakage current low limit setting, then press the SET key to advance to the next parameter or press the EXIT key to store the setting and return to the test mode.
- Page 41 OPERATION Freq. = 60Hz Freq. = 50Hz Press the Up () or Down () arrow keys to toggle the frequency setting to 50 or 60 Hertz, then press the SET key to advance to the next parameter or press the EXIT key to store the setting and return to the test mode.
- Page 42 OPERATION 6.2. To set the High Resistance Limit Press the SET key until the display shows: HI-Limit = XXXXM Use the Up () or Down () arrow keys to enter the desired resistance high limit setting, then press the SET key to advance to the next parameter or press the EXIT key to store the setting and return to the test mode.
- Page 43 OPERATION 6.5. To set the DUT OUTPUT ON Press the SET key until the display shows: DUT Output = OFF DUT Output = ON Press the Up () or Down () arrow keys to toggle the DUT OUTPUT mode to ON or OFF, then press the SET key to advance to the first parameter or press the EXIT key to store the setting and return to the test mode.
- Page 44 OPERATION Use the Up () or Down () arrow keys to enter the desired value of the High or Low Limits resistance trip point then press the SET key to advance to the next parameter or press the EXIT key to store the setting and return to the test mode. The unit of measure is in milliohms with a range of 0m...
- Page 45 OPERATION Press the Up () or Down () arrow keys to toggle the frequency setting to 50 or 60 Hertz, then press the SET key to advance to the next parameter or press the EXIT key to store the frequency setting and return to the test mode. 7.6.
- Page 46 OPERATION Use the Up () or Down () arrow keys to enter the desired value of the High or Low Limits resistance trip point then press the SET key to advance to the next parameter or press the EXIT key to store the setting and return to the test mode. The unit of measure is 0 –...
- Page 47 OPERATION Note: The Delay timer in the Functional Run test mode differs from the Dwell timer in the Hipot mode. A judgment is not made until the Delay time has elapsed. Therefore, when the Delay time is set to zero Pass and Fail judgment or indications will not be made.
- Page 48 OPERATION Press the SET key until the display shows: Leakage-HI = XXXXuA Leakage-LO = XXXXuA Please use the Up () or Down () arrow keys to enter the desired value of the High or Low Limits resistance trip point then press the SET key to advance to the next parameter or press the EXIT key to store the setting and return to the test mode.
- Page 49 OPERATION Cross Agency Specification Application Reference Letter UL544NP, UL484, UL923, UL471, Non-Patient Medical Equipment UL867, UL697 IEC60990 Fig4 U2, IEC 60950-1, IT Equipment, Household IEC60335-1, IEC60598-1, Appliances, Luminaries, IEC60065, IEC61010 Laboratory Equipment UL2601-1, IEC60601-1 Medical Equipment External User configurable User configurable The Line Leakage test can be The selection is intended to be Frequency...
- Page 50 OPERATION 9.5. To set the Delay time Press the SET key until the display shows: Delay = XXX.Xs Use the Up () or Down () arrow keys to enter the desired delay time, then press the SET key to advance to the next parameter or press the EXIT key to store the setting and return to the test mode.
- Page 51 OPERATION 0.5 seconds. The maximum delay time setting is 999.9 seconds. Any attempt to set the value more than 999.9s or less than 0.0s will cause the instrument to indicate an ERROR by producing two short beeps. Note: The Delay timer in the Line Leakage mode differs from the Dwell timer in the Hipot mode.
- Page 52 RESET button will silence the alarm and reset the instrument. 10.4. Key Lock or Memory Lock setting The model 6330 is equipped with two different levels of lockout selection. The first selection is Key Lock. Within this selection, you can lockout all front panel control functions except TEST and RESET.
- Page 53 OPERATION To set the key Lock ON please press EXIT key once and then press the SET key until the display shows: Lock Use the Up () or Down () arrow keys to change the Lock setting to ON, then press the SET key to advance to the next parameter or press the EXIT key to store the setting and return to the test mode.
- Page 54 OPERATION 10.6. DUT-HV Set setting Press EXIT key once then press the SET key until the display shows: DUT-HV Setting = OFF DUT-HV Setting = ON Use the Up () or Down () arrow keys to change the DUT-HV setting, then press the SET key to advance to the next parameter or press the EXIT key to store the setting and return to the test mode.
- Page 55 OPERATION OPERATING PROCEDURES Instrument Connections If the instruments defaults are acceptable then be sure to connect the appropriate test leads to the device under test (DUT) or test fixture. Be sure to connect the safety ground (on the rear panel) to a suitable known good ground before energizing this instrument. Connect the return lead to the test fixture or the DUT first, followed by the high voltage lead.
- Page 56 OPERATION ACW Pass XXX.Xs or DCW Pass XXX.Xs XX-XX X.XXkV XX.XXmA XX-XX X.XXkV XX.XXmA The instrument is ready to perform another test. 1.3. If the operator elects to abort a test in process this can be accomplished by pressing the RESET button at anytime. The instrument will stop the test process immediately and the display will show: ACW Abort XXX.Xs...
- Page 57 OPERATION 2. Insulation Resistance Test Mode 2.1. To initiate a test press the TEST button on the front panel. The red High Voltage Arrow indicator will flash and the display will immediately show: IR Set XXX.Xs then IR Delay XX-XX XXXXV XXXXMΩ XXX.Xs XX-XX XXXXV XXXXMΩ...
- Page 58 OPERATION 2.5. If the insulation resistance does not exceed the low limit setting and is within the metering range the red RESET button will illuminate and an alarm will activate. The display will show: IR LO-Limit XXX.Xs XX-XX XXXXV XXXXMΩ To stop the alarm, please press the RESET button once.
- Page 59 OPERATION 3.4. If the resistance exceeds the metering range, the red RESET button will illuminate and the alarm will be activate. The display will show: If current X – X HI-Lmt XXX.Xs 3.0 – 10.0A XX.XA GND >510m If current X –...
- Page 60 OPERATION RUN Set XXX.Xs RUN Delay XXX.Xs XX-XX XX.XV XX.XA then XX-XX XX.XV XX.XA The instrument will continue to output the desired voltage for the duration of the selected Delay and Dwell times. Use the Up () or Down () arrow keys to bring up an alternate display screen while the test is running.
- Page 61 OPERATION 4.5. If the DUT input current exceeds the high limit setting or does not exceed the low limit setting, the red RESET button will illuminate and an alarm will activate. The display will show: RUN Amp-HI XXX.Xs RUN Amp-LO XXX.Xs XX-XX XX.XV XX.XA XX-XX XX.XV...
- Page 62 OPERATION XXX.Xs XXX.Xs XX-XX XX.XV XX.XA XX-XX XX.XV XX.XA To stop the alarm, please press the RESET button once. The alarm will stop and the display will retain the failure information. The instrument is now ready for the next test. If the RESET button is pressed again, the failure information will be cleared and the display will indicate the setting data of the test.
- Page 63 OPERATION XX-XX XXX.XV XXXXuA The instrument is ready to perform another test. 5.3. If the operator elects to abort a test in process this can be accomplished by pressing the RESET button at anytime. The instrument will stop the test process immediately and the display will show: LLT Abort XXX.Xs...
- Page 64 OPERATION 5.6. If there is a short circuit in the DUT during the test, the red RESET button will illuminate and an alarm will activate. The display will show: LLT Line-OC XXX.Xs XX-XX XX.XV XXXXuA To stop the alarm, please press the RESET button once. The alarm will stop and the display will retain the failure information.
- Page 65 When the EXIT key is pressed the instrument will continue with its normal failure indication process. The failure light and alarm can be cleared by pressing the RESET button. If Output Error occurs please call the Slaughter Company Customer Support Center at 1-800-504-0055 for assistance.
- Page 66 OPERATION CONNECTION OF REMOTE I/O Two 9-pin “D” type connectors are mounted on the rear panel that provides REMOTE- INPUT-OUTPUT control and information. These connectors mate with standard 9 pin D-sub-miniature connector provided by the user. The output mates to a male (plug) connector while the input mates to a female (receptacle) connector.
- Page 67 SIGNAL INPUTS OF REMOTE I/O and PROGRAMMED TESTS The model 6330 remote connector enables remote operation of the TEST, RESET, and REMOTE INTERLOCK functions, and allows the operator to select one of 6 preprogrammed tests.
- Page 68 REMOTE INTERLOCK The model 6330 is equipped with a featured referred to as “Remote Interlock”. Remote Interlock is a feature that utilizes a set of closed contacts to enable the instruments output. In other words, if the Interlock contacts open, the output of the instrument will be disabled.
- Page 69 Provided with the instrument are two 10 AWG output power leads (terminated on one end) that may be used to connect to the 6330’s DUT Power Out screw-mount terminals (line and neutral). These leads are left un-terminated at the other end and should be...
- Page 70 OPERATION The following diagram shows how to connect the stand alone test leads to the 6330 and to the device under test: 99-10469-01 LINE 99-10468-01 EARTH GROUND 99-10470-01 NEUTRAL AC SOURCE 99-10457-01 0-277VAC CHASSIS YOUR 99-10472-01 NEUTRAL TEST 99-10471-01 LINE...
- Page 71 OPERATION The adapter box (P/N 99-10467-01) may be used to perform Hipot, Ground Bond, Insulation Resistance, Functional Run, and Line Leakage tests. The adapter box is rated for a maximum of 20 Amps of input current. If current levels greater than 20 Amps are needed for either the Functional Run test or the Line Leakage test, the stand alone test leads must be used.
-
Page 72: Bus Remote Interface: Rs-232
Each command string should be terminated by the ASCII control code, New Line <NL>, or OAh. The following conventions are used to describe the commands syntax for the 6330. Braces ({ }) enclose each parameter for a command string. Triangle brackets (< >) indicate that you must substitute a value for the enclosed parameter. - Page 73 REMOTE BUS INTERFACE: RS-232 data must be separated with a space. All commands that end with a question mark (?) are query commands and require an IEEE-488 read command to retrieve the data from the device's output buffer. Test Execution Commands The following commands are used to control actual output voltage and current from the instrument.
- Page 74 REMOTE BUS INTERFACE: RS-232 The parameter values should use complete text and not use the coded values that are associated with the individual parameter setting commands. Such as "ON" and "OFF" and any toggle field that use words or phrases like "OPEN", "CLOSE". The LS? companion command will also list all parameters in complete text as they appear on the setting screen.
- Page 75 REMOTE BUS INTERFACE: RS-232 types however the input range may be different and therefore used a different possible set of values. Command Name Test Value Types ECC {1|0} Edit Step Connect 1= On, 0=Off ECC? EC < value > Edit Current 3.00 - 30.00A ECH <...
- Page 76 REMOTE BUS INTERFACE: RS-232 Command Name Test Value Types ELINE Edit Line Fault 1=Open Neutral, Normal {1|2|3|4|5|6|7|8} Condition Polarity, Open Ground ELINE? 2=Open Neutral, Reverse Polarity, Open Ground 3=Open Neutral, Normal Polarity, Closed Ground 4=Open Neutral, Reverse Polarity, Closed Ground 5=Closed Neutral, Normal Polarity, Open Ground 6=Closed Neutral, Reverse...
- Page 77 REMOTE BUS INTERFACE: RS-232 System Parameter Editing Commands and Companion Queries These commands are used to modify the system parameters for the instrument. These commands require a parameter value to be included with the command. Command Name Value SDH{1|0} DUT HV Setup ON/OFF 1=On, 0=Off SDH? SPR {1|0}...
- Page 78 *ESR?, *ESE, *ESE? and *STB?. Command Name Description *IDN? Identification Query SLA, Model Number, Serial Number, Firmware Revision *RST Reset Command Resets 6330 *TST? Self-Test Query 00H=OK 01H=TEST EEPROM ERROR *CLS Clear Status Command Clear Standard Event Status Register Clear Service Request Register *OPC...
- Page 79 REMOTE BUS INTERFACE: RS-232 0 = Power-on load previous enable registers *PSC? Power-on Status Clear Query *ESR? Standard Event Status Register Query 0 - 255 *ESE <value> Standard Event Status Enable value = 0 - 255 Command *ESE? Standard Event Status Enable Query 0 - 255 *STB? Read Status Byte Query...
- Page 80 REMOTE BUS INTERFACE: RS-232 Sets the power-on status clear bit. When set to 1 the Standard Event Enable register and Status Byte Enable registers will be cleared when power is turned ON. 0 setting indicates the Enable registers will be loaded with Enable register masks from non-volatile memory at power ON.
-
Page 81: Options
OPTIONS MODEL 6330 OPTIONS Introduction This section contains a list and descriptions of available factory installed options at the time of this printing. The list of options contains an option code number which can be referenced on the model option label on the rear panel of the unit when options are present. - Page 82 OPTIONS OPTIONS Option 01 Rack Mount Kit The optional rack mount kit allows for mounting the 6330 to a standard 19” rack. The instrument will take 3U’s of rack space. The rack mount kit includes: Component Qty. Description 99-10458-01 Handle Rack Mount 3U...
-
Page 83: Section 2 Service Manual
CALIBRATION SECTION 2 SERVICE MANUAL... -
Page 84: Calibration
"Certificate of Calibration". It is recommended that you have this instrument recalibrated and a safety check done at least once per year. Slaughter recommends you use "Calibration Standards" that are NIST traceable, or traceable to agencies recognized by NIST to keep this instrument within published specifications. - Page 85 CALIBRATION point, otherwise the instrument will output two short “beeps” and will not advance to the next calibration point. 1. To calibrate AC Voltage Please connect a standard 4000V AC Voltmeter to the HV and RETURN connectors. Then press the TEST button on the front panel. The instrument will provide around 4000VAC on the output connectors and the display will show: Voltage XXXXV...
- Page 86 CALIBRATION Press the Up () or Down () arrow keys to enter the reading of the standard DC Voltmeter into the instrument. Then press SET key to store the voltage setting and to advance to the next calibration point or press the RESET button to return to the calibration menu without changing the calibration setting.
- Page 87 CALIBRATION calibration menu without changing the calibration setting. Press the EXIT key to exit from the calibration mode and to return to the test mode. 6. To calibrate Insulation Resistance low range Please connect a 100k standard resistor across the HV and RETURN connectors. Press the Up () or Down () arrow keys until the display shows: 06.
- Page 88 CALIBRATION Load = 50M Please connect a 50M standard resistor across the HV and RETURN connectors. Then press the TEST button on the front panel. The instrument will execute automatic calibration process. The process does not require data entry. The instrument will provide around 1000VDC on the output connectors and the display will show: Automatic The instrument will output one short “beep”...
- Page 89 CALIBRATION Press the Up () or Down () arrow keys to enter the reading of the standard AC Voltmeter into the instrument. Then press SET key to store the voltage setting and to advance to the next calibration point or press the RESET button to return to the calibration menu without changing the calibration setting.
- Page 90 CALIBRATION Step 2: ACV 250V Input Then press the TEST button on the front panel. The display will show: Automatic Press the Up () or Down () arrow keys to enter the reading of the standard AC voltmeter into the instrument. Then press SET key to store the current setting and to advance to the next calibration point or press the RESET button to return to the calibration menu without changing the calibration setting.
- Page 91 CALIBRATION 14. RUN 8400W L=10Ω, V=220VAC Then press the TEST button on the front panel and the display will show: Power = XXXXW Press the Up () or Down () arrow keys to enter the reading of the power meter into the instrument.
- Page 92 CALIBRATION Then press the TEST button on the front panel and the display will show: Automatic Then press SET key to advance to the next calibration point or press the RESET button to return to the calibration menu without changing the calibration setting. Press the EXIT key to exit from the calibration mode and to return to the test mode.
- Page 93 CALIBRATION 19. To calibrate the Line Leakage test x16 Please connect a standard voltmeter and DC power supply in parallel to the DUT Input terminals. Place the power supply’s positive output (+) to the instrument’s Neutral terminal. Place the power supply’s negative output (-) to the instrument’s Ground terminal.
- Page 94 CALIBRATION Then press the TEST button on the front panel and the display will show: Current = XXXXuA Then press SET key to advance to the next calibration point or press the RESET button to return to the calibration menu without changing the calibration setting. Press the EXIT key to exit from the calibration mode and to return to the test mode.
- Page 95 CALIBRATION Then press the TEST button on the front panel and the display will show: Current = XXXXuA Then press SET key to advance to the next calibration point or press the RESET button to return to the calibration menu without changing the calibration setting. Press the EXIT key to exit from the calibration mode and to return to the test mode.
-
Page 96: Parts
CALIBRATION Replacement Parts List Model 6330 Rev: G 10/10/2014 ECO 5598-4, ECO5732 Part Number Qty. Ref. Designator Description Supplied Accessories 99-10460-01 OPTIONAL 3U Rack Mount Hardware 99-10106-01 Fuse 6.3A 250V Slow-Blow 20mm 102-055-913 High Voltage Cable 125-013-001 Cable Input Cord set USA... - Page 97 SCHEMATICS Part Number Qty. Ref. Designator Description 99-10530-01 RY4320 HV AC/DC Switch Board 99-10325-01 PWR7500 Input Voltage Select Board 99-10475-01 CON7500 Main Control Board 99-10476-01 CON7128 LLT Control Board 99-10477-01 MD7500 Measuring Device Board 99-10478-01 SW7128 LLT Switching Board 99-10583-01 RS232 RS232 Interface Board Part Number...
Need help?
Do you have a question about the 6330 and is the answer not in the manual?
Questions and answers