Table of Contents
Advertisement
Available languages
Available languages
Quick Links
See also:
Service Manual
THE HYBRID WATER PURIFIER USER MANUAL
MANUEL D'UTILISATION
POUR LE PURIFICATEUR D'EAU HYBRID
Congratulations on the purchase
of your water purifier
Félicitations pour l'achat de votre
purificateur d'eau
F-FWEG1-M-A-NT-**-***
Warning: Boil the water should the purification unit fail
Attention : en cas de défaillance de l'unité, faire bouillir l'eau
Advertisement
Table of Contents

Related Manuals for WaterLogic F-FWEG1-M-A-NT SERIES


Summary of Contents for WaterLogic F-FWEG1-M-A-NT SERIES
- Page 1 THE HYBRID WATER PURIFIER USER MANUAL MANUEL D’UTILISATION POUR LE PURIFICATEUR D’EAU HYBRID Congratulations on the purchase of your water purifier Félicitations pour l’achat de votre purificateur d’eau F-FWEG1-M-A-NT-**-*** Warning: Boil the water should the purification unit fail Attention : en cas de défaillance de l’unité, faire bouillir l’eau...
- Page 2 DECLARATION Waterlogic International Ltd 1. If any abnormal case occurs, firstly unplug 6. Children must not play with the appliance. the appliance. 7. If the supply cord or the detachable cord 2. This appliance is not intended for use by...
- Page 3 11. This appliance contains a UV-C emitter (UV lamp). 12. Unintended use of the appliance or damage to the housing may result in the escape of dangerous UV-C radiation. UV-C radiation may, even in little doses, cause harm to the eyes and skin. 13.
- Page 4 • O nly use authorised parts from the manufacturer to repair and service the unit • O nly use Waterlogic UV lamps and filters with the appliance, failure to do so will void the warranty • W hen the appliance has not been used for 3 hours or is idle, the UV lamp will turn on for 60 seconds at 3 hour intervals •...
- Page 5 CAUTIONS 1. O nly trained competent technicians should 6. Connect only to a circuit that is protected carry out repairs on the appliance by a ground-fault circuit-interrupter (GFCI) 2. Packing materials could present a trip 7. WARNING – Improper connection of hazard. Keep them off the floor and out of the appliance-grounding conductor reach of infants and small children can result in a risk of electric shock.
-
Page 6: Box Contents
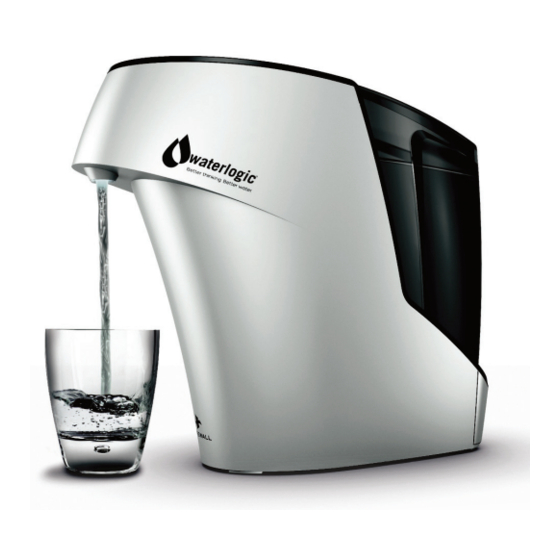
1. BOX CONTENTS 1.1 R emove the HYBRID from the box. To HYBRID UNIT avoid damaging the appliance DO NOT RESERVOIR LID use any sharp object to open the box RESERVOIR Please check the contents of the box and make sure that all items are present DISPENSING BUTTON The UV lamp and filter are pre-installed FAUCET and ready to use DRIP TRAY... - Page 7 2. SET-UP GUIDE IMPORTANT Check the unit for any damage, if the appliance is damaged then please return to the place of purchase Remove the protective cover from the end of the Firewall spiral Insert the plug into the mains socket. When the mains power is switched on the appliance will automatically go through a self check/test and once this...
- Page 8 Rinse the reservoir and then fill the reservoir from a potable water source. Do not overfill the reservoir. Re-fit the reservoir cover 2.6 0 Re-fit the reservoir to the appliance making sure it is firmly fitted...
- Page 9 Note: Should the machine fail or any of the components fail, and the water in your area is particularly hard, we recommend purchasing a Waterlogic de-scaling kit and de-scaling the unit x3-4 Repeat steps 2.4-2.7 three to four times (3x - 4x).
- Page 10 Replacement Parts: ANY OF THE COMPONENTS FAIL, Please make sure you use only original AND THE WATER IN YOUR AREA Waterlogic replacement parts. If you IS PARTICULARLY HARD, WE are not sure which replacement parts RECOMMEND PURCHASING A to use, please consult with your local...
- Page 11 Remove the top cover from the unit by slightly pushing it back and then lifting it up Disconnect the UV lamp connector by holding it and pressing in the clip on the connector and pulling it up To remove the UV lamp firmly pull it up and out.
- Page 12 Insert the new UV lamp while holding the white end caps only. Insert the UV lamp as shown in the illustration and push it all the way down until it cannot go any further CAUTION :- Do not use force when removing and inserting the UV lamp as you may damage internal parts :- Do not touch the UV lamp glass...
- Page 13 Fit the new filter assembly into the appliance as follows: 1. Insert the filter assembly back into its cradle, aligning the two male spigots with the female holes in the cradle 2. Push firmly until the filter sits snugly and is flush inside the cradle and with the cradle top surface 3.
- Page 14 3.10 Re-fit the top cover, making sure the front is attached first. If the top cover is not fitted correctly the unit will not switch on Hint: Fit the top cover making sure the front is pushed in place first and then push the back end with the screws down to give a snug fit Re-fit the two screws that hold...
-
Page 15: Button Functions
4. BUTTON FUNCTIONS When the appliance is in standby mode the button will be blue but when it is touched it will turn green and water will be dispensed Note: If the button is not touched within 2 minutes of being activated then it will automatically stop the flow of water and turn the pump off 4.2 Touch to STOP dispensing water. - Page 16 5. INDICATION AND WARNING ICONS Your product has been designed and internationally certified to the highest standards of water purification, and guarantees at all times, to dispense the purest and cleanest water. The self monitoring system will warn you of any potential risks, by way of 3 possible alarms. Once the Filter has reached 95% of its life, the Filter icon will flash as a reminder, and continue to flash until the filter has been replaced as per below.
-
Page 17: Troubleshooting
Waterlogic de-scaling kit and de-scaling the unit. 8. STORAGE Never store the appliance with water in the reservoir and always store it the correct way up in a dry environment. - Page 18 To return your used device, please use the WEEE compliance return and collection systems or contact the retailer where the product was purchased. They can take this product for environmental safe recycling. Manufactured by Qingdao Waterlogic Manufacturing Co., Ltd No 10 Jinling Road, Jinling Industrial Zone, Chengyang District, Qingdao, 266111, Shandong, P.R. CHINA 25042014v19 TEL: +86-532-87909132...
- Page 20 DÉCLARATION Waterlogic International Ltd 1. En cas d’anomalie, débranchez d’abord 6. Les enfants ne doivent pas jouer avec l’appareil. l’appareil. 2. Cet appareil n’est pas destiné à être utilisé 7. S i le cordon d’alimentation ou cordon par des personnes (notamment des amovible est endommagé, il doit être enfants) ayant des capacités physiques,...
- Page 21 11. Cet appareil contient un émetteur UV-C (lampe UV). 12. L’utilisation non conforme de l’appareil ou un boîtier endommagé peut entraîner la fuite de rayons UV-C dangereux. Le rayonnement UV-C peut, même à petites doses, être dangereux pour les yeux et la peau.
- Page 22 • N ’utilisez que des pièces autorisées par le fabricant pour réparer et entretenir l’unité • N ’utilisez que des lampes UV et filtres Waterlogic avec l’appareil, le non-respect de cette précaution annulera la garantie • L orsque l’appareil n’a pas été utilisé pendant 3 heures ou est à l’arrêt, la lampe UV s’allumera pendant 60 secondes toutes les 3 heures •...
- Page 23 CONSEILS 1. S euls des techniciens compétents qualifiés 6. Connecter uniquement à un circuit protégé doivent effectuer les réparations sur par une mise à la un défaut à la terre de l’appareil circuit (GFCI) 2. Les matériaux d’emballage peuvent 7. AVERTISSEMENT – Un mauvais présenter un risque de trébuchement.
-
Page 24: Contenu De La Boîte
1. CONTENU DE LA BOÎTE 1.1 R etirez le HYBRID de la boîte. Pour éviter UNITÉ HYBRID d’endommager l’appareil NE PAS utiliser COUVERCLE DU RÉSERVOIR d’objet pointu pour ouvrir la boîte RÉSERVOIR Veuillez vérifier le contenu de la boîte et assurez-vous que tous les éléments sont BOUTON DE DISTRIBUTION présents ROBINET La lampe UV et le filtre sont pré-installés PLATEAU ÉGOUTTOIR et prêts à... -
Page 25: Guide D'installation
2. GUIDE D’INSTALLATION IMPORTANT Vérifiez l’unité, si l’appareil est endommagé veuillez alors le retourner au lieu d’achat Retirez le couvercle de protection de l’extrémité de la spirale pare-feu Insérez la fiche dans la prise secteur. Lorsque l’alimentation secteur est allumée sur l’appareil, un auto contrôle / test est automatiquement mis en marche et une fois cette opération terminée le bouton bleu s’allume... - Page 26 Rincez le réservoir et remplissez-le d’eau potable. Ne pas trop remplir le réservoir. Replacez le couvercle du réservoir 2.6 0 Replacez le réservoir sur l’appareil en vous assurant qu’il est fermement installé fitted...
- Page 27 Remarque: Si la machine ou l’un quelconque des éléments tombe en panne, et l’eau de votre région est particulièrement dure, nous vous recommandons d’acheter un kit de détartrage Waterlogic et de détartrer l’unité x3-4 Répétez les étapes2.4 à 2.7 trois à quatre fois (3x - 4x). Ceci permettra de purger le carbone du nouveau filtre Une fois l’étape...
- Page 28 PARTICULIÈREMENT DURE, NOUS d’origine Waterlogic. Si vous avez un VOUS RECOMMANDONS D’ACHETER doute quant aux pièces de rechange UN KIT DE DÉTARTRAGE WATERLOGIC à utiliser, veuillez consulter votre ET DE DÉTARTRER L’UNITÉ concessionnaire ou distributeur Waterlogic local Détachez le réservoir d’eau du corps principal de l’appareil.
- Page 29 Retirez le couvercle supérieur de l’appareil en appuyant dessus légèrement vers l’arrière, puis soulevez vers le haut Débranchez le connecteur de la lampe UV en maintenant et appuyant sur le clip du connecteur tout en le soulevant vers le haut Pour retirer la lampe UV tirez fermement vers le haut.
- Page 30 Insérez la nouvelle lampe UV en la tenant uniquement par l’extrémité blanche. Insérez la lampe UV comme indiqué sur l’illustration et poussez-la à fond vers le bas jusqu’à ce qu’elle soit bien emboîtée AVERTISSEMENT :- Ne forcez pas lorsque vous retirez ou replacez la lampe UV car vous risquez d’endommager les pièces internes :- Ne touchez pas la surface en...
- Page 31 Montez le nouvel filtre dans l’appareil comme suit: 1. Replacez l’ensemble filtre dans son logement, en alignant les deux ergots mâles avec les trous femelles dans le logement 2. Appuyez fermement jusqu’à ce que le filtre soit bien installé et encastré dans le logement et aligné...
- Page 32 3.10 Replacez le couvercle supérieur, en vous assurant que la face avant soit fixée en premier. Si le couvercle supérieur n’est pas bien installé correctement l’appareil ne fonctionnera pas Astuce: Montez le couvercle supérieur en veillant à ce que l’avant soit placé en premier puis enfoncez l’extrémité arrière de la vis vers le bas pour un ajustement serré...
-
Page 33: Fonction Des Boutons
4. FONCTION DES BOUTONS Lorsque l’appareil est en mode veille, le bouton sera bleu, mais lorsqu’il est activé, il devient vert et l’eau s’écoulera Remarque: Si le bouton n’est pas enfoncé 2 minutes après avoir été activé, le débit de l’eau sera automatiquement arrêté et la pompe s’éteindra Touchez pour ARRÊTER la distribution de l’eau. - Page 34 5. ICÔNES ET INDICATION D’AVERTISSEMENT Votre produit a été conçu et certifié au niveau international selon les normes les plus élevées de purification de l’eau, et il garantit à tout moment une distribution d’eau pure et propre. Le système d’auto-surveillance vous avertit des risques éventuels au moyen de 3 alarmes. Lorsque le filtre a atteint 95% de sa durée de vie, l’icône du filtre clignote et continue à...
-
Page 35: Dépannage
à base d’alcool ou des matières abrasives sur une partie quelconque du produit. Si la machine ou l’un quelconque des éléments tombe en panne, et l’eau de votre région est particulièrement dure, nous vous recommandons d’acheter un kit de détartrage Waterlogic et de détartrer l’unité. 8. STOCKAGE Ne rangez jamais l’appareil avec de l’eau dans le réservoir et conservez-la toujours correctement dans un environnement sec. Si l’appareil n’a pas été utilisé pendant plus de 3... -
Page 36: Mise Au Rebut
DEEE. produit a été acheté. Ils peuvent récupérer ce produit pour le recycler tout en respectant l’environnement. Fabriqué par Qingdao Waterlogic Manufacturing Co., Ltd No 10 Jinling Road, Jinling Industrial Zone, Chengyang District, Qingdao, 266111, Shandong, P.R. CHINE 25042014v19 TÉL : +86-532-87909132...
Need help?
Do you have a question about the F-FWEG1-M-A-NT SERIES and is the answer not in the manual?
Questions and answers