
Subscribe to Our Youtube Channel
Related Manuals for WaterLogic Countertop Pure K-FU-00S20-00C1L-13-0-XXX


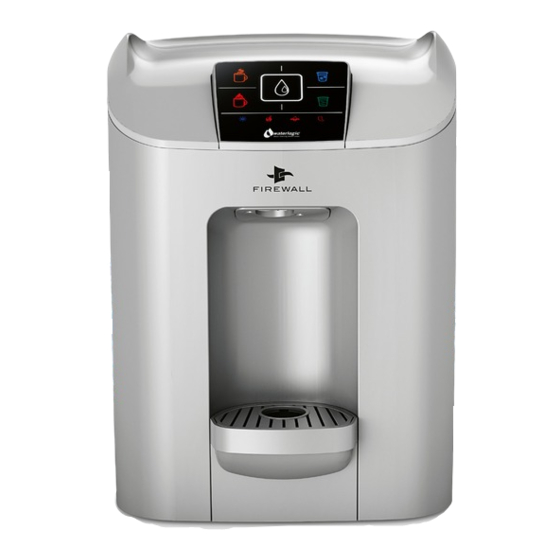
Summary of Contents for WaterLogic Countertop Pure K-FU-00S20-00C1L-13-0-XXX
- Page 1 Waterlogic® Countertop Service Guide Waterlogic® Countertop Pure Kit K-FU-00S20-00C1L-13-0-XXX (includes sediment filters FT-0003-L00-XXX, carbon filter FT-0006-L00-XXX, UV lamp CT-2090-C) Only for use with Waterlogic® Countertop F-FWCU1-M-HCA-TT-XX-YY2...
-
Page 2: Table Of Contents
Your Guide Thank you for purchasing the Waterlogic® Countertop Pure Kit. Please read this manual before servicing the Countertop machine. Index Declarations Box contents 12 month servicing guide Product disposal Performance Data Sheet... -
Page 3: Declarations
18. Follow proper grounding safety precautions and instructions prior to plugging in appliance. 19. WARNING: Boil the water should the purification unit fail. 20. Note: Flush 2 liters of water from the system after a system failure. Waterlogic® Countertop Service Guide - Version 1, May 2015... -
Page 4: Box Contents
Box Contents IN THE COUNTERTOP PURE KIT BOX YOU WILL FIND: 1. Waterlogic® sediment filter 2. Waterlogic carbon block filter (CBC) 3. Waterlogic® Firewall® UV bulb... - Page 5 & lead reduction capabilities, and a 13 Watt UV-C lamp, that requires periodoc replacement (annually, in most cases). Please ensure you purchase only original Waterlogic replacement parts sold in the US. Part numbers: • The Countertop Pure Kit which is sold in the US: K-FU-00S20-00C1L-13-0-XXX •...
-
Page 6: Month Servicing Guide
• During the 12 month service it is recommended you de-scale the hot tank in order to remove any calcium build up inside the tank, just like you would a kettle. Please use the Waterlogic Countertop De-scaling Kit. If you do de-scale the machine, please do so prior this service procedure •... - Page 7 1.4 Turn off the red and green power switches at the back of the Countertop to the ‘0’ position and remove the power lead from the wall socket and machine (see picture B) Waterlogic® Countertop Service Guide - Version 1, May 2015...
- Page 8 1.5 Remove the top cover from the machine by placing your hands on the top of it, pushing it backwards (step 1) and lifting it upwards (step 2) (see picture C). You may be required to remove two screws at the back of the machine to enable you to remove the top cover (this is dependant on the machine model) Note: you may need to move the machine from under wall units to allow access.
- Page 9 2.4 Push the filter firmly into place until the filter sits snugly and is flush with the cradle top surface then lock the filter into place by closing the locking lever until it ‘clicks’ into place (see picture G) Waterlogic® Countertop Service Guide - Version 1, May 2015...
- Page 10 3. REPLACING THE SEDIMENT FILTER 3.1 Insert your finger into the loop at the top of the sediment filter (the one which is closer to the back of the machine) and pull it up until it is in the vertical position (see picture H) Sediment filter (some machines may not have this option, due to better water conditions in some regions)
- Page 11 4.2 Disconnect the UV lamp connector by pressing in the clip on the side of the connector (step 1) and pulling the connector towards the front of the machine (step 2) (see picture N) Step 1 Step 2 Waterlogic® Countertop Service Guide - Version 1, May 2015...
- Page 12 4.3 Holding onto the white end cap of the UV lamp, pull firmly upwards to remove the lamp. Make sure you do not pull the lamp out at an angle, as you may risk breaking or damaging the machine’s internal components (see picture O) UV lamp 4.4 Take the new UV lamp and insert it into the same position at the front of the machine where the old lamp was positioned, making sure you hold the lamp only...
- Page 13 Hand tighten only. Step 1 Step 2 4.8 Reconnect the power lead into the back of the machine and then insert the plug into the wall socket (see picture T) Waterlogic® Countertop Service Guide - Version 1, May 2015...
- Page 14 4.9 Turn on the red power switch on the back of the machine to the “I” position. Turn on the red switch 5. FLUSHING THE NEW FILTERS 5.1 Turn on the incoming water supply at the isolation point. 5.2 Place your container in the machine’s dispense area for the flushing process (see picture V).
- Page 15 7.1 To reset the filter timer, hold down the hot and cold icons simultaneously for 10 seconds, until the appliance “beeps”. If the filter warning indicator was lit, it should disappear at this stage. Waterlogic® Countertop Service Guide - Version 1, May 2015...
-
Page 16: Product Disposal
Hand it in at an official collection point for recycling. ROHS All Waterlogic machines comply with EC Directive (2002/95/EC) on the Restriction of the Use of Certain Hazardous Substances in Electrical and Electrical Equipment (RoHS). -
Page 17: Performance Data Sheet
8.5) Particulate >/=10,000 Class I (>=0.5 >=85% reduction 97.9% 94.9% particles/ml particles/ml particles/ml um to <1 um) Tested using flow rate=0.5 GPM; pressure=60 psi; pH=7.5 ± 0.5; temp.=20 ± 1.0 °C. Waterlogic® Countertop Service Guide - Version 1, May 2015... - Page 18 • Replace UV lamps every 12 months, or when the UV intensity is lower than required. • Install in compliance with state and local laws and regulations. Manufactured by Qingdao Waterlogic Manufacturing Co., Ltd No 10 Jinling Road, Jinling Industrial Zone, Chengyang District, Qingdao, 266111,...
- Page 19 Waterlogic is absolved of any and all liability for any use of the product. In the event of defect or non-conformity, buyer shall promptly...
- Page 20 We hope you love drinking good water as much as we do. Please let us know your thoughts by email to goodwater@waterlogic.com To speak to a Water Expert, please refer to your Guarantee and After-sales service card for contact details.
Need help?
Do you have a question about the Countertop Pure K-FU-00S20-00C1L-13-0-XXX and is the answer not in the manual?
Questions and answers