Table of Contents
Advertisement
SERVICE MANUAL
EN
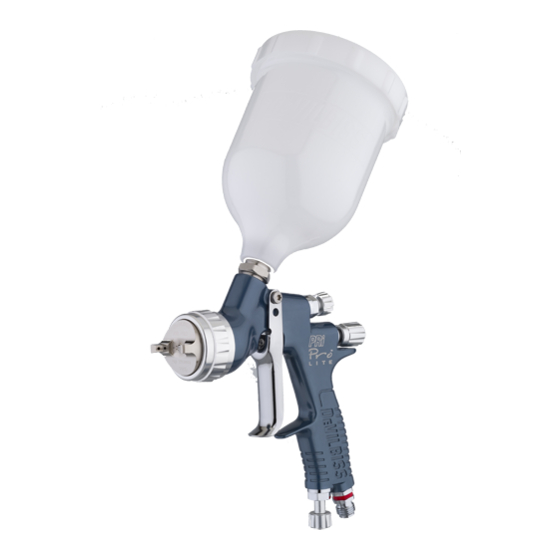
DEVILBISS PRI Pro Lite
High Efficiency
Gravity Spray Gun
II 2 G X
IMPORTANT! DO NOT DESTROY
It is the Customer's responsibility to have all operators and service personnel read and understand
this manual.
Contact your local DeVilbiss representative for additional copies of this manual.
READ ALL INSTRUCTIONS BEFORE OPERATING THIS DEVILBISS PRODUCT.
1/24
SB-E-2-859 R1.1
Advertisement
Table of Contents

Related Manuals for DeVilbiss PRI Pro Lite


Summary of Contents for DeVilbiss PRI Pro Lite
- Page 1 IMPORTANT! DO NOT DESTROY It is the Customer's responsibility to have all operators and service personnel read and understand this manual. Contact your local DeVilbiss representative for additional copies of this manual. READ ALL INSTRUCTIONS BEFORE OPERATING THIS DEVILBISS PRODUCT. 1/24...
-
Page 2: Functional Description
FUNCTIONAL DESCRIPTION The PRi PRO Lite spray gun is a professional quality gun designed with EPA compliant, High Efficiency technology. High Efficiency complies with EPA by obtaining transfer efficiency above 65%. SPECIFICATIONS AIR INLET PRESSURES P1 = Max Static Air Input Pressure... - Page 3 Product Description / Object of Declaration: PRi Pro Lite™ This Product is designed for use with: Solvent and water based materials Suitable for use in hazardous area: Zone 1 / Zone 2 Protection Level: II 2 G X Notified body details and role:...
- Page 4 In this part sheet, the words WARNING, CAUTION and NOTE are used to emphasise important safety information as follows: WARNING CAUTION NOTE Hazards or unsafe practices which could result in Hazards or unsafe practices which could result in Important installation, operation or maintenance severe personal injury, death or substantial minor personal injury, product or property information.
-
Page 5: Fluid Tip
PRi Pro Lite GUN PART NUMBER FORMAT & PART SELECTION GUIDE PRILT PR10 Gravity FLUID TIP Size See table 2 AIR CAP PR10 High Efficiency See table 1 TABLE 1 PRi Pro Lite™ AIR CAP PERFORMANCE GUIDE Recommended Air Inlet Air Cap &... -
Page 6: Exploded View
EXPLODED VIEW 6/24 SB-E-2-859 R1.1... -
Page 7: Parts List
PARTS LIST REF. PART No. DESCRIPTION QTY. RETAINING RING SLIP RING RETAINING RING SEAL PRO-420-K RETAINING RING SUB ASSEMBLY AIR CAP JGA-156-K5 SPRING CLIP (KIT OF 5) SEE TABLE AIR CAP & RETAINING RING SEE TABLE FLUID TIP SN-41-K BAFFLE PLATE SPRAYHEAD SN-18-1-K2 GASKET (KIT OF 2) -
Page 8: Service Parts
PARTS LIST (Continued) REF. PART No. DESCRIPTION QTY. SN-26-K4 COLOUR ID RING KIT (4 COLOURS) SN-9-K AIR INLET TRIGGER SCREW TRIGGER TRIGGER STUD SP-617-CR-K TRIGGER STUD & SCREW KIT VALVE BODY SPREADER VALVE ADJUSTING KNOB PRO-406-K SPREADER VALVE ASSEMBLY KGP-5-K5 FILTER (KIT OF 5) GRAVITY CUP GFC-402... -
Page 9: Start-Up Sequence
(pH 6 to 8). • The gun is not designed to be cleaned within an ultrasonic bath. If there is any doubt regarding the suitability of a specific material, contact your DeVilbiss Distributor or DeVilbiss direct. START-UP SEQUENCE Connect the gun to a clean, moisture and oil free air supply using a conductive hose of at least 8mm I.D. - Page 10 NOTE Depending on hose length, larger I.D. hose may be required. Install an air gauge at the gun handle. When gun is triggered on, adjust regulated pressure as required. Do not use more pressure than is necesarry to atomise the material being applied. Excess pressure will create additional overspray and reduce transfer efficiency.
- Page 11 DISASSEMBLY TIP & NEEDLE NOTE When replacing the fluid tip or fluid needle, replace tip, needle and fluid packing at the same time. Using worn parts can cause fluid leakage. Do not overtighten. CAUTION To prevent damage to fluid tip or fluid needle, be sure to either: Pull the trigger and hold while tightening or loosening the fluid tip, or, Remove the fluid adjusting knob to relieve spring pressure against needle collar.
- Page 12 DISASSEMBLY AIR VALVE 12/24 SB-E-2-859 R1.1...
- Page 13 ASSEMBLY AIR VALVE SEALS 13/24 SB-E-2-859 R1.1...
- Page 14 DISASSEMBLY PACKING (12/24) DISASSEMBLY AIR VALVE SPREADER VALVE REPLACEMENT 14/24 SB-E-2-859 R1.1...
-
Page 15: General Faults
TROUBLESHOOTING MECHANICAL PERFORMANCE GENERAL FAULTS CAUSE CORRECTION No air pressure at gun. Check air supply and air line. Will not spray. Fluid needle adjustment knob Open fluid needle adjustment not open enough. knob. Check fluid tip/needle selection Incorrect needle fitted to gun. chart and fit correct item. - Page 16 When removing air cap from retaining ring, do not remove the ring seat from the retaining ring. Damage to the parts may occur. Simply wipe parts clean and reassemble with new or clean air cap. FLUID FAULTS CAUSE CORRECTION Fluid tip internal seat scored Replace.
-
Page 17: Air Faults
AIR FAULTS CAUSE CORRECTION Remove Air Valve Stem and Air Valve Stem contaminated thoroughly clean valve shaft and and not correctly seating. seating surfaces. Small air leak from air cap when gun is not triggered. Air Valve Stem seal damaged or Replace. - Page 18 TROUBLESHOOTING SPRAY PERFORMANCE CONDITION CAUSE CORRECTION Heavy top or bottom pattern. Material build-up on air cap, Soak cap or tip in suitable plugged horn holes, centre holes solvent and thoroughly clean. or jets. Material build-up on fluid tip Replace fluid tip or air cap if exterior or partially plugged fluid necesarry.
- Page 19 Heavy centre pattern. Pattern adjustment valve set too Turn out counter clockwise to low. achieve correct pattern. Reduce fluid flow by turning fluid Too much material. needle adjusting screw clockwise. Reduce fluid pressure. Material too thick. Thin to correct consistency. Atomising air pressure too low.
- Page 20 Ball end heavy pattern. Change fluid tip for smaller size Too much fluid flow. or change air cap for different specification air cap. Too much atomisation air Reduce air pressure. pressure. Excessive bounce-back. Check distance (normally 150- Gun too far from surface. 200mm).
- Page 21 DIMENSIONS 21/24 SB-E-2-859 R1.1...
- Page 22 NOTES 22/24 SB-E-2-859 R1.1...
- Page 23 NOTES 23/24 SB-E-2-859 R1.1...
-
Page 24: Warranty Policy
© 2016 Carlisle Fluid Technologies,Inc., dba Finishing Brands. All rights reserved. DeVilbiss is part of Finishing Brands, a global leader in innovative spray finishing technologies. For technical assistance or to locate an authorised distributor, contact one of our international sales and customer support locations below.
Need help?
Do you have a question about the PRI Pro Lite and is the answer not in the manual?
Questions and answers