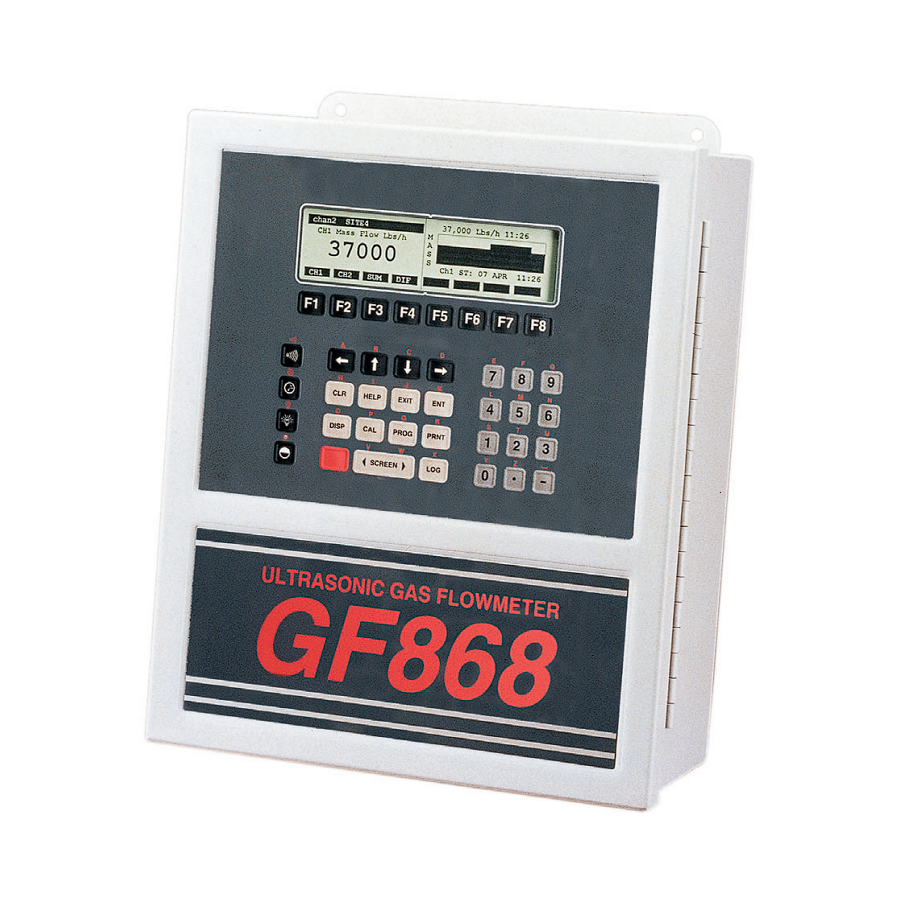
Panametrics GF868 Programming Manual
Ultrasonic flowmeter for flare gas 2-channel
Hide thumbs
Also See for GF868:
- Programming manual (153 pages) ,
- Programming manual (107 pages) ,
- Service manual (68 pages)
Table of Contents
Advertisement
Advertisement
Table of Contents

Related Manuals for Panametrics GF868


Summary of Contents for Panametrics GF868
- Page 1 Model GF868 Programming Manual (Two-Channel)
- Page 2 12/1/99 Process Control Instrument Division Model GF868 Ultrasonic Flowmeter for Flare Gas (2-Channel) Programming Manual 910-194P2A...
-
Page 3: Table Of Contents
12/1/99 Table of Contents Chapter 1: Programming Site Data Introduction ..............1-1 Using the Keypad . - Page 4 12/1/99 Table of Contents (cont.) Chapter 3: Logging Data Introduction ..............3-1 The STD Sub-Menu .
- Page 5 Checking the GF868 Baud Rate ........
- Page 6 Chapter 1...
- Page 7 Programming Site Data Introduction ......... . . 1-1 Using the Keypad .
-
Page 8: Introduction
12/1/99 Introduction The 2-Channel Model GF868 flowmeter cannot provide accurate flow rate measurements for either channel until the instrument has been properly installed, the channel has been activated, and the basic system and pipe parameters have been programmed into the meter. -
Page 9: Using The Keypad
12/1/99 Using the Keypad The Model GF868 keypad contains 39 keys, which are labeled with their primary (unshifted) functions. In addition, pressing the red key will access the secondary functions assigned to most of [SHIFT] the keys. The complete keypad is illustrated in Figure 1-1 below and a detailed description of both the unshifted and shifted functions for each of the 39 keys is listed in Table 1-1 on page 1-3. - Page 10 12/1/99 Table 1-1: Model GF868 Key Functions Unshifted Function Shifted Function Software Function Keys - press to None select the functions displayed directly above them in the option bar. These keys apply only to the left pane of the display screen.
- Page 11 12/1/99 Table 1-1: Model GF868 Key Functions (Continued) Unshifted Function Shifted Function Display Key - use to display data in a Use to enter the letter O. variety of numeric and graphic format- ting options. See the Programming Manual for details.
- Page 12 12/1/99 Table 1-1: Model GF868 Key Functions (Continued) Unshifted Function Shifted Function Two Key - use to enter the number 2. Use to enter the letter T. Three Key - use to enter the number 3. Use to enter the letter U.
-
Page 13: Obtaining On-Line Help
• Press ) to access this function, and the ERROR: [F3] [F7] various Model GF868 error codes are displayed. Use the [F1] [F4] ) function keys, in conjunction with the [←] and [→] [F5] [F8] keys, to obtain additional information on the desired error code or to exit the help system. -
Page 14: Using The Console Control Keys
12/1/99 Using the Console The Model GF868 has four console control keys, which are located on the left side of the keypad. Use these keys, which are described Control Keys and pictured in Table 1-1 on page 1-5, in accordance with the... -
Page 15: The User Program
ACTIV SYSTM PIPE sub-menus is necessary for operation of the Model GF868. Failure to accurately enter all of the required information will result in unreliable flow rate data. Therefore, be sure to complete at least the sections of this chapter pertaining to those three sub-menus. -
Page 16: The Ch1/Ch2 Menu
ACTIV sub-menu and return to current mode appears here the channel menu screen. Skan As indicated in the above prompt, the Model GF868 flowmeter can take measurements in two different ways: • Skan is a low resolution technique for locating the acoustic signal and for high velocity measurements. -
Page 17: The Systm Sub-Menu
12/1/99 The ACTIV Sub-Menu If Skan is selected at the next prompt, the instrument uses this technique exclusively. However, if S/M is selected, the meter uses (cont.) Skan to find the acoustic signal and then tries to use the Measure technique for a more precise measurement. - Page 18 12/1/99 The SYSTM Sub-Menu É Chan 1 SYSTM (cont.) Press [F1]-[F4] to select the CHANNEL MESSAGE desired volumetric units for the current message appears here flow rate display, or press [→] to access the additional choices of VOLUMETRIC UNITS [F1] = KSCF [F2] = MMSCF.
- Page 19 12/1/99 The SYSTM Sub-Menu Chan 1 SYSTM (cont.) Press [F1]-[F4] to select the VOLUMETRIC TIME desired number of digits to the current setting appears here right of the decimal point in the volumetric flow rate display. VOL DECIMAL DIGITS current setting appears here É...
- Page 20 12/1/99 The SYSTM Sub-Menu Chan 1 SYSTM (cont.) Press [F1]-[F4] to select the TOTAL DECIMAL DIGITS desired mass flow units for the current value appears here flow rate display MASS FLOW current setting appears here MMLB TONS Note: The option bar above shows English units. If Metric units are specified in the GLOBL menu, these will appear instead.
- Page 21 12/1/99 The SYSTM Sub-Menu Chan 1 SYSTM (cont.) Press [F1]-[F4] to select the MDOT DECIMAL DIGITS desired units for the totalized current setting appears here mass flow display MASS (TOTALIZER) current setting appears here MMLB TONS Note: The option bar above shows English units. If Metric units are specified in the GLOBL menu, these will appear instead.
-
Page 22: The Pipe Sub-Menu
Chan 1 PIPE PROG Enter the special transducer time FREQUENCY delay value supplied by current setting appears here Panametrics and press [ENT] (The meter will only accept values from 0 to 1000 µsec.) current value appears here Programming Site Data... - Page 23 12/1/99 The PIPE Sub-Menu Note: Tw is the time required for the transducer signal to travel through the transducer and its cable. This time delay must be (cont.) subtracted from the transit times of the upstream and downstream transducers to ensure an accurate measurement. If a standard transducer is being used, the programming sequence should be rejoined at this point.
- Page 24 1/8 to 900 in.) inch feet Note: Panametrics has calculated both the transducer signal path length and the transducer signal axial length , based on the exact transducer configuration used for the application.
- Page 25 Edit table? K-factor table. current selection appears here Note: If velocity vs. K-factor data was not provided with the Model GF868, the K-factor table can not be edited. Chan 1 PIPE PROG Enter the number of K-factors to Edit table?
- Page 26 12/1/99 PROGRAM Start At the User Program screen shown, press to return to [F1] measurement mode without saving the file or press [F2] Do you want to SAVE enter the sub-menu. SAVE current selection appears here Note: See the SAVE sub-menu section on page 1-62 for more information on this function.
-
Page 27: The I/O Sub-Menu
12/1/99 The I/O Sub-Menu The following specific tasks may be performed via the sub-menu: • Enter a zero cutoff value to eliminate low flow reading fluctuations • Set up any optional temperature and/or pressure inputs While following the programming instructions, refer to the menu map in Figure A-2 on page A-2 in Appendix A, Menu Maps. - Page 28 12/1/99 The I/O Sub-Menu(cont.) Chan 1 I/O Press to select input A or [F1] TEMP INPUT press [F2] to select input B.The selected slot appears here inputs were labeled during setup. A:LABEL B:LABEL last selection appears here [IF SLOT X WAS CHOSEN] Note: The set up of input A is used as an example.
- Page 29 BASE PRESSURE volumetric flow.Base pressures current value appears here in the 0–5000 psia (0–34.5 MPa) range are acceptable. When the previous selection has been made, the Model GF868 will leave the sub-menu and return to the prompt. Channel PROGRAM To leave the User Program, press twice.
-
Page 30: The Setup Sub-Menu
12/1/99 The SETUP Sub-Menu The signal limits and response times for the Model GF868 are specified via the SETUP sub-menu. While following the programming instructions, refer to the menu map in Figure A-2 on page A-2 in Appendix A, Menu Maps. The following three sub- menus are included in this section: •... - Page 31 12/1/99 The SIGNL Option Chan 1 SIGNAL SETUP (cont.) Press [ENT] to accept the current SET UP SIGNAL LOW LIMIT value or signal enter a new value and press . (The meter will only [ENT] SIGNAL LOW LIMIT accept values from –20 to 100.) current value appears here The default value for this parameter is 20 and values from –20 to 100 are acceptable.
- Page 32 The amplitude discriminator measures the size of the transducer signal received by the Model GF868. The default value for this parameter is 14 and values from 0 to 100 are acceptable. The error message appears when the amplitude...
- Page 33 The amplitude discriminator measures the size of the transducer signal received by the Model GF868. The default value for this parameter is 34 and values from 0 to 100 are acceptable. The error message appears when the amplitude...
- Page 34 12/1/99 The SIGNL Option(cont.) Chan 1 SIGNAL SETUP Press [ENT] to accept the current Skan T OFFSET % of Peak value or enter a new current value appears here value and press [ENT] % of Peak current value appears here The percentage of peak used to calculate the transit times and Delta T is specified at this prompt.
- Page 35 12/1/99 The SIGNL Option Chan 1 SIGNAL SETUP (cont.) Press [ENT] to accept the current M>S_Switch # shifts value or enter a new current value appears here value and press [ENT] # shifts current value appears here The number of shifts corresponds to the actual number of transmits per cycle (number of signals added together in one direction to produce an averaged signal for one interrogation of the fluid) and need only be changed if the environment is very noisy or the acoustic...
- Page 36 [ENT] R WINDOW (cycles) current value appears here Normally, the Model GF868 calculates the size of the receive window based on pipe size and fluid sound speed. However, for special diagnostic purposes, it may sometimes be necessary to reset the window size.
- Page 37 12/1/99 The AVRG Option Use this option to specify the number of readings that occur before the meter will respond to a step change in flow rate. In general, the smaller the number of readings, the less steady the display will appear.Complete the following steps to set the response time: É...
- Page 38 12/1/99 The INIT Option Use this option to initialize (reset) all of the parameters within the SETUP menu to their default values. Complete the following steps to reset all of the parameters: Chan 1 SETUP Press [F1] to keep the current SET UP values or press [F2] to reset all Default Setup...
-
Page 39: The Globl Menu
12/1/99 The GLOBL Menu menu is used to enter information that is not specific to GLOBL one of the individual channels. Information programmed via this menu is used to compute parameters such as the sum, difference or average of the channel 1 and channel 2 signals. In addition, several general system parameters may be entered in the GLOBL menu. -
Page 40: The Clock Sub-Menu
12/1/99 The CLOCK Sub-Menu Use the sub-menu to enter the current date and time. While CLOCK following the programming instructions, refer to the menu map in Figure A-3 on page A-3 in Appendix A, Menu Maps. Enter the sub-menu by pressing at the prompt CLOCK... - Page 41 12/1/99 The CLOCK Sub-Menu Set CLOCK (cont.) If the displayed time is correct, press [F1] and proceed to the current setting appears here final prompt. If the displayed time is incorrect, press [F2] to TIME: hh:mm:ss XM change the time. last selection appears here EDIT Set CLOCK...
- Page 42 12/1/99 The CLOCK Sub-Menu Programming of the sub-menu has now been completed. To CLOCK leave the User Program, press [EXIT] twice. If changes have been (cont.) made in any of the menus, the following screen appears: PROGRAM Start At the User Program screen shown, press to return to [F1]...
-
Page 43: The Systm Sub-Menu
12/1/99 The SYSTM Sub-Menu IMPORTANT: After setting up the Stopwatch Totalizer, press [CLR] to clear the Stopwatch Totalizer, or the new totals (cont.) will be added to any previously accumulated totals. The manner in which the Stopwatch Totalizer responds to an error condition may be set in the sub-menu. - Page 44 12/1/99 The SYSTM Sub-Menu Global SYSTM (cont.) Press [F1]-[F4] to select the VOLUMETRIC TIME desired number of digits to the current setting appears here right of the decimal point in the volumetric flow rate display. VOL DECIMAL DIGITS current setting appears here É...
- Page 45 12/1/99 The SYSTM Sub-Menu The abbreviations and definitions of all the available mass flow units are shown in Table 1-6 below. The choices shown on the option bar (cont.) are determined by the selection made at the prompt SYSTEM UNITS screen.
-
Page 46: The I/O Sub-Menu
12/1/99 The SYSTM Sub-Menu Chan 1 SYSTM (cont.) Press [F1]-[F4] to select the MASS (TOTALIZER) desired number of digits to the current setting appears here right of the decimal point in the totalized mass flow display. MASS DECIMAL DIGITS current setting appears here When the previous selection has been made, the meter will exit the SYSTM sub-menu and return to the... - Page 47 With this function enabled, the Model GF868 performs error handling only if both channels are in error. If this function is disabled, error handling occurs when either channel goes into error.
- Page 48 [EXIT] Global PROGRAM The OPTN Option The Model GF868 has two built-in analog outputs, which are assigned to Slot 0 . Also, a variety of option cards may be installed in the six expansion slots. See Chapter 1, Installation, of the Startup Guide for a complete description of the available option cards.
- Page 49 12/1/99 Slot 0 Analog Outputs Complete the following steps to set up the analog outputs: Slot 0 Global Analog Out Press to set up output A or [F1] press [F2] to set up output B. Slot 0 Slot 0 Outputs last output selected appears here Note: The set up of output A is used as an example.
- Page 50 12/1/99 Slot 0 Analog Outputs Table 1-10: Output Measurement Options (cont.) Option Description Flow Velocity VOLUM Volumetric Flow +TOTL Forward Totalized Flow -TOTL Reverse Totalized Flow MDOT Mass Flow +MASS Forward Totalized Mass Flow -MASS Reverse Totalized Mass Flow DIAG Diagnostics DIAG option provides access to a wide variety of diagnostics...
- Page 51 12/1/99 Option Card Analog Complete the following steps to set up the four analog outputs of an Outputs option card installed in Slot x: Global Analog Out Press [F1]-[F4] to set up outputs A, B, C or D, respectively. Slot x Slot x Outputs last output selected appears here Note: The set up of output A is used as an example.
- Page 52 12/1/99 Option Card Analog Outputs (cont.) É Global Analog Out Press [←] and [→] and [F1]-[F4] Slot x Output A to specify the desired output selected range appears here measurement parameter. See Table 1-12 below for a Output measurement description of the available last selection appears here options.
- Page 53 12/1/99 Option Card Analog Outputs (cont.) Global Analog Out Enter a value for the low end of Output measurement the chosen output range and selected option appears here press [ENT] ZERO current value appears here Global Analog Out Enter a value for the high end of ZERO the chosen output range and current value appears here...
- Page 54 12/1/99 Option Card Alarms Complete the following steps to set up the three alarm relays of an option card installed in Slot x: Global Alarms Press [F1]-[F3] to set up alarm relays A, B, or C, respectively. Slot x Slot x Alarms last selection appears here Note: The set up of alarm A is used as an example.
- Page 55 12/1/99 Option Card Alarms (cont.) Note: If was selected as the alarm type, the next two prompts FAULT do not appear. Skip over them to the final prompt. Global Alarms Press [←] and [→] and [F1]-[F4] Failsafe? to specify the desired output last selection appears here measurement parameter.
- Page 56 12/1/99 Option Card Alarms (cont.) Global Alarms Press to set up another [F1] [F3] last prompt appears here alarm or press [EXIT] to select last selection appears here another slot for set up. Slot x Alarms last alarm selected appears here For instructions on setting up additional inputs and/or outputs proceed to the appropriate section.
- Page 57 12/1/99 Option Card Totalizer/ Table 1-15: Channel Options Frequency Outputs (cont.) Option Description Channel 1 Channel 2 CH1+CH2 CH1-CH2 (CH1+CH2)/2 Proceed to section A for instructions on programming a frequency output or to section B for instructions on programming a totalizer output.
- Page 58 12/1/99 Option Card Totalizer/ Note: The measurement units that appear in these prompts are those Frequency Outputs (cont.) selected in the GLOBL-SYSTM menu earlier in this chapter. Global Pulse Output Enter a value for the low end of Output measurement the frequency output range and last selection appears here press...
- Page 59 12/1/99 Option Card Totalizer/ Frequency Outputs (cont.) Table 1-17: Output Measurement Options Option Bar Choice Description [F1] = +TOTL Forward Totalized Volume Flow [F2] = -TOTL Reverse Totalized Volume Flow [F3] = +MASS Forward Totalized Mass Flow [F4] = -MASS Reverse Totalized Mass Flow Note: The measurement units that appear in these prompts are those selected in the GLOBL-SYSTM menu earlier in this chapter.
- Page 60 12/1/99 Option Card Analog Inputs Complete the following steps to set up the two analog inputs of an option card installed in Slot x Global Analog Out Press [F1] to set up input A or [F2] to set up input B. Slot x Slot x Inputs last input selected appears here...
- Page 61 12/1/99 Option Card Analog Inputs (cont.) Global Analog Out Enter a unit of measurement for INPUT NAME input A and press [ENT] current name appears here INPUT UNITS current units appears here The programming sequence is rejoined here, if PRESR TEMP chosen at the input measurement prompt.
- Page 62 12/1/99 Option Card RTD Inputs Option cards are available with RTD inputs having a temperature range of –100° to 350°C. Complete the following steps to set up the two RTD inputs of an option card installed in Slot x: Global Analog Out Press to set up RTD input A [F1]...
- Page 63 12/1/99 Option Card RTD Inputs (cont.) Global Analog Out Press to set up another [F1] [F2] FULL Scale Value input or press [EXIT] to select current value appears here another slot for set up. Slot x Inputs last input selected appears here For instructions on setting up additional inputs and/or outputs, proceed to the appropriate section.
-
Page 64: The Comm Sub-Menu
12/1/99 The COMM Sub-Menu The Model GF868 flowmeter can transmit stored data and displayed readings to a remote ANSI terminal or a personal computer by connecting the meter’s RS232 interface to the serial port of the PC. In addition, the Model GF868 can receive and execute remote commands via this link. - Page 65 Network I.D.? current number appears here A network ID number is only necessary for communication with the Panametrics Flowmeter Data Manager software. See the software User’s Manual for more information. IMPORTANT: If the network ID number is changed, communication with the Flowmeter Data Manager must be re- established with the new ID number.
-
Page 66: The Secur Sub-Menu
[CLR] When the system is locked, access to the above menus will be denied unless the correct password is entered. The Model GF868 is shipped with a default password, which is given later in this section. For increased security, the default password should be changed. - Page 67 12/1/99 The SECUR Sub-Menu Global SYSTM (cont.) Enter the current password (2719 LOCK OUT is the default password) and Locked press [ENT] ENTER PASSWORD Password Global SYSTM Press to leave the password [F1] ENTER PASSWORD unchanged and return to the Password Global PROGRAM prompt, or...
- Page 68 12/1/99 The SECUR Sub-Menu Start É PROGRAM (cont.) Press the [←] and [→] keys and one of the function keys [F1]-[F4] to select the desired sub-menu. From this screen, press [EXIT] Global PROGRAM return to measurement mode. Security SECUR Programming of the SECUR sub-menu has now been completed.
-
Page 69: The Save Menu
The SAVE Menu The currently programmed site data may be stored in the Model GF868’s non-volatile memory by saving it as a site file. Up to ten site file names, consisting of up to five characters each, may be stored at any given time. -
Page 70: The Recll Menu
12/1/99 The RECLL Menu Any site file currently stored in the Model GF868’s non-volatile memory may be recalled at any time. Up to ten site file names, consisting of up to five characters each, may be stored at any given time. - Page 71 Chapter 2...
- Page 72 Displaying Data Introduction ......... . . 2-1 The BIG Sub-Menu .
-
Page 73: Introduction
SLEEP - blanks out the display screen until a key is pressed. Proceed to the appropriate section to set up the Model GF868 display screen(s), using one of the listed sub-menus. For convenience, a complete flow diagram of the Display Menu is shown in Figure A-5 on page A-5 of Appendix A, Menu Maps. -
Page 74: The Big Sub-Menu
12/1/99 The BIG Sub-Menu format, which is the Model GF868’s default power up format, displays one measurement in large print. To change from another display format to the format, follow the instructions in this section. Upon power up, a measurement mode display (similar to the one shown below) appears. - Page 75 12/1/99 The BIG Sub-Menu site file É ←] and [→] to Ch1 Channel Label (cont.) [F1]-[F4], [ Velocity Ft/s select a display parameter. See Table 2-2 below for a description 6.95 of the available options. Then, press [EXIT] to return to the (error codes appear here) channel option screen.
-
Page 76: The Dual Sub-Menu
12/1/99 The DUAL Sub-Menu format displays two measurements simultaneously in DUAL normal print. To select the DUAL format and the measurements to display in this format, follow the instructions in this section. Upon power up, a measurement mode display (similar to the one shown below) appears. - Page 77 12/1/99 The DUAL Sub-Menu site file É ←] and [→] to Ch1 Channel Label (cont.) [F1]-[F4], [ Velocity Ft/s select a display parameter. See 12.50 Table 2-4 below for a description FWD Total ACF of the available options. Then, 126.0 press [EXIT] to return to the...
-
Page 78: The Graph Sub-Menu
12/1/99 The GRAPH Sub-Menu sub-menu permits the display of either the flow velocity, GRAPH the volumetric flow or the mass flow on an XY bar graph, with a specified time interval on the x-axis. This section describes the procedures for setting up and using the graph format. Setting Up the GRAPH Press the appropriate side of the [SCREEN]... -
Page 79: Using The Graph Format
+only After the Y RANGE is entered, the Model GF868 automatically begins taking measurements and displays them in the specified graphical format. Proceed to the next section for a discussion of manipulating the graphical display. Using the GRAPH... - Page 80 12/1/99 Using the GRAPH The typical screen shown above is for a Velocity vs. Time graph with only the positive y-axis displayed. The measurement parameter (VEL) Format (cont.) is shown to the left of the y-axis and there is a message line below the graph that initially indicates the starting date and time of the graphed data.
-
Page 81: The Log Sub-Menu
12/1/99 The LOG Sub-Menu sub-menu permits the numeric or graphical display of the data in a log file. Because screen size limitations prevent the simultaneous display of the complete log file, the function keys must be used to view the remaining data. Follow the instructions in this section to display a log file in the desired format. -
Page 82: Numeric Format
Numeric Format The Model GF868 can log up to three parameters simultaneously. Each set of data values is called a record, and up to 120 consecutive records can be stored in a page. A log file can consist of up to 120 pages. -
Page 83: Graphical Format
12/1/99 Numeric Format (cont.) É PAGE# 1 REC# 80 Use the [←], [→] and [F1]-[F4] 05:47:34 AM 09 MAR 98 keys to view additional records 11.66 Ft/s or to exit the log display. The 1.32 KACF/MI options are shown in Figure A-5 6.91 KACF on page A-5 and are listed in E5: Amplitude... - Page 84 Y values. Y RANGE current value appears here +only After the Y RANGE is entered, the Model GF868 automatically displays the chosen log file records in the specified graphical format. É 1.23 Ft/s 10:16 Use the [←], [→] and [F1]-[F4] keys to select the desired option.
- Page 85 12/1/99 Table 2-7: Graphical Log Display Options Option Bar Choice Description Move the cursor one record to the left and [F1] <CURS display the value and time of that record in the status line: (i.e. 6.85 Ft/s 10:38 Move the cursor one record to the right and [F2] CURS>...
-
Page 86: The Signl Sub-Menu
12/1/99 Graphical Format (cont.) In the typical graphical display shown, the first logged parameter (VEL) is shown to the left of the y-axis and there is a message line below the graph that initially indicates the starting date and time of the current page. - Page 87 12/1/99 The SIGNL Sub-Menu Press the appropriate side of the key to activate the desired [SCREEN] pane of the display screen, then proceed as follows: (cont.) Note: For this discussion, it is assumed that the left pane of the display screen is active. If the right pane is active, it is only necessary to replace the [F1]-[F4] keys designations by the...
- Page 88 12/1/99 The SIGNL Sub-Menu The signal graph is a plot of signal amplitude (y-axis) vs. time in microseconds (x-axis). When the SIGNL display screen first appears, (cont.) it may briefly remain blank. As soon as the signal is acquired, processed and loaded into the display memory, the graph will appear. A cursor, which is displayed as a vertical line that extends the full height of the graph window, is used to highlight any point in time along the x-axis.
- Page 89 12/1/99 The SIGNL Sub-Menu The typical display screen shown on page 2-16 has the transducer signal listed to the left of the y-axis and there is a message (cont.) line below the graph that initially indicates the starting date and time of the graphed signal.
-
Page 90: The Backl Sub-Menu
Backlight timeout value of 0 and press [ENT] current value appears here site file É Ch1 Channel Label The Model GF868 will Velocity Ft/s automatically return to the previous data display screen and 6.95 the programmed backlight timeout interval will begin. -
Page 91: The Sleep Sub-Menu
The SLEEP Sub-Menu When the display is not in use, activate SLEEP mode to temporarily suspend LCD activity and permit the Model GF868 to process data more quickly and efficiently. Press the appropriate side of the key to activate the desired pane of the display screen, then... - Page 92 Chapter 3...
- Page 93 Logging Data Introduction ......... . . 3-1 The STD Sub-Menu .
-
Page 94: Introduction
Error logs record data only when an error message is generated. The Model GF868 allocates up to 120 pages of memory, each of which can contain up to 120 records, for data logging. Each page is assigned a header, to distinguish one page from another. -
Page 95: The Std Sub-Menu
Recall that a flashing asterisk (*) appears at the far right of the locator bar if the Model GF868 is currently logging data (see Chapter 3, Operation, of the Startup Guide). - Page 96 12/1/99 The STD Sub-Menu NAME,MESSAGE,etc. (cont.) Enter a brief description (up to NAME 21 characters) of the log and selected log appears here press [ENT] LOG MESSAGE current message appears here É NAME,MESSAGE,etc. Press [←] and [→] and [F1]-[F4] LOG MESSAGE to select a channel option to be current message appears here logged.
- Page 97 12/1/99 The STD Sub-Menu Table 3-2: Measurement Parameter Options (cont.) Option Bar Choice Description = VEL Flow Velocity [F1] = VOLUM Volumetric Flow [F2] = +TOTL Forward Totalized Volume Flow [F3] = -TOTL Reverse Totalized Volume Flow [F4] →] = MDOT Mass Flow + [F1] →]...
- Page 98 12/1/99 The STD Sub-Menu (cont.) É NAME,MESSAGE,etc. Use the [←], [→] and [F1]-[F4] 3rd Value logged keys to select the third parameter current channel appears here to be logged. See Table 3-2 on page 3-4 for a list of the 3rd Value logged available options.
-
Page 99: Starttime Prompt
12/1/99 STARTTIME Prompt NAME,MESSAGE,etc. Press [F1] to accept the displayed Is LOG circular ? start time or press [F2] to enter a current selection appears here different start time. To start logging immediately, press [F3] STARTTIME hh:mm:ss XM previous selection appears here EDIT was selected, proceed to the START DATE... -
Page 100: End Time Prompt
12/1/99 START DATE Prompt was selected, proceed to the prompt for a TODAY END TIME non-circular log or to the DURATION prompt for a circular log. Refer (cont.) to Figure A-7 on page A-7 of Appendix A, Menu Maps for a flow diagram of the programming sequences. -
Page 101: End Date Prompt
12/1/99 END TIME Prompt NAME,MESSAGE,etc. (cont.) Press [F1] or press [F2] END TIME hh:mm:ss XM . Then, enter the desired Edit hour and press . The [ENT] acceptable range is 1 to 12. HOUR previous value appears here NAME,MESSAGE,etc. Enter the desired minutes and HOUR press . -
Page 102: Duration Prompt
12/1/99 END DATE Prompt É NAME,MESSAGE,etc. (cont.) Use the [←], [→] and [F1]-[F4] YEAR keys to select the desired month. current value appears here MONTH previous value appears here NAME,MESSAGE,etc. Enter the desired day and press MONTH . The acceptable range is 1 [ENT] current selection appears here to the number of days in the... -
Page 103: Time Increment Prompt
Note: The available options at this prompt are: 5sec, 10sec, 30sec, 1min, 3min, 6min, 12min, 30min and 60 min. The time increment is the frequency at which the Model GF868 takes and records data measurements. If any reading takes longer than the programmed time increment, the log is filled in with the next consecutive reading. -
Page 104: The Mem Sub-Menu
If the expected amount of logged data will exceed the remaining memory capacity, the Model GF868 suggests that some old logs be cleared to make room for the new log. -
Page 105: The Stop Sub-Menu
12/1/99 The MEM Sub-Menu If it is undesirable to delete old logs to free up additional memory, the number of pages pending may be reduced by altering the parameters (cont.) of one or more of the currently active logs. For example, either increasing the time increment or decreasing the total logging time will reduce the memory requirements for a log file. - Page 106 Recall that a flashing asterisk (*) appears at the far right of the locator bar if the Model GF868 is currently logging data (see Chapter 3, Operation, of the Startup Guide).
-
Page 107: The Error Sub-Menu
12/1/99 The ERROR Sub-Menu Use the sub-menu to create a new error log and to select the ERROR logging parameters. An error log updates every 5 seconds (when the display updates), but only if a new error condition occurs. Error logs have a fixed length of 2 pages and contain sixty records per page. - Page 108 Note: The option bar lists all error logs currently stored in memory. Recall that a flashing asterisk (*) appears at the far right of (cont.) the locator bar if the Model GF868 is currently logging data (see Chapter 3, Operation, of the Startup Guide). NAME,MESSAGE,etc.
- Page 109 12/1/99 The ERROR Sub-Menu Table 3-4: Measurement Parameter Options (cont.) Option Bar Choice Description [F1] = VEL Flow Velocity [F2] = VOLUM Volumetric Flow = +TOTL Forward Totalized Volume Flow [F3] = -TOTL Reverse Totalized Volume Flow [F4] →] + [F1] = MDOT Mass Flow →]...
- Page 110 12/1/99 The ERROR Sub-Menu É NAME,MESSAGE,etc. (cont.) Use the [←], [→] and [F1]-[F4] 2nd Value logged keys to select the third parameter current selection appears here to be logged. See Table 3-4 on page 3-16 for a list of the 3rd Value logged available options.
-
Page 111: Starttime Prompt
12/1/99 STARTTIME Prompt NAME,MESSAGE,etc. Press [F1] to accept the displayed Is LOG circular ? start time or press [F2] to enter a current selection appears here different start time. To start logging immediately, press [F3] STARTTIME hh:mm:ss XM previous selection appears here EDIT was selected, proceed to the START DATE... - Page 112 STOP ERROR site file É * Ch1 Channel Label The * indicates that the Model Velocity Ft/s GF868 is now compiling the specified error log. 6.95 (error codes appear here) VOLUM +TOTL -TOTL The error log will continue to run until it is manually stopped, the meter runs out of memory (for a non-circular log), or the entire 120 records (2 pages x 60 records/page) have been logged.
- Page 113 Chapter 4...
- Page 114 Printing Data Introduction ......... . . 4-1 The DATA Sub-Menu .
-
Page 115: Introduction
12/1/99 Introduction The Model GF868 flowmeter has the capability to print any of the data stored in its memory via the built-in RS232 communications port. In order to use the function, the RS232 port must be connected to a printer with a serial port input. (A printer with a parallel port input may be used with a third-party serial-to-parallel adapter.) -
Page 116: The Data Sub-Menu
12/1/99 The DATA Sub-Menu Use the sub-menu to print live measurement data, as it is DATA collected. The data may be printed in either numeric or graphical format, with a user specified time increment. IMPORTANT: Make sure that a printer has been properly set up before proceeding with this section. - Page 117 12/1/99 Numeric Format To print live data in numeric format, continue as follows: É Print Data Press [←] and [→] and [F1]-[F4] FORMAT to select a channel option for the Print Numeric data source. See Table 4-1 below for a description of the available 1st value printed options.
-
Page 118: Numeric Format
12/1/99 Numeric Format (cont.) Note: The units assigned to the parameters in Table 4-2 on page 4-3 are those selected in the GLOBL-SYSTM sub-menu. É Print Data Press [←] and [→] and [F1]-[F4] 1st value printed to select a channel option for the current selection appears here data source. - Page 119 12/1/99 Numeric Format (cont.) After the time increment is chosen, the Model GF868 returns to the standard data display screen and continues to take measurements. The live data is printed at the specified time intervals, until a STOP command is issued (see the instructions for the sub-menu).
- Page 120 12/1/99 Graphical Format To print live data in graphical format, continue as follows: É Print Data Press [←] and [→] and [F1]-[F4] FORMAT to select a channel option for the Plot data source. See Table 4-3 below for a description of the available 1st value printed options.
-
Page 121: Graphical Format
Note: The available options at this prompt are: 5sec, 10sec, 30sec, 1min, 3min, 6min and 12min. After the time increment is chosen, the Model GF868 returns to the standard data display screen and continues to take measurements. The live data is printed at the specified time intervals, until a... -
Page 122: The Log Sub-Menu
12/1/99 Graphical Format (cont.) CHANNEL NAME CHANNEL MESSAGE START TIME X-AXIS 50 seconds PER-DIV END TIME 03:27:01 PM 03:28:46 PM 20 OCT 97 Y-AXIS MAX 500 ACF/M 20 OCT 97 Figure 4-2: A Typical Graphical Printout The LOG Sub-Menu Use the sub-menu to print logged measurement data, from a log file in the meter’s memory. - Page 123 12/1/99 The LOG Sub-Menu Print Log (cont.) Press [F1] to print the log in PRINT numeric format or press [F2] Print Log print the log in graphical format. FORMAT previous selection appears here PLOT É Print Log Use the [←], [→] and [F1]-[F4] FORMAT keys to select a log file to print.
-
Page 124: Numeric Format
Numeric Format After the numeric format (and starting page and number of pages, if applicable) is chosen, the Model GF868 returns to the standard data display screen and begins printing the log file. The printout continues until the entire log has been printed or until a... -
Page 125: The Prog Sub-Menu
12/1/99 Graphical Format (cont.) The Model GF868 returns to the standard data display screen and begins printing the log file. The printout continues until the entire log has been printed or until a command is issued (see the STOP instructions for the sub-menu). - Page 126 (Work) The Model GF868 returns to the standard data display screen and generates a site file printout similar to the one shown in Figure 4-5 below. The printout continues until the entire file has been printed or...
-
Page 127: The Stop Sub-Menu
Either wait for the printer to finish or turn the printer off to empty the buffer immediately. The Model GF868 returns to the standard data display screen and normal measurement taking. Printing Data... -
Page 128: The Prntr Sub-Menu
PRNTR the Model GF868. To set up a printer, refer to Figure A-6 on page A- 6 of Appendix A, Menu Maps, and complete the following steps: IMPORTANT: A printer must be properly set up before proceeding to any of the other sections in this chapter. -
Page 129: The Sgnls Sub-Menu
The BOTH option prints both sets of data. After the desired print selection has been made, the Model GF868 returns to the standard data display screen and normal measurement taking. The specified signal array data is printed continuously, until it is manually stopped. - Page 130 12/1/99 The SGNLS Sub-Menu A portion of a typical printout is shown in Figure 4-6 below. (cont.) Figure 4-6: A Typical Signal Array Printout The data printed (see Figure 4-6 above) via the sub-menu SIGNL consists of 1024 lines, each of which lists the following three values: •...
- Page 131 Chapter 5...
- Page 132 Clearing Data Introduction ......... . . 5-1 The TOTAL Sub-Menu .
-
Page 133: Introduction
12/1/99 Introduction This chapter explains how to purge the Model GF868’s memory of various measurement totals and/or files. The Clear Menu, which is accessed by pressing the key on the keypad, is divided into [CLR] three sub-menus: • - used to reset totalized measurement values TOTAL •... -
Page 134: The Total Sub-Menu
12/1/99 The TOTAL Sub-Menu sub-menu permits the user to reset volumetric and energy TOTAL totals for channel 1, channel 2 or both channels to zero. In addition, the stopwatch totalizer is reset. Press the appropriate side of the key to activate the desired pane of the display screen, and [SCREEN] refer to Figure A-7 on page A-7 of Appendix A, Menu Maps, while completing the following steps:... -
Page 135: The Site Sub-Menu
12/1/99 The SITE Sub-Menu Use the sub-menu to clear site files from the meter’s memory. SITE Use the [SCREEN] key to activate the desired display pane, and refer to Figure A-7 on page A-7 of Appendix A, Menu Maps, while completing the following steps: site file É... -
Page 136: The Log Sub-Menu
TOTAL SITE The LOG Sub-Menu Use the sub-menu to clear log files from the Model GF868’s memory. Press the appropriate side of the [SCREEN] key to activate the desired pane of the data display screen, and refer to Figure A-7 on... - Page 137 12/1/99 The LOG Sub-Menu É CLEAR LOG (cont.) Use the [←], [→] and [F1]-[F4] CLEAR keys to select a log file for Clear Log deletion. To leave the sub- menu, press the key. [EXIT] NAME previous selection appears here LOG1 LOG2 LOG3 LOG4...
- Page 138 12/1/99 Clearing Data...
- Page 139 Chapter 6...
- Page 140 Wiring the RS232 Interface ....... 6-1 Checking the GF868 Baud Rate ......6-2 Setting Up the Terminal Software .
-
Page 141: Introduction
• Transfer the log files to the personal computer. Wiring the RS232 The first step is to connect the built-in RS232 port in the GF868 to one of the serial ports (COM1 or COM2) on the personal computer. Interface Table 6-1 below lists the standard cables available from Panametrics for this purpose. -
Page 142: Setting Up The Terminal Software
For successful serial communications, the GF868 and the personal computer must be set up to send/receive data at the same speed. To Baud Rate verify/change the baud rate setting of the GF868, proceed as follows: Access the User Program, by pressing the [PROG] key on the keypad. -
Page 143: Windows 3.X Systems
Using the Settings Menu, select the Communications option. 3. When the Communications Screen appears, make the following selections: • Baud Rate - set to the same value as the GF868 setting • Data Bits - 8 • Stop Bits - 1 •... -
Page 144: Windows 9X/Nt Systems
To set up serial communications with a Systems personal computer running under Windows 95, Windows 98 or Windows NT, make sure the GF868 is powered on and complete the following steps: 1. From the Windows START menu, select PROGRAMS>... -
Page 145: The Optional Rs485 Serial Interface
1.8 m (6 ft) of the electronics console. Interface Converter A special bracket containing the serial interface converter and a three- terminal barrier strip is mounted inside the Model GF868, just below Mounting RS232 terminal block (see Figure 6-1 below). The standard... -
Page 146: Point-To-Point Wiring
Point-To-Point Wiring Standard factory wiring of the RS485 serial interface is configured for point-to-point wiring. That is, a single Model GF868 may be wired directly to a single personal computer. To connect the RS485 serial interface, refer to Figure 6-1 on page 6-5 and complete the following steps: Note: For compliance with the European Union’s Low Voltage... -
Page 147: Multi-Point Wiring
12/1/99 Multi-Point Wiring The standard point-to-point wiring configuration for the serial interface converter may be modified to permit the use of a multi-point wiring arrangement. In a multi-point RS485 system, one flowmeter (the master) is connected to the personal computer, while a number of additional flowmeters (the slaves) are chained together and connected to the master flowmeter. - Page 148 12/1/99 Reconfiguring a Serial Interface Converter (cont.) Plastic Case Mounting Screw Screwdriver DB9 Connector Figure 6-2: Opening the Converter Case Table 6-3: Switch Assembly Settings Position # Point-To-Point Multi-Point 7. Reassemble the serial interface converter and secure it to the mounting bracket with the two mounting screws.
- Page 149 12/1/99 Wiring the System Note: The XMT+ terminal on the barrier strip is the screw opposite the red wire connection and the XMT– terminal on the barrier (cont.) strip is the screw opposite the green wire connection. 3. Reinstall the clear plastic shroud (for units so equipped), close the cover to the electronics console and reconnect the main power.
- Page 150 Appendix A...
-
Page 151: The Activ, Systm And Pipe Sub-Menu Map
Menu Maps The ACTIV, SYSTM and PIPE Sub-Menu Map ....A-1 The CH1/CH2-I/O and SETUP Sub-Menu Maps ....A-2 The GLOBL, SAVE and RECLL Menu Maps . - Page 152 12/1/99 PROGRAM GLOBL SAVE RECLL Channel PROGRAM ACTIV SYSTM PIPE SETUP CHANNEL LABEL Channel status TRANSDUCER NUMBER CHANNEL MESSAGE BURST SPEC VOLUMETRIC UNITS SPECIAL TRANSDUCER # Skan/Measure Mode FREQUENCY KACF MMACF KSCF MMSCF Skan 100k 200k 500k VOLUMETRIC TIME /SEC /MIN /DAY PIPE OD...
- Page 153 12/1/99 PROGRAM GLOBL SAVE RECLL Channel PROGRAM ACTIV SYSTM PIPE SETUP ZERO CUTOFF SET UP TEMP INPUT SIGNL AVRG INIT FIXED SLOT1 SLOT2 SLOT3 SLOT4 SLOT5 SLOT6 Press YES to Default SIGNAL LOW LIMIT A:LABEL B:LABEL COR. PEAK LIMIT VELOCITY LOW LIMIT FIXED TEMP.
- Page 154 12/1/99 PROGRAM GLOBL SAVE RECLL Global PROGRAM CLOCK SYSTM COMM SECUR DATE SYSTEM UNITS LOCK OUT SITE NAME EDIT METRC UNlck LOCK SITE1 SITE2 SITE3 SITE4 YEAR ENTER PASSWORD PRESSURE UNITS MONTH ? EDIT PASSWORD ENTER NEW PASSWORD VERIFY NEW PASSWORD STOPWATCH TOTALIZER TIME AUTO...
- Page 155 12/1/99 PROGRAM GLOBL SAVE RECLL Global PROGRAM CLOCK SYSTM COMM SECUR Global I/O ERROR OPTN ERROR HANDLING HOLD HIGH HHIGH SLOT0 SLOTX Slot 0 - Analog Outputs Slot x (Option Card) 2PATH ERROR HANDLING Slot x - Freq/Total Outputs Slot x - Analog Inputs Slot x - Alarms Slot x - Analog Outputs LABEL...
- Page 156 12/1/99 DISPLAY FORMAT DUAL GRAPH SIGNL BACKL SLEEP LCD SLEEP MODE Backlight timeout NAME LOG1 LOG2 LOG3 LOG4 DISPLAY FORMAT PLOT GRAPH VARIABLE Y AXIS MAX Y RANGE VOLUM MDOT +only TIME INCREMENT Site Channel 5sec 10sec 30sec 1min 3min 6min 12min NUMERIC LOG...
- Page 157 12/1/99 PRINT DATA PROG STOP PRNTR SGNLS FORMAT PLOT 1st value printed FORMAT Printer Type SIGNAL ARRAY PLOT DP411 XTECH EPSON KODAK SP401 SIGNL CROSS BOTH 1st value printed NAME VOLUM +TOTL -TOTL MDOT +MASS -MASS DIAG LOG1 LOG2 LOG3 LOG4 (NUM option) (PLOT option) (log>1 page)
- Page 158 12/1/99 LOGGING CLEAR STOP ERROR TOTAL SITE X/120 Pages FREE NAME Total to Clear SITE NAME NAME Y Pages PENDING LOG1 LOG2 LOG3 LOG4 BOTH SITE1 SITE2 SITE3 SITE4 LOG1 LOG2 LOG3 LOG4 NAME Stop Logging ? CLEAR TOTALS CLEAR SITE NAME CLEAR NAME LOG1 LOG2...
- Page 159 Appendix B...
-
Page 160: Appendix B: Data Records
Data Records Option Cards Installed ........B-1 Initial Setup Data . - Page 161 12/1/99 Option Cards Installed Whenever an option card is installed in one of the Model GF868’s expansion slots, record the type of card and any additional setup information in the appropriate row of Table B-1 below. Table B-1: Option Cards Installed...
- Page 162 12/1/99 Initial Setup Data After the Model GF868 flowmeter has been installed, some initial setup data must be entered via the User Program, prior to operation. Record that information in Table B-2 below. Table B-2: Initial Setup Data General Information...
- Page 163 12/1/99 Table B-2: Initial Setup Data (cont.) Pipe/Transducer Parameters (CH1/CH2-PIPE) Channel 1 Channel 2 Std. Trans. # Std. Trans. # Spec. Trans. # Spec. Trans. # Spec. Trans. Hz Spec. Trans. Hz Spec. Trans. Tw Spec. Trans. Tw Pipe O.D. Pipe O.D.
- Page 164 12/1/99 Index ACTIV DATA Printing Menu Map ......A-1 Live Graphical ..... .4-6 Sub-Menu .
- Page 165 12/1/99 Index (cont.) I/O (CH1/CH2) Measure Mode ......1-9 Menu Map.....1-20, A-2 MEM Sub-Menu .
- Page 166 12/1/99 Index (cont.) Pages, Calculating ....3-12 RECLL Password Menu ......1-63 Default .
- Page 167 12/1/99 Index (cont.) SAVE Time, Programming....1-34 Menu ......1-62 TOTAL Sub-Menu .
Need help?
Do you have a question about the GF868 and is the answer not in the manual?
Questions and answers