Table of Contents
Advertisement
Advertisement
Table of Contents

Related Manuals for IP-COM AP615


Summary of Contents for IP-COM AP615
- Page 1 1 Product Overview...
-
Page 2: Copyright Statement
IP-COM does not assume any liability that may occur due to the use or application of the product or circuit layout(s) described herein. Every effort has been made in the... - Page 3 1 Product Overview Conventions Thank you for choosing IP-COM! Please read this user guide before you start. This user guide instructs you to install and configure the AP. Typographical conventions in this User Guide: Item Presentation Example “Click the Save button” can be simplified as...
-
Page 4: Table Of Contents
1 Product Overview Contents 1 Product Overview ........................1 Package Contents .......................... 1 Hardware Description ........................2 Front View ..........................2 Rear View ..........................3 Label ............................4 2 Quick Installation Guide ......................5 Step 1: Connect an Ethernet Cable to the AP ................5 Step 2: Install the AP ........................ - Page 5 1 Product Overview Administrator .......................... 54 System Log ..........................56 Appendix ............................57 1 Configure PC ........................... 57 Windows 8 ..........................57 Windows 7 ..........................59 Windows XP ........................... 61 2 FAQs ............................63 3 Safety and Emission Statement ....................63...
-
Page 6: Product Overview
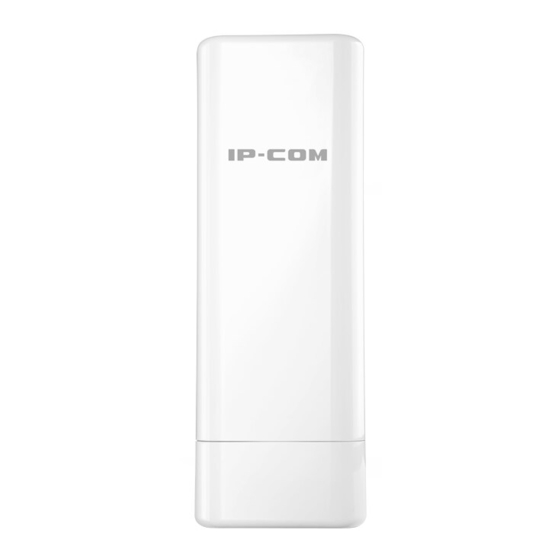
1 Product Overview 1 Product Overview IP-COM AP615 is an advanced and high-performance long-range wireless access point which is suitable for long-range data transmission and video surveillance, especially in WISP CPE solutions. Equipped with built-in 12dBi directional dual-polarized antenna, it offers high data transmission of up to 5km on 2.4GHz band with maximum transmission power of 800mW. -
Page 7: Hardware Description
1 Product Overview Hardware Description Front View Item Port / Button Description With the included grounding screw, attach a copper wire here to provide proper surge and lightning protection for your device. Pressing and holding the reset button for over 7 seconds restores this device to factory defaults. -
Page 8: Rear View
1 Product Overview Rear View Status Description Malfunction occurs or the device is not powered on. Blinking The device is working properly. There is no device linked to this port. Solid There is a device linked to this port but no data transmission. WAN/LAN Blinking Data transmission is occurring on this port. -
Page 9: Label
1 Product Overview Label 1. IP Address: Default login IP address for web login of this device. 2. Default login user name and password (admin for both). 3. Power specification of this device. -
Page 10: Quick Installation Guide
2 Quick Installation Guide 2 Quick Installation Guide Step 1: Connect an Ethernet Cable to the AP ❶ Slide the bottom cover of the AP down to expose the ports. ❷ Connect an Ethernet cable (≤ 60m), which will be connected to the injector, to the PoE LAN/WAN port of your AP. -
Page 11: Step 3: Connect The Poe Injector
2 Quick Installation Guide Step 3: Connect the PoE Injector ❶ Connect the Ethernet cable in Step 1 to the PoE port of the injector. ❷ Connect your computer to the LAN port of the injector with another Ethernet cable. ❸... - Page 12 2 Quick Installation Guide Input 192.168.2.1 in a web browser’s address bar, and then press Enter or Return on your keyboard. Enter the default username and password (admin for both defaults) and click Login. Please select the proper operating mode and follow instructions on the web UI to apply your settings.
-
Page 13: Ap Mode
2 Quick Installation Guide AP Mode In this mode, the device can be connected to a wired network and transform the wired access into wireless that multiple devices can share together. Configuration Steps: ❶ Select AP mode and click Next. ❷... -
Page 14: Station (Client) Mode
2 Quick Installation Guide ❸ Click Save to apply your changes. Wait until the device restarts automatically. Station (Client) Mode In this mode, the device can be connected to another device via an Ethernet port and act as an adapter to grant your wired devices access to a wireless network, especially for data transmission or video surveillance. - Page 15 2 Quick Installation Guide Configuration Steps: ❶ Select Station (Client) mode and click Next. ❷ Select the SSID (WiFi name) you wish to connect to and click Next. ❸ Enter the key (WiFi password) of the remote device and click Next.
-
Page 16: Universal Repeater Mode
2 Quick Installation Guide ❹ Make sure that the IP address is different from that of the remote device but on the same network segment and then click Next. ❺ Click Save to apply your changes. Wait until the device restarts automatically. When the Bridge LED stays solid, it has been bridged successfully! Universal Repeater Mode In this mode, the device extends the wireless coverage of another wireless AP or router. - Page 17 2 Quick Installation Guide Configuration Steps: ❶ Select Universal Repeater mode and click Next. ❷ Select the SSID (WiFi name) you wish to connect to and click Next. ❸ Enter the key (WiFi password) of the remote SSID and click Next.
-
Page 18: Wisp Mode
2 Quick Installation Guide ❹ Make sure that the IP address is different from that of the remote device but on the same network segment and then click Next. ❺ Click Save to apply your changes. Wait until the device restarts automatically. When the Bridge LED stays solid, it has been bridged successfully! WISP Mode In this mode, the device connects to ISP hotspot wirelessly to share Internet with local devices. - Page 19 2 Quick Installation Guide Configuration Steps: ❶ Select WISP mode and click Next. ❷ Select the SSID (WiFi name) you wish to connect to and click Next. ❸ Enter the key (WiFi password) of the remote SSID if needed and click Next.
- Page 20 2 Quick Installation Guide ❹ Select the WAN connection type, set corresponding parameters if needed and click Next. ❺ Customize the SSID (WiFi name) and wireless security settings (Recommended: WPA-PSK, AES) for your local network, and then click Next. ❻ Make sure that the IP address is different from that of ISP hotspot and on the different network segment.
-
Page 21: Repeater + P2Mp Mode
2 Quick Installation Guide ❼ Click Save to apply your changes. Wait until the device restarts automatically. When the Bridge LED stays solid, it has been bridged successfully! Repeater + P2MP Mode Both the Repeater mode and P2MP mode support point-to-multipoint bridge connection. Only the base device and remote device scan each other and keep their SSIDs, channels, security modes and keys the same, can they bridge successfully. - Page 22 2 Quick Installation Guide Before configuring Repeater + P2MP settings, verify the following information: Mode SSID MAC Address Base AP P2MP IP-COM_000139 00:B0:C6:00:01:39 11111111 IP-COM_002160 00:B0:C6: 00:21:60 11111111 IP-COM_000020 00:B0:C6:00:00:20 11111111 Repeater IP-COM_130507 00:B0:C6:13:05:07 11111111 IP-COM_4EF409 00:B0:C6:4E:F4:09 11111111 Note: 1. As for IP addresses, they should not be the same but on the same network segment. 2.
- Page 23 2 Quick Installation Guide ❷ Select the SSID of base AP you want to connect to and click Next. ❸ Enter the key of the base AP and click Next. ❹ Make sure the IP address is different from the base AP’s IP address but on the same network segment and click Next.
- Page 24 2 Quick Installation Guide ❺ Click Save to apply your changes. Wait until the device restarts automatically. ❻ Then you can go to the Status page to view that its SSID is identical with the base AP’s, which indicates that this AP has bridged with the base AP successfully.
- Page 25 2 Quick Installation Guide b. Set the base AP in P2MP mode and bridge with AP1, AP2, AP3 and AP4. ❶ Select P2MP mode on the Quick Setup page and click Next. ❷ Select SSIDs of AP1, AP2, AP3 and AP4 one by one and click Next. ❸...
-
Page 26: Router
2 Quick Installation Guide ❹ Make sure the IP address is different from that of remote APs and click Next. ❺ Click Save to apply your changes. Wait until the device restarts automatically. When the Bridge LED stays solid, it has been bridged successfully! Router In this mode, the device enables multi-users to share Internet via ADSL/Cable Modem. - Page 27 2 Quick Installation Guide Configuration Steps ❶ Select Router mode and click Next. ❷ Select the WAN connection type, set corresponding parameters if needed and click Next. ❸ Customize the SSID (WiFi name) and wireless security settings (Recommended: WPA-PSK, AES) for your local network, and then click Next.
- Page 28 2 Quick Installation Guide ❹ Click Save to apply your changes. Wait until the device restarts automatically. After finishing operating mode settings mentioned above, please verify that devices connecting to the AP are set to Obtain an IP address automatically for Internet access.
-
Page 29: Advanced Settings
3 Advanced Settings 3 Advanced Settings Status To view system info, wireless info and statistics like throughput, clients info, port info, ARP table, etc., click Status to enter page below: System Info Device Name --- Display the remarks or identifier of the device. ... - Page 30 3 Advanced Settings This can indicate whether there’s an active Ethernet connection on the corresponding port. Wireless Info Working Mode --- Display the operating mode of the device. SSID --- Display the WiFi name (SSID). Security Mode --- Display the wireless security method being used on the device. ...
-
Page 31: Quick Setup
3 Advanced Settings Quick Setup This section mainly walks you through operating modes of the AP. Click Quick Setup to enter page below and you can select the proper operating mode in terms of your network environment. For specific configuration steps and application scenarios of different operating modes, see Step 4: Quick Setup the Network... - Page 32 3 Advanced Settings To set your AP’s IP address in Static IP mode: ❶ Address Type: Select Static IP. ❷ IP Address: Enter a unique IP address that will be used to login to this AP’s web UI. ❸ Subnet Mask: Enter the subnet mask of your network. ❹...
-
Page 33: Dhcp Server
3 Advanced Settings DHCP Server If you enable DHCP server on the device, it will automatically configure the TCP/IP settings for all your LAN computers (including IP address, subnet mask, gateway and DNS etc.), eliminating the need of manual intervention. Just be sure to set all computers on your LAN to be DHCP clients by selecting Obtain an IP Address Automatically respectively on each PC. -
Page 34: Dhcp Client
3 Advanced Settings DHCP Client To view DHCP clients information, click Network > DHCP Client to enter page below: MAC Clone In general, if you cannot access the Internet via your connected computer or smart-phone, meanwhile you find you can only access the Internet via a specified computer directly without a router, you can try cloning the MAC address on the MAC Clone page. -
Page 35: Wireless
3 Advanced Settings ❶ Enter the MAC address of the specified computer in the MAC Address field. ❷ Click Save. Other Options may help: Default MAC: Click it to restore the current MAC address to factory default MAC of the Router. Clone MAC: Click it to copy the MAC address of the connected computer to the MAC Address field. - Page 36 3 Advanced Settings disabled, wireless clients are unable to scan the SSID. At this time, if you want to connect to it wirelessly, you have to type in the SSID and select the encryption mode manually. Network Mode --- Select a proper network mode: 11 b/g/n mixed, 11 b/g mixed, 11g or 11b. ...
-
Page 37: Advanced
3 Advanced Settings possible channel for your wireless network to operate on. TX Power --- Define the maximum average transmitted output power (in dBm) of the device. To specify the output power, use the slider to adjust the output power. Transmitted power regulations differ in different countries. - Page 38 3 Advanced Settings Transmission Range --- Specify the transmission range for your device between 0.1 km and 20 km. Beacon Interval --- This is a time interval between any two consecutive Beacon packets sent by an Access Point to synchronize a wireless network. Specify a valid value between 20 and 999.
-
Page 39: Access Control
3 Advanced Settings Signal Reception--- Adjust the signal receiving ability for your device. WMM Capable --- Enable Wi-Fi Multimedia feature to configure different minimum and maximum waiting times for the transmission of packets in each queue based on the requirements of the media being sent. -
Page 40: Advanced
3 Advanced Settings For Example: To only allow your computer at the MAC address of the A8:A6:68:14:8C:15 to join your wireless network: ❶ Check the Enable box to enable the MAC Filter feature. ❷ Select Permit only as the Filter Mode. ❸... -
Page 41: Diagnose
3 Advanced Settings Diagnose Three ways are available here to diagnose your network. If there’s something wrong with your network, select the proper one as you need. To deactivate this feature, select Disable. Site Survey To get an overview of your nearby wireless networks in range on all supported channels, click Advanced >... - Page 42 3 Advanced Settings Ping Ping is a computer network administration utility used to test the reachability of a host on an Internet Protocol (IP) network and to measure the round-trip time for messages sent from the original host to a destination computer. To implement Ping action, click Tools >...
- Page 43 3 Advanced Settings Traceroute Traceroute is a computer network diagnostic tool for displaying the route (path) and measuring whether network connection is available or not. When malfunctions occur to the network, you can locate trouble spot of the network with this traceroute test. To implement Traceroute action, click Tools >...
-
Page 44: Network Service
3 Advanced Settings Then you can view the traceroute info below. Network Service Regular Reboot When some settings you have configured cannot be activated or your device is functioning improperly, you can reboot your device. Once this function is enabled, please make sure that your device is synchronized with the Internet time server. - Page 45 3 Advanced Settings Web Service This function enables you to log in to its web UI in a more secure way. Configuration Steps: ❶ Click Advanced > Network Service and locate the HTTP web service feature. ❷ Check the Enable box to enable HTTP web service feature. ❸...
- Page 46 3 Advanced Settings SNMP The Simple Network Management Protocol (SNMP) is widely used in local area networks (LANs) for collecting information, managing, and monitoring network devices, such as servers, printers, hubs, switches, and routers. Specialized software in each SNMP capable device, known as an Agent, continuously monitors the status of the device and reports the results to the SNMP Manager software, which can then act on the report.
- Page 47 3 Advanced Settings UPNP When UPnP is enabled on your device, a network device possessing a specific purpose, such as a printer, can be identified and used automatically by another computer or device on your network. If the UPNP protocol is disabled, other devices behind this device may have difficulty communicating their identification or purpose.
- Page 48 ❸ User Name: Enter the DDNS user name registered with your DDNS service provider. Here in this example, enter ip-com. ❹ Password: Enter the DDNS Password registered with your DDNS service provider. Here in this example, enter 123456.
- Page 49 3 Advanced Settings ❺ Domain Name: Enter the DDNS domain name with your DDNS service provider. Here in this example, enter ip-com.dyndns.org. ❻ Click Save at the bottom of this page to save your settings. ❼ Click Advanced > Network Service to locate the Remote Web Access section to enable the Remote WAN function, enter 218.88.93.33 in the IP Address field, and 8080 in the Port field , then...
-
Page 50: Traffic Control
3 Advanced Settings ❶ Check the Enable box to enable the Remote Web Access function. ❷ IP Address: Specify the IP address for remote management (When it is set to 0.0.0.0, the device becomes remotely accessible to all the PCs on Internet or other external networks. It is not safe). -
Page 51: Port Forwarding
3 Advanced Settings For a better and reasonable network bandwidth experience, here you can configure the bandwidth to limit the speed of users with different IPs. Click Add to enter page below: Remarks --- Description of the rule. Start/End IP --- If you want to specify a rule for several devices which get IPs within an IP range, you need to enter the start IP and end IP to these two fields respectively. - Page 52 3 Advanced Settings 1. Make sure your WAN IP address (Internet IP address) is a public IP address. Private IP addresses are not routed on the Internet. 2. Make sure that the service port number you entered on the router and the service port number you configured on the PC are identical.
-
Page 53: Mac Filter
3 Advanced Settings ❷ Internal IP: Specify the internal host’s IP address. In this example, enter 192.168.0.101. ❸ Internal/External Port: Specify the internal port and external port. Contact the corresponding service provider or google it if you don't know the port number of the service to use. ❹... - Page 54 3 Advanced Settings Forbid Only: Specify a list of devices to Forbid access to the Internet. All other devices not listed as Forbidden will be permitted. Permit Only: Specify a list of devices to Permit access to the Internet. All other devices not listed as Permitted will be forbidden.
-
Page 55: Tools
3 Advanced Settings ❹ MAC Address: Input the MAC address of the device you want to permit, here 00:E4:A5:44:35:69. ❺ Time, Day: Select 13:00~18:00, Sat~Sun. ❻ Click Save to apply your settings. Tools Date & Time This section assists you in setting the device's current time; you can select to either set the time and date manually or obtain the GMT time from the Internet automatically. - Page 56 3 Advanced Settings ❹ Select your time zone. ❺ Click Save. To set time and date manually: ❶ Click Tools > Date & Time to enter page below. ❷ Select Manual. ❸ Specify the time and date manually or click Synchronized with local time to automatically copy your PC's time to the device.
-
Page 57: Maintenance
3 Advanced Settings Maintenance Reboot Device To reboot your device manually, click Tools > Maintenance, locate the Reboot Router section and click Reboot. Reset to Factory Defaults If the device or client connected to the device fails to access the Internet due to incorrect configurations and you cannot solve the problem, you can reset the device. -
Page 58: Upgrade Firmware
If your device is in normal operation, it is not advisable to upgrade your device. If you want to acquire the latest software version or better value-added functions for your device, you can access our official website www.ip-com.com.cn to download the latest software for upgrading. To upgrade your AP: ❶... -
Page 59: Administrator
3 Advanced Settings Backup & Restore If you configure many settings on this device, which will make this device work in good status and suitable environment, it’s suggested to backup settings for this device, which will be convenient for troubleshooting and saving time for next time’s configuration. Click Tools > Maintenance and locate the Backup/Restore section. - Page 60 3 Advanced Settings To change the login user name and password for the administrator, click the Administrator edit icon: To change the login user name and password for the guest, click the Guest Account edit icon:...
-
Page 61: System Log
3 Advanced Settings System Log Click Tools > System Log to enter page below. Here you can view the history of the device’s actions. Three types of logs are supported on this device: All, System and WAN. You can select any one of them from the drop-down list. -
Page 62: Appendix
Appendix Appendix 1 Configure PC Windows 8 ❶ Right click the icon on the bottom right corner of your desktop. ❷ Click Open Network and Sharing Center. ❸ Click Ethernet > Properties. ❹ Find and double click Internet Protocol Version 4(TCP/IPv4). - Page 63 Appendix ❺ Select Use the following IP address, type in the IP address: 192.168.2.x (2~253), Subnet mask: 255.255.255.0 and click OK. ❻ Click OK on the Ethernet Properties window.
-
Page 64: Windows 7
Appendix Windows 7 ❶ Click the icon on the bottom right corner of your desktop. ❷ Click Open Network and Sharing Center. If you cannot find the icon on the bottom right corner of your desktop, follow steps below: Click Start >... - Page 65 Appendix ❺ Select Use the following IP address, type in the IP address: 192.168.2.x (2~253), Subnet mask: 255.255.255.0 and click OK. ❻ Click OK on the Local Area Connection Properties window.
-
Page 66: Windows Xp
Appendix Windows XP ❶ Right click My Network Places on your desktop and select Properties. ❷ Right click Local Area Connection and select Properties. ❸ Scroll down to find and double click Internet Protocol (TCP/IP). - Page 67 Appendix ❹ Select Use the following IP address, type in the IP address: 192.168.2.x (2~253), Subnet mask: 255.255.255.0 and click OK. ❺ Click OK on the Local Area Connection Properties window.
-
Page 68: Faqs
Appendix 2 FAQs Q: I enter the device’s LAN IP address in the web browser but cannot access this device’s web UI. What should I do? 1) Verify that the IP address of computer should be a different one but on the same network segment as the LAN IP address of this device. - Page 69 Appendix interference to radio or television reception, which can be determined by turning the equipment off and on, the user is encouraged to try to correct the interference by one of the following measures: — Reorient or relocate the receiving antenna. —...
Need help?
Do you have a question about the AP615 and is the answer not in the manual?
Questions and answers