Table of Contents

Related Manuals for ZyXEL Communications MGS3750-28F


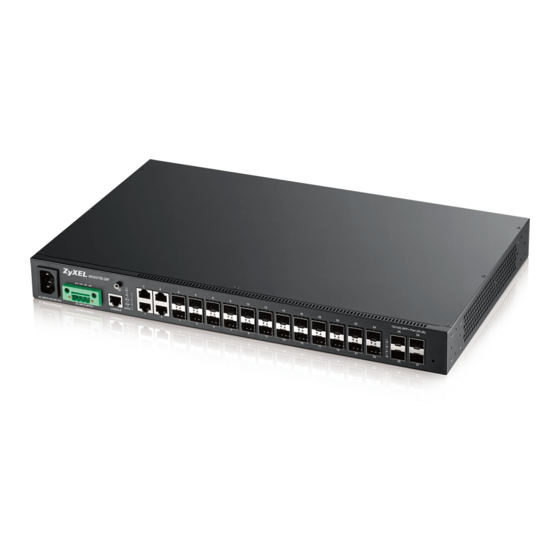
Summary of Contents for ZyXEL Communications MGS3750-28F
- Page 1 MGS3750-28F MetroGigabit Switch Version 1.02 Edition 2, 11/2016 Quick Start Guide User’s Guide Default Login Details IP Address http://192.168.1.1 User Name admin www.zyxel.com Password 1234 Copyright © 2016 ZyXEL Communications Corporation...
- Page 2 Related Documentation • CLI Reference Guide The CLI Reference Guide explains how to use the Command-Line Interface (CLI) and CLI commands to configure the Switch. • More Information Go to support.zyxel.com to find other information on the Switch MGS3750-28F User’s Guide...
-
Page 3: Table Of Contents
Contents Overview Contents Overview Hardware Installation and Connection ......................7 Hardware Overview ..........................10 Logging into the Web Interface .......................15 Overall Web Page Layout ........................16 Basic Settings ............................18 Advanced Application Configurations .....................22 Management ............................61 MGS3750-28F User’s Guide... -
Page 4: Table Of Contents
4.1 Port Status ............................16 Chapter 5 Basic Settings .............................18 5.1 System Info ............................18 5.2 General Application ...........................19 5.3 IP Setup ............................20 5.4 Port Setup ............................20 Chapter 6 Advanced Application Configurations .....................22 6.1 VLAN ..............................22 6.1.1 VLAN Status ..........................22 MGS3750-28F User’s Guide... - Page 5 7.1.1 Firmware Upgrade ........................61 7.1.2 Restart System ........................62 7.1.3 OAM Diag ..........................63 7.2 Access Control ..........................63 7.2.1 SNMP ............................64 7.2.2 User Information ........................65 7.2.3 Logins ............................67 7.3 Diagnostic ............................68 7.4 Syslog Setup .............................68 7.4.1 Syslog Server Setup ........................69 MGS3750-28F User’s Guide...
- Page 6 Table of Contents Appendix A Customer Support ......................71 Appendix B Legal Information......................77 MGS3750-28F User’s Guide...
-
Page 7: Hardware Installation And Connection
1.3.1 Rack-mounted Installation Requirements • Two mounting brackets. • Eight M3 flat head screws and a #2 Philips screwdriver. • Four M5 flat head screws and a #2 Philips screwdriver. Failure to use the proper screws may damage the unit. MGS3750-28F User’s Guide... -
Page 8: Attaching The Mounting Brackets To The Switch
Position a mounting bracket (that is already attached to the Switch) on one side of the rack, lining up the two screw holes on the bracket with the screw holes on the side of the rack. Figure 2 Mounting the Switch on a Rack MGS3750-28F User’s Guide... - Page 9 Chapter 1 Hardware Installation and Connection Using a #2 Philips screwdriver, install the M5 flat head screws through the mounting bracket holes into the rack. Repeat steps to attach the second mounting bracket on the other side of the rack. MGS3750-28F User’s Guide...
-
Page 10: Hardware Overview
This chapter describes the front panel and rear panel of the Switch and shows you how to make the hardware connections. 2.1 Front Panel The following figure shows the front panel of the Switch. Figure 3 MGS3750-28F Front Panel: AC/DC Model SFP or SFP+ Slots Console Port Power Connection Dual Personality Interfaces The following table describes the port labels on the front panel. -
Page 11: Transceiver Slots
2.1.2.1 Transceiver Installation Use the following steps to install a mini-GBIC transceiver (SFP module). Insert the transceiver into the slot with the exposed section of PCB board facing down. Press the transceiver firmly until it clicks into place. MGS3750-28F User’s Guide... - Page 12 Remove the fiber optic cables from the transceiver. Open the transceiver’s latch (latch styles vary). Pull the transceiver out of the slot. Figure 6 Removing the Fiber Optic Cables Figure 7 Opening the Transceiver’s Latch Example Figure 8 Transceiver Removal Example MGS3750-28F User’s Guide...
-
Page 13: Power Connector
Connect one end of a power wire to the Switch’s -48V (input) pin and tighten the captive screw. Connect the other end of the power wire to the negative terminal on the power supply. Insert the terminal block plug in the Switch’s terminal block header. MGS3750-28F User’s Guide... -
Page 14: Leds
This link is disconnected or failed 10/100/1000 BASE-T Ethernet Ports (in Dual Personality Interface) LNK/ACT Green The link to the network is up. Blinking The port is receiving or transmitting data. This link is disconnected or failed. MGS3750-28F User’s Guide... -
Page 15: Logging Into The Web Interface
Enter http://device IP (default administration IP: 192.168.1.1). Press Enter. The login page appears. The default user name is "admin", and the default password is "1234". Select English or Chinese interface. Figure 9 Login Click on the Login button to enter the web setup interface. MGS3750-28F User’s Guide... -
Page 16: Overall Web Page Layout
10000 for 1Gbps ) and the duplex (F for full duplex or H for half). It also shows the cable type (Copper or Fiber) for the combo ports. Set Speed This field helps you set port speed. The speed is set to auto by default. MGS3750-28F User’s Guide... - Page 17 This field shows the total amount of time in hours, minutes and seconds the port has been Clear Counter Select Port, enter a port number and then click Clear Counter to erase the recorded statistical information for that port, or select Any to clear statistics for all ports. MGS3750-28F User’s Guide...
-
Page 18: Basic Settings
Application Switch The Switch has temperature sensors that are capable of detecting and reporting if the temperature temperature rises above the threshold. System Name This field displays the name used to identify the Switch on any network. MGS3750-28F User’s Guide... -
Page 19: General Application
This field displays the descriptive name of the Switch for identification purposes. description Refresh Click Refresh to update the screen. Modify Click Modify to save your changes to the Switch’s run-time memory. The Switch loses these changes if it is turned off or loses power. MGS3750-28F User’s Guide... -
Page 20: Ip Setup
Click Modify to save your changes to the Switch’s run-time memory. The Switch loses these changes if it is turned off or loses power. 5.4 Port Setup Set port speed, priority, and enable/disable ports. View the status of all ports. Note: "O" means connected, and "-" means not connected. MGS3750-28F User’s Guide... - Page 21 You can add descriptions to a port in this field. 128 Chars) Refresh Click Refresh to update the screen. Modify Click Modify to save your changes to the Switch’s run-time memory. The Switch loses these changes if it is turned off or loses power. MGS3750-28F User’s Guide...
-
Page 22: Advanced Application Configurations
This is the VLAN identification number that was configured in the Static VLAN screen. Elapsed Time This field shows how long it has been since a normal VLAN was registered or a static VLAN was set up. MGS3750-28F User’s Guide... -
Page 23: Vlan Port Settings
A PVID (Port VLAN ID) is a tag that adds to incoming untagged frames received on a port so that the frames are forwarded to the VLAN group that the tag defines. Enter a number between 1and 4094 as the port VLAN ID. MGS3750-28F User’s Guide... -
Page 24: Static Vlan
If a new VLAN is added with VID=10 that contains 1 Tagged port and 2 Untagged ports, the user can click on the white area underneath the port number to edit its member ports. The Modify function is identical to Add. Figure 17 Static VLAN Screen MGS3750-28F User’s Guide... -
Page 25: Static Mac Forwarding
MAC addresses for a port. This may reduce the need for broadcasting. Static MAC address forwarding together with port security allow only computers in the MAC address table on a port to access the Switch. A blackhole port drops traffic without notifying the sources. MGS3750-28F User’s Guide... - Page 26 (No). You may temporarily deactivate a rule without deleting it. MAC Address This field displays the MAC address that will be forwarded and the VLAN identification number to which the MAC address belongs. This field displays the ID number of the VLAN group. MGS3750-28F User’s Guide...
-
Page 27: Spanning Tree Protocol
This is the unique identifier for this bridge, consisting of bridge priority plus MAC address. This ID is the same for Root and Our Bridge if the Switch is the root switch. Root Path Cost It is the cost of transmitting a frame to a LAN through that port. MGS3750-28F User’s Guide... -
Page 28: Spanning Tree Configuration
The Switch supports Spanning Tree Protocol (STP), Rapid Spanning Tree Protocol (RSTP) and Multiple Spanning Tree Protocol (MSTP) as defined in the following standards. • IEEE 802.1D Spanning Tree Protocol • IEEE 802.1w Rapid Spanning Tree Protocol • IEEE 802.1s Multiple Spanning Tree Protocol MGS3750-28F User’s Guide... -
Page 29: Compatible/Rapid Spanning Tree Protocol
The opened page can be used to configure the STP and RSTP mode of the spanning tree including global, port priority, port spanning tree status, and path cost. Bridge priority can be modified (by default, bridge priority is set to 32768), STP protocol packet interval, Maximum packet lifetime, and forwarding delay. MGS3750-28F User’s Guide... - Page 30 The allowed range is 4 to 30 seconds. As a general rule: Note: 2 * (Forward Delay - 1) >= Max Age >= 2 * (Hello Time + 1) MGS3750-28F User’s Guide...
-
Page 31: Multiple Spanning Tree Protocol
You can configure Hello Time, MAX Age, Forwarding Delay, Configuration Name, and Revision Number under Bridge. Hello Time This is the time interval in seconds between BPDU (Bridge Protocol Data Units) configuration message generations by the root switch. The allowed range is 1 to 10 seconds. MGS3750-28F User’s Guide... - Page 32 Note: Changes in this row are copied to all the ports as soon as you make them. Active Select this check box to add this port to the MST instance. MGS3750-28F User’s Guide...
-
Page 33: Erps Protocol
VLAN that does not exist on the system. Protected-instance Enter the protection instance information in this field. The same port can not be List configured with the same protection instance in different ERPS. MGS3750-28F User’s Guide... -
Page 34: Instance Screen
Select the check box to enable the ring protection function for the corresponding instance. Otherwise, the instance cannot be used. 6.5 EAPS Protocol Use this screen to add domain, control VLAN, and select a Work Mode to enable topology collection. MGS3750-28F User’s Guide... - Page 35 Switch’s run-time memory. The Switch loses these changes if it is turned off or loses power. Cancel Click Cancel to reset the fields back to your previous configuration. Clear Click Clear to delete the configurations of the above fields. MGS3750-28F User’s Guide...
- Page 36 Primary Port Enter a primary port number for master or transit selected in Bridge Role field. Secondary Port Enter a secondary port number for master or transit selected in Bridge Role field. Level Select the ring level number. MGS3750-28F User’s Guide...
-
Page 37: Layer 2 Protocol Tunnel
This field displays the EAPS secondary Port Number and state. Port:State Delete Click Delete to remove the selected entry from the summary table. 6.6 Layer 2 Protocol Tunnel Use the screen to set the packet to be sent by the port. MGS3750-28F User’s Guide... -
Page 38: Bandwidth Control
6.7 Bandwidth Control This section shows you how you can cap the maximum bandwidth using the Bandwidth Control screen. Bandwidth control means defining a maximum allowable bandwidth for incoming and/or out-going traffic flows on a port. MGS3750-28F User’s Guide... -
Page 39: Broadcast Storm Control
Unicast packets is reached per second, the subsequent packets are discarded. Enable this feature to reduce broadcast, multicast and/or Unicast packets in your network. You can specify limits for each packet type on each port. Figure 31 Broadcast Storm Control Screen MGS3750-28F User’s Guide... -
Page 40: Mirroring
Use this row only if you want to make some settings the same for all ports. Use this row first to set the common settings and then make adjustments on a port-by-port basis. Note: Changes in this row are copied to all the ports as soon as you make them. MGS3750-28F User’s Guide... -
Page 41: Link Aggregation
Link Aggregator ID consists of the following: system priority, MAC address, key, port priority and port number. The ID displays only when there is a port belonging to this trunk group and LACP is also enabled for this group. MGS3750-28F User’s Guide... -
Page 42: Link Aggregation Setting
• LACP - if the ports are configured to join a trunk group via LACP. 6.10.1 Link Aggregation Setting Click Link Aggregation Setting in the upper right corner of Link Aggregation Status screen. Configure link aggregation ports MGS3750-28F User’s Guide... - Page 43 Select src-ip to distribute traffic based on the packet’s source IP address. Select dst-ip to distribute traffic based on the packet’s destination IP address. Select src-dst-ip to distribute traffic based on a combination of the packet’s source and destination IP addresses. MGS3750-28F User’s Guide...
-
Page 44: Link Aggregation Control Protocol
The following table describes the fields in this screen. Table 29 Group ID Screen LABEL DESCRIPTION Group ID This field displays the group ID to identify a trunk group, that is, one logical link containing multiple ports. LACP Active Enable/Disable aggregation group. MGS3750-28F User’s Guide... -
Page 45: Port
MAC address(es) for a port. It is not recommended you disable port security together with MAC address learning as this will result in many broadcasts. By default, MAC address learning is still enabled even though the port security is not activated. MGS3750-28F User’s Guide... - Page 46 Click Cancel to begin configuring this screen afresh.. Address Learn Global Set the maximum MAC learning limit for the switch (default is 16K). Control Global This field is to limit the maximum MAC numbers based on global. MGS3750-28F User’s Guide...
-
Page 47: Classifier
A classifier distinguishes traffic into flows based on the configured criteria. Use the Classifier Configuration screen to define the classifiers. After you define the classifier, you can specify actions (or policy) to act upon the traffic that matches the rules. MGS3750-28F User’s Guide... - Page 48 00:13:49:12:34:56 matches this criteria. If you leave the Mask field blank, the Switch automatically sets the mask to ff:ff:ff:ff:ff:ff. Port Select Any to apply the rule to all ports. To specify a port group, select the second choice and type a port group numbers. Destination MGS3750-28F User’s Guide...
- Page 49 Click Cancel to reset the fields back to your previous configuration. Clear Click Clear to delete the configurations of the above fields. Index This field displays the index number of the rule. Click an index number to edit the rule. MGS3750-28F User’s Guide...
-
Page 50: Policy Rule
A policy rule ensures that a traffic flow gets the requested treatment in the network. Figure 40 Policy Screen The following table describes the fields in this screen. Table 33 Policy Screen LABEL DESCRIPTION Active Select this option to enable the policy. Name Enter a descriptive name for identification purposes. MGS3750-28F User’s Guide... - Page 51 Select Set the packet’s 802.1p priority and send the packet to priority queue to replace the packet’s 802.1p priority field with the value you set in the Priority field and put the packets in the designated queue. MGS3750-28F User’s Guide...
-
Page 52: Queuing Method
This queuing mechanism is highly efficient in that it divides any available bandwidth across the different traffic queues. By default, the weight for Q0 is 1, for Q1 is 2, for Q2 is 3, and so on. MGS3750-28F User’s Guide... -
Page 53: Multicast
Click Cancel to begin configuring this screen afresh. 6.15 Multicast View all multicast groups, specific groups of hosts that will receive particular data, on the Switch; this includes both static multicasts as well as multicasts learned through the IGMP-snooping protocol. MGS3750-28F User’s Guide... -
Page 54: Multicast Setting
Use this screen to enable IGMP snooping to forward group multicast traffic only to ports that are members of that group. Click Multicast Setting in the upper right corner of Multicast Status screen. Figure 43 Multicast Setting Screen MGS3750-28F User’s Guide... -
Page 55: Igmp Snooping Deny Vlan
6.15.2 IGMP Snooping Deny VLAN Use the screen to set the traffic in the specified VLAN groups to ignore IGMP snooping. Click Deny VLAN in the upper right corner of Multicast Setting screen. Figure 44 IGMP Snooping Deny VLAN Screen MGS3750-28F User’s Guide... -
Page 56: Igmp Filtering Profile
Clients connected to those ports are then able to join the multicast groups specified in the profile. Each port can be assigned a single profile. A profile can be assigned to multiple ports. Figure 45 IGMP Filtering Profile Screen MGS3750-28F User’s Guide... -
Page 57: Cpu Queue Control
This field displays the VLAN ID with the IGMP filtering profile. Delete Click Del to delete a profile ID. 6.16 CPU Queue Control Use this screen to control the rate at which packets are passed to the CPU. MGS3750-28F User’s Guide... -
Page 58: Dos Attack Control
Click Cancel to begin configuring this screen afresh. 6.17 DoS Attack Control A Denial of Service (DoS) attack aims to bring down a network or a device by sending tremendously high counts of requests. Use the screen to control DoS packets. MGS3750-28F User’s Guide... - Page 59 Control ICMP packets marked as fragmented. packets TCP fragments with Control TCP packets with a fragment value of 1(*8). offset value of 1(*8) TCP with SYN & FIN Control TCP packets with SYN and FIN bits. bits MGS3750-28F User’s Guide...
- Page 60 Control TCP packets with FIN, URG, and PSH bits whose sequence = 0. and PSH bits,and sequence equal 0 TCP first fragments Control TCP packets where the first fragment has the minimum TCP header length. with minimum tcp header length MGS3750-28F User’s Guide...
-
Page 61: Management
Switch Maintenance OAM Diag Click Click Here to go to the OAM Diag screen. Use this screen to run Virtual Cable Test (VCT) diagnostics. 7.1.1 Firmware Upgrade Upgrade the Switch's BootRom and Host programs. MGS3750-28F User’s Guide... -
Page 62: Restart System
Table 43 Restart System Screen LABEL DESCRIPTION Startup Application Select Default Host When the Switch start up, it will run the default host software. This number is the software version on the Switch and it will change once you upgrade/downgrade it. MGS3750-28F User’s Guide... -
Page 63: Oam Diag
100M port is 181 meters, and GE port is 175 meters. 7.2 Access Control Enter the Logins page then click on SNMP to configure the SNMP protocol. Click on Logins to add administrators for the Switch. MGS3750-28F User’s Guide... -
Page 64: Snmp
Get Community Enter the Get Community string, which is the password for the incoming Get- and GetNext- requests from the management station. The Get Community string is only used by SNMP managers using SNMP version 2c or lower. MGS3750-28F User’s Guide... -
Page 65: User Information
LABEL DESCRIPTION User Information Use the username and password of the login accounts you specify in this screen to create accounts on the SNMP v3 manager. Username Specify the username of a login account on the Switch. MGS3750-28F User’s Guide... - Page 66 This field displays the SNMP group to which this user belongs. Delete Click Delete to remove the selected entry from the summary table. Delete Click Delete to remove. Cancel Click Cancel to begin configuring this screen afresh. MGS3750-28F User’s Guide...
-
Page 67: Logins
Edit Other Logins Admin user can add/delete users and change user passwords; up to 15 users can be added. User Name Set a user name (up to 32 ASCII characters long). New Password Enter your new system password. MGS3750-28F User’s Guide... -
Page 68: Diagnostic
Click to display system logs. Clear Clears the system log. 7.4 Syslog Setup The syslog feature sends logs to an external syslog server. Use this screen to configure the Switch’s system logging settings and configure a list of external syslog servers. MGS3750-28F User’s Guide... -
Page 69: Syslog Server Setup
Select the severity level(s) of the logs that you want the Switch to send to this syslog server. The lower the number, the more critical the logs are. Click Add to save your changes to the Switch’s run-time memory. The Switch loses these changes if it is turned off or loses power. MGS3750-28F User’s Guide... - Page 70 This field displays the severity level of the logs that the Switch is to send to this syslog server. Delete Click Delete to remove the selected entry(ies). Delete Click Delete to remove. Cancel Click Cancel to begin configuring this screen afresh. MGS3750-28F User’s Guide...
-
Page 71: Customer Support
• Brief description of the problem and the steps you took to solve it. Corporate Headquarters (Worldwide) Taiwan • ZyXEL Communications Corporation • http://www.zyxel.com Asia China • ZyXEL Communications (Shanghai) Corp. ZyXEL Communications (Beijing) Corp. ZyXEL Communications (Tianjin) Corp. • http://www.zyxel.cn India • ZyXEL Technology India Pvt Ltd • http://www.zyxel.in Kazakhstan •... - Page 72 • http://www.zyxel.com.sg Taiwan • ZyXEL Communications Corporation • http://www.zyxel.com/tw/zh/ Thailand • ZyXEL Thailand Co., Ltd • http://www.zyxel.co.th Vietnam • ZyXEL Communications Corporation-Vietnam Office • http://www.zyxel.com/vn/vi Europe Austria • ZyXEL Deutschland GmbH • http://www.zyxel.de Belarus • ZyXEL BY MGS3750-28F User’s Guide...
- Page 73 • http://www.zyxel.by Belgium • ZyXEL Communications B.V. • http://www.zyxel.com/be/nl/ • http://www.zyxel.com/be/fr/ Bulgaria • ZyXEL България • http://www.zyxel.com/bg/bg/ Czech Republic • ZyXEL Communications Czech s.r.o • http://www.zyxel.cz Denmark • ZyXEL Communications A/S • http://www.zyxel.dk Estonia • ZyXEL Estonia • http://www.zyxel.com/ee/et/ Finland •...
- Page 74 • ZyXEL Communications Poland • http://www.zyxel.pl Romania • ZyXEL Romania • http://www.zyxel.com/ro/ro Russia • ZyXEL Russia • http://www.zyxel.ru Slovakia • ZyXEL Communications Czech s.r.o. organizacna zlozka • http://www.zyxel.sk Spain • ZyXEL Communications ES Ltd • http://www.zyxel.es Sweden • ZyXEL Communications • http://www.zyxel.se Switzerland •...
- Page 75 Appendix A Customer Support • http://www.zyxel.ch/ Turkey • ZyXEL Turkey A.S. • http://www.zyxel.com.tr • ZyXEL Communications UK Ltd. • http://www.zyxel.co.uk Ukraine • ZyXEL Ukraine • http://www.ua.zyxel.com Latin America Argentina • ZyXEL Communication Corporation • http://www.zyxel.com/ec/es/ Brazil • ZyXEL Communications Brasil Ltda.
- Page 76 Appendix A Customer Support North America • ZyXEL Communications, Inc. - North America Headquarters • http://www.zyxel.com/us/en/ Oceania Australia • ZyXEL Communications Corporation • http://www.zyxel.com/au/en/ Africa South Africa • Nology (Pty) Ltd. • http://www.zyxel.co.za MGS3750-28F User’s Guide...
-
Page 77: Legal Information
The contents of this publication may not be reproduced in any part or as a whole, transcribed, stored in a retrieval system, translated into any language, or transmitted in any form or by any means, electronic, mechanical, magnetic, optical, chemical, photocopying, manual, or otherwise, without the prior written permission of ZyXEL Communications Corporation. Published by ZyXEL Communications Corporation. All rights reserved. -
Page 78: Safety Warnings
CLASS 1 LASER PRODUCT (for products with mini-GBIC slots or laser products, such as fiber-optic transceiver and GPON products). • PRODUCT COMPLIES WITH 21 CFR 1040.10 AND 1040.11. (for products with mini-GBIC slots or laser products, such as fiber-optic transceiver and GPON products) MGS3750-28F User’s Guide... - Page 79 Symbolen innebär att enligt lokal lagstiftning ska produkten och/eller dess batteri kastas separat från hushållsavfallet. När den här produkten når slutet av sin livslängd ska du ta den till en återvinningsstation. Vid tiden för kasseringen bidrar du till en bättre miljö och mänsklig hälsa genom att göra dig av med den på ett återvinningsställe. MGS3750-28F User’s Guide...
- Page 80 Appendix B Legal Information Environmental Product Declaration MGS3750-28F User’s Guide...
-
Page 81: Zyxel Limited Warranty
(the Warranty Period) from the date of purchase. The Warranty Period varies by region. Check with your vendor and/or the authorized ZyXEL local distributor for details about the Warranty Period of this product. During the warranty period, and upon proof of MGS3750-28F User’s Guide... - Page 82 North American products. Trademarks ZyNOS (ZyXEL Network Operating System) and ZON (ZyXEL One Network)are registered trademarks of ZyXEL Communications, Inc. Other trademarks mentioned in this publication are used for identification purposes only and may be properties of their respective owners.
Need help?
Do you have a question about the MGS3750-28F and is the answer not in the manual?
Questions and answers