Table of Contents
Advertisement
Advertisement
Table of Contents

Related Manuals for Novus NV-DVR1104/CD


Summary of Contents for Novus NV-DVR1104/CD
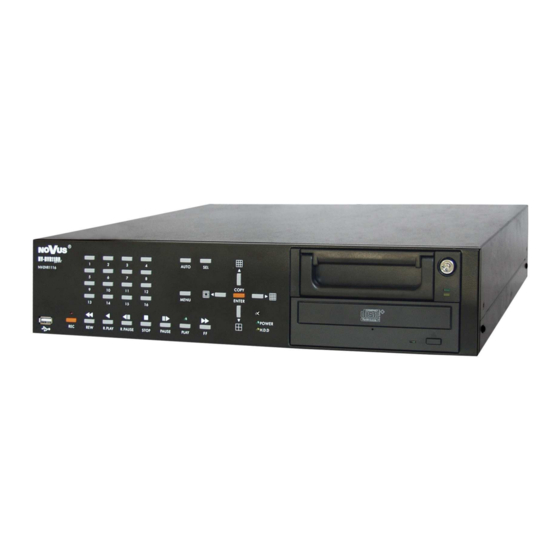
- Page 1 ' s m a n u a l NV-DVR1104/CD NV-DVR1108/CD NV-DVR1116/CD...
- Page 2 NV-DVR1104/CD, NV-DVR1108/CD and NV-DVR1116/CD ver. 1.1 - user's manual INFORMATIONS EMC (89/336/EEC) and LVD (73/23/EEC ) Directives CE Marking Our products are manufactured to comply with requirements of following directives and national regulations implementing the directives: Electromagnetic compatibility EMC 89/336/EEC with further amendments.
-
Page 3: Warnings And Precautions
DEVICES BASED ON CMOS/MOSFET TECHNOLOGY. INFORMATION Data included in the following user’s manual is up to date at the time of printing. Novus Security Sp z o.o. holds exclusive rights to modify this manual. The producer reserves the rights for device specification modification and change in the design without prior notice. - Page 4 NV-DVR1104/CD, NV-DVR1108/CD and NV-DVR1116/CD ver. 1.1 - user's manual WARNINGS AND PRECAUTIONS 1. Installation and servicing of should only be carried out by qualified service the Multiplexer personnel and conform to all local regulations. 2. Do not place the Multiplexer in areas where ventilation openings might be blocked or covered.
-
Page 5: Table Of Contents
NV-DVR1104/CD, NV-DVR1108/CD and NV-DVR1116/CD ver. 1.1 - user's manual TABLE OF CONTENTS 1. FOREWORD INFORMATION......................6 1.1 Main characteristics ........................6 1.2 Technical specification ........................7 2. DEVICE POWER UP.......................... 9 2.1 Preparing the equipment for operation..................10 2.2 Electric connectors of back panel ....................12 2.3 External Devices Connection ......................13... -
Page 6: Foreword Information
NV-DVR1104/CD, NV-DVR1108/CD and NV-DVR1116/CD ver. 1.1 - user's manual FOREWORD INFORMATION FOREWORD INFORMATION 1.1 Main characteristics Operating mode triplex (simultaneous recording, playback and networking); Operating system based on Linux system; The possibility of installing two HDDs 3.5’’ IDE, one of them placed in swappable bay;... -
Page 7: Technical Specification
NV-DVR1104/CD, NV-DVR1108/CD and NV-DVR1116/CD ver. 1.1 - user's manual TECHNICAL SPECIFICATION 1.2. Technical Specifications NV-DVR1104/CD Triplex (simultaneous: recording, playback, networking) Operation Mode 4 x BNC loop-through, 1Vp-p/75 Ohm Video Input Video Output 1 x BNC Main Monitor output (BNC, 1Vp-p/75 Ohm) - Page 8 NV-DVR1104/CD, NV-DVR1108/CD and NV-DVR1116/CD ver. 1.1 - user's manual TECHNICAL SPECIFICATION NV-DVR1108/CD NV-DVR1116/CD Triplex (simultaneous: recording, playback, networking) Operation Mode 8 x BNC loop-through, 16 x BNC loop-through, Video Input 1Vp-p/75 Ohm 1Vp-p/75 Ohm 1 x BNC Main Monitor output (BNC, 1Vp-p/75 Ohm),...
-
Page 9: Device Power Up
NV-DVR1104/CD, NV-DVR1108/CD and NV-DVR1116/CD ver. 1.1 - user's manual DEVICE POWER UP 2. DEVICE POWER UP 2.1 Preparing equipment for operation Please take extra caution when unpacking the device. Please ensure that following items are included in the package: Digital Multiplexer NV-DVR1104/CD, NV-DVR1108/CD or NV-DVR1116/CD... - Page 10 NV-DVR1104/CD, NV-DVR1108/CD and NV-DVR1116/CD ver. 1.1 - user's manual DEVICE POWER UP Electric connectors on back panel of the multiplexers. NV-DVR1108/CD NV-DVR1116/CD Audio in: 1 x RCA audio recording input; Audio out : RCA audio output; video output for spot monitor connection, only full screen display available;...
- Page 11 NV-DVR1104/CD, NV-DVR1108/CD and NV-DVR1116/CD ver. 1.1 - user's manual DEVICE POWER UP NV-DVR1104/CD CAMERA OUT: loop-through video outputs; MONITOR OUT: main monitor connection (1 x BNC and 1 x S-Video connectors available); the possibility of selection from various display modes;...
-
Page 12: Electric Connectors Of Back Panel
NV-DVR1104/CD, NV-DVR1108/CD and NV-DVR1116/CD ver. 1.1 - user's manual DEVICE POWER UP 2.3 External Devices Connection All installation procedures should be conducted by qualified personnel. Before device installation and operation please analyze the scheme shown below. Depending on specific user needs and requirements each system will consist of various number of external devices. -
Page 13: Hdd Installation
Max. allowed capacity of single HDD is 400GB. WARNING: Producer strongly advices against utilizing Samsung or Western Digital HDD's. Novus does not take any responsibility for problems caused by using improper HDD. Before installing HDD please make sure that jumpers are set properly! When using only one HDD it must be set in MASTER mode. -
Page 14: Device Power On And Power Off
NV-DVR1104/CD, NV-DVR1108/CD and NV-DVR1116/CD ver. 1.1 - user's manual DEVICE POWER UP 2.5 Device turn on and turn off. Before turning on the device please make sure that the power supply (voltage and frequency) conforms to device requirements. Also make sure that the power switch is set to „0”, HDD swappable bay is locked with the key and that the all external devices are connected properly. -
Page 15: Front Panel Description
NV-DVR1104/CD, NV-DVR1108/CD and NV-DVR1116/CD ver. 1.1 - user's manual FRONT PANEL DESCRIPTION Front Panel Description NV-DVR1108/CD NV-DVR1116/CD Displayed channel selection; AUTO pressing AUTO button activates sequential display mode on Main monitor; Channel selection; each additional press of this button toggles between various, available display formats ;... - Page 16 NV-DVR1104/CD, NV-DVR1108/CD and NV-DVR1116/CD ver. 1.1 - user's manual FRONT PANEL DESCRIPTION NV-DVR1104/CD Displayed channel or quad selection; Cursor buttons; In PTZ mode these buttons are used to control the camera; ENTER in setting mode is used to enter submenu and edition bars ;...
-
Page 17: Device Menu
NV-DVR1104/CD, NV-DVR1108/CD and NV-DVR1116/CD ver. 1.1 - user's manual URUCHOMIENIE URZĄDZENIA DEVICE MENU DEVICE MENU NV-DVR1104/CD, NV-DVR1108/CD and NV-DVR1116/CD digital multiplexers are equipped with multi level OSD (on screen display) sub-menus. This menus are used to program settings and to exe- cute functions such us playback or copying In order to enter device menu press MENU button. -
Page 18: System Setup
NV-DVR1104/CD, NV-DVR1108/CD and NV-DVR1116/CD ver. 1.1 - user's manual DEVICE MENU 4.1 System setup SYSTEM SETUP 0F0GBD N3.12 ▪ DATE FORMAT Y-M-D ▪ DATE 2006/06/10 ▪ TIME H:M:S 10:10:10 ▪ AUTO SWITH DWELL 02 SEC ▪ SPOT SETUP ▪ DATE AND OSD DISPLAY ENABLE ▪... - Page 19 NV-DVR1104/CD, NV-DVR1108/CD and NV-DVR1116/CD ver. 1.1 - user's manual DEVICE MENU in order to activate sequence mode on spot monitor SPOT SWITCHING position should be set to ON. SPOT SETUP ▪ SPOT SWITCHING ▪ CAM01 02SEC ▪ CAM09 02SEC ▪ CAM02 02SEC ▪...
- Page 20 NV-DVR1104/CD, NV-DVR1108/CD and NV-DVR1116/CD ver. 1.1 - user's manual DEVICE MENU KEY LOCK this position is used to select multiplexer access protection mode. Together with system password it limits (reduces) access to selected functions. When TYPE 1 is selected after exiting main menu, recording and playback functions are unavailable from the front panel.
-
Page 21: Camera Setup
NV-DVR1104/CD, NV-DVR1108/CD and NV-DVR1116/CD ver. 1.1 - user's manual DEVICE MENU 4.2 Camera setup CAMERA SETUP ▪ CAMERA CAM1 ▪ DISPLAY ▪ RECORD ▪ BRIGHTNES ▪ CONTRAST ▪ HUE ▪ COLOR ▪ CAMERA TITLE ▪ EXIT ENTER -SET MENU EXIT... -
Page 22: Motion Detection
NV-DVR1104/CD, NV-DVR1108/CD and NV-DVR1116/CD ver. 1.1 - user's manual DEVICE MENU 4.3 Motion detection MOTION SETUP ▪ CAMERA CAM1 ▪ MOTION DETECT ▪ BUZZER ▪ SENSITIVITY ▪ AREA SETUP ▪ EXIT ENTER -SET MENU EXIT In MOTION DETECTION menu following settings can be set individually for each video channel:... - Page 23 NV-DVR1104/CD, NV-DVR1108/CD and NV-DVR1116/CD ver. 1.1 - user's manual DEVICE MENU AREA SETUP when this position is selected and ENTER button is pressed , the motion detection zone screen (16x12) is displayed. Zones, where motion detection is active are marked with yellow color. Black color means that the zone is inactive.
-
Page 24: Recording
NV-DVR1104/CD, NV-DVR1108/CD and NV-DVR1116/CD ver. 1.1 - user's manual DEVICE MENU 4.4 Recording RECORD SETUP ▪ SCHEDULE RECORD ▪ NORMAL RECORD FPS ▪ ALARM RECORD FPS ▪ ALARM RECORD DWELL 5 SEC ▪ RECORD QUALITY HIGH ▪ AUDIO RECORD ▪ EXIT... - Page 25 NV-DVR1104/CD, NV-DVR1108/CD and NV-DVR1116/CD ver. 1.1 - user's manual DEVICE MENU ALARM RECORD DWELL Time defined in seconds describing the alarm duration. This setting allows to record in alarm mode for longer periods of time than the duration of alarm event;...
-
Page 26: Alarm Setup
NV-DVR1104/CD, NV-DVR1108/CD and NV-DVR1116/CD ver. 1.1 - user's manual DEVICE MENU 4.5 Alarm setup ALARM SETUP BUZZER ▪ BUZZER/ALARM DWELL 05SEC ▪ VIDEO LOSS ALARM ▪ AUDIBLE ALARM ▪ EXT. ALARM MODE N.O. ▪ ALARM DISPLAY MODE DISABLE ▪ MOTION EVENT RELAY ▪... - Page 27 NV-DVR1104/CD, NV-DVR1108/CD and NV-DVR1116/CD ver. 1.1 - user's manual DEVICE MENU ALARM DISPLAY MODE: If this option is set to ON, alarm camera will be displayed in fullscreen mode. If this option is set to OFF in case of alarm detection all cameras will be displayed in the same mode as before the event;...
-
Page 28: Event List
NV-DVR1104/CD, NV-DVR1108/CD and NV-DVR1116/CD ver. 1.1 - user's manual DEVICE MENU 4.6 Event List EVENT LIST MASTER PAGE: 001 NO YY / MM /DD HH:MM:SS CH TYPE 01 2006 / 06 / 12 15: 22: 36 ALARM 02 2006 / 06 / 12 14: 22: 36 V.LOSS... -
Page 29: Hdd Management
NV-DVR1104/CD, NV-DVR1108/CD and NV-DVR1116/CD ver. 1.1 - user's manual DEVICE MENU 4.7 HDD management HDD MANAGEMENT ▪ OVERWRITE MODE ▪ CAPACITY WARNING 20 % ▪ HDD FORMAT SETUP ▪ EXIT DISK CAPACITY LEFT RATIO MASTER 400GB SLAVE NONE NONE ENTER -SET... - Page 30 NV-DVR1104/CD, NV-DVR1108/CD and NV-DVR1116/CD ver. 1.1 - user's manual DEVICE MENU HDD FORMAT SETUP: in order to enter HDD FORMAT submenu select (highlight) this position and press ENTER button HDD FORMAT SETUP ▪ HDD PASSWORD PROTECT ENABLE ▪ HDD PASSWORD 1111 ▪...
-
Page 31: Network Setup
NV-DVR1104/CD, NV-DVR1108/CD and NV-DVR1116/CD ver. 1.1 - user's manual DEVICE MENU 4.8 Network setup NETWORK SETUP ▪ IP ADDR : 192.168.1.123 [ ] ▪ GATEWAY: 192.168.1.254 [ ] ▪ SUB NET: 255.255.255.0 [ ] ▪ IP MODE: STATIC ▪ NETWORK ENV: ▪... -
Page 32: Firmware Update
The FIRMWARE UPDATE Menu is used for device firmware updating. CAUTION: before firmware updating please consult it with your NOVUS products distributor. In order to update the firmware, copy files on flash memory, than insert this memory into DVR USB port and press ENTER button. -
Page 33: Cd/Dvd Backup
NV-DVR1104/CD, NV-DVR1108/CD and NV-DVR1116/CD ver. 1.1 - user's manual DEVICE MENU 4.10 CD/DVD BACKUP CD/DVD BACKUP ▪ START TIME SETUP [ ] START: 2006/08/28 16:24:30 END: 2006/08/28 16:25:30 ▪ BACKUP SIZE: 0004MB [ ] ▪ CLOSE DISK: ▪ ERASE DISK: ▪... -
Page 34: Recording
NV-DVR1104/CD, NV-DVR1108/CD and NV-DVR1116/CD ver. 1.1 - user's manual RECORDING 5. RECORDING NV-DVR1104/CD, NV-DVR1108/CD and NV-DVR1116/CD multiplexers allow for manual (activated by orange REC button) and schedule recording. In all recording modes only channels with active recording function are recorded (see chapter 4,2) Current recording status can be monitored by observing descriptions displayed on the screen and LEDs on device’s front panel. -
Page 35: Manual Recording
NV-DVR1104/CD, NV-DVR1108/CD and NV-DVR1116/CD ver. 1.1 - user's manual RECORDING 5.1 Manual Recording If SCHEDULE RECORDING option, in RECORD menu , is inactive, the device operates as follows: ▪ If orange REC button is pressed active channels recording is activated. Red REC inscription is displayed in left upper corner of the screen. -
Page 36: Schedule Recording
NV-DVR1104/CD, NV-DVR1108/CD and NV-DVR1116/CD ver. 1.1 - user's manual RECORDING 5.2 Schedule recording NV-DVR1104/CD, NV-DVR1108/CD and NV-DVR1116/CDrepresents schedule recording function with various recording modes during the day. CAUTION: To activate schedule recording set to ON in SCHEDULE RECORDING option in RECORD menu. - Page 37 NV-DVR1104/CD, NV-DVR1108/CD and NV-DVR1116/CD ver. 1.1 - user's manual RECORDING Second hour section in WEEKDAY position will be set automatically as 16-08 hour section. Only recording mode and speed should be adjusted for normal and alarm recording. Normal recording speed matters only if recording mode is adjusted manual by operator within 16-08 section.
-
Page 38: Playback
PLAYBACK 6. PLAYBACK NV-DVR1104/CD, NV-DVR1108/CD and NV-DVR1116/CD allow to find desired recordings in two ways. First search option can be done by inputting specified time and date. Second search option is possible by viewing the event registry and playback of recordings related to the selected event. - Page 39 NV-DVR1104/CD, NV-DVR1108/CD and NV-DVR1116/CD ver. 1.1 - user's manual PLAYBACK When ENTER button is pressed playback is initiated. NOTICE: if high capacity HDDs are installed in the device data loading can take up to several seconds. During this time following message will be displayed on the top of the screen: LOADING, PLEASE WAIT...
-
Page 40: Event List Search
NV-DVR1104/CD, NV-DVR1108/CD and NV-DVR1116/CD ver. 1.1 - user's manual PLAYBACK 6.2 EVENT LIST SEARCH This searching method is very similar to recorded data search described in 6,6 chapter. The only difference is that in this case it is possible to define period of time, whereof events will be displayed. -
Page 41: Recorded Data Backup
NV-DVR1104/CD, NV-DVR1108/CD and NV-DVR1116/CD ver. 1.1 - user's manual BACKUP 7. RECORDED DATA BACKUP 7.1 Flash memory backup NV-DVR1104/CD, NV-DVR1108/CD and NV-DVR1116/CD are equipped with USB interface, allowing to connect flash memory. NOTICE: HDD data backup via USB interface is unavailable Size of copied file depends on time of copied file, recording speed and image quality. -
Page 42: Cd Backup
NV-DVR1104/CD, NV-DVR1108/CD and NV-DVR1116/CD ver. 1.1 - user's manual BACKUP 7.2 CD backup NV-DVR1104/CD, NV-DVR1108/CD and NV-DVR1116/CD are equipped with built-in CD-RW recorder. It enables to backup records on CD-R and CD-RW. In order to avoid compatibility and copy durability problems only reputable CDs are recommended. - Page 43 NV-DVR1104/CD, NV-DVR1108/CD and NV-DVR1116/CD ver. 1.1 - user's manual BACK UP Start time and date of the copy should be set using cursor buttons. Please, follow steps, regarding recorded data search, described in chapter 6. If ENTER button is pressed system starts searching for available data.
-
Page 44: Alarm Inputs And Outputs Connections For External Devices
NV-DVR1104/CD, NV-DVR1108/CD and NV-DVR1116/CD ver. 1.1 - user's manual ALARM INPUTS AND OUTPUTS CONNECTION ODTWARZANIE 8. ALARM INPUTS AND OUTPUTS CONNECTION NV-DVR1104/CD, NV-DVR1108/CD, NV-DVR01116/CD digital multiplexers are equipped accordingly with 4, 8 or 16 alarm inputs, which allow to connect external devices. - Page 45 Notice: both alarm inputs and outputs are not protected against high voltage induction. Alarm inputs and outputs should be protected against discharges, which may damage them. NV-DVR1104/CD, NV-DVR1108/CD and NV-DVR1116/CD are equipped with alarm outputs which allow for external devices control. Both outputs modes: NO and NC are available. Alarm output load current can not exceed 100mA.
-
Page 46: Speed Dome Cameras - Connection And Control (Ptz)
Notice: All cameras in the system should have identical protocol and transmission speed (please view speed dome camera manual). Camera connection description applies to Novus camera connections. In order to connect cameras of other producers, technical department should be contacted and user should familiarize himself with specific camera manual. - Page 47 NV-DVR1104/CD, NV-DVR1108/CD and NV-DVR1116/CD ver. 1.1 - user's manual SPEED DOME CAMERA - CONNECTION AND CONTROL An example of CCTV system based on NV-DVR1116/CD and Cama series camera Twisted pair UTP 5 max Novus camera CAMA I Novus camera CAMA I...
-
Page 48: Camera Control
MENU EXIT PTZ SETUP is used to set protocol and transmission speed (identical for all cameras). Following protocols can be selected: Novus-C, Novus-C1, Novus-C2, Pelco-D. following transmission speeds can be selected: 2400, 4800, 9600, 19200 BPS. In order to exit PTZ menu, MENU button should be pressed. -
Page 49: Ir Remote Control
NV-DVR1104/CD, NV-DVR1108/CD and NV-DVR1116/CD ver. 1.1 - user's manual IR REMOTE CONTROL 10. IR REMOTE CONTROL NV-DVR1104/CD, NV-DVR1108/CD and NV-DVR1116/CD multiplexers are equipped with IR remote control. Remote control allows to control only one device. If more than one device are situated within remote control range all of them will be controlled. -
Page 50: Keyboard Control
NV-DVR1104/CD, NV-DVR1108/CD and NV-DVR1116/CD ver. 1.1 - user's manual KEYBOARD CONTROL 11. KEYBOARD CONTROL NV-DVR1104/CD, NV-DVR1108/CD and NV-DVR1116/CD multiplexers can be remotely controlled from the level of NV-KBD60 or NV-KBD30 system keyboards. It is possible to control up to 10 multiplexers using one system keyboard. -
Page 51: Network Connection
Warning: NOVUS company is not a distributor of server systems, routers, hubs, and other net devices which have influence on proper net working. Net user or network administrator is responsible for configuration propriety of mentioned devices . -
Page 52: Initiating Connection
NV-DVR1104/CD, NV-DVR1108/CD and NV-DVR1116/CD ver. 1.1 - user's manual NETWORK CONNECTION FEATURE 12.2 Initiating connection For network connections Microsoft Internet Explorer browser should be used. Multiplexer IP address, which was set previously in network settings, should be input in the browser address bar. -
Page 53: User Interface View
NV-DVR1104/CD, NV-DVR1108/CD and NV-DVR1116/CD ver. 1.1 - user's manual NETWORK CONNECTION FEATURE 12.3 User Interface view The view of software window in display mode (after login admin account) The view software window in setting mode All rights reserved © NOVUS Security Sp. z o.o. -
Page 54: Display Settings
NV-DVR1104/CD, NV-DVR1108/CD and NV-DVR1116/CD ver. 1.1 - user's manual NETWORK CONNECTION FEATURE 12.4 Display settings When network connection is indicated camera images and software icons will be displayed on the screen. Notice: only cameras with network display mode available, are visible (chapter 4.8). - Page 55 NV-DVR1104/CD, NV-DVR1108/CD and NV-DVR1116/CD ver. 1.1 - user's manual NETWORK CONNECTION FEATURE In order to save camera image as a video sequence, right mouse button should be clicked on required camera image and Rec to AVI option, from displayed menu, should be selected. Following menu will be displayed on the screen: In CODEC position one of available video codecs should be selected.
-
Page 56: Ptz Camera Control In "Live" Mode
NV-DVR1104/CD, NV-DVR1108/CD and NV-DVR1116/CD ver. 1.1 - user's manual NETWORK CONNECTION FEATURE 12.4.2 PTZ camera control in „live” mode If PTZ cameras are connected in the system and all settings, as described in chapter 9, are adjusted properly it is possible to control these cameras via network applet, after connection with multiplexer. -
Page 57: Recorded Data Search
NV-DVR1104/CD, NV-DVR1108/CD and NV-DVR1116/CD ver. 1.1 - user's manual NETWORK CONNECTION FEATURE 12.5 Recorded data search CAUTION: Playback mode is available only with admin authorization. Except for live display, network applet offers recorded data search. It is possible, as locally, to search for recorded data by date and time and also to playback records. - Page 58 NV-DVR1104/CD, NV-DVR1108/CD and NV-DVR1116/CD ver. 1.1 - user's manual NETWORK CONNECTION FEATURE Selection of camera channel and screen division can be done in the same way as in „live” mode. In order to change playback speed and direction, during playback, following icons/buttons should be used.
-
Page 59: Saving Images While Playback Mode
NV-DVR1104/CD, NV-DVR1108/CD and NV-DVR1116/CD ver. 1.1 - user's manual NETWORK CONNECTION FEATURE In order to playback records connected with the event, Search menu should be entered and required HDD should be selected. Event list from required HDD will be displayed in a while. -
Page 60: Software Settings
NV-DVR1104/CD, NV-DVR1108/CD and NV-DVR1116/CD ver. 1.1 - user's manual NETWORK CONNECTION FEATURE 12.6 Software settings In order to enter software settings click icon from right upper corner In order to return back to main window icon should be clicked. 12.6.1 Software language and Server time settings In System information submenu following settings can be adjusted: ▪... -
Page 61: Ftp & E-Mail
NV-DVR1104/CD, NV-DVR1108/CD and NV-DVR1116/CD ver. 1.1 - user's manual NETWORK CONNECTION FEATURE 12.6.5 FTP & e-Mail FTP & e-Mail submenu is used to apply modification in the FTP server settings (image sending) and e-mails sending from alarm events. Mail Server - mail server address, which is utilized for sending e-mails... -
Page 62: Backup Playback
NV-DVR1104/CD, NV-DVR1108/CD and NV-DVR1116/CD ver. 1.1 - user's manual BACKUP PLAYBACK 13. BACKUP PLAYBACK During CD backup or memory flash backup together with records copy, NC Viewer file is recorded as a self-extracting player.exe file. It allows to playback copied files on every PC with no need of additional software or video codecs installation. -
Page 63: Flash Memory Backup Playback
NV-DVR1104/CD, NV-DVR1108/CD and NV-DVR1116/CD ver. 1.1 - user's manual BACKUP PLAYBACK 13.2 Flash memory backup playback When USB flash memory is connected to PC port, please verify if it has been properly detected . FilePlay tab should be selected. Opening file icon should be clicked. -
Page 64: Flash Memory Backup Converting To Jpeg Or Avi Format
NV-DVR1104/CD, NV-DVR1108/CD and NV-DVR1116/CD ver. 1.1 - user's manual BACKUP PLAYBACK Records range and current playback progress information are displayed above the playback speed controller. In an example shown below the file includes records from 2006 31 August 10:09:38 to 2006 31 August 10:28:45, and currently records, from 2006 31 August 10:28:04, are played. - Page 65 NV-DVR1104/CD, NV-DVR1108/CD and NV-DVR1116/CD ver. 1.1 - user's manual BACKUP PLAYBACK Subsequently following icon should be clicked. Camera selection and AVI file save path menu will be displayed. Filename position is used to select AVI file save path (when green „plus” icon is clicked). CAM 01 to CAM 16 positions are used to select backup channels.
-
Page 66: Flash Memory Backup Printing
NV-DVR1104/CD, NV-DVR1108/CD and NV-DVR1116/CD ver. 1.1 - user's manual BACKUP PLAYBACK 13.4 Flash memory backup printing When playback is run it is possible to print played images, using system printer directly, with no need of use additional software. In order to print single image right mouse button should be clicked on the camera image and Print "CamNo 01"... -
Page 67: Cd Backup Playback
NV-DVR1104/CD, NV-DVR1108/CD and NV-DVR1116/CD ver. 1.1 - user's manual BACKUP PLAYBACK 13.5 CD backup playback When CD with copied records is inserted to PC CD drive, FilePlay tab should be selected. File opening icon should be clicked and required file should be selected. - Page 68 NV-DVR1104/CD, NV-DVR1108/CD and NV-DVR1116/CD ver. 1.1 - user's manual BACKUP PLAYBACK 13.9 Creating records copy It is possible to copy HDD contents onto PC HDD, that will be used for further records playback. Copied record will be saved in its own format as a file with *.dvr extension. This file format allows for further playback in any display mode (one file consists of records from all channels).
- Page 69 NV-DVR1104/CD, NV-DVR1108/CD and NV-DVR1116/CD ver. 1.1 - user's manual NOTES All rights reserved © NOVUS Security Sp. z o.o.
- Page 70 NOVUS Security Sp. z o.o. ul. Puławska 431, 02-801 Warszawa tel.: (22) 546 0 700, fax: (22) 546 0 719 www.novuscctv.com 2007-01-25...
Need help?
Do you have a question about the NV-DVR1104/CD and is the answer not in the manual?
Questions and answers