Table of Contents
Advertisement
INSTRUCTIONS FOR
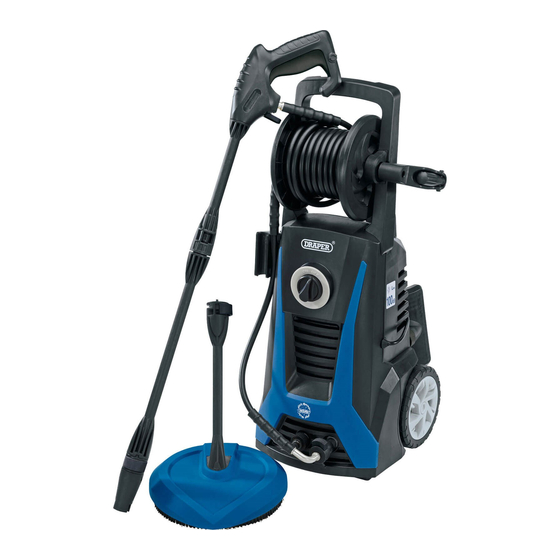
2200W 230V
Pressure Washer
Stock No.83414
Part No.PW2200
IMPORTANT: PLEASE READ THESE INSTRUCTIONS CAREFULLY TO ENSURE THE SAFE AND
EFFECTIVE USE OF THIS PRODUCT.
GENERAL INFORMATION
These instructions accompanying the product are the original instructions. This document is part of the product, keep it
for the life of the product passing it on to any subsequent holder of the product. Read all these instructions before
assembling, operating or maintaining this product.
This manual has been compiled by Draper Tools describing the purpose for which the product has been designed, and
contains all the necessary information to ensure its correct and safe use. By following all the general safety instructions
contained in this manual, it will ensure both product and operator safety, together with longer life of the product itself.
AlI photographs and drawings in this manual are supplied by Draper Tools to help illustrate the operation of the product.
Whilst every effort has been made to ensure the accuracy of information contained in this manual, the Draper Tools
policy of continuous improvement determines the right to make modifications without prior warning.
Advertisement
Table of Contents

Related Manuals for Draper 2200W


Summary of Contents for Draper 2200W
-
Page 1: Pressure Washer
AlI photographs and drawings in this manual are supplied by Draper Tools to help illustrate the operation of the product. -
Page 2: Title Page
Commercial copying, redistribution, hiring or lending is prohibited. No part of this publication may be stored in a retrieval system or transmitted in any other form or means without written permission from Draper Tools Limited. In all cases this copyright notice must remain intact. -
Page 3: Table Of Contents
CONTENTS CONTENTS ..................PAGE CONTENT PAGE TITLE PAGE INTRODUCTION ..................2 REVISION HISTORY................2 UNDERSTANDING THIS MANUAL ............2 COPYRIGHT NOTICE ................2 CONTENTS CONTENTS ...................3 GUARANTEE GUARANTEE ..................4 INTRODUCTION SCOPE ....................5 SPECIFICATION ..................5 HANDLING & STORAGE ..............5 HEALTH & SAFETY INFORMATION GENERAL SAFETY INSTRUCTIONS FOR POWER TOOL USE ....6-7 SPECIFIC SAFETY INSTRUCTIONS FOR PRESSURE WASHER USE..8-9 CONNECTION TO THE POWER SUPPLY ..........9 TECHNICAL DESCRIPTION... -
Page 4: Guarantee 3.1 Guarantee
This guarantee applies in lieu of any other guarantee expressed or implied and variations of its terms are not authorised. Your Draper guarantee is not effective unless you can produce upon request a dated receipt or invoice to verify your proof of purchase within the guarantee period. -
Page 5: Introduction
Part no ..........................PW2200 Working pressure ....................1595psi (110Bar) Max. permissible pressure..................2393psi (165Bar) Max. flow rate ....................5.5L/min (330L/hour) Rated voltage ........................ 230V~50Hz Rated input ........................... 2200W Type of protection ........................IPX5 Max. water feed temperature....................40°C Guaranteed sound power level..................100dB(A) Vibration..........................2.5m/s Weight (nett)..........................10.5kg... -
Page 6: Health & Safety Information
HEALTH & SAFETY INFORMATION Have this tool repaired by a qualified person. This tool is designed to conform to the relevant international and local standards and as such should be maintained and repaired by someone qualified; using only original parts supplied by the manufacturer: This will ensure the tool remains safe to use. - Page 7 HEALTH & SAFETY INFORMATION f) Dress properly. Do not wear loose clothing or jewellery. Keep your hair, clothing and gloves away from moving parts. Loose clothes, jewellery or long hair can be caught in moving parts. g) If devices are provided for the connection of dust extraction and collection facilities, ensure these are connected and properly used.
-
Page 8: Specific Safety Instructions For Pressure Washer Use
HEALTH & SAFETY INFORMATION SPECIFIC SAFETY INSTRUCTIONS FOR PRESSURE WASHER USE Warning: This appliance is for outdoor use only. Warning: Always disconnect the electricity and water supplies on completion of every job. Warning: Never use the appliance if the electrical cable or important parts of the appliance are damaged, e.g. -
Page 9: Connection To The Power Supply
HEALTH & SAFETY INFORMATION Warning: Every machine is tested in its operating conditions, so it is normal for a few drops of water to be left inside it. Warning: Take care not to damage the electric cable. Have a damaged power cord replaced immediately by an authorized service point or an electrical specialist. -
Page 10: Technical Description
TECHNICAL DESCRIPTION IDENTIFICATION Hose cart wheel handle ON/OFF Switch Hose cart wheel Wheel 5M High pressure hose Water inlet Handle Water outlet Integrated detergent bottle Detergent filler cap Moulded approved plug and cable Spare nozzle accessory storage... -
Page 11: Total Stop Device
TECHNICAL DESCRIPTION TOTAL STOP DEVICE This pressure washer is fitted with the TOTAL STOP DEVICE. This will cause the motor to start and stop when the trigger is activated, unlike standard washers where the motor would run continuously. This device reduces the amount of water and electricity used and the amount of wear and tear on the machines components. -
Page 12: Unpacking & Checking
Lay the contents out and check them against the parts shown below. If any part is damaged or missing; please contact the Draper Helpline (the telephone number appears on the Title page) and do not attempt to use the pressure washer. -
Page 13: Setting The Pressure Washer
, locate and slide. 8.2 ASSEMBLING THE CABLE TIDY & FIG. 2 ADDING DETERGENT - FIG. 2 Attach the cable tidy . Locate and slide into place. Remove the detergent filler cap and fill with suitable detergent (Draper Stock No’s 46303 and 52597). -
Page 14: Assembling The Hose And Lance
SETTING THE PRESSURE WASHER 8.3 ASSEMBLING THE LANCE AND HOSE - FIG. 5 FIGS. 5 - 7 Connect the lance to the trigger assembly by pushing in the bayonet fitting and turning anti-clockwise 45˚ to lock in place. To connect the high pressure hose to the trigger assembly , push-fit the hose connector into the... -
Page 15: Attaching The Water Supply
FIGS. 9 - 10 To attach the pressure washer to the water supply a push fit hose connector will be required (Draper Stock No.89384). Ensure the connector is correctly, fitted to the hose and that a ‘click’ is heard when attaching to the machine. -
Page 16: Operation And Use
OPERATION AND USE NOTE: FIG. 6 Remove the plug from the socket before carrying out adjustment, servicing or maintenance. 9.1 ON/OFF SWITCH - FIG. 6 NOTE: Do not run the motor “DRY, and ensure the machine is switched “OFF” prior to plugging in. This pressure washer is designed to be used in the upright position only. -
Page 17: Accessories
10. ACCESSORIES 10.1 90° NOZZLE - FIG. 8 FIG. 8 For effective cleaning of difficult to reach areas eg. roof gutters or vehicle underbodies. Be careful that high pressure water can remove paint and other surface treatments. It can also damage tarmac and may remove grouting between paving slabs. -
Page 18: Patio Cleaner
10. ACCESSORIES 10.4 ASSEMBLING AND ATTACHING THE FIG. 13 PATIO CLEANER - FIGS. 13 - 14 The patio cleaning brush has a rotating arm with two nozzles to allow quick and effective cleaning of large flat areas. Attach the patio cleaning lance to the brush by pushing the lance into position. -
Page 19: Troubleshooting
11. TROUBLESHOOTING 11.1 TROUBLESHOOTING Trouble Possible Cause Remedy Motor pulsing. Air in the system. See the section on bleeding (see page 16). Replace fuse. Plug fuse blown. Pump fails to start. Have the cable replaced by a repair agent. Cable damaged. Pump starts/stops Correct operation Nothing. -
Page 20: Disposal
12. DISPOSAL 12.1 DISPOSAL - At the end of the machine’s working life, or when it can no longer be repaired, ensure that it is disposed of according to national regulations. - Contact your local authority for details of collection schemes in your area. In all circumstances: •... -
Page 21: Explanation Of Symbols
13. EXPLANATION OF SYMBOLS Do not point hose at people, animals, pressure washer or electrical points. Do not dispose of WEEE* as unsorted municipal waste. Class II construction (Double insulated). Single value noise marking. (Maximum declared A-Weighted sound power level in decibels). - Page 22 NOTES Do not point hose at people, animals, pressure washer or electrical points. Do not dispose of WEEE* as unsorted municipal waste. Class II construction (Double insulated). Single value noise marking. (Maximum declared A-Weighted sound power level in decibels).
- Page 23 NOTES...
- Page 24 - Sales Desk: (023) 8049 4333 - General Enquiries: (023) 8026 6355 - Service/Warranty Repair Agent For aftersales servicing or warranty repairs, please contact the Draper Tools Helpline for details of an agent in your local area. YOUR DRAPER STOCKIST DKJP1215...
Need help?
Do you have a question about the 2200W and is the answer not in the manual?
Questions and answers