Table of Contents
Advertisement
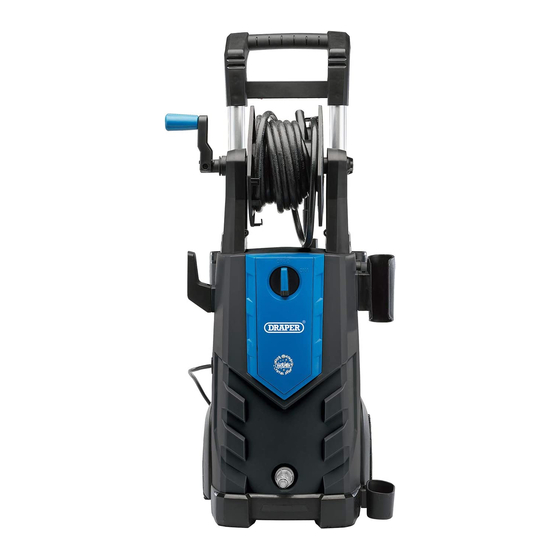
230V 165/195BAR
PRESSURE
WASHERS
98678 & 98679
These instructions accompanying the product are the original instructions. This document is part of the product, keep
it for the life of the product passing it on to any subsequent holder of the product. Read all these instructions before
assembling, operating or maintaining this product.
This manual has been compiled by Draper Tools describing the purpose for which the product has been designed,
and contains all the necessary information to ensure its correct and safe use. By following all the general safety
instructions contained in this manual, it will ensure both product and operator safety, together with longer life of the
product itself.
All photographs and drawings in this manual are supplied by Draper Tools to help illustrate the operation of the
product.
Whilst every effort has been made to ensure the accuracy of information contained in this manual, the Draper Tools
policy of continuous improvement determines the right to make modifications without prior warning.
Advertisement
Table of Contents

Subscribe to Our Youtube Channel
Related Manuals for Draper 98678


Summary of Contents for Draper 98678
- Page 1 All photographs and drawings in this manual are supplied by Draper Tools to help illustrate the operation of the product.
-
Page 2: Title Page
Commercial copying, redistribution, hiring or lending is prohibited. No part of this publication may be stored in a retrieval system or transmitted in any other form or means without written permission from Draper Tools Limited. In all cases this copyright notice must remain intact. -
Page 3: Table Of Contents
FITTING THE TURBO NOZZLE HOLDER ..............12 FITTING THE INTEGRATED DETERGENT BOTTLE ..........13 ASSEMBLING THE LANCE AND HOSE ..............13 ATTACHING THE WATER SUPPLY ................14 TELESCOPIC HANDLE ADJUSTMENT (98678 ONLY) ..........14 HOSE REEL ....................... 14 OPERATION TOTAL STOP DEVICE ....................15 ON/OFF SWITCH ...................... - Page 4 CONTENTS 11. MAINTENANCE AND TROUBLESHOOTING 11.1 MAINTENANCE ......................18 11.2 TROUBLESHOOTING GUIDE ................... 18 12. EXPLANATION OF SYMBOLS 12.1 EXPLANATION OF SYMBOLS .................. 19 13. DISPOSAL 13.1 DISPOSAL ......................... 20 DECLARATION OF CONFORMITY ................ENCLOSED – 4 –...
-
Page 5: Warranty 3.1 Warranty
This warranty applies in lieu of any other warranty expressed or implied and variations of its terms are not authorised. Your Draper warranty is not effective unless you can produce upon request a dated receipt or invoice to verify your proof of purchase within the warranty period. -
Page 6: Introduction
Any other application is considered misuse. SPECIFICATION Stock No ................ 98678 ..........98679 Part No ..............PW2100I/110D ......PW2500I/135D Rated voltage ............230V~50Hz ........230V~50Hz Rated input .............. -
Page 7: Health And Safety Information
HEALTH AND SAFETY INFORMATION GENERAL SAFETY INSTRUCTIONS FOR POWER TOOL USE When using any type of power tool there are steps that should be taken to make sure that you, as the user, remain safe. Common sense and a respect for the tool will help reduce the risk of injury. Read the instruction manual fully. -
Page 8: Additional Safety Instructions For Pressure Washer Use
HEALTH AND SAFETY INFORMATION Wait for the machine to stop. Unless the machine is fitted with a safety brake, some parts may continue to move due to momentum. Wait for all parts to stop, then unplug it from the power supply before making any adjustments, carrying out maintenance operations or just finishing using the tool. -
Page 9: Residual Risk
HEALTH AND SAFETY INFORMATION − The safety button on the gun is not there to lock the lever during operation, but to prevent its accidental operation. − Appliances equipped with Total Stop System: these appliances should not be left in standby for more than 5 minutes. -
Page 10: Technical Description
(4) Power supply ON/OFF switch. (11) Spare nozzles storage. (5) Detergent flow adjustment (98679 only). (12) Hose reel handle. (6) Transport wheels. (13) 8M steel armoured hose (98679 only - 6M PVC hose on 98678). (7) Water inlet. – 10 –... -
Page 11: Unpacking And Checking
Lay the contents out and check them against the parts shown below. If any part is damaged or missing, please contact the Draper Help Line (the telephone number appears on the Title page) and do not attempt to use the product. -
Page 12: Assembly
FIG. FIG. CABLE TIDY HOOKS - FIG. 3 The two cable tidy hooks (10) on 98679 machine both rotate 360°. (98678 has one cable hook, but this does not rotate). (10) FIG. FITTING THE TURBO NOZZLE HOLDER - FIG. 4 98679 machine comes with a holder for the black turbo nozzle. -
Page 13: Fitting The Integrated Detergent Bottle
ASSEMBLY FITTING THE INTEGRATED DETERGENT BOTTLE - FIGS. 5 - 6 Fill the detergent bottle (8) with a suitable detergent. Slot the bottle onto the back of the pressure washer and attach the cap, making sure the hose goes into the detergent liquid. FIG. -
Page 14: Attaching The Water Supply
FIG. TELESCOPIC HANDLE ADJUSTMENT (98678 ONLY) - FIG. 11 98678 has a telescopic handle, allowing for adjustment in height. To adjust the height of the handle press the button (20) at the side of the pressure washer and move handle. Release button once at required position. -
Page 15: Operation
OPERATION TOTAL STOP DEVICE This pressure washer is fitted with the Auto Control Total Stop Device. This will cause the motor to start and stop when the trigger is activated, unlike standard washers where the motor would run continuously. This device reduces the amount of water and electricity used and the amount of wear and tear on the machines components. -
Page 16: Spray Nozzles
OPERATION SPRAY NOZZLES - FIGS. 16 - 18 Note: Always make sure the pressure washer is OFF before swapping nozzles or attachments. The pressure washer comes with four spray nozzles, which come stored on the back of the pressure washer, as well as a turbo nozzle. Each nozzle is color coded and delivers a specific spray pattern and pressure for particular uses detailed below. -
Page 17: Fixed Brush
OPERATION FIXED BRUSH - FIGS. 19 - 21 Note: Always make sure the pressure washer is OFF before swapping nozzles or attachments. The pressure washer is supplied with a fixed brush (16). The brush has soft bristles and can be used in conjunction with the detergent dispenser to apply detergent to the surface you are cleaning. -
Page 18: Maintenance And Troubleshooting
11. MAINTENANCE AND TROUBLESHOOTING 11.1 MAINTENANCE Regular inspection and cleaning reduces the necessity for maintenance operations and will keep your tool in good working condition. The motor must be correctly ventilated during tool operation. Avoid blocking the air inlets and vacuum the ventilation slots regularly. -
Page 19: Explanation Of Symbols
12. EXPLANATION OF SYMBOLS 12.1 EXPLANATION OF SYMBOLS Read the instruction manual. Wear safety glasses. Wear protective footwear. Wear protective gloves. Do not spray at animals or people. For use with cool water. Do not exceed 50°C water temperature. Earthed. WEEE –... -
Page 20: Disposal
13. DISPOSAL 13.1 DISPOSAL – At the end of the machine’s working life, or when it can no longer be repaired, ensure that it is disposed of according to national regulations. – Contact your local authority for details of collection schemes in your area. In all circumstances: •... - Page 21 NOTES – 21 –...
- Page 22 NOTES – 22 –...
- Page 23 NOTES – 23 –...
- Page 24 ©Published by Draper Tools Limited. No part of this publication may be reproduced, stored in a retrieval system or transmitted in any form or by any means, electronic, mechanical photocopying, recording or otherwise without prior permission in writing from Draper Tools Ltd.
Need help?
Do you have a question about the 98678 and is the answer not in the manual?
Questions and answers