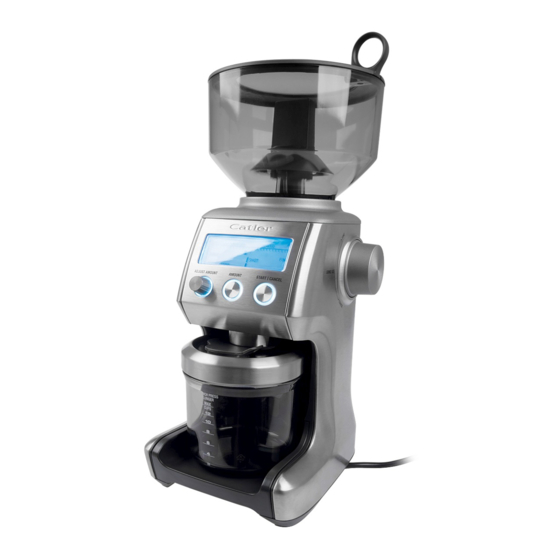
Catler 800 Series Instructions For Use Manual
Hide thumbs
Also See for 800 Series:
- Instructions for use manual (48 pages) ,
- Instruction manual (36 pages) ,
- Instructions for use manual (40 pages)
Advertisement
Quick Links
Advertisement

Summary of Contents for Catler 800 Series
- Page 1 C O F F E E G R I N D E R Instructions for use...
- Page 2 C O F F E E G R I N D E R...
-
Page 3: Table Of Contents
CONTENTS Congratulations Catler recommends safety first Know your Coffee Grinder CG 8010 Assembling your Coffee Grinder CG 8010 Operating your Coffee Grinder CG 8010 Hints & tips Care and Cleaning Troubleshooting CONTENTS... - Page 4 Congratulations on the purchase of your new Catler Coffee Grinder CG 8010. CONGRATULATIONS...
-
Page 5: Catler Recommends Safety First
CATLER RECOMMENDS SAFETY FIRST We at Catler are very safety conscious. We design and manufacture consumer products with the safety of you, our valued customer foremost in mind. In addition we ask that you exercise a degree of care when using any electrical appliance and adhere to the following precautions: IMPORTANT SAFEGUARDS FOR YOUR COFFEE GRINDER CG 8010 •... - Page 6 • Do not operate the device for longer than RUNNING WATER. 2 minutes as this could cause overheating. Allow the Catler Coffee Grinder to cool down for 20 minutes after long operation. WARNING: TO PROTECT AGAINST ELECTRIC SHOCK, DO NOT IMMERSE THE POWER BASE,...
- Page 7 For the security reasons, we recommend to physical, sensory or mental capabilities or ALWAYS ENSURE THE BEAN HOPPER IS plug the Catler Coffee Grinder directly to its lack of experience and knowledge, unless INSERTED FIRMLY AND LOCKED PRO- own circuit, separate from other appliances.
-
Page 8: Know Your Coffee Grinder Cg 8010
KNOW YOUR COFFEE GRINDER CG 8010 Bean Hopper Lid Air tight seal to maximise bean freshness. Bean Hopper 450g bean hopper with locking system for easy removal and bean transfer. Hardened Stainless Steel Conical Burrs Reduce grinding heat to protect the oils in the coffee bean. - Page 9 Operating...
-
Page 10: Assembling Your Coffee Grinder Cg 8010
ASSEMBLING YOUR COFFEE GRINDER CG 8010 Before fi rst use Assembling the grinder Before first use, remove and safely discard all pro- NOTE: Bean Hopper motional labels and packing materials attached If Bean Hopper has not been locked into Align tabs and place bean hopper into position. to the device. -
Page 11: Operating Your Coffee Grinder Cg 8010
AMOUNT button. The amount dispensed will vary depending on To increase, keep pressing the AMOUNT button the grind setting. The Catler Coffee Grinder will to the maximum number of shots or cups, as automatically adjust the dose for the grind se- shown in the Coffee Chart below. - Page 12 STEP 3: Using Auto or Manual Grinding Mode NOTE: You can grind direct into your portafilter You can START and STOP the grinding operation even if it does not fit into the cradles in 2 ways. supplied; without the cradle attached, press the ‘PORTAFILTER SWITCH’...
- Page 13 2. Grinding into Grind Container Customising your grind amount Energy Saving Feature • Slide in grind container with cap open di- The ADJUST AMOUNT function gives you the rectly under grind outlet. The grinder will automatically switch off if not ability to modify the preset amount to deliver •...
-
Page 14: Hints & Tips
HINTS & TIPS These hints and tips will help you to improve the results of grinding coffee and preparation of your favorite beverages. • Fresh grinds are the key to making coffee with • Store coffee beans in a dark, cool and dry place. •... -
Page 15: Care And Cleaning
Care and Cleaning 15 15 PÉČE A ČIŠTĚNÍ... - Page 16 CARE AND CLEANING 1. Make sure the device has been switched Storage off by pressing START/CANCEL button. The WARNING: 1. Ensure the appliance is switched off, cleaned device is switched off if push-dial backlight NEVER IMMERSE THE POWER BASE, and dried before storing. has gone off.
- Page 17 Cleaning conical burrs Regular cleaning helps the burrs achieve consistent grinding results which is especially important when grinding for espresso coff ee. Unlock hopper. Remove beans. Lock hopper. Run grinder until Remove hopper. Remove upper burr. Clean upper burr empty. with cleaning brush.
-
Page 18: Troubleshooting
TROUBLESHOOTING Problem Possible Cause What to Do • Grinder not plugged in! • Plug power cord into power outlet. Grinder does not start after • Grinder is overheated. • Remove power plug from power outlet. Leave for 20 minutes to pressing START/CANCEL cool down before using again. - Page 19 INSTRUCTIONS AND INFORMATION REGARDING THE DISPOSAL OF USED PACKAGING MATERIALS Dispose of packaging material at a public waste disposal site. DISPOSAL OF USED ELECTRICAL AND ELECTRONIC APPLIANCES The meaning of the symbol on the product, its accessory or packaging indicates that this product shall not be treated as household waste.
- Page 20 C O F F E E G R I N D E R Due to continued product improvement, the products illustrated/photographed in this brochure may vary slight- ly from the actual product. W W W . C A T L E R . E U I N F O @ C A T L E R .


Need help?
Do you have a question about the 800 Series and is the answer not in the manual?
Questions and answers