
Related Manuals for ESAB ES 95i


Summary of Contents for ESAB ES 95i
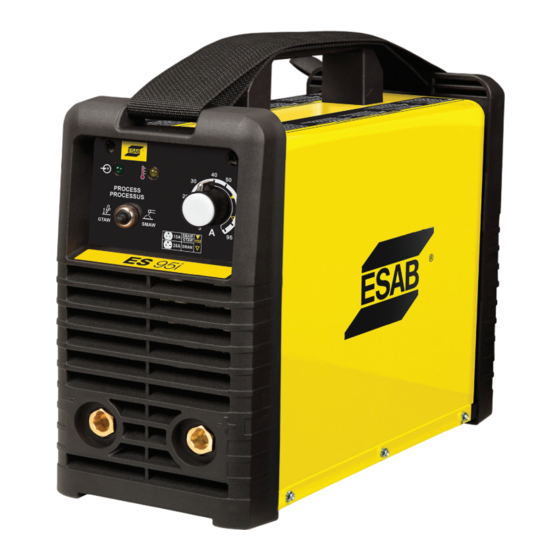
- Page 1 ESAB ES 95i Inverter Arc Welder Operating Manual A-13026 3163339 Révision : AA Issue Date: June 8, 2016 Manual No.: 0-5458 esab.com...
- Page 2 WE APPRECIATE YOUR BUSINESS! Congratulations on your new ESAB product. We are proud to have you as our customer and will strive to provide you with the best service and reliability in the industry. This product is backed by our extensive warranty and world-wide service network.
- Page 3 While the information contained in this Manual represents the Manufacturer's best judgement, the Manufacturer assumes no liability for its use. Plasma Cutting Power Supply ESAB ES95i with Stick Kit ESAB ES95i with Stick/TIG Kit Operating Manual Number 0-5458 Published by: ESAB 2800 Airport Rd.
- Page 4 Be sure this information reaches the operator. You can get extra copies through your supplier. CAUTION These INSTRUCTIONS are for experienced operators. If you are not fully familiar with the principles of operation and safe practices for arc welding and cutting equip- ment, we urge you to read our booklet, “Precautions and Safe Practices for Arc Welding, Cutting, and Gouging,”...
- Page 5 The RoHS Directive 2011/65/EU, entering into force 2 January 2013 Type of equipment WELDING POWER SUPPLY Type designation etc. ESAB ES 95i Brand name or trade mark ESAB Manufacturer or his authorised representative established within the EEA Name, address, telephone No: ESAB Group Inc.
-
Page 7: Table Of Contents
TABLE OF CONTENTS SECTION 1: SAFETY ..................1-1 1.01 Safety Precautions ..................1-1 SECTION 2: INTRODUCTION ..................2-1 2.01 How To Use This Manual ................2-1 2.02 Equipment Identification ................. 2-1 2.03 Receipt Of Equipment ..................2-1 2.04 Description ..................... 2-1 2.05 Transportation Methods .................. - Page 8 TABLE OF CONTENTS SECTION 5: SERVICE ....................5-1 5.01 Maintenance and Inspection ................5-1 5.02 SMAW (Stick) Welding Problems ..............5-2 5.03 GTAW (Lift TIG) Welding Problems ............... 5-3 5.04 Power Source Problems ................5-4 APPENDIX 1: REPLACEMENT PARTS ..............A-1 APPENDIX 2: OPTIONS AND ACCESSORIES ............
-
Page 9: Section 1: Safety
1.01 Safety Precautions Users of ESAB welding and plasma cutting equipment have the ultimate responsibility for ensuring that anyone who works on or near the equipment observes all the relevant safety precautions. Safety precautions must meet the requirements that apply to this type of welding or plasma cutting equipment. The following recommendations should be observed in addition to the standard regulations that apply to the workplace. - Page 10 ESAB ES 95i Arc welding and cutting can be injurious to yourself and others. Take WARNING precautions when welding and cutting. Ask for your employer's safety practices which should be based on manufacturers' hazard data. ELECTRIC SHOCK - Can kill.
-
Page 11: Introduction
Additional copies of this manual may be purchased by contacting ESAB at the address and phone number in your area listed on back cover of this manual. Include the Owner’s Manual number and equipment identification numbers. -
Page 12: Transportation Methods
ESAB ES 95i 2.05 Transportation Methods CAUTION ELECTRIC SHOCK can kill. DO NOT TOUCH live electric parts. Disconnect input power conductors from de- energized supply line before moving the welding power source. WARNING FALLING EQUIPMENT can cause serious personal injury and equipment damage. -
Page 13: Installation
• In areas, not exposed to direct sunlight or rain. • Place at a distance of 12” (300mm) or more from walls or similar that could restrict natural air flow for cooling WARNING ESAB advises that this equipment be elec- trically connected by a qualified electrician. Manual 0-5458 INSTALLATION... - Page 14 ESAB ES 95i Refer to Figure 3-1: 1. Connect end of ground (GREEN or GREEN/YELLOW) conductor to a suitable ground. Use a grounding method that complies with all applicable electrical codes. 2. Connect ends of line 1 (BLACK) and line 2 (WHITE) input conductors to a de-energized line disconnect switch.
- Page 15 ESAB ES 95i Input Power Each unit incorporates an INRUSH circuit. When the MAIN CIRCUIT SWITCH is turned on, the inrush circuit provides pre-charging for the input capacitors. A relay in the Power Control Assembly (PCA) will turn on after the input capacitors have charged to operating voltage...
-
Page 16: Electromagnetic Compatibility
ESAB ES 95i 3.04 Electromagnetic Compatibility WARNING Extra precautions for Electromagnetic Compatibility may be required when this Welding Power Source is used in a domestic situation. A. Installation and Use - Users Responsibility The user is responsible for installing and using the welding equipment according to the manufacturer’s instructions. If electromagnetic disturbances are detected then it shall be the responsibility of the user of the welding equipment to resolve the situation with the technical assistance of the manufacturer. -
Page 17: Setup For Welding
ESAB ES 95i 4. Equipotential Bonding Bonding of all metallic components in the welding installation and adjacent to it should be considered. However, metallic components bonded to the work piece will increase the risk that the operator could receive a shock by touching the metallic components and the electrode at the same time. -
Page 18: Smaw (Stick) Setup
ESAB ES 95i 3.06 SMAW (Stick) Setup Set Welding Current as specified by the Set Process Selection Electrode Manufacturer. Switch to SMAW (Stick) Negative Output Positive Output Terminal Terminal (Dinse™ 25) (Dinse™ 25) Art #: A-08602_AC Figure 3-2: Setup for SMAW (Stick) Welding... -
Page 19: Gtaw (Lift Tig) Setup
ESAB ES 95i 3.07 GTAW (Lift TIG) Setup Set Process Selection Switch to GTAW (Lift TIG). Set Welding Current as specified by the Electrode Manufacturer. Negative Output Terminal (Dinse™ 25) Secure the gas cylinder in an Positive Output upright position by chaining it... - Page 20 ESAB ES 95i 8. Plug the power cable into the appropriate outlet, and turn the switch to the “ON” position. The power L.E.D. light should illuminate. 9. Set the “Process Selection Switch” to GTAW (Lift TIG) 10. Set the weld current control knob to the desired amperage.
-
Page 21: Operation
ESAB ES 95i SECTION 4: OPERATION Conventional operating procedures apply when using the Welding Power Source, i.e. connect work lead directly to work piece and electrode lead is used to hold the electrode. The welding current range values should be used as a guide only. Current delivered to the arc is dependent on the welding arc voltage, and as welding arc voltage varies between different classes of electrode, welding current at any one setting would vary according to the type of electrode in use. -
Page 22: Smaw Electrode Polarity
ESAB ES 95i 4.02 SMAW Electrode Polarity Stick electrodes are generally connected to the "+" Positive Output Terminal and the work lead to the "−" Negative Output Terminal but if in doubt consult the electrode manufacturers literature for further information. -
Page 23: Gtaw (Lift Tig) Electrode Polarity
ESAB ES 95i 4.04 GTAW (Lift TIG) Electrode Polarity 4.06 Tungsten Electrode Current Ranges Connect the TIG torch to the "-" Negative Output Terminal and Electrode Diameter DC Current the work lead to the "+" Positive Output Terminal for direct .040"... -
Page 24: Arc Welding Practice
ESAB ES 95i 4.10 Arc Welding Practice The techniques used for arc welding are almost identical regardless of what types of metals are being joined. Naturally enough, different types of electrodes would be used for different metals as described in the preceding section. -
Page 25: Joint Preparations
ESAB ES 95i 4.12 Joint Preparations In many cases, it will be possible to weld steel sections without any special preparation. For heavier sections and for repair work on castings, etc., it will be necessary to cut or grind an angle between the pieces being joined to ensure proper penetration of the weld metal and to produce sound joints. -
Page 26: Arc Welding Technique
ESAB ES 95i 4.13 Arc Welding Technique 4.16 Arc Length The securing of an arc length necessary to produce a neat weld A Word to Beginners soon becomes almost automatic. You will find that arc produces For those who have not yet done any welding, the simplest way a crackling or spluttering noise and the weld metal comes across to commence is to run beads on a piece of scrap plate. - Page 27 ESAB ES 95i 20°-30° 45° from vertical Electrode Tack Weld 60° - 70° from line of weld Tack Weld Art # A-07697_AB Figure 4-12: Butt weld Art # A-07699_AB Figure 4-14: Electrode position for HV fillet weld Art # A-07700_AB...
-
Page 28: Distortion
ESAB ES 95i Art # A-07702 Art # A-07704 Figure 4-19: Overhead fillet weld 4.19 Distortion Figure 4-17: Multi run vertical fillet weld Distortion in some degree is present in all forms of welding. In many cases it is so small that it is barely perceptible, but in other cases allowance has to be made before welding commences for the distortion that will subsequently occur. -
Page 29: Overcoming Distortion Effects
ESAB ES 95i shape exerts a strong pull on adjacent metal. Several things can then happen. The metal in the weld area is stretched (plastic deformation), the job may be pulled out of shape by the powerful contraction stresses (distortion), or the weld may crack, in any case, there will remain “locked-up”... - Page 30 ESAB ES 95i Art # A-07711_AB Figure 4-26: Step back sequence Art # A-07712 Figure 4-27: Chain intermittent welding Art # A-07713_AB Figure 4-28: Staggered intermittent welding OPERATION 4-10 Manual 0-5458...
-
Page 31: Service
ESAB ES 95i SECTION 5: SERVICE 5.01 Maintenance and Inspection The only routine maintenance required for the power supply is a thorough cleaning and inspection, with the frequency depending on the usage and the operating environment. WARNING There are extremely dangerous voltages and power levels present inside this product. Disconnect primary power at the source before opening the enclosure. -
Page 32: Smaw (Stick) Welding Problems
ESAB ES 95i 5.02 SMAW (Stick) Welding Problems Description Possible Cause Remedy 1. Gas pockets or voids in weld metal Electrodes are damp. A. Dry electrodes before use. (Porosity). Welding current is too high. B. Reduce welding current. Surface impurities such as oil, C. -
Page 33: Gtaw (Lift Tig) Welding Problems
ESAB ES 95i 5.03 GTAW (Lift TIG) Welding Problems Weld quality is dependent on the selection of the correct consumables, maintenance of equipment and proper welding technique. Description Possible Cause Remedy 1. Excessive beard build-up or poor Welding current is too low... -
Page 34: Power Source Problems
ESAB ES 95i Description Possible Cause Remedy 12. Arc start is not smooth. A. Tungsten electrode is too large A. Refer to section Tungsten Electrode for the welding current. Current Ranges for the correct size. B. The wrong electrode is being B. -
Page 35: Appendix 1: Replacement Parts
ESAB ES 95i APPENDIX 1: REPLACEMENT PARTS Description Part No. Case Toolbox, 95i W4012801 Fan, 24V DC, 95i W7003004 Rectifier Bridge, 700V, 50A, 95i W7003010 Current Sensor, 95i CSA W7003077 Thermistor, 95i W7003016 Terminal, Output, 95i W7003019 Handle, 95i CSA... -
Page 36: Appendix 2: Options And Accessories
ESAB ES 95i APPENDIX 2: OPTIONS AND ACCESSORIES Description Part Number 17V style TIG Torch with 3m lead, gas valve, 25mm dinse connection and accessory kit W4012500 Argon Shielding Gas Regulator with 5/8"-18 UNF Hose Connection 600300 Power Adapter-115V,20A Socket to 15A Plug... -
Page 37: Appendix 3: System Schematic
ESAB ES 95i APPENDIX 3: SYSTEM SCHEMATIC Art # A-09016 Manual 0-5458 APPENDIX... - Page 38 ESAB ES 95i This Page Intentionally Blank APPENDIX Manual 0-5458...
- Page 40 ESAB Asia/Pacific Pte Ltd ESAB Nederland B.V. Singapore Amersfoort Tel: +65 6861 43 22 Tel: +31 33 422 35 55 Fax: +65 6861 31 95 Fax: +31 33 422 35 44 www.esab.eu ©2015 ESAB Welding and Cutting Products Printed in China...
Need help?
Do you have a question about the ES 95i and is the answer not in the manual?
Questions and answers