
Related Manuals for Sanus SLT2


Summary of Contents for Sanus SLT2
- Page 1 SLT 2 INSTRUCTION MANUAL We’ll Make It Stress-Free If you have any questions along the way, just give us a call. 1-888-333-1376 (UK: 0800-056-2853). We’re ready to help! Scan for easy install video http://san.us/937...
- Page 2 No — Perfect! (including accessories) 180 lb wood studs, solid weigh MORE than? Yes — This mount is NOT compatible. Visit Simplicity.Sanus.com or call concrete, and (81.6 kg) 1-888-333-1376 (UK: 0800-056-2853) to find a compatible mount. concrete block walls: No — Perfect!
- Page 3 Do you have all the tools needed? 1/2 in. (13 mm) Tape Measure Pencil Level Screwdriver Electric Drill Socket Wrench 7/32 in. 1/2 in. 3/8 in. (5.5 mm) (13 mm) (10 mm) Wood Steel Stud Concrete Drill Bit Drill Bit Stud Finder Drill Bit Hammer...
- Page 4 Features Level adjustment creates a worry-free installation 10º TV tilts up Adjustment knobs allow or down for fingertip control or to restrict the perfect movement viewing angle TV brackets snap into place on wall plate for added safety TV brackets adjust to fit TV hole patterns from 100 x 100 mm up to 625 x 420 mm...
- Page 5 Dimensions 25.0 in. (635 mm) Up to 24.6 in. 7° 10° (625 mm) 17.5 in. 2.0 in. 16.5 in. (445 mm) 2.8 in. 4.7 in. (51 mm) (420 mm) (72 mm) (120 mm) 7.1 in. (180 mm) 1.8 in. (46 mm) 27.0 in.
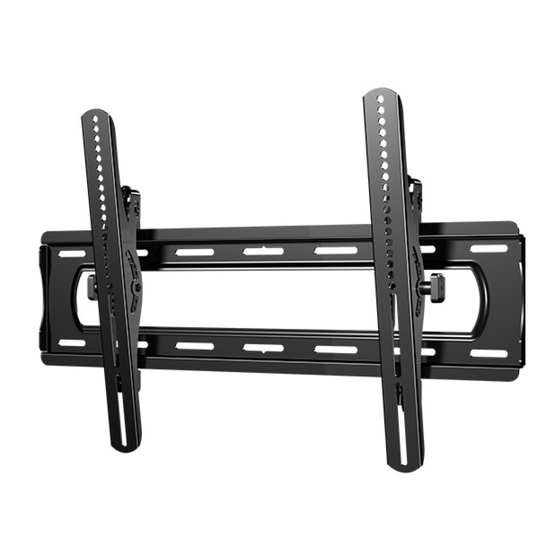
- Page 6 Supplied Parts and Hardware WARNING: This product contains small items that could be a choking hazard if swallowed. Before starting assembly, verify all parts are included and undamaged. If any parts are missing or damaged, do not return the damaged item to your dealer;...
- Page 7 TV Screws Washers M4 x 35mm M8 x 45mm M6 / M8 M6 x 35mm Spacers M8 x 50mm M8 x 35mm 2.5mm 22mm...
- Page 8 Parts and Hardware for STEP 2 Wall Plate Template Lag Bolts 5/16 x 2¾ in. Lag Bolt Washer Wall Plate .695 x .350 x .075 in. For concrete installations ONLY CAUTION : Do not use in drywall or wood Concrete Anchors UX 10 x 60 Fischer UX10 x 60R...
- Page 9 Parts and Hardware for STEP 2C Steel Stud Anchor Kit (not included) - contact Customer Service at 1-888-333-1376 (UK: 0800-056-2853) t o have the addtional hardware shipped directly to you. 1/4-20 Snap Toggle BB 1/4-20 x 1¾ in. 1/4 in.
- Page 10 STEP 1 Attach Brackets to TV If your TV included inset spacers or wall mount adapters, see Troubleshooting 1.1 Select TV Screw Diameter 1.2 Select TV Screw Length on PAGE 23. Hand thread screws into the threaded : If your TV has a : Spacers and longer screws are inserts on the back of your TV to flat back AND you...
-
Page 11: Attach Brackets To Tv
1.3 Attach Brackets to TV Center the TV brackets over your TV hole pattern as shown - making sure the brackets are level. NOTE: The tilt tension knob TV brackets should be oriented to the outside edges. Install using the spacer, TV screw and washer combination you selected for your TV. CAUTION: Avoid potential personal injuries and property damage! DO NOT use power tools for this step. -
Page 12: Wood Stud Installation
● Minimum wood stud size: common 51 x 102 mm (2 x 4 in.) nominal 38 x 89 mm (1 1/2 x 3 1/2 in.) HeightFinder at Simplicity.Sanus.com ™ ● Minimum horizontal space between fasteners: 406 mm (16 in.) Locate studs. - Page 13 Drill pilot holes then remove the wall plate template IMPORTANT: Be sure to drill into the center of the stud. IMPORTANT: Pilot holes must be drilled to a depth of 3 in. (75 mm), using a 7/32 in. (5.5 mm) diameter drill bit. Install the wall plate using four lag bolts and washers...
- Page 14 ● Minimum concrete block size: 8 x 8 x 16 in. (203 x 203 x 406 mm) HeightFinder at Simplicity.Sanus.com ™ ● Minimum horizontal space between fasteners: 24 in. (610 mm) Level the wall plate template and mark the hole locations.
- Page 15 Remove the wall plate template and insert concrete anchors CAUTION: Be sure the anchors are seated flush with the concrete surface. Install the wall plate using four lag bolts and washers . Tighten all lag bolts only until they are pulled firmly against the wall plate. CAUTION: Improper use could reduce the holding power of the lag bolt.
- Page 16 Attach Wall Plate STEP 2C Steel Stud Installation Steel Stud Anchor Kit (not included) - contact Customer Service at 1-888-333-1376 (UK: 0800-056-2853) t o have the addtional hardware shipped directly to you. 1/4-20 x 1¾ in. 1/4-20 Snap Toggle BB 1/4 in.
- Page 17 Locate studs. Verify the center of the stud(s) using an awl, a thin nail, or an edge to edge stud finder. Level the wall plate template mark the hole locations in the center of the studs. NOTE: Do not use center 3 slots for steel stud mounting. NOTE: TV with brackets can be shifted to the left or right from center.
- Page 18 Insert snap toggle anchors by folding metal channel until it is flat with the plastic straps. Slide the metal channel into the drilled hole. Hold the plastic straps by the end and pull towards you until the metal channel is flush behind the drywall.
- Page 19 Slide the plastic cap down the straps and into the hole with the lip of the cap flush against the wall. Bend the straps side to side until they snap off level with the lip of the cap.
- Page 20 Install the wall plate using four screws and washers . Tighten all screws only until they are pulled firmly against the wall plate CAUTION: Improper use could reduce the holding power of the screws . DO NOT over-tighten the screws 2 4 i ( 6 0 1 6 i...
- Page 21 STEP 3 Hang TV onto Wall Plate Install the TV / Bracket assembly by fitting the top hooks of the mounting brackets over the top edge of the wall plate Swing the mounting brackets down until the spring loaded locking tabs slip over and fully engage the bottom edge of the wall plate .
- Page 22 Adjustments LEVEL TILT TV LATERAL SHIFT REMOVING THE TV...
-
Page 23: Troubleshooting
Troubleshooting If you are uncertain about your hardware selection, TV Supplied contact Customer Service at 1-888-333-1376. TV supplied spacers Spacers : Use your TV supplied spacer and spacer for: : Use your TV supplied spacer for flat back TVs (AND you want your TV closer to the wall). - Page 24 81.6 kg montantes de (incluidos los accesorios) 59 kg Sí — Este soporte NO es compatible. Visite MountFinder.Sanus.com o pesa más de? madera, hormigón montantes (180 lbs.) (130 lbs.) llame al 1-888-333-1376 (Reino Unido: 0800-056-2853)
- Page 25 ESPAÑOL Características ver páginas 4 Los soportes del televisor se pueden ajustar para poder utilizarse con patrones de orificios de televisor desde 100 x 100 mm hasta 625 x 420 mm El ajuste del nivel permite una instalación sin preocupaciones El televisor se inclina hacia arriba o hacia abajo para obtener el ángulo de visualización perfecto El brazo de montaje se ajusta dentro de la placa de pared para un posicionamiento óptimo La perilla de regulación permite mover el televisor con la punta de los dedos o dejar el televisor fijo en una posición...
- Page 26 ESPAÑOL PASO 1 Fijar el soporte al televisor ver páginas 10 1.1 Seleccione el diámetro de los tornillos del televisor Enrosque manualmente los tornillos en los orificios roscados de la parte posterior del televisor para determinar el diámetro correcto del tornillo (M4, M6 o M8) que debe usar.
- Page 27 Tamaño mínimo de los montantes de madera: común 51 x 102 mm (2 x 4 pulg.) nominal 38 x 89 mm (1½ x 3½ pulg.) ™ nuestro Height Finder en Simplicity.Sanus.com ● Espacio mínimo entre los elementos de sujeción: 213,4 mm (8,40 pulg.) ●...
- Page 28 ● Grosor mínimo del hormigón macizo: 203 mm (8 pulg.) ™ nuestro Height Finder en Simplicity.Sanus.com ● Tamaño mínimo del bloque de hormigón: 203 x 203 x 406 mm (8 x 8 x 16 pulg.) ● Espacio mínimo horizontal entre los elementos de sujeción: 610 mm (24 pulg.) Nivele la plantilla de la placa de pared y marque la posición de los orificios.
- Page 29 El televisor y los accesorios no deben pesar más de 59 kg (130 lb) la placa de pared, consulte nuestro Height Finder en Simplicity. Sanus.com ● Los montantes deben tener al menos 2 x 4 pulgadas / 25 ga. de grosor ●...
- Page 30 ESPAÑOL PASO 3 Colgar el televisor en la placa de pared ver páginas 22 ¡PRODUCTO PESADO! Podría necesitar ayuda para realizar esta operación. Instale el montaje del soporte del televisor; para esto, encaje los enganches superiores de los soportes del montaje sobre el borde superior de la placa de pared Incline hacia abajo los soportes del montaje hasta que las pestañas de bloqueo con resorte se deslicen y enganchen por completo el borde inferior de la placa de...
-
Page 31: Solución De Problemas
ESPAÑOL Solución de problemas ver páginas 24 Si no está seguro acerca de cuáles son las herramientas que debe utilizar, póngase en contacto con el Servicio de Atención al Espaciador Espaciadores suministrados Cliente al 1-888-333-1376. con el televisor : Use el espaciador suministrado con el televisor y el espaciador en el caso de: : Utilice el espaciador suministrado con el televisor para televisores que tengan ●... - Page 32 SANUS will not be liable for any damages whatsoever arising out of the use or inability to use its products, even if SANUS has been advised of the possibility of such damages. To the maximum extent permitted by applicable law, SANUS disclaims any responsibility for incidental or consequential damages (such as the cost of repairing or replacing other property which damaged when the device does not work properly).
Need help?
Do you have a question about the SLT2 and is the answer not in the manual?
Questions and answers